By: Ray Barley
Overview
The first step in implementing Reporting Services security is to specify Site Settings. As the name implies Site Settings have to do with securing the Report Manager. We'll cover item level security in the next section where we talk about securing folders, reports, and data sources.
Explanation
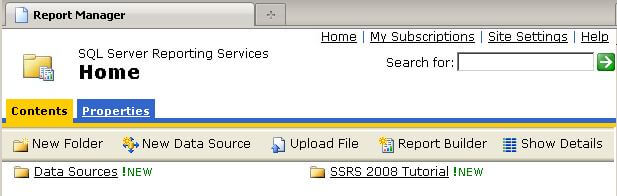
To begin open your browser and launch the Report Manager. By default the Report Manager URL is http://SERVERNAME/reports unless you changed it by manually configuring Reporting Services. You will see the Report Manager home page as shown below:
Note in the upper right hand corner the Site Settings hyperlink; click it to navigate to the Site Settings page then click the Security hyperlink; the Site Settings Security page will be displayed as shown below:
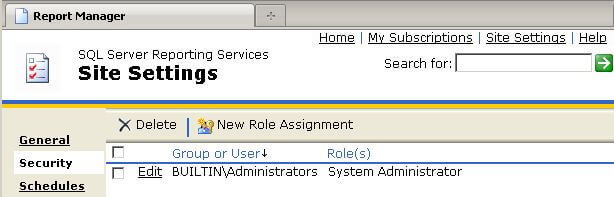
Site settings offers two roles: System Administrator and System User. The default installation and configuration of Reporting Services adds the local administrators group to the System Administrator role. You can add any user or group that you want to administer the Report Manager to the System Administrator role. Any user or group that you want to allow access to the Report Manager content, you add them to the System User role. Click on the New Role Assignment button to display the New System Role Assignment page as shown below:
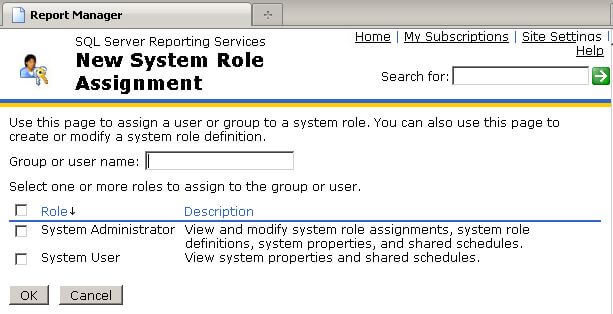
Fill in a user name or group using the format DOMAIN\USERNAME or DOMAIN\GROUPNAME. If your Reporting Services installation is on a stand-alone server (i.e. not a member of a domain) then substitute MACHINENAME for DOMAIN. Check the appropriate box to add the group or user to the System Administrator or System User role. Sometimes you may want to add the domain group Authenticated Users to the System User role; you still have to provide item level security settings which we will cover in the next section.
