By: Ashish Kumar Mehta | Comments (3) | Related: > SQL Server Configurations
Problem
I have installed SQL Server 2008 Developer Edition on Windows Server 2008 R2 and I am unable to get connect to SQL Server 2008 Instance from SQL Server 2008 Management Studio which is installed on another remote server. As I am new to Windows Server 2008 R2 it would be great if you can let me know the step by step approach to enable the default port of SQL Server 2008 in Windows Firewall for user connectivity.
Solution
Windows Firewall helps prevent unauthorized access to computers in the network. By default, Windows Firewall will be turned ON once the operating is installed. If a firewall is turned ON, and if it is not configured correctly then attempts made by the users to connect to SQL Server will be blocked. In order to access an instance of SQL Server which is behind a firewall, database administrator needs to configure the firewall on the computer that is running SQL Server to allow users access. In this tip, we will go through the steps that you need to follow to quickly configure Windows firewall in Window Server 2008 or in Window Server 2008 R2 to allow SQL Server access to users.
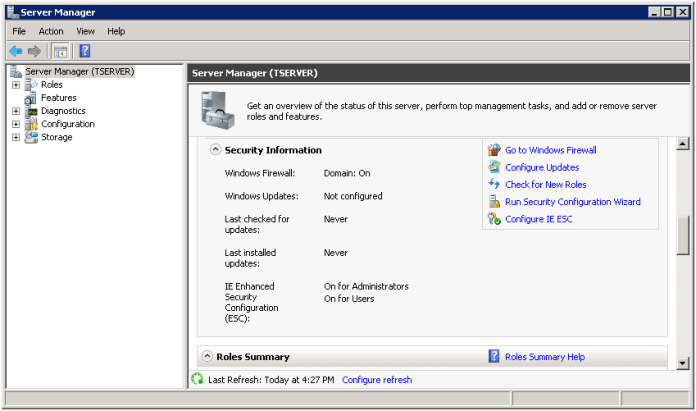
1. Click Start | All Programs | Administrative Tools | Server Manager. This will open up Server Manager as shown in the below snippet.
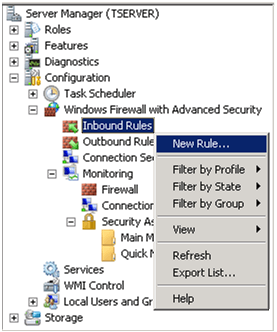
2. In Server Manager, expand Configurations tab and then expand Windows Firewall with Advanced Security. Right click Inbound Rules and click on New Rule... as shown in the below snippet to open up New Inbound Rule Wizard.
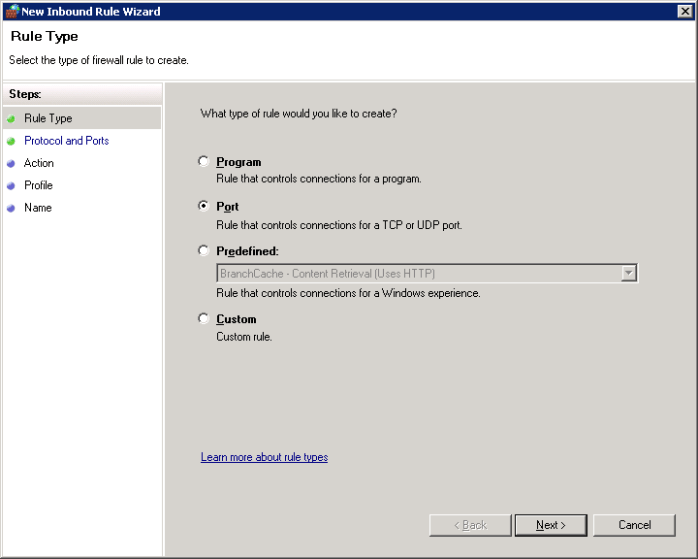
3. In New Inbound Rule Wizard's Rule Type Page, you need to select Port option as shown in the below snippet to control connections for a TCP or UDP Port. Click Next to continue with the wizard.
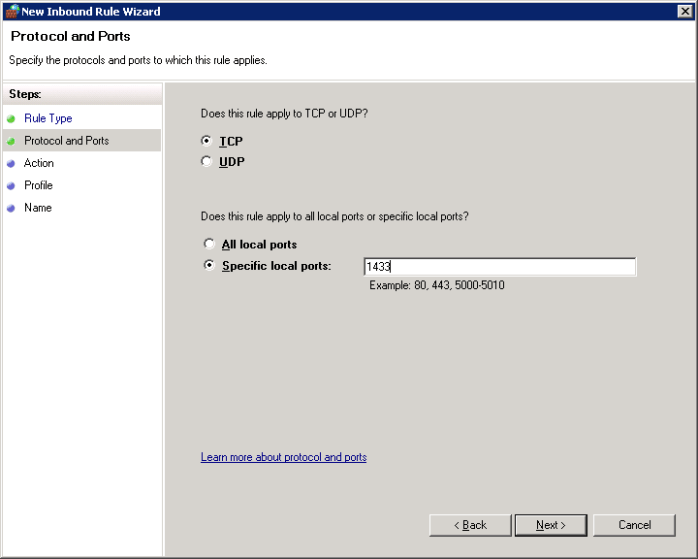
4. In Protocol and Ports, specify the protocols and ports to which this rule applies. As we know that SQL Server when installed as a default instance will use 1433 as the default port, hence you need to choose TCP option and then specify the port number as 1433 as shown in the below snippet. Click Next to continue with the wizard.
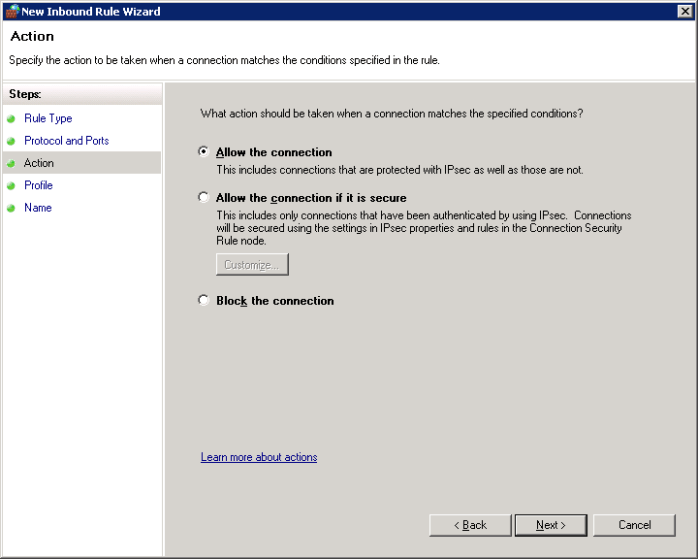
5. In Action page, specify the action to be taken when a connection matches the conditions specified in this rule. There are basically three options available to choose from which are self explanatory.
- a) Allow the connection
- b) Allow the connection if it is secure
- c) Block the connection
Here, you need to choose the first option which is Allow the connection and click Next, to continue with the wizard.
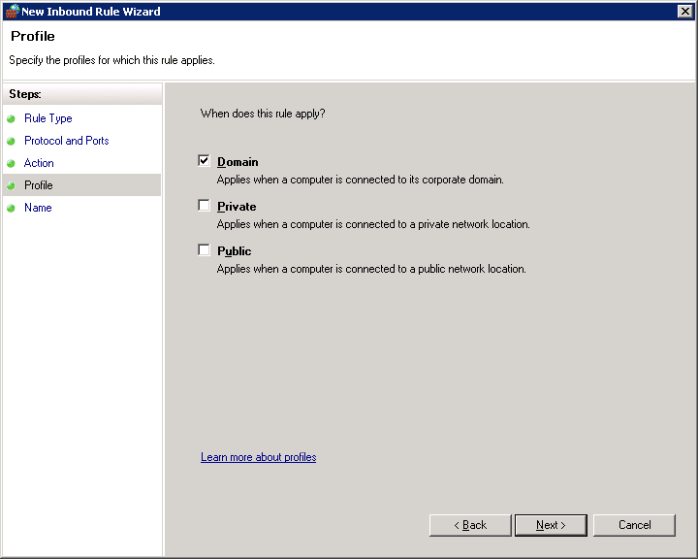
6. In Profile page, specify the profiles for which this rule should apply. There are three options available to choose from which are self explanatory.
- a) Domain - Applies when a computer is connected to its corporate domain
- b) Private - Applies when a computer is connected to a private network location
- c) Public - Applies when a computer is connected to a public network location
Once the above mentioned index creation code is executed you will be able to see a better performance for of the above sample TSQL code.
Here, you need to choose the first option which is Domain as you want everyone who is connected to its corporate domain to get connected to the SQL Server Instance as long as they have permissions to connect to the SQL Server 2008 Instance. Click Next, to continue with the wizard.
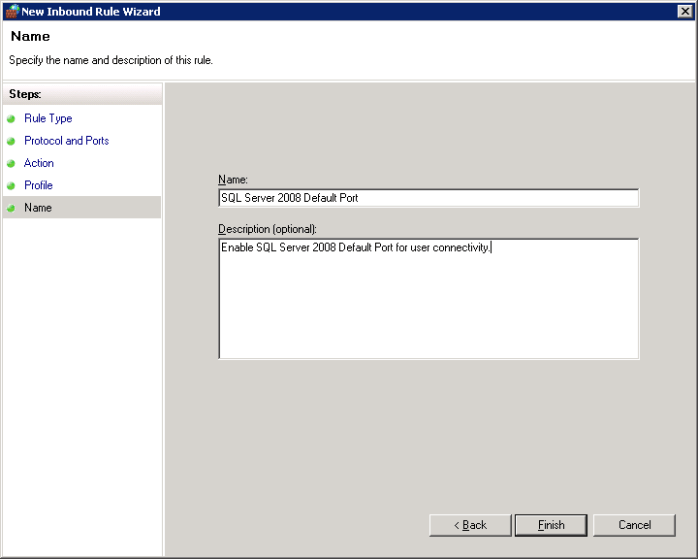
7. In Name Page, you need to provide a meaningful name and also provide a meaningful description as shown in the below snippet and click Finish to complete the wizard.
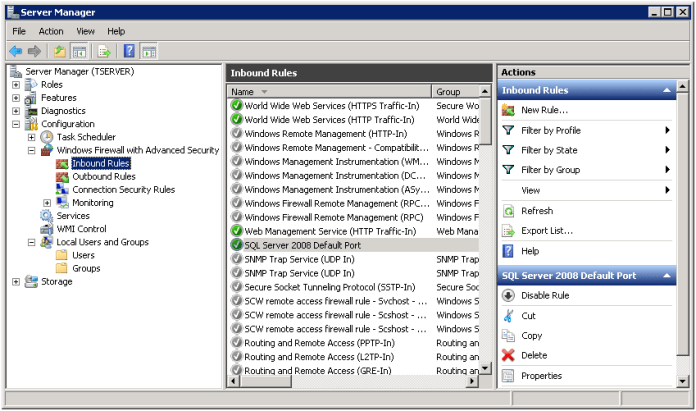
Once the wizard configuration is complete, you will be able to see the new rule available under Inbound Rules as shown in the below snippet.
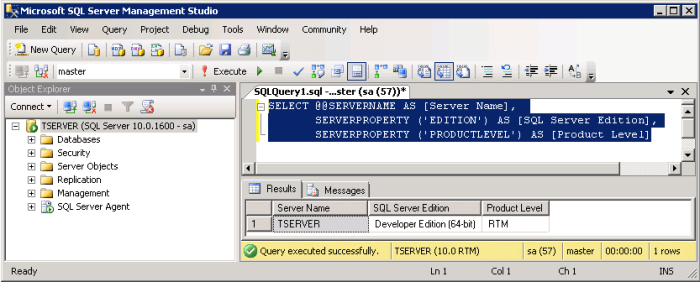
Now you will be able to get connected to your SQL Server 2008 Instance from remote SQL Server 2008 Management Studio and run TSQL Queries. Execute the below mentioned TSQL code to identify SQL Server Name, SQL Server Edition and Product Level Information.
SELECT @@SERVERNAME AS [Server Name],
SERVERPROPERTY ('EDITION') AS [SQL Server Edition],
SERVERPROPERTY ('PRODUCTLEVEL') AS [Product Level]
Next Steps
- Additional tips on SQL Server Configuration can be found here.
About the author
 Ashish Kumar Mehta has been contributing to the MSSQLTips.com community since 2009 with over 60 tips.
This author pledges the content of this article is based on professional experience and not AI generated.
View all my tips


