By: Scott Murray | Comments (5) | Related: > Reporting Services Development
Problem
What are SQL Server Reporting Services Custom Code Assemblies? Why would I want to use them? Check out this tip to learn more.
Solution
In a previous tip, I described the process of adding code directly to an individual SSRS report. As noted in the tip, using embedded code provides for some code reuse while at the same time giving report developers, local report level customized coding. Similarly, we can actually take the coding to a second level by creating custom code assemblies that are referenced by a SSRS report via a class\ function embedded in a dll. Of course, using this method extends our code reuse from beyond a single report to across a group of reports. We can then make changes in one location which will then be applied to all reports which reference the assembly code. Furthermore, we can add multiple functions within a single class file, and of course, the coding can take place in Visual Studio and allow for easier use of version control applications. Finally, the coding can be completed in any DotNet language; for this tip, though, we will use Visual Basic. As with any process, there are some disadvantages which include a rather complicated process of creating, deploying, and referencing the code assembly, and many find troubleshooting the assembly to be rather complicated. Finally, report data sets are not allowed to be passed to custom assemblies.
Develop Custom Assembly and Add to an SSRS Report
To display data for our reports, we will again use AdventureWorks 2012 SSAS database; the database is available on Codeplex. Once you download and install the SQL Server database, we will subsequently use the SSRS 2012 sample reports. Now we can create a simple function to evaluate whether a number is less than zero or not; if the value is less than zero then the function will return the string "Red". Otherwise it will return the string "Blue". Thus, we will first open up Visual Studio 2010, as shown below, and create a new solution and project for our function.
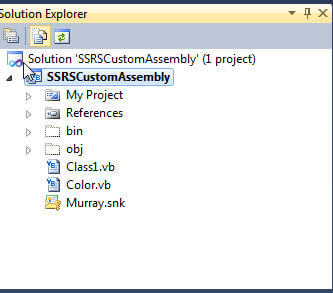
As mentioned earlier, the coding for this tip is being completed using Visual Basic. Thus, as coded below, we create a class and then a very simple function. The function accepts one argument, an integer and then returns a string with the color red or blue. We use an If / Else statement to decide which color we want returned by the function.
Imports Microsoft.VisualBasic

Public Class ColorClass
    Public Shared Function COLORNUMBER(ByVal InputNumber As Integer) As String
        Dim ReturnColor As String
        If InputNumber < 0 Then
            ReturnColor = "RED"
        Else : ReturnColor = "BLUE"
        End If
        Return ReturnColor
    End Function

End Class
Now that the function is built, we have a several step process to get the assembly deployed. First, we need to sign the assembly with a strong name. In order to sign the assembly, we first must right mouse click on the project and select properties as displayed subsequently.
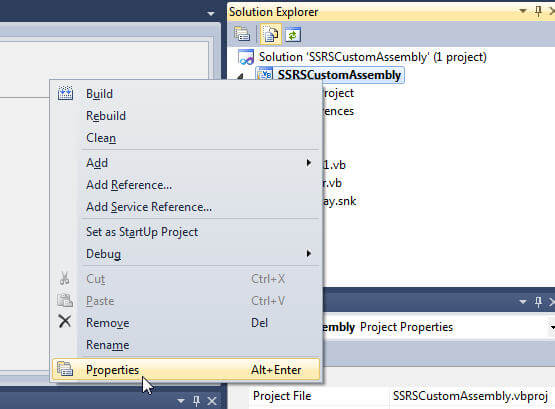
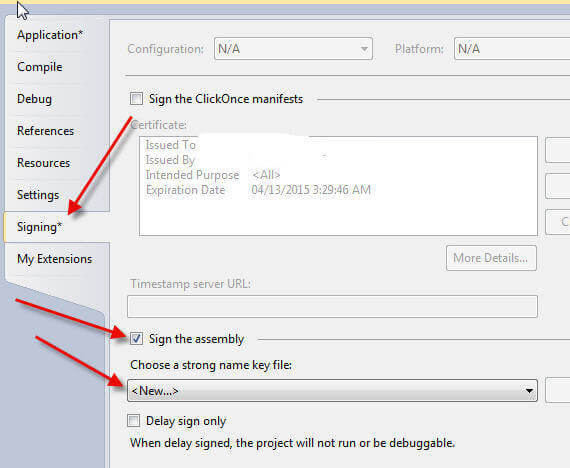
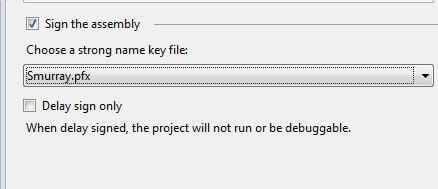
After that, we need to navigate to the Signing tab. First, as shown below, click on the Sign the assembly check box, and then click "New" in the Choose a strong name key file list box.
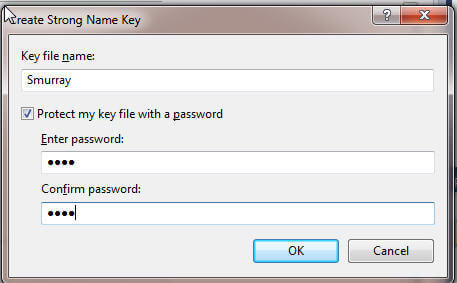
Next, on the Create Strong Name Key window, illustrated below, add a key file name and a password. Secondly, you can click ok twice to finish the signing process.
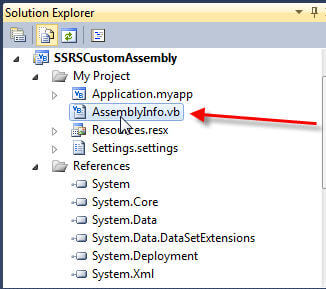
As shown below as part of our security setup for the assembly, we need to adjust the assembly to allow only partially trusted assemblies. We complete this task by opening up the AssemblyInfo.vb file available within the project.
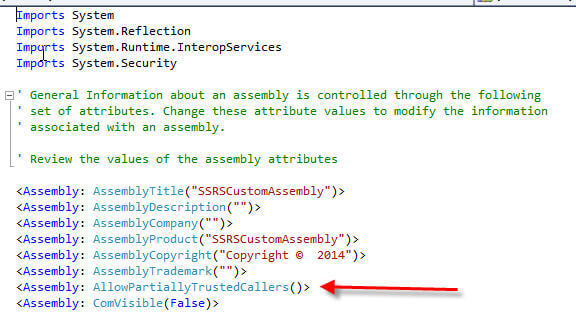
Once open, you need to add <Assembly: AllowPartiallyTrustedCallers()> as shown in the subsequent screen shot. This addition may also require a reference to the System.Security object.
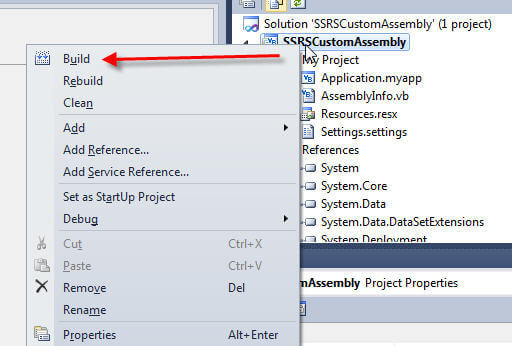
Now, we are ready to build the project as noted next.
At this point, the assembly is ready to be copied to our report server directories (see below) and to the c:\windows\assemblies directory (aka GAC or Global Assembly Cache). You may have to install the file as described in this link. The dll file will reside in the bin\debug directory within our project folder. Again, the dll is copied to the noted directories on the report server and not the local machine.
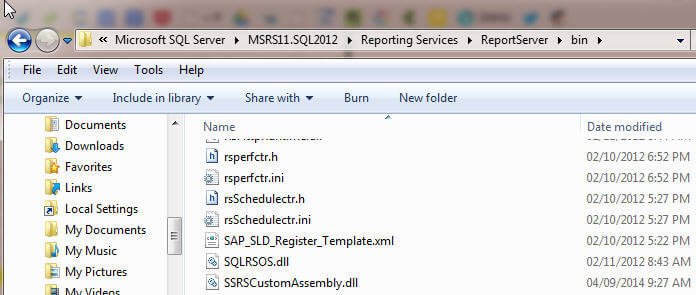
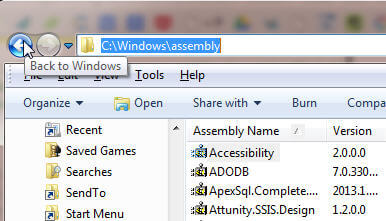
Once successful, we are at last ready to finally use the custom assembly in a report. Thus, you can open SQL Server Data Tools, SSDT, and create a new SSRS project and report. Add a data source and data set. If you are not familiar with creating a new report, please see the following tips:
- SQL Server Reporting Services Tutorial
- Creating a Multiserver Query SSRS Report Using Central Management Servers
- Developing a SSS Report using a SSAS Data Source
In the below example, we created a dataset based on the SalesOrderDetail table in the Adventure Works database; after that add a tablix to report and add several fields to the tablix including the UnitPrice field. Now we want to use the function in the custom code assembly, but in order to do so we must add a reference to the dll in the report properties. From the menu bar, Select Report, then Properties as shown next.
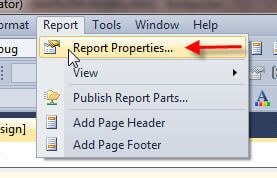
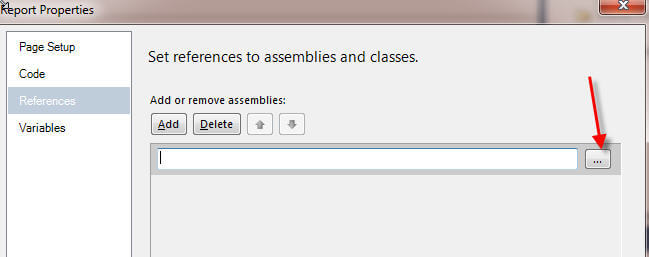
As illustrated below, select the Reference Window, and click the Add button. Next click on the ellipse button.
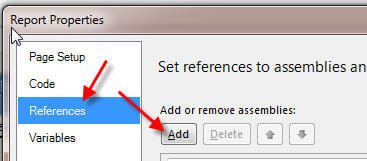
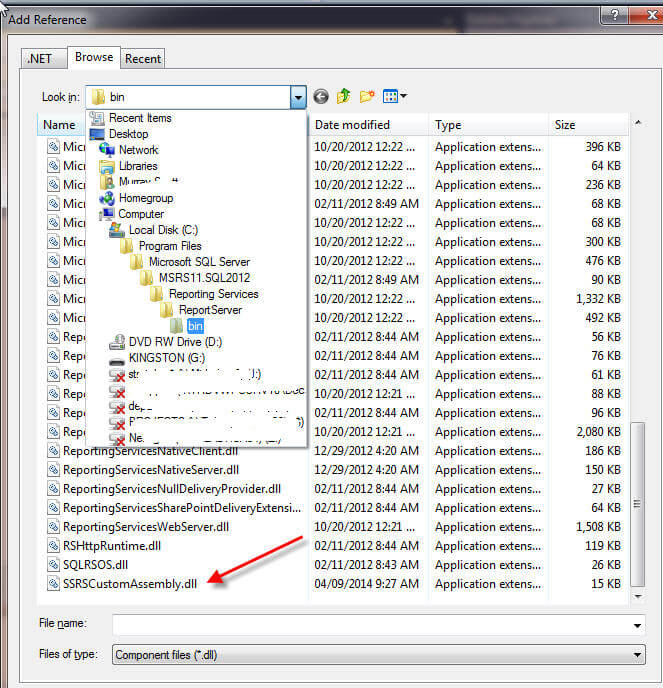
Now, click on the Browse tab and then navigate to the <program files>....Reporting Services > Report Server > bin directory and find the newly created custom assembly, as noted below. Then click OK and OK again.
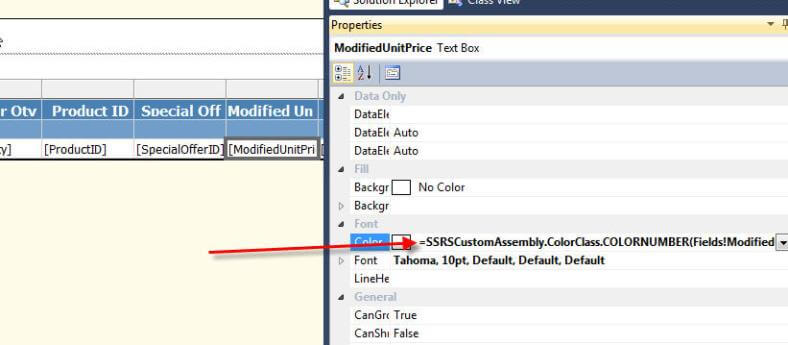
Finally we are ready to implement the function in an expression. In order to reference a function in the assembly, we must use the following syntax: =AssemblyName.ClassName.FunctionName(arguments). For our example, the syntax is: =SSRSCustomAssembly.ColorClass.COLORNUMBER(Fields!ModifiedUnitPrice.Value). Thus for the Modified Unit Price field, we are adding the noted expression to the Font Color property as shown below. Thus, if the Modified Unit Price is less than zero, the font color will be red; otherwise the font color will be blue.
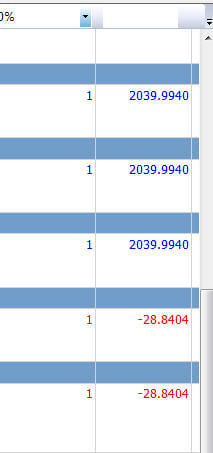
This expression results in the following report, which is partially shown below. Notice that the positive numbers are blue and the negative numbers are red.
We are now free to use this function within this report or other reports as long as we add the appropriate reference to the assembly. We could certainly add additional functions to this same dll which would be handy for complicated calculations or formatting across a range of reports.
Conclusion
Custom assemblies in SSRS allow for report developers to program code using a DotNet language within a separate object from the SSRS report itself. The coding can be completed in Visual Basic or C and allows for consistent code reuse and simplified maintenance of standard code across multiple reports and projects. However, the process of implementing and deploying the code is rather complicated with required changes to the AssemblyInfo file along with required signing of the project. Once these steps are completed, the dll file must be deployed to the report server bin directory along with the windows\assembly directory on the reports. Finally, in the report itself, a reference must be added for the assembly, and then at last the assembly functions can be used and referenced within the report.
Next Steps
- Deploying Assembly to GAC - http://msdn.microsoft.com/en-us/library/aa560649.aspx
- Check out these resources on MSSQLTips.com:
About the author
 Scott Murray has a passion for crafting BI Solutions with SharePoint, SSAS, OLAP and SSRS.
This author pledges the content of this article is based on professional experience and not AI generated.
View all my tips


