Problem
Different organizations have different hierarchy structures. In some applications there can be some areas where specific users are not allowed to access documents or at least where the actual storage location exists. On the other hand, there would be some business requirements where users need to at least read a single document without knowing it’s actual storage location.
Solution
The solution in SharePoint 2010 is to use the Manage Copies feature. The feature allows one to keep an updated copy of an original document at any other location without exposing the original file location. In this article we will show how to manage a copy of a document right “out of the box”, without any kind of workflow or other configurations. For our purpose, we have created a test document in a document library.

Open document library, select the document and go to Ribbon -> Copies -> Manage Copies.

A Dialog box appears which has two options on the top, one is New Copy and other is Update Copies. Basically one allows the creating of a new copy and other updates the copy with the new data updated in the original document. Click on “New Copy”.

In the Edit Copy Dialog box, we need to select where the copy of a document will be stored and what would be the name of the copied document. Also we need to select whether the user needs to be prompted or not in order to update the copy, whenever a user checks in a document. Select “Yes” for prompting the user and click OK.

Now we can see that our action has been added to “Copies that prompts for updates”.

Now “check out” the document, make some changes and “check in” again.
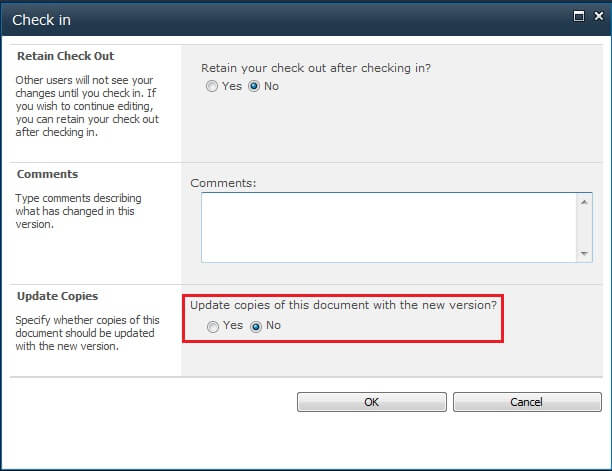
When we check the document in, a dialog box appears which asks some basic details about whether the document should be kept in checked out mode or not, if any comments need to be provided for the new version, and specifically whether the new version should be updated to the related copy or not.
Select “Yes” and click OK.
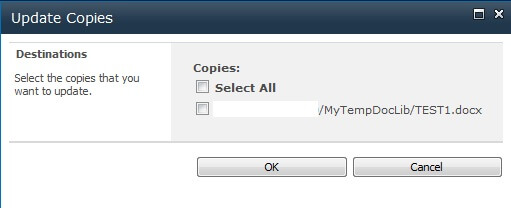
As soon as we click OK, another dialog box appears which prompts for the selection of which copy of the document to update. Select the appropriate one and Click OK.
Again a dialog box for confirmation will be prompted, Click OK and go to the other library (where the copy document is stored) and we can see the document has updated its new data into copied document.
Next Steps
- Use the Manage Copies feature to manage more than one copy of a document at different locations but maintain the unique data at a single location.
- Read about Document Versioning in SharePoint 2010

Rahul Mehta is a Project Architect/Lead at Tata Consultancy Services in Mumbai focusing on ECM. My prime role is as a system architect. I work with Microsoft SharePoint to build ECM solutions and Microsoft SQL Server Reporting Services and Integration Services for Business Intelligence solutions. I have worked with clients like Viacom, Paramount, BP, AmeriSourceBergen, etc. I am Microsoft Certified Professional for Microsoft SharePoint ECM solutions.