By: Mohammed Moinudheen | Comments | Related: > SQL Server on Linux
Problem
Are there any existing built-in templates on Azure that run SQL Server on Linux which can be quickly setup to test SQL Server features on Linux? Can we connect to the new SQL Server on Linux locally from my desktop using SQL Server Management Studio (SSMS)?
Solution
There are already some templates that are available in Azure that run SQL Server on Linux. This tip describes the step by step process to quickly set it up.
Setup a Linux VM on Azure for SQL Server
First, log on to the Azure portal: https://portal.azure.com/.
If you don’t have an account, you can set up a trial edition https://azure.microsoft.com/en-us/free/ and get a $200 credit for 30 days. Once you login, follow the sequence of steps as shown below. The available SQL Server VMs on Linux appear as shown below.
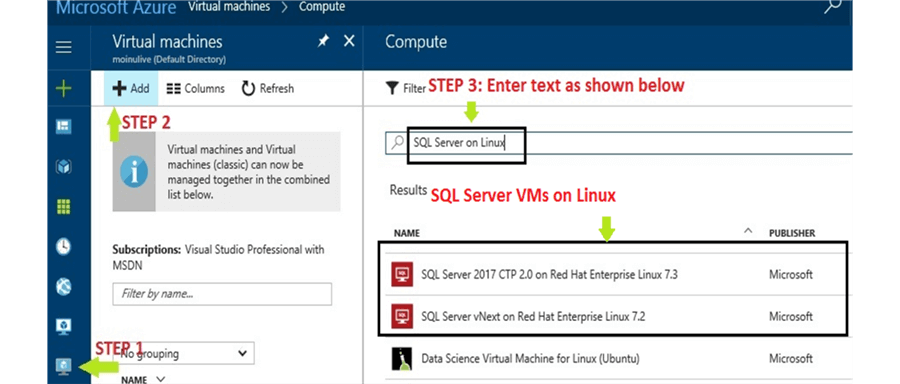
Just click on one of the templates. In this tip, we will try the first one, that is, SQL Server 2017 CTP 2.0 on Red Hat Enterprise Linux 7.3. Once you click on this image, you will get this screen, click on ‘Create’.

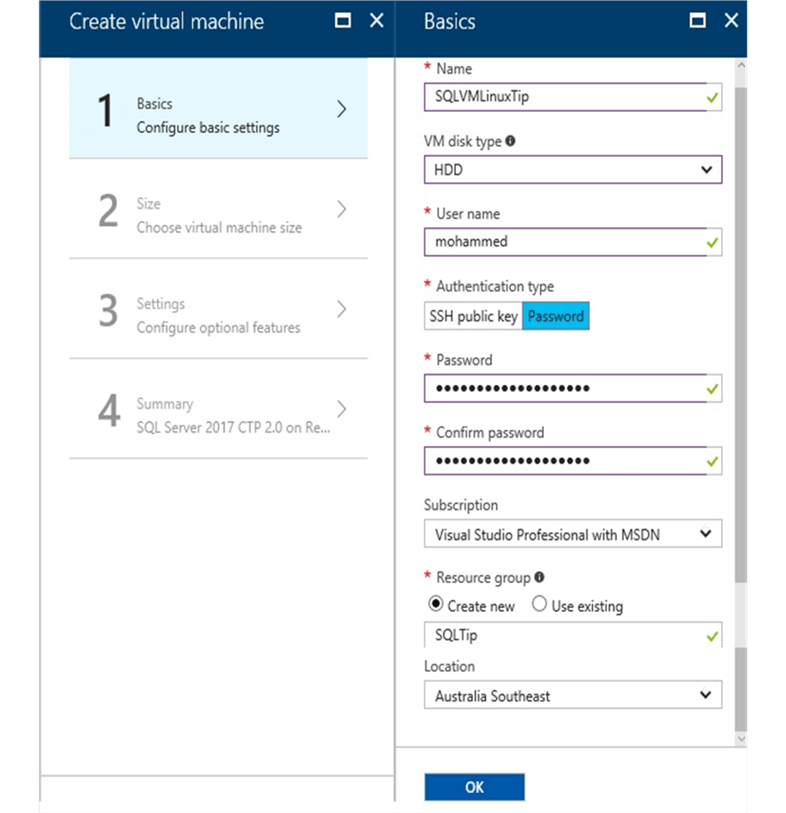
Once you click on ‘Create’, you will need to complete the process for creating the new VM. In the first screen, you will see the option to enter details for the ‘Basic Configuration Setting’. Enter the details as shown below. In the VM Disk type section, you can provide either SSD or HDD, then provide a complex password and for location, provide a location closest to you.
In the next screen, you will get the option to choose the virtual machine size. Review the list of machine sizes available and select the one that best suits your requirement.
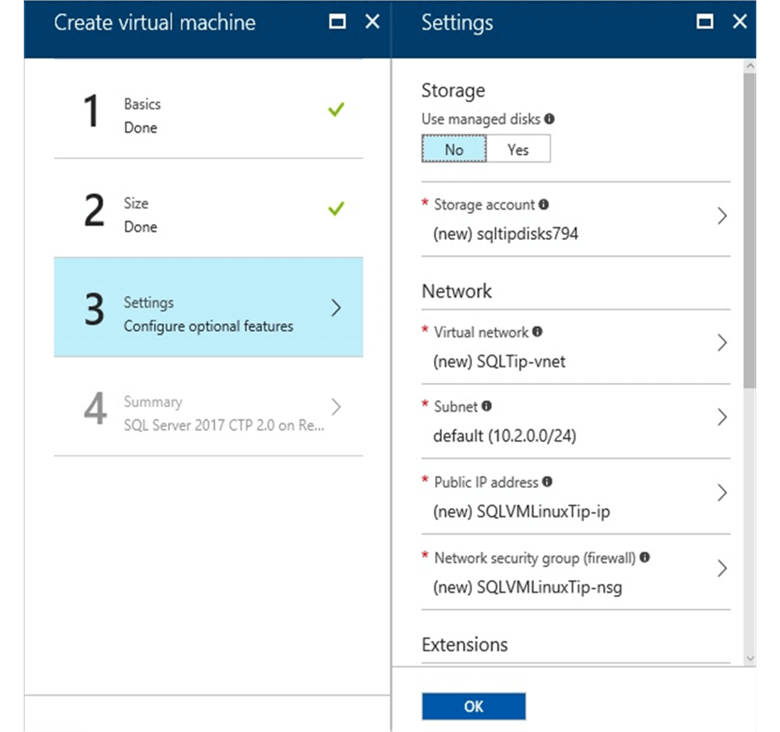
The next screen is the section to configure optional features. You can leave it to the default settings as shown below.
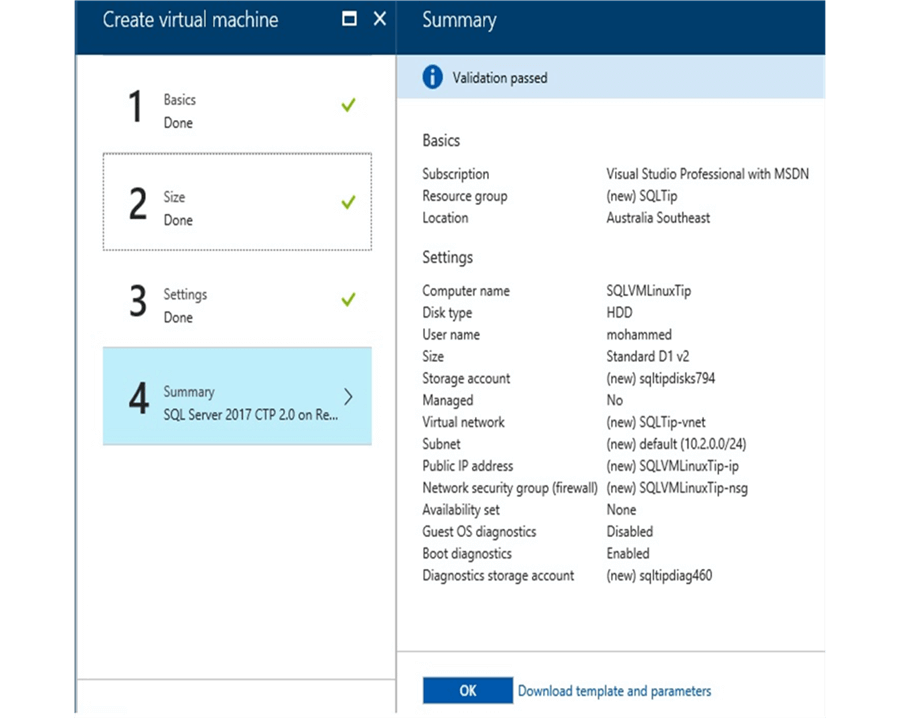
In the final summary screen, review the parameters and click on ‘OK’ which will create the new virtual machine.
Steps to create the inbound security rules for the new VM
Once the VM is created, make sure to create the inbound security rules on the Azure portal. Refer to the below image and follow the sequence as shown to setup the inbound rules. (note I have indicated various steps in the images)
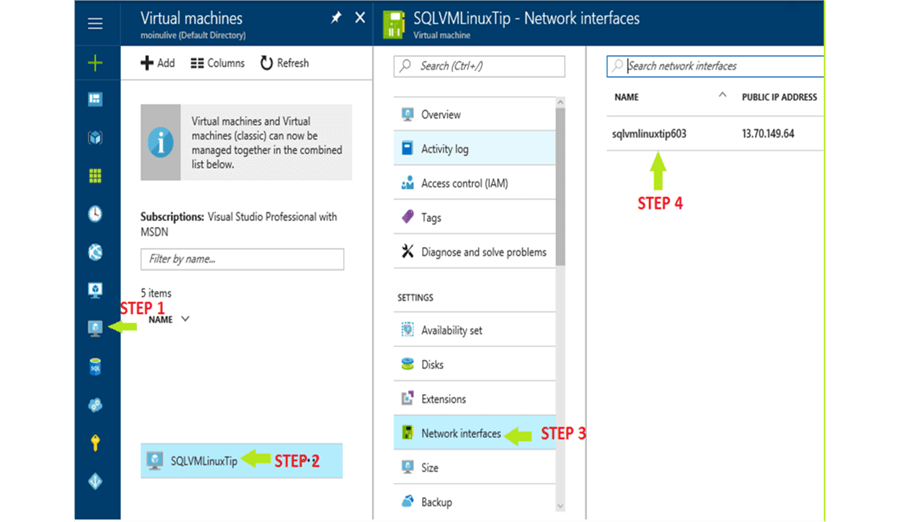
Once you click on the Network interfaces name as shown (step 4), you will get this screen.
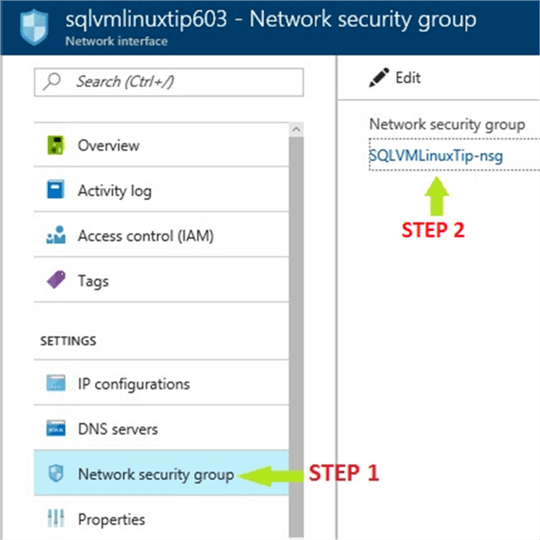
Click on the Network Security group (step 2 above) to get to the next screen. In the next screen, you will see the option to add the inbound security rules. Make sure to add the inbound security rules as shown. One for SSH and the other for the default SQL port.

Steps to connect to the new VM
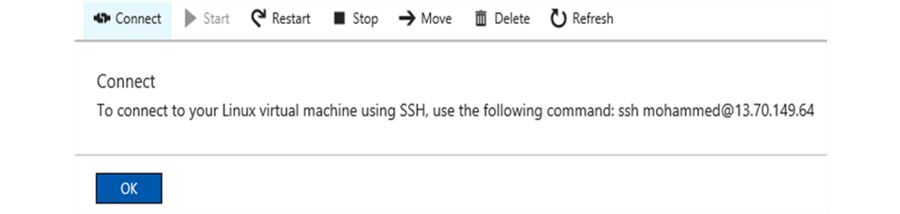
Go to the section to connect to the VM. You will get this message to connect to the new virtual machine using SSH.
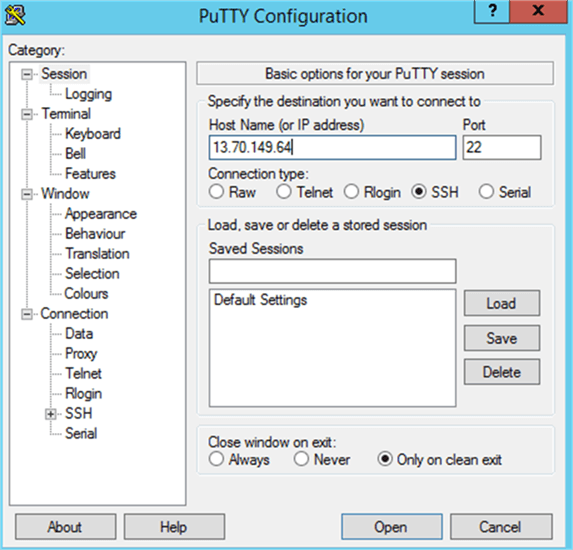
You can download a compatible SSH version from this link: http://www.putty.org/.
Enter the IP address details as shown and click on Open.
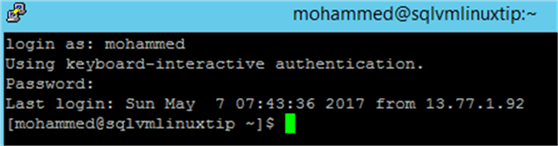
Once you click on Open a pop window appears where you need to input your user name and password. Refer to the image below. Once you key in the correct credentials, you will get connected to the VM.
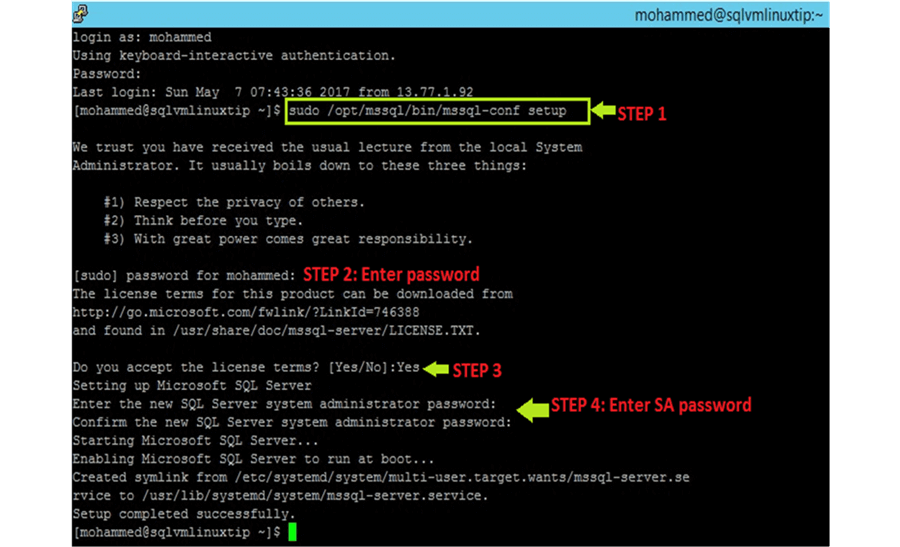
In order to set up SQL Server on this template, run this command at the prompt.
sudo /opt/mssql/bin/mssql-conf setup
The below screen shows the sequence of prompts that we get when we install SQL Server.
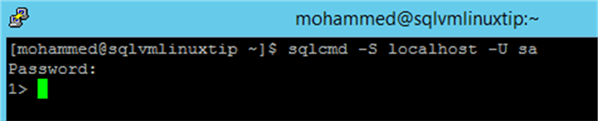
Now, when you try to connect to SQL server using SQLCMD, you will get this error message.

This is because, the SQL Server tools are not yet installed. In order to install the SQL Server tools on the Red Hat Enterprise Linux (RHEL), refer to these sequence of steps.
Step 1: Enter super user mode
sudo su
Step 2: Download the Red Hat configuration file
curl https://packages.microsoft.com/config/rhel/7/prod.repo > /etc/yum.repos.d/msprod.repo
Step 3:: Exit super user mode

Run the below command at the prompt in order to install the SQL Server tools:
sudo yum update
Accept the terms and conditions when you are prompted. In the final step, run below command to make the SQLCMD utility accessible.
echo 'export PATH="$PATH:/opt/mssql-tools/bin"' >> ~/.bashrc
source ~/.bashrc
Once this command is run, you will be able to start using SQLCMD utility to connect to the installed SQL Server as shown. This shows that a connection is made to SQL Server on Linux.
Steps to connect to the SQL Server on Linux locally using SSMS
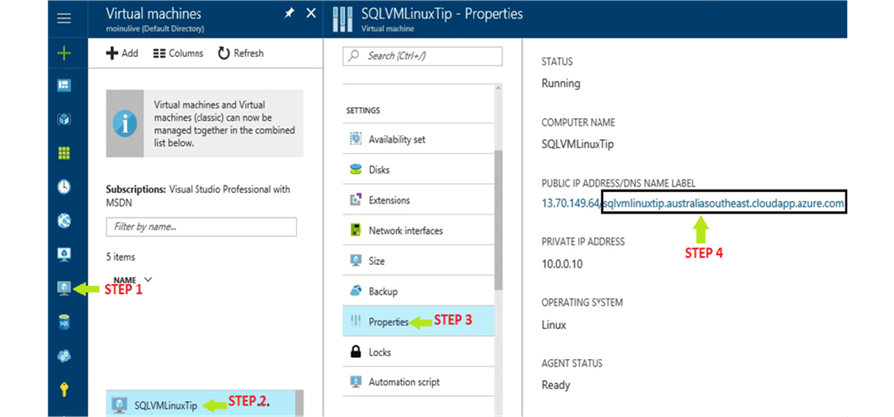
In this section, we will try to connect to this SQL Server on Linux locally using SSMS installed on a windows machine. To get the full DNS name or IP address, refer to the below image from the Azure portal.
On SSMS installed locally, provide the details as shown with the correct credentials.
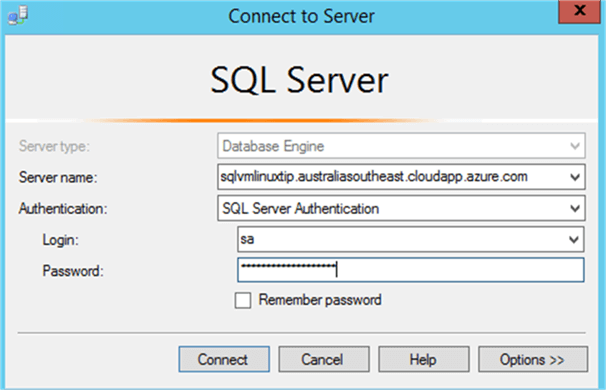
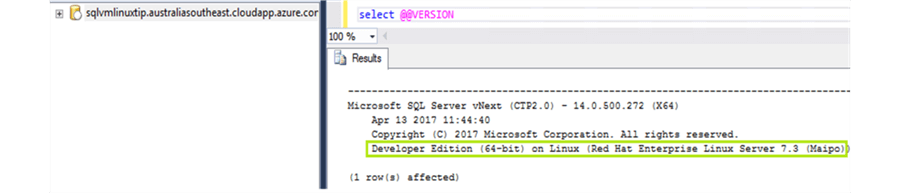
With this, you will be able login successfully to a SQL Server installed on Linux.
Next Steps
- Try this tip using your own Azure subscription and test connectivity locally from SSMS.
- To get familiar with Azure, refer to these SQL Server Azure Tips
- To get familiar with SQL Server on Linux, refer to these SQL Server on Linux Tips


About the author
 Mohammed Moinudheen is a SQL Server DBA with over 6 years experience managing production databases for a few Fortune 500 companies.
This author pledges the content of this article is based on professional experience and not AI generated.
View all my tips
