Problem
Most companies are faced with the ever-growing big data problem. It is estimated that there will be 40 zettabytes of new data generated between 2012 to 2020. See the computer world article for details. Most of this data will be generated by sensors and machines. However, only a small portion of the data is available for users.
Every operating system contains files in two different formats. Binary files contain a sequence of bytes only understood by special programs. One example of a binary file is family photo saved to your laptop in a jpeg format. Another example of a binary file is the executable program named “notepad++.exe”. Text files contain a sequence of ASCII characters which can be easily understood by humans. A log file is considered a text file with a specific format defined by the program that generated it. I used Notepad++ application to open, edit and save text files which contain the code snippets used in this article.
How can IT professionals help business lines gather and process data from various sources?
Solution
Microsoft has installed PowerShell on every up-to-date operating system. Given a little time and practice, you will be an expert at processing text files with PowerShell.
Business Problem
There are many financial companies that invest in the stock market via mutual funds. Our fictitious company named Big Jon Investments is such a company. They currently invest in the S&P 500 mutual fund but are thinking of investing in individual funds starting in 2017. The investments department will need historical data to make informed choices when picking stocks.
Our boss has asked us to pull summarized daily trading data for the 505 stocks that make up the list of S&P 500 companies. Last year’s historical data will be the start of a new data mart. The preferred format of the data is comma delimited.
How can we accomplish this task using PowerShell?
Part One
As a designer, we will need to combine a bunch of cmdlets to create a solution to solve our business problem.
I chose to break this solution into two parts for easy learning.
- Working with directories and files.
- Processing text files.
Today, we will focus on the first topic.
Read the manual
The hardest part of any project is to figure out what components are available to the designer to solve the problem. PowerShell has many built in, open source and commercial cmdlets that might suit your needs.
How can we review available cmdlets that process comma separate files (CSV)?
The Get-Module cmdlet retrieves information about currently imported (loaded) PowerShell modules in the ISE environment. Using the -ListAvailable parameter, you are shown all locally installed modules that can be used (imported) in your particular solution. The Find-Module cmdlet which is part of the PowershellGet module gives you access to the PowerShell Gallery that has a large assortment of free and commercial modules.
The PowerShell code below lists all currently installed cmdlets that have the abbreviation CSV in the name.
#
#  1 - Finding cmdlets inside modules
#
# Find all installed PowerShell cmdlets
$CmdList = Get-Module |
    Where-Object { $_.Name -like 'Microsoft.PowerShell*' } |
    ForEach-Object { $_.ExportedCommands.Values }
# Show cmdlets specific to CSV
$CmdList | Where-Object { $_.Name -like '*Csv*' }
We can see from the output that four cmdlets match our search criteria. Okay, we now know the cmdlets that might help us in saving our data to the correct format.

How can we get more information about a chosen cmdlet?
The Get-Help cmdlet retrieves information about a named cmdlet. Adding the -Detailed parameter to the call provides extra information such as examples that show usage. The PowerShell code below gets regular help for the Export-Csv cmdlet and detailed help for the Import-Csv cmdlet.
#
#  2 - Detailed help on a cmdlet
#
# Just like a UNIX man page
Get-Help Export-Csv
# All available information
Get-Help Import-Csv -Detailed
The output window from the PowerShell Integrated Scripting Environment (ISE) shows help for the Export-Csv cmdlet.

The output window from the PowerShell ISE shows detailed help for the Import-Csv cmdlet. If we scroll down the output, we can see several examples on how to call the cmdlet.

To recap this section, use the Get-Module cmdlet to search for cmdlets to use in your solution and the Get-Help cmdlet to find detailed information on a selected cmdlet.
Working with directories
Every operating system has a concept of storage. Two popular operating systems that are on the market are Windows and Linux. Each file system is broken into directories (folders) that contain files (text or binary). The file system supports nested directories. Creating a graph of the parent-child directory relationship looks like the branches of an inverted tree.
In Linux, the pwd command stands for print working directory. In PowerShell, the same command exists. However, it is an alias for the Get-Location cmdlet. There is a lot of PowerShell code on the internet that might use these shortcuts. If you suspect a cmdlet is an alias, use the Get-Alias with the -Name parameter to reveal the hidden command.
The PowerShell code below shows us the current working directory.
#
#  3 - List working directory
#
# Alias
Get-Alias -Name pwd
# Get working directory
Get-Location
The image below shows the output from the PowerShell ISE. I am writing the fifth article of the year by looking at the naming convention of the directory.

Manipulating directories is key to creating automated processes. The New-Item command allows a script designer to create a new directory. The opposite command is Remove-Item can be used to recursively remove a directory and all files contained within. The -Force parameter tells the cmdlet to skip prompting the user for confirmation.
I want to create a directory called “c:\stocks” that will contain all the data we gather for Big Jon’s Investments. The code below demonstrates the use of these two commands.
#
#  4 - Creating a new directory
#
# Directory exists (=) failure
$path = "c:\stocks"
New-Item -ItemType Directory -Path $path
# Remove directory & all items
$path = "c:\stocks"
Remove-Item -Recurse -Force $path
It is always good to test for the existence of a directory before removing it. Calling the New-Item cmdlet on an existing directory will result in an error. The Remove-Item cmdlet will remove an existing directory.

The PowerShell code below creates the stocks project directory with an inbound sub-directory containing unprocessed files and an outbound sub-directory holding finished files. The Test-Path cmdlet prevents the code from erroring on existing directories.
#
#  5 - Create directory structure
#
# Create stocks directory
$path = "c:\stocks"
If (!(test-path $path))
{
  New-Item -ItemType Directory -Force -Path $path
}
# Create inbound directory
$path = "c:\stocks\inbound"
If (!(test-path $path))
{
New-Item -ItemType Directory -Force -Path $path
}
# Create outbound directory
$path = "c:\stocks\outbound"
If (!(test-path $path))
{
New-Item -ItemType Directory -Force -Path $path
}
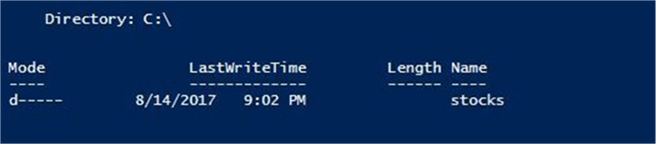
The output below shows the stocks project directory.
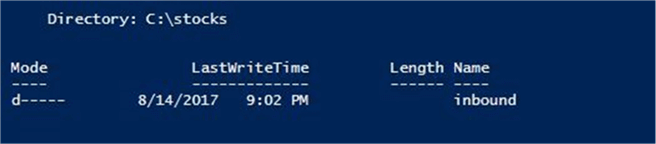
The output below shows the inbound sub-directory.
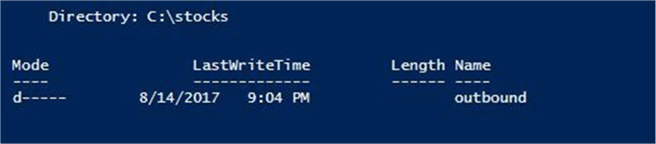
The output below shows the outbound sub-directory.
In Linux, the chdir command stands for change directory. The same command exists in PowerShell. However, it is an alias for the Set-Location cmdlet. The PowerShell code below changes the working directory to our new project directory.
#
# 6 - Set working directory
#
# Alias
Get-Alias -Name chdir
# Set directory
Set-Location "c:\stocks"
In Linux, the ls command stands for list files, and in Windows, the dir command means produce a directory listing. Both commands are an alias for the Get-ChildItem cmdlet in PowerShell.
The pipeline is a very important concept in PowerShell. It is represented by the | character. Any output from the cmdlet on the left is passed to the cmdlet on the right. Formatting is important when presenting results to a user. The Format-List converts the input into a single column output. The Format-Table cmdlet converts the input into a tabular output which has multiple columns.
The PowerShell code below shows examples on how to use these cmdlets.
#
# 7 - List directory contents
#
# Alias
Get-Alias -Name dir
# Directory as list
$path = "c:\stocks"
Get-ChildItem -Path $path | Format-List
# Directory as table
$path = "c:\stocks"
Get-ChildItem -Path $path | Format-Table
The dir cmdlet is an alias for the Get-ChildItem cmdlet.

The output below shows any files and directories inside the stocks directory. The information is formatted as a list.

The output below shows any files and directories inside the stocks directory. The information is formatted as a table.

In a nutshell, working with directories is pretty straight forward. A script designer might want to do the following: find the working directory, change the working directory, create a new directory, remove a current directory, test the existence of a directory, list the objects in a directory, and rename or move an existing directory. I did not cover the last two cmdlets.
Can you guess their names?
The Rename-Item cmdlet allows for name changing and the Move-Item cmdlet allows for physical drives to be changed.
Writing to console window
The console window allows the designer to see the output from a given cmdlet. You can also type the name of a variable in this window to see its contents. This window can get very cluttered when executing a bunch of cmdlets.
How can we clear this window?
The Get-Alias cmdlet has another parameter that I did not talk about. I know the Clear-Host cmdlet will clean up the console window in the PowerShell ISE application. What are the aliases for the command? Use the -Definition parameter to discover known aliases.
The PowerShell code below shows examples on how to use these cmdlets.
#
# 8 - Clear console window
#
# Alias
Get-Alias -Definition Clear-Host
# Clear the screen
cls
The output below shows two aliases for the Clear-Host cmdlet.

I happen to know that the Write-Host cmdlet allows us to place a message into the console window. If we search for an alias on this command, we end up with an error. I am very fond of the Microsoft BASIC language. It was one of the first languages sold to customers, and it is the grandfather of VB.NET. The print statement is used in that language to write output to the screen.
How can we define a new alias?
The Set-Alias cmdlet allows us to define a new alias. The scope of the alias is the PowerShell ISE session. Once we exit the application, the alias is lost. The PowerShell code below shows examples on how to use these cmdlets. Also, the -ForegroundColor and -BackgroundColor parameters are used to give some color to our output.
#
# 9 - Write 2 console window
#
# Any alias (?)
Get-Alias -Definition Write-Host
# Add alias
Set-Alias -Name print -Value Write-Host
# Very simple program
print "Hello World" -ForegroundColor red -BackgroundColor Black
There is no pre-installed alias for the Write-Host cmdlet.

Fans of the BASIC language can create an alias named print.

There are many places that we can write output to. If we execute the first code snippet (#1) above looking for Write cmdlets, we will see the following output.

I want to call out one cmdlet that we will talk about. The Write-Verbose cmdlet will only print output to the screen if a user defined cmdlet is defined as an advanced function and the -Verbose parameter is used on the call. If you are writing a script without functions (cmdlets), the preference variable can be used to control output.
This is awesome. Since I do not write the perfect program on the first try, I can’t add optional output to help me debug my program. The PowerShell code below shows example calls to the cmdlet. The first call does not produce output. The second call writes output to the console window.
#
# 10 - Optionally write output
#
# No output
$VerbosePreference = "Silent"
Write-Verbose "Hello World"
# Console output
$VerbosePreference = "Continue"
Write-Verbose "Hello World"
The output from the Write-Verbose cmdlet.

To summarize this section, controlling information on the console window allows you to debug your script and/or have run time messaging.
Working with files
You should not be surprised to find out that you already know how to manipulate files. The *-Item cmdlets can be used for both directories and files. For completeness, I am going to create and manipulate a text file.
The algorithm for this exercise is below.
| Task | Cmdlet | Description |
|---|---|---|
| 11 A | New-Item | Create a new c:\stocks\hello-world.txt file. |
| 11 B | Copy-Item | Copy file to c:\temp directory as a backup. |
| 11 C | Rename-Item | Rename file to c:\stocks\sample-file.txt. |
| 11 D | Remove-Item | Remove file named c:\stocks\sample-file.txt. |
| 11 E | Move-Item | Move file from hello-world.txt file from c:\temp to c:\stocks |
The PowerShell code below executes the above algorithm.
#
#  11 - Working with files
#
# Define variables
$file1 = "c:\stocks\hello-world.txt"
$name1 = "sample-file.txt"
# A - Create new file
New-Item $file1 -type file -force -value "Hello World"
# B - Copy the file
Copy-Item $file1 -Destination "c:\temp"
# C - Rename the file
Rename-Item -Path $file1 -NewName $name1
# D - Remove the file
$file2 = "c:\stocks\sample-file.txt"
Remove-Item $file2
# E - Move the file
$file2 = "c:\temp\hello-world.txt"
Move-Item -Path $file2 -Destination $file1
I leave inspecting the output for each step as an exercise for you to do. The image below is taken after step 11 A is executed. We can see that the text file exists in the correct directory. I even opened the file in my Notepad++ editor to examine the contents.

Summary
The big data problem is faced by most companies today. To be competitive in your industry, it is important to gather data from various sources, inspect data for usefulness, and automate processing of useful data for business lines.
Today, we talked about how to find cmdlets that can be used to craft a business solution. Obtaining documentation on selected cmdlets is important for an overall understanding. Every operating system has storage divided into directories and files. Manipulating both directories and files is important when writing automated processes. For instance, if there are files in the inbound directory, you can then process them into an Azure SQL database. Upon successful execution, create a date time stamped archive directory, and then move the files to that directory. This might be a typical business process.
Last but not least, how many people write the perfect program the first time? Having output directed to the console or windows event log might be helpful in debugging your program when a runtime error occurs.
In conclusion, we now know how to work with directories and files. Next time, we will learn how to process text files of various formats.
Next Steps
- Learn how to process text files with PowerShell in your environment.
- Check out these other PowerShell tips.

John Miner is a Senior Data Architect at Insight Digital Innovation helping corporations solve their business needs with various data platform solutions.
He has over thirty years of data processing experience, and his architecture expertise encompasses all phases of the software project life cycle, including design, development, implementation, and maintenance of systems.
His credentials include undergraduate and graduate degrees in Computer Science from the University of Rhode Island. Also, he has earned certificates from Microsoft for Database Administration (MCDBA), System Administration (MCSA), Data Management & Analytics (MCSE), Data Science (MPP), Databricks Certified, and Fabric Certified.
John has been recognized with the Microsoft MVP award nine times for his outstanding contributions to the Data Platform community.
When he is not busy talking to local user groups or writing blog entries on new technology, he spends time with his wife and daughter enjoying outdoor activities. Some of John’s hobbies include wood working projects, crafting a good beer and playing a game of chess.
- MSSQLTips Awards: Author of the Year – 2019, 2022, 2023 | Champion (100+tips) – 2023