By: Tim Smith | Comments (1) | Related: > PowerShell
Problem
In this tip, we'll be looking at extracting file information with PowerShell along with useful logic for getting information, which can be useful in ETL contexts with file imports, data migrations with files, and reporting. Files provide information that we may use with business logic to either validate prior to using or to confirm following the creation after we migrate information to them. In addition, we'll see that we can use methods with these file objects that we create for copying or writing data without needing to create new object contexts - which can be convenient if we have multiple steps for a file.
Solution
If we are migrating data to a file, we want to first check if the file exists because we may migrate data to a file that does exist, or create a file and then migrate data. Also, since an application that extracts our file information may use date and time meta-information, we have to be careful about the create and modified times.
If we want to create a new file because the application looks for recent files created, we want to delete and re-create the file. However, if the application looks for a recent modified date, we may be able to re-use the same file - deleting all data in the file and adding data. The quickest route is to remove the file and re-create as this will update both the creation and modified time information.
Creating Files with PowerShell
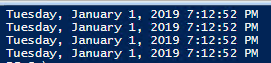
In our first example, both of these files shouldn't exist, so we'll create them if they don't exist and we output their creation and modified times in PowerShell ISE (the date and times of when you run this will differ).
if (!(Test-Path "C:\files\textcreate1.txt")) { New-Item "C:\files\textcreate1.txt" -ItemType File }
if (!(Test-Path "C:\files\textcreate2.txt")) { New-Item "C:\files\textcreate2.txt" -ItemType File }

(Get-ChildItem "C:\files\textcreate1.txt").CreationTime.DateTime
(Get-ChildItem "C:\files\textcreate1.txt").LastWriteTime.DateTime
(Get-ChildItem "C:\files\textcreate2.txt").CreationTime.DateTime
(Get-ChildItem "C:\files\textcreate2.txt").LastWriteTime.DateTime
Get File Information with PowerShell
We can get further information about our file with PowerShell, which can assist us with meta-information about the file which we may need to use. Some of the properties that we return in the below code block are:
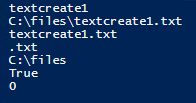
- BaseName: this is the base name of the file, which excludes the directory or the name of the file. One applied example of this is with security, we may have dynamic code that does not allow a full path being passed in, but only the base file name to restrict other information.
- FullName this is the full name of the file including the path and the extension. One applied example where we may use a full file name in a bulk load statement that depends on the full file name (SSIS or bulk insert).
- Name: this is the name with the extension of the file. One applied example where we may use this for organizing the file sources that are saved to a file or table.
- Extension: this is the extension of the file and we generally use this in filtering files, such as filtering for specific extensions.
- DirectoryName: this is the directory where the file is located. One applied example of where we may use this is creating a duplicate directory on a different drive or computer.
- Exists: this property tells us if the file exists or not. We can use this to check if a file exists, though I tend to prefer using the if (!($file)) syntax. However, this is an option with Get-ChildItem and directly accessing this property.
- Length: this tell us the file size in bytes (0 in our case). An applied example of this is validating a file has data before importing, or validating that a file is within a range before importing. We can also use this to validate a file size after we export data.
$file1 = Get-ChildItem "C:\files\textcreate1.txt"

### Properties
$file1.BaseName
$file1.FullName
$file1.Name
$file1.Extension
$file1.DirectoryName
$file1.Exists
$file1.Length
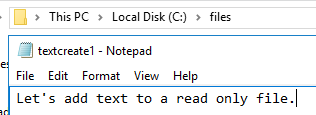
We should note here that in some cases, we can update the properties of files (if we have permissions). For example, in the below code, we first get the property of IsReadOnly (which is False), then set it to true, then get the property again (which is now True).
$file1.IsReadOnly
$file1.IsReadOnly = $true
$file1.IsReadOnly
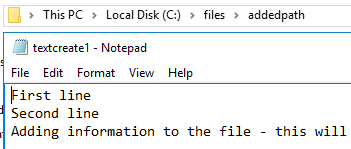
After we update the property, let's edit the file and add a sentence to the textcreate1.txt file (first image below) and then try to save it. If we try to overwrite the file (second image below), we get an error.
We should keep this in mind: if we can update some properties, with appropriate access, others can as well. Properties like IsReadOnly can be useful if we want to give people access to read and only access to read without updating. The principle of least permissions applies here: only give the access that's absolutely required.

Copy, Write and Delete Files with PowerShell
We can also run methods on our files to perform operations on the file that we require - popular methods being writing to files, copying a file, or even removing a file.
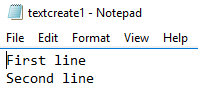
With some of the below methods, we use the properties we recently extracted to see how these can be used dynamically along with how we can extract properties in one line without necessarily creating an object (if this step is not needed). In our textcreate1 file, let's add two lines of text - "First line" and "Second line" to test adding text to a new line. We'll also create a path in our folder called "addedpath" that we'll use in this and the next step.
- Delete: we can call the delete method on an object directly, or as we do in the below code with the Get-ChildItem function directly. This removes the textcreate2 file.
- Write: after we initialize AppendText with our $adddata object, we can use the write function to add information to the file. This will be appended to the file. Because we have initialized AppendText with the $adddata object, we dispose this object since we're finished. Because of the multiple steps involved with writing data here, we may prefer to use the built in function, Add-Content. In some cases (strict encoding and custom encryption), we may prefer to use write directly.
- CopyTo: we use the CopyTo method to copy our file to an added file path (addedpath) in the same directory and we dynamically use the name, which has the base name and extension of the file.
(Get-ChildItem "C:\files\textcreate2.txt").Delete()
$file1.IsReadOnly = $false
$adddata = $file1.AppendText()
$adddata.Write([Environment]::NewLine + "Adding information to the file - this will be in addition to what exists.")
$adddata.Dispose()
$file1.CopyTo("C:\files\addedpath\" + $file1.Name)
Running PowerShell Scripts from SQL Server Agent
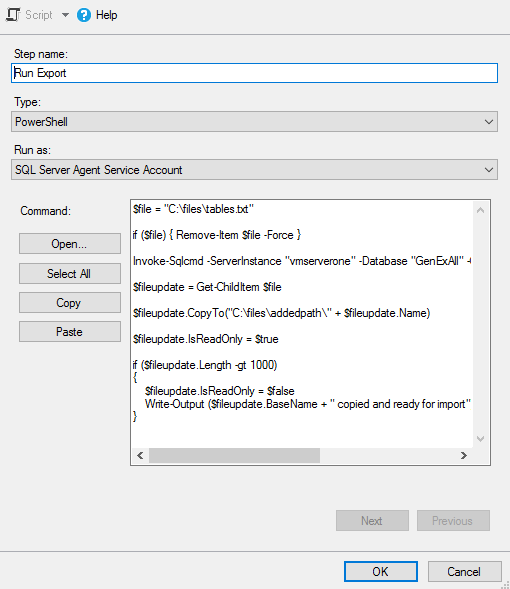
Now we're going to put some of our properties and methods together in a SQL Server Agent Job step.
We'll first remove our initial file if it exists, then use Invoke-Sqlcmd to save table information to a file, and from there create an object from Get-ChildItem. With this object, we'll copy our file to our added path, set the file to read only, then check the file's length and if it meets the criteria, turn off read-only, and write the output that the file is ready for import. The account that's executing the SQL Server Job Agent step has appropriate permissions to the file path and this will be required in order for the above step to complete.
$file = "C:\files\tables.txt"

if ($file) { Remove-Item $file -Force }

Invoke-Sqlcmd -ServerInstance "OurServer" -Database "OurDatabase" -Query "SELECT [name] FROM sys.tables" | Out-File $file

$fileupdate = Get-ChildItem $file

$fileupdate.CopyTo("C:\files\addedpath\" + $fileupdate.Name)

$fileupdate.IsReadOnly = $true

if ($fileupdate.Length -gt 1000)
{
    $fileupdate.IsReadOnly = $false
    Write-Output ($fileupdate.BaseName + " copied and ready for import")
}

Since we have multiple steps for our file, we want to re-use the object as much as possible to save data to it, copy it to a path, set it to read-only, then validate the file, and further update it. These properties and methods allow us to use multiple steps, if they're required in our design without needing to rebuild or re-declare everything in each line.
Next Steps
- As we see with our created files, we can get useful meta-information about our files that we can apply with filtering as well as update some of the properties to possibly restrict access.
- We looked at some helpful methods that can copy, write or remove files. While these methods can be helpful, we want to make sure that we restrict these operations to accounts that should be allowed access.
- This tip involves using PowerShell version 5.1; to determine your version, type $PSVersionTable and review the PSVersion property. For security, I would recommend using a newer version of PowerShell.


About the author
 Tim Smith works as a DBA and developer and also teaches Automating ETL on Udemy.
This author pledges the content of this article is based on professional experience and not AI generated.
View all my tips
