Problem
In the previous tip, you described in detail the steps required to perform backups of databases running SQL Server on Azure Virtual machines. I noticed that the database backups are running successfully. However, I would like to perform restore of the databases using the backups and test if they are indeed working as expected. Can we have a detailed demo in this tip for performing a database restore?
Solution
In the previous tip, we had configured Azure backups for a demo database named “C100”. We also confirmed as part of the demo that the backups are running successfully. Assuming in this demo, that you are planning to restore the database using the Azure backups, let us go through the steps one by one. Similar to how you performed the backups using Azure, the restore process is also simple which can be completed in a few easy steps.
Restore the database using the backups performed using Azure backup
As a first step, logon to the Azure portal and then go to the recovery services vault. As you had already configured the “Recovery Services Vault” to perform the backups, you will be able to view it in your resource group.
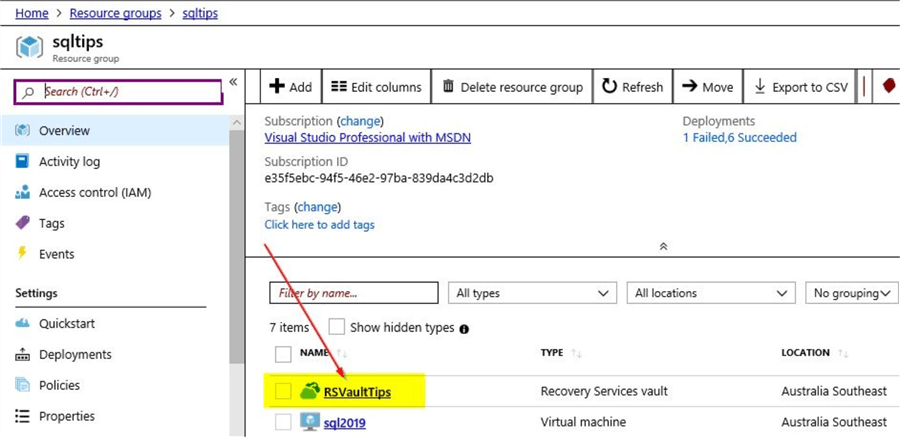
Click on the “Recovery Services Vault” which you configured. In this demo, click on “RSVaultTips”, and click on the “Backup Items” option on the left-hand pane. Once done, click on the “SQL in Azure VM” backup type.

Once you click on the counter (2) – “SQL in Azure VM”, you will see this window.

Here, you can view the database “C100” which has a backup status of “Healthy”.
Restore as a new database
In order to begin the restore process, click on the symbol on the right as shown to view the options available.

As shown, you can view the options that are available to perform the database restore. Click on the “Restore DB” option as shown. You will see this screen with these options.

In this demo, we are restoring the database on to the same server where the database is being backed up. We could also restore the database on to another SQL Server on an Azure VM. We are restoring the database with a new name as shown. Click on ‘OK’. Once done, it will take you to this screen where you can select the “Restore point”.

In this example, we are using the last full backup as a restore point. Click on the “Time” option of “Full Backup” as shown in the screenshot and click on “Ok”. Once done, it will take you to the “Advanced Configuration” section as shown.

Review this screen, to confirm if you want to restore the database with the “NoRecovery” option or not and verify the target locations if they are available. Click on “Ok”. Finally, click on the “Restore” option to begin the process of restoration.

Database Restore Process from Azure
Once you click on the “Restore” option, the restore trigger gets initiated. You can view the progress of the trigger on the right-hand top corner of the Azure portal.

Once the restore is triggered successfully for the database, you can view the confirmation on the notifications pane on the right-hand top corner of the Azure portal as shown.

From the above screenshot, you can also see the information regarding monitoring progress of the restore in the backup jobs page. Once the restore process is triggered, you can view the progress of the restore process under the “Backup Jobs” pane on the left-hand side of the “Recovery Services Vault”.

Here, you can view the status of the restore process as “In Progress”. You can also view the status of the other backup operations that have completed successfully. You can check the status of the restore process on this window and you will notice that the status gets changed to “Completed” once the restore process is done. Refer to the screenshot below for status change on completion.

Click on the “Completed” status to check detailed information of the restore process.

As seen from the screenshot above, you can view summary information of the restore process.
Check Restored Database
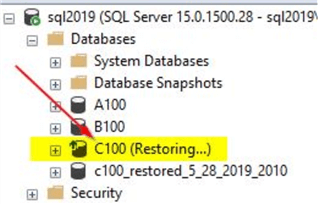
Now that the database is restored, you can logon to the SQL Server in order to confirm that the database is indeed restored. Refer to the screenshot below of the restored database on the destination server.

You can query the msdb database in order to view information of the database restore.
select * from msdb.dbo.restorehistory
order by restore_date desc

Here, you can view details of a login named – [NT Service\AzureWLBackupPluginSvc] which was used by the restore process. This login gets created automatically as part of the Azure backups when backups are configured first and has sysadmin access on the SQL Server instance.
Overwrite existing database with “NoRecovery” and with Point in Time recovery option
In the previous example, you restored the database on the same server, but with a new name. In this demo, we will try overwriting the existing database with the “NoRecovery” option and also perform a point in time restore activity. As you know with the “NoRecovery” restore option database will not be accessible after restoration. Go back to the “Backup Items” blade as done before and click on the “Restore DB” option.

In the next screen to restore the database, click on the option to “Overwrite” the database as shown and click “OK”.

This will take you to the “Restore Point” section, where you can perform the point in time restore of the database as shown.

Here, you select the restore point as 8:28 PM and click on “OK”.

In this window, you select the “NoRecovery” option as Enabled which means the database will not be accessible after the restore. Click on “Ok” and then the “Restore” button to trigger the restore process. Similar to the first example while restoring with a new database name, you can check the status and progress of the restore jobs in the “Backup Jobs” pane of the Recovery Services Vault. Once the restore process completes, you can view the status of the database on the destination server. Below is the screenshot of the database after the restore process completed.
You can see that the database status is “Restoring” as we had selected the “NoRecovery” option for the database restore. When you query the msdb database, you will view the details as shown.

As you can see from the last column “stop_at” which we used for performing point in time restore of the database. If you look at the previous screenshots, we had selected the point of recovery as 8:28 PM.
With these examples, you have successfully restored databases on to SQL Server running on Azure VMs using the backups that were configured using Azure backups. As you can see, the process to perform these restore operations were simple and required hardly any kind of high-level technology expertise.
Next Steps
- In this tip, you learned about using the Azure backup for SQL Server on Azure VM
- In this tip, you learned how the database restores can be performed using simple steps
- You learnt that this restore solution requires zero infrastructure and can be centrally managed
- You learnt how to restore the backup with a new database name
- You learnt how to perform the restore by overwriting the existing database
- You also learnt how easily point in time restores can be done using the database backups
- Try out the Azure backup feature described in this tip and explore the options using a demo database
- Refer to the different Azure articles available on MSSQLTips

Mohammed has been a SQL Server DBA since 2005 and has had the opportunity to work on different versions of SQL Server starting from SQL Server 2000 with exposure to Sybase as well. He is based in Wellington, New Zealand and works at Datacom Systems Ltd, as a SQL Database Administrator. He can be reached at: moinu@live.com.
- MSSQLTips Awards: Author of the Year Contender – 2016, 2018-2021 | Achiever (75+ tips) – 2021