Problem
SQL Server Analysis Services (SSAS) is one of the major components of the Microsoft Business Intelligence (MSBI) stack. It’s the analytical data engine that’s used to create decision support data for reporting applications such as SQL Server Reporting Services (SSRS), Power BI and Excel.
You’re installing a new SQL Server with Analysis Services (SSAS) or adding it to an existing SQL Server installation and would like a step by step guide showing how to install it.
Solution
We’ll walk through each of the steps of installing SSAS 2019 on SQL Server 2019 Standard Edition running on Windows Server 2019.
SSAS Minimum Hardware and Software Requirements
You’ll likely have much more storage and memory than this, but the bare minimum hardware and software required to install SQL Server 2019 are:
- Windows Server 2016 or Windows 10 TH1 1507
- 6 GB of available hard disk space
- 4 GB memory
- 1.4 GHz minimum 64-bit CPU
Install SSAS
This step will look the same whether you are installing SQL Server, Analysis Services or Integration Services as are all installed / added on from the same media.
- Double click on setup.exe on your installation media and the first screen will open

This step will also look the same here whether installing SQL Server with or adding Analysis Services and / or Integration Services. We choose the same option.
- Choose ‘Installation’ from the list on the left side to go to the next screen

Again, we choose the same option whether we’re building a new SQL Server with or adding SSIS and / or SSAS to an existing SQL Server install.
- Choose ‘New SQL Server stand-alone installation or add features to an existing installation’ from the list on the right side

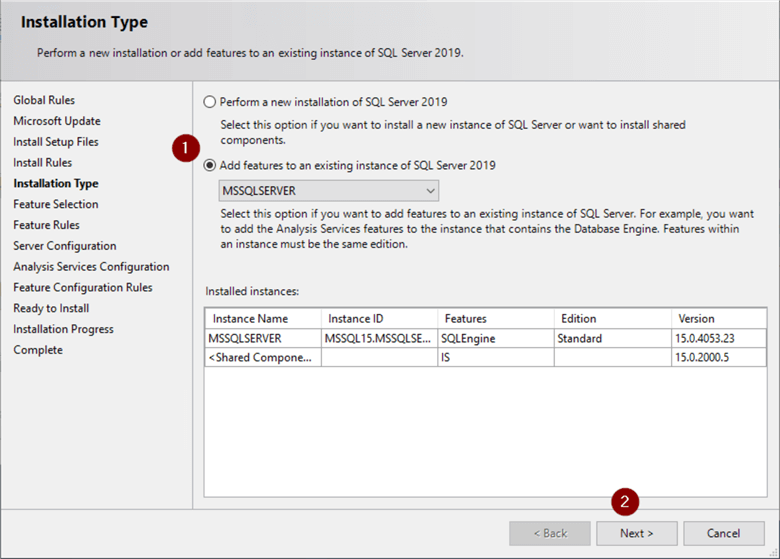
Now we need to choose an option. If we were installing a new SQL Server, we would leave the ‘Perform a new installation of SQL Server 2019’ radio button selected, but for our example we’re adding SSAS onto an existing SQL Server install.
- Select ‘Add features to an existing instance of SQL Server 2019’ radio button and choose the instance we’re adding to in the dropdown. We only have one instance to choose from here as it’s the primary instance and we have no named instances.
- Next
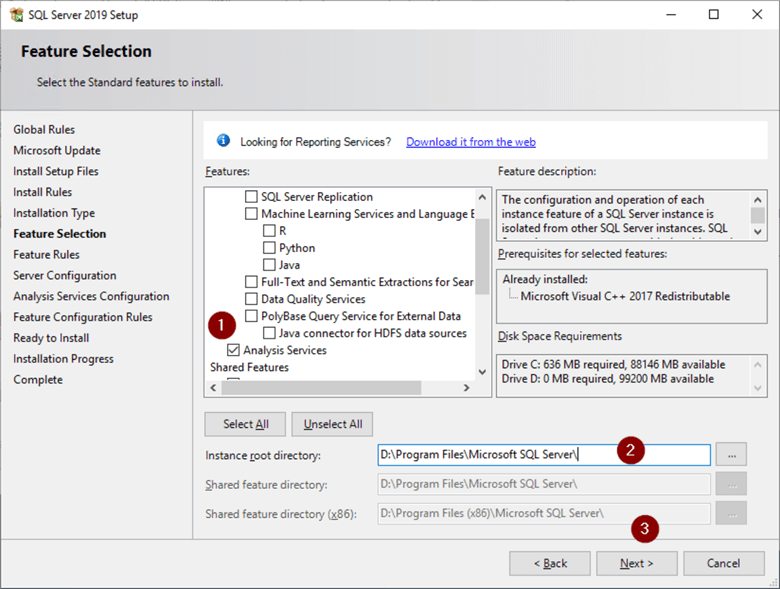
If we were installing a new SQL Server, we would check the ‘Database Engine Services’ box it’s already installed as indicated by the grayed-out checkbox.
- Check ‘Analysis Services’ checkbox
- Set ‘Instance root directory’
- Next
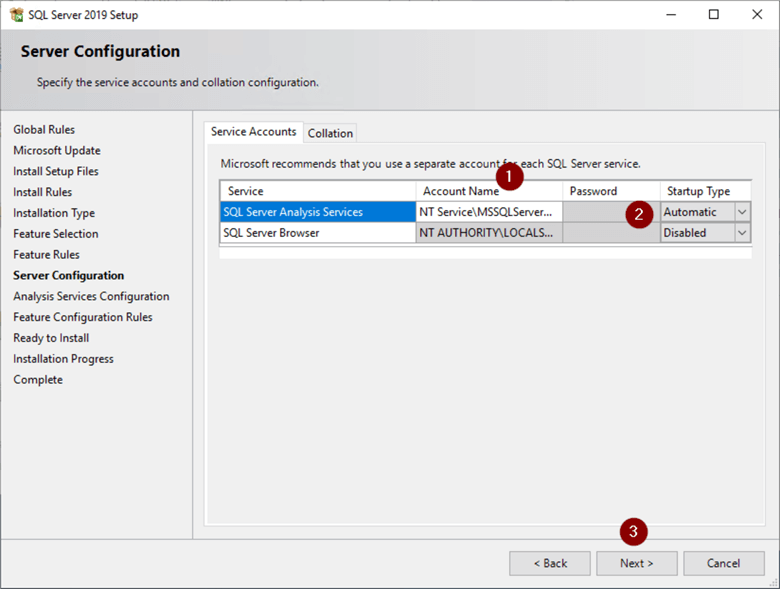
Best practice is to not use the default account to run any of the SQL Server services. Microsoft Docs has more information (Configure Windows Service Accounts and Permissions):
- Configure ‘Account Name’ you’ll run SSAS as
- Verify Startup is Automatic
- Next
At this point we need to know which Analysis Services mode we’re installing so it’s a good time to briefly discuss the differences. A full discussion is out of the scope of this tip, but we’ll look at some basics to help understand why we’re using which mode.
Multidimensional and Data Mining mode is a mature and widely used technology that’s considered difficult to master. It uses OLAP modeling constructs of cubes, dimensions and measures.
Tabular Mode is considered more intuitive, easier to develop with and easier to manage. It uses relational modeling constructs of model, tables and columns.
It’s likely if you’re installing SSAS to replace an existing SSAS install you’ll be installing Multidimensional and if it’s for new work it’s likely to be Tabular.
Continue on once you’ve confirmed.
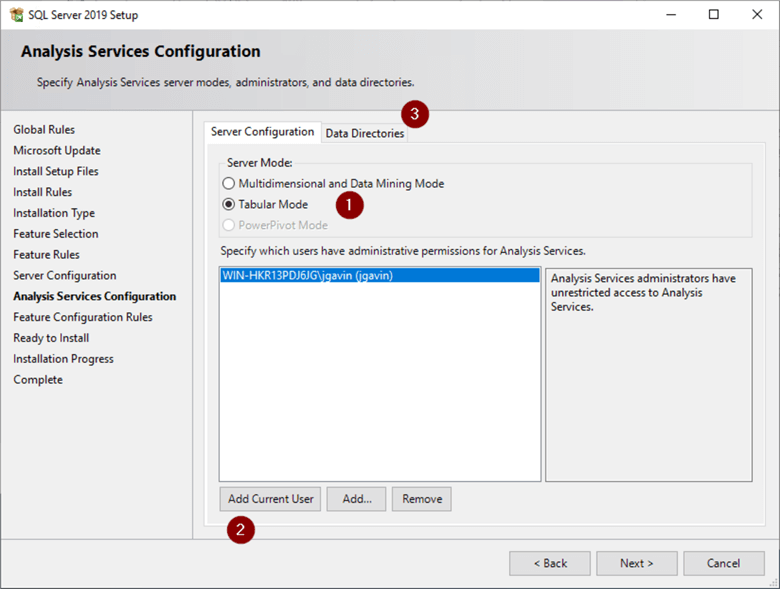
- Select ‘Server Mode’ (default is Tabular)
- ‘Add Current User’ to make your account Analysis Services administrator
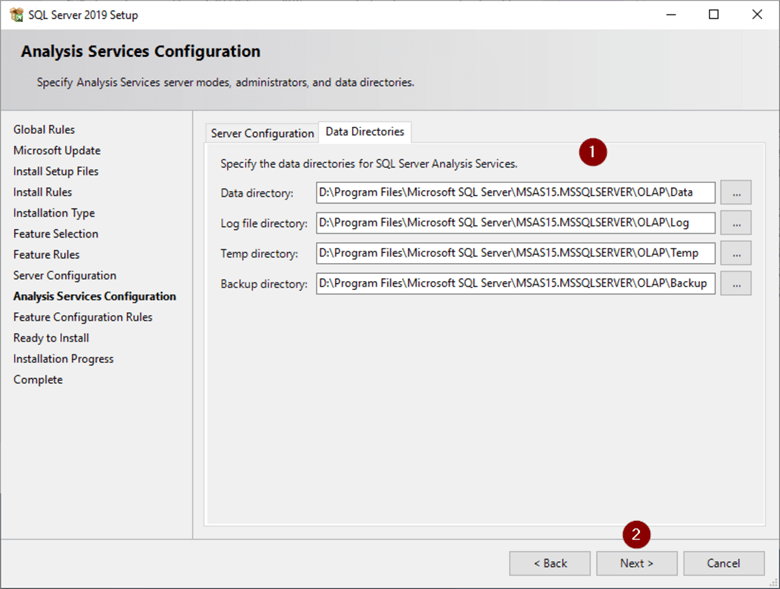
- Click ‘Data Directories’ tab
The install looks pretty much the same from here whether you chose Tabular or Multidimensional.
- Verify / edit SSAS directories
- Next
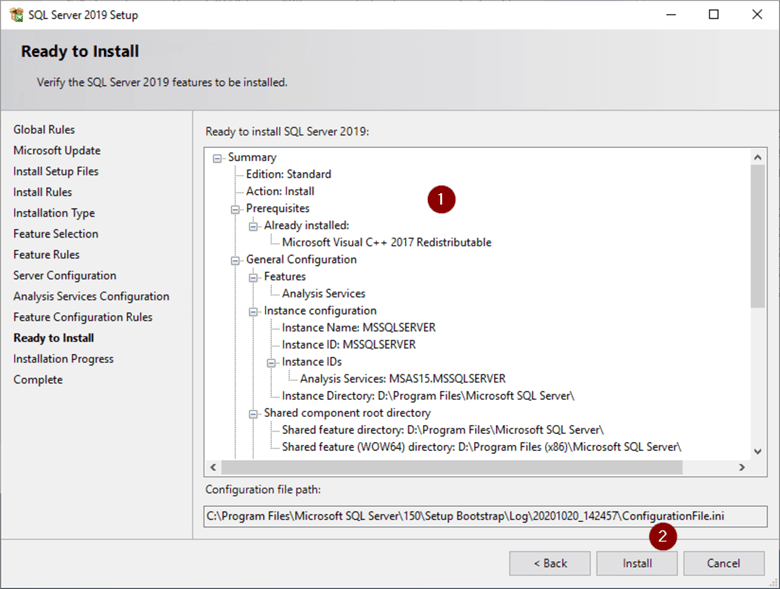
- Verify Summary
- Install
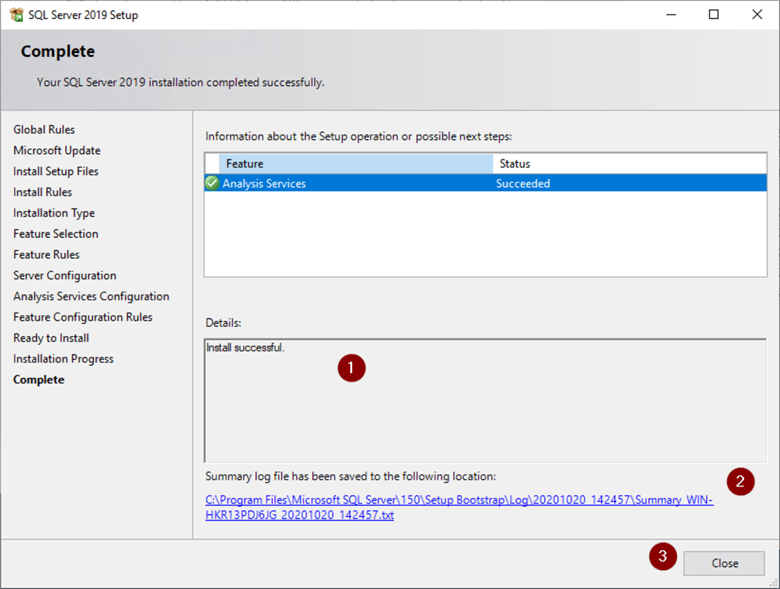
- Verify install was successful
- Review log file
- Close
- Close setup screen

Identify SSAS Multidimensional or Tabular Mode
There are a few places you will see slight differences depending on whether you installed SSAS in Multidimensional or Tabular mode. This can be handy if you weren’t the one who installed SSAS and need to figure out which mode you have. Open SQL Studio Management Studio (SSMS) and connect to SSAS.
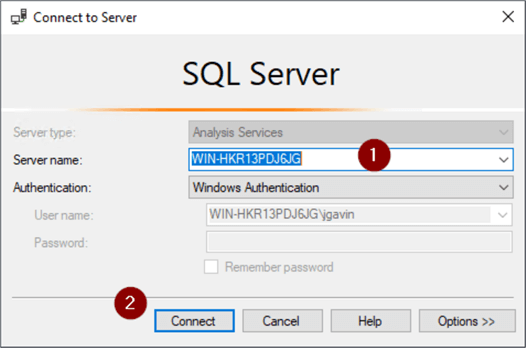
- Connect
- Analysis Services…
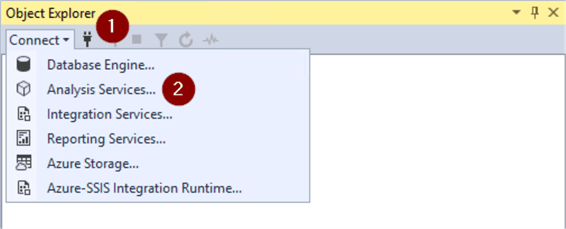
- Enter server name
- Connect
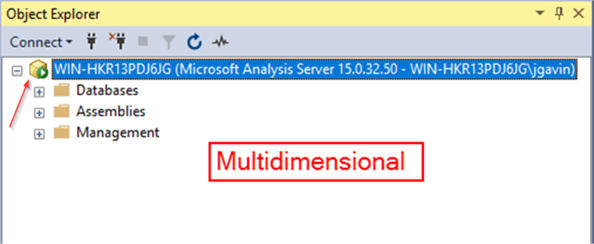
The icon next to the server name indicates it’s Tabular. And if you expand the server dropdown you see there are dropdowns under it called Databases and Management.

If we installed Multidimensional, you will see it’s a different icon next to the server name that indicates it’s Multidimensional. And in addition to the Databases and Management folders there is an additional folder called Assemblies.
Another way to see if it’s Tabular or Multidimensional is open the msmdrv.ini file under the SSAS Config directory and look at the value in the DeploymentMode tag. If it’s 0, it’s Multidimensional and if it’s 2 it’s Tabular.
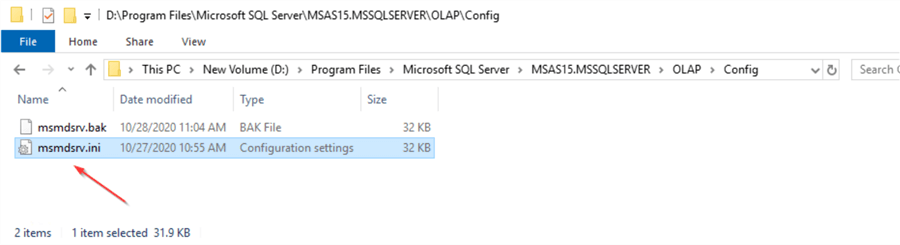

An important thing to note here is if Multidimensional mode is installed and you want to change it to Tabular or vice versa, you can’t simply just change the DeploymentMode value. You would need to uninstall SSAS and reinstall the other mode.
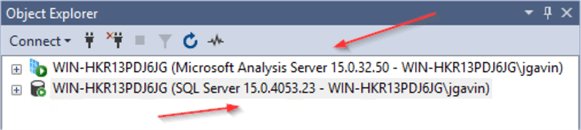
SSAS Version Numbers
Something else you may notice is the SQL Server and Analysis Services versions don’t match. This is expected. As of SQL Server 2017, the same installer is still used for both, but the build systems each use are separate.
SSAS Properties
To get to the SSAS properties
- Right click on the server in SSMS Object Explorer
- Properties
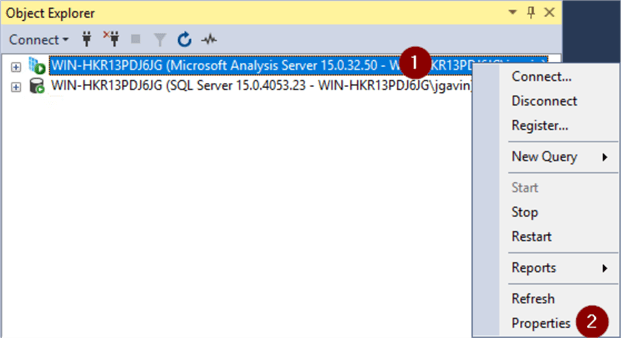
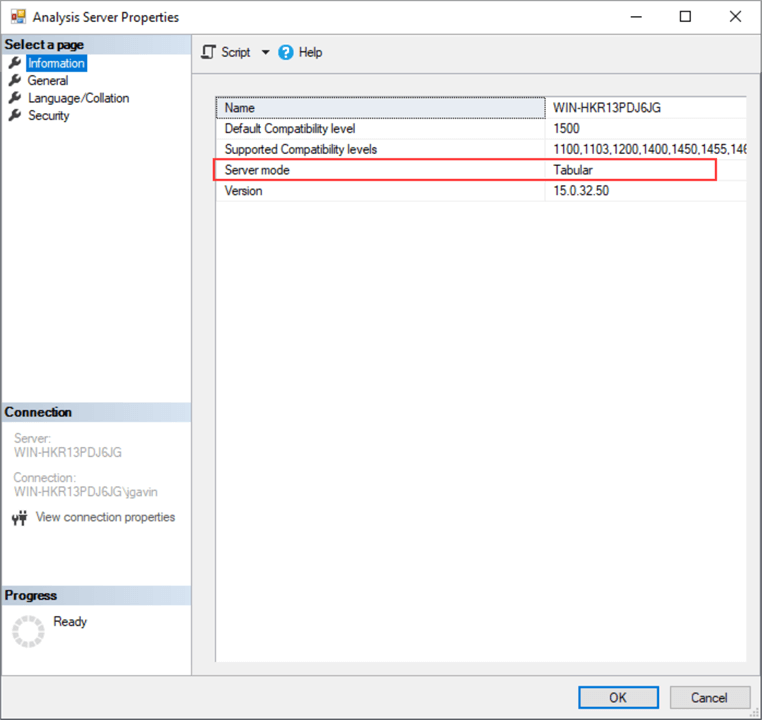
And you’ll notice even another way to see what server mode you have.
Cumulative Updates (CU)
Cumulative Updates, if applicable, are installed as part of the SQL Server CU.
Next Steps
- We now know how to install SQL Server Analysis Services, configure it for Multidimensional or Tabular mode, confirm mode after it’s installed, and access the server properties. This gives us some basic knowledge and a great place to continue learning can be found here: SQL Server Analysis Services 2016 (SSAS) Tutorial

Joe Gavin is from Greater Boston and has worked in technology as a Field Service Engineer for an automotive dealer computer system vendor, a Technical Consultant and Operations Analyst with Sybase and SQL Server based database applications in financial services and now works as a SQL Server Database Administrator.
- MSSQLTips Awards:
- Achiever Award (75+ Tips) – 2024 | Author of the Year – 2021 | Author Contender – 2024 |
- Rookie Contender – 2018