By: Xiaowei Cao | Comments (4) | Related: > Integration Services Upgrade
Problem
There will come as time when you need to upgrade the host operating system and SQL Server to a newer version. If you are using SQL Server Integration Services (SSIS), one of the things you may need to do is to move the SSIS catalog (SSISDB database) to the new server. We will cover the steps in this tutorial.
Solution
This tutorial describes different approaches that you can use to upgrade and migrate the SSIS catalog to a new server that has a later version of Windows OS and SQL Server. The example is to upgrade to SQL Server 2019 with CU9. I will walk through some important steps.
Approach 1 - Install SSIS catalog, then deploy from a Visual Studio Integration Services Project
This is often used when you have a version control system that saves versions of your projects.
- Install SQL Server 2019 and latest cumulative update and install Integration Services.
- Install and configure SSIS catalog.
- Login to SQL Server, right click on Integration Services Catalog.
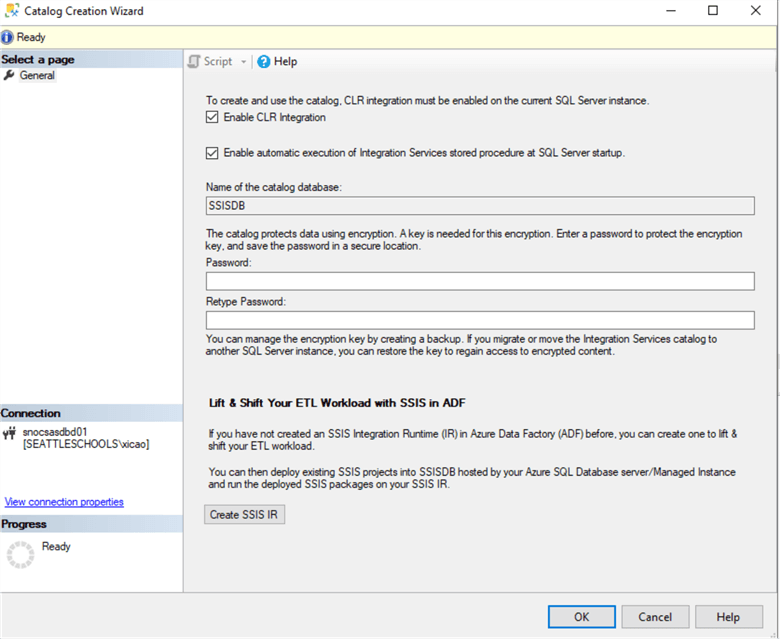
- On the below screen check the enable boxes.
- Enter a strong password and click OK.
This will create the SSISDB catalog, SSISDB database, a login, a SQL Agent Job called SSIS Server Maintenance Job, some permissions and some procedures in the master database.
We will upgrade the SSIS project to the newer SQL Server version. Do a backup of the project before you proceed.
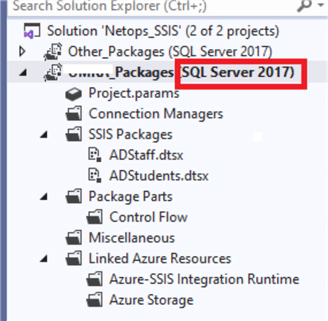
When you open your project in Visual Studio, you can see the project below is using SQL Server 2017.
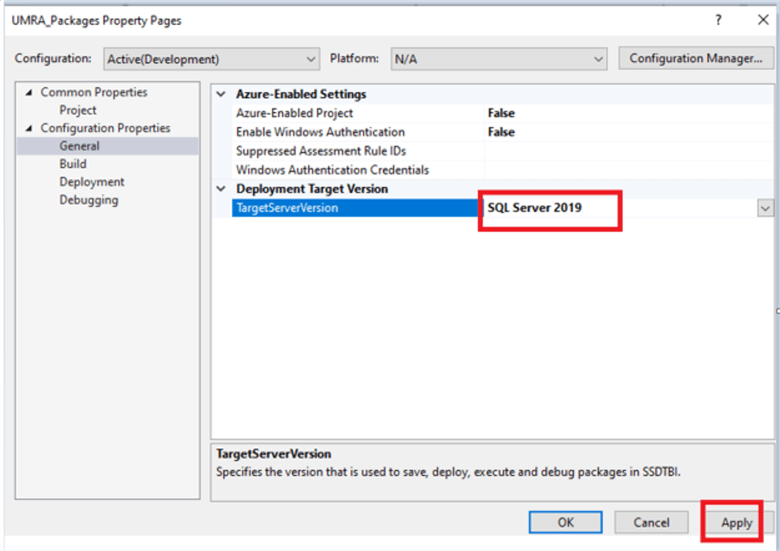
Right click the project and click Property, change the target server version to SQL Server 2019 and click Apply. This will install all the needed extensions for SQL Server 2019. Then click Yes and OK. This will upgrade the SSIS project from the older version to SQL 2019.
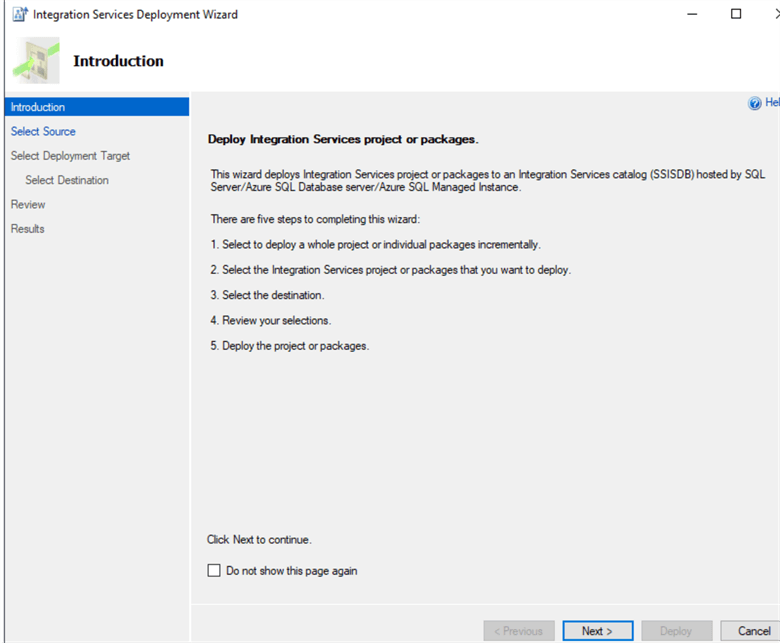
From the menus, go to Project > Deploy go through the Integration Services Deployment Wizard and choose the server and SSIS catalog path. The upgraded project will be deployed onto the new server. If you have environment variables you need to create them manually as they are not part of the project. Since it is a new deployment, it will not carry over the history of job executions or the deployed project versions which is fine since we have source control. But this is the cleanest way to upgrade the projects. You can clean up old folders, users, permissions, etc. You may also need to change some catalog property settings such as retention period, maximum number of versions, etc.
Approach 2 - Integration Services Import Wizard
The second approach is a supplement for the first approach.
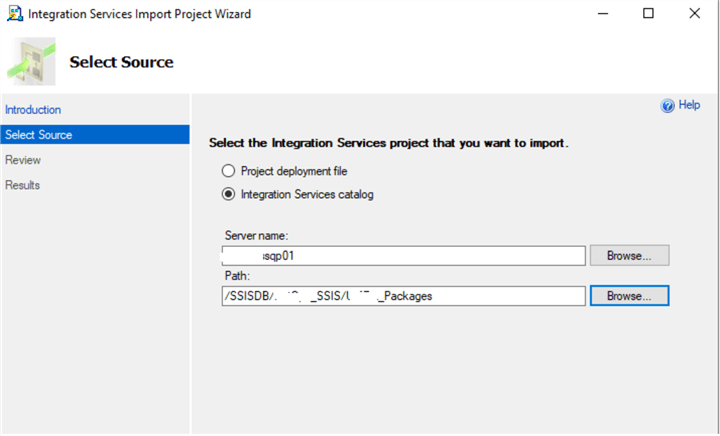
If you don’t have version control for some projects, you can import the project from the source server to Visual Studio using the Integration Services Import Project Wizard and you can either import from an .ispac file or from the SSIS catalog directly on the source server. If you use Visual Studio 2019 with Integration Services Project installed, the imported project will be automatically upgraded to the SQL 2019 version.
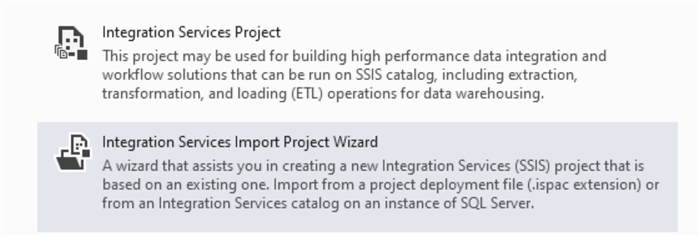
To open the wizard, in Visual Studio create a new project and select Integration Services Import Project Wizard.
Select the source as shown below to import the SSIS packages.
If you use Visual Studio 2019 with Integration Services Project installed, the imported project will be automatically upgraded to the 2019 version. After the upgrade, you can deploy it to the new server as discussed in approach 1.
Approach 3 - Backup and Restore Database
The third approach is to restore the SSIS database and encryption key from the backup of the source server to the new server. This approach retains the execution history, project versions, permissions, environment variables, SSIS catalog properties, etc. If your business needs execution history for reporting usage statistics or trend analysis, you may want to choose this approach.
Install SQL Server
Install the SSIS catalog on the new server as described in approach 1. This will avoid some hassles that could make restoring the encryption key harder.
Backup Keys and Database
On the source server, backup the SSISDB database.
For the master key, if you don’t have the original password that was used to create SSISDB, do a backup of the master key.
backup master key to file = 'c:\mybackup\SrcSSISEncrptKey'
encryption by password = 'Keepsafe2!'
Or if needed add a new password and then backup the key.
alter master key
add encryption by password = 'Keepsafe2!'
Restore Keys and Database
On the new server, restore the SSISDB database using the backup.
Restore the master key by using one of the following methods
If you have performed a backup of the database master key and you have the password used to encrypt the master key, use the following and ignore the warning.
restore master key from file = 'c:\mybackup\SrcSSISEncrptKey'
decryption by password = 'Keepsafe2!' -- Master Key Password
encryption by password = 'Keepsafe3!' -- New Password
force
Use this method if you have the original password that was used to create SSISDB or use the new password you added.
open master key decryption by password = 'Keepsafe2!' -- SSISDB Password
alter Master Key Add encryption by Service Master Key
Use sp_change_users_login to synchronize the SID of SSIS catalog user.
EXEC sp_change_users_login 'update_one', '##MS_SSISServerCleanupJobUser##','##MS_SSISServerCleanupJobLogin##'
Upgrade Database
The database is migrated, but the format of SSISDB is still at the original version. Run the SSISDB Upgrade Wizard to upgrade the SSIS Catalog.
Right-click on SSISDB and then select Database Upgrade to launch the SSISDB Upgrade Wizard. Or launch the SSISDB Upgrade Wizard by running C:\Program Files\Microsoft SQL Server\150\DTS\Binn\ISDBUpgradeWizard.exe with elevated permissions on the local server.
Note: there used to be an error when running the wizard, but SQL 2019 CU9- KB5000642 fixed it.
Approach 4 - Use SSIS Catalog Migration Wizard
You can install this tool from the Visual Studio 2019 Market Place.
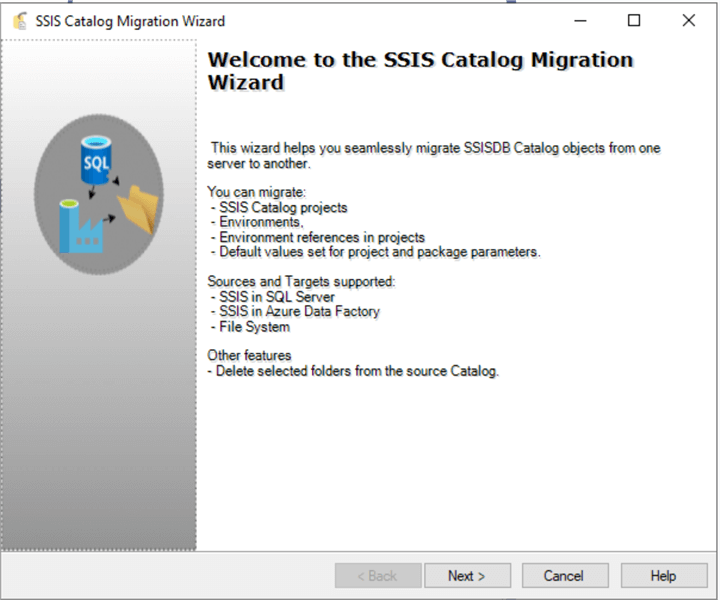
Once you install it, you can open it on the tool menu. It will also generate a report after the migration is done.
The wizard supports the following source and target types:
- SSIS for SQL Server
- SSIS in Azure Data Factory
- File System
You can migrate:
- Catalog Folders
- SSIS Projects
- Environments
- Configuration of Project and Package Parameters
Below it will list your SSISDB catalogs that you can select to migrate and the options.
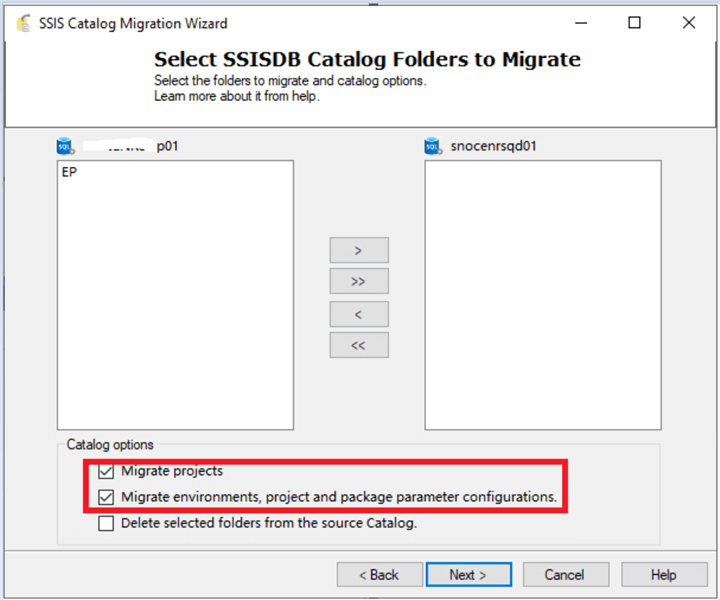
This tool does not upgrade the packages to the 2019 format. Normally, the lower version of SSIS Catalog projects works fine with the higher version of the SQL Server Integration Services Catalog. But if you want it to be 2019 format, you need either use the upgrade step in Visual Studio as in approach 1 or use the upgrade wizard in SSMS as in approach 3.
Conclusion
We discussed a few approaches to upgrade/migrate the SSIS catalog and SSIS database to a new SQL Server 2019. You can choose any of these options to meet your business needs.
Next Steps
- Read Integration Service Roles
- Read Upgrade and Migrate SSRS Report Server 2019 and retain server name
About the author
 Xiaowei Cao has been a SQL DBA and developer for 15+ years, supporting varies environments and has a passion for all aspects of SQL server including the DB engine, SSIS, SSRS, and SSAS.
This author pledges the content of this article is based on professional experience and not AI generated.
View all my tips


