Problem
SQL Server has a built-in feature called Change Data Capture (CDC) which can capture incremental changes being made to your SQL database tables. Here's how to use it with Azure SQL Database and Azure Data Factory.
Solution
This tutorial creates an Azure Data Factory pipeline for exporting Azure SQL Database Change Data Capture (CDC) information to Azure Blob Storage.
The high-level steps for implementing the solution are:
- Create an Azure SQL Database table
- Deploy an Azure Data Factory
- Create linked services for Azure database and Azure Blob Storage
- Create source and sink datasets
- Create a pipeline to check the modified source data
- Execute and monitor the incremental run of the Azure Data Factory pipeline.
Prerequisites
- Azure SQL Database: This article uses the Azure SQL Database as a source data store. You require an existing database before proceeding with the article. If you do not have it, refer to Azure tips.
- Azure Blob Storage: Create an Azure storage account and blob storage for the destination datastore.
- Azure Data Factory: Deploy an Azure Data Factory cloud-managed service for defining pipelines and scheduling. Refer to these articles SQL Server Azure Data Factory Tips for deploying the service.
I have already deployed the prerequisites for this article as shown below:
- Azure Data Factory: azdtdemo
- Azure SQL Database: myazuresql1
- Azure storage account: mydemoazstorage

The storage account [mydemoazstorage] has a blob container [myazuresqldata] to store the exported CSV file with incremental data.

Create a data source table in Azure SQL Database
This section creates a sample [Employees] table and enables the change data capture (CDC) features. The following script does the following tasks.
- Creates a [Employees] data table
- Enable CDC for Azure database using SP sys.sp_cdc_enable_db
- Enable CDC for the Employees table
- Inserts two records into the [Employees] table
Create table Employees
(
Emp_id int,
First_name varchar(50),
Last_name varchar(50),
Email varchar(100),
[Location] varchar(50), CONSTRAINT "PK_Employees" PRIMARY KEY CLUSTERED ("Emp_id")
 );
EXEC sys.sp_cdc_enable_db
Go

EXEC sys.sp_cdc_enable_table
@source_schema = 'dbo',
@source_name = 'Employees',
@role_name = 'null',
@supports_net_changes = 1

Go

insert into Employees
     (Emp_id, first_name, last_name, email, [Location])
 values
     (1, 'Rajendra', 'Gupta', 'rajendra.gupta16@gmail.com', 'Bracknell'),
     (2, 'Kusum', 'Agarwal', 'Kusum.gr@gmail.com', 'London');
If you are not familiar with Change Data Capture for Azure DB, you can refer to an article Change Data Capture (CDC) for Azure SQL Database.
Create Linked Services
This section creates linked services for the source (Azure DB) and destination (Azure Blob Storage) in the Azure Data Factory (ADF).
To create the linked services, launch ADF in the Azure portal and click on Linked Services as highlighted below.

First, we will create a linked service for the destination Azure container. Click on +New and Choose Azure Blob Storage from the list of datastore.

It opens the new linked service (Azure Blob Storage) configuration page. Enter the following values.
- Enter AzureBobStore for Name
- Connect via Integration Runtime: AutoResolveIntegrationRunTime
- Select Azure subscription and storage account from the drop-down list
Once you enter the required information, click on Test Connection to validate the connection to Azure blob storage linked service is working fine.

Click on Create, and it creates the linked service as shown below.

Create Azure SQL Database Linked Service
We need another linked service for Azure Database. In the new linked service page, select Azure SQL Database and select the Azure server, database, authentication method as SQL authentication and specify credentials to connect the database. Click Test connection to validate the connection details.


Create Datasets in Azure Data Factory
This step creates a dataset to represent the data source and data destination. In ADF, click on DataSet and New Dataset.
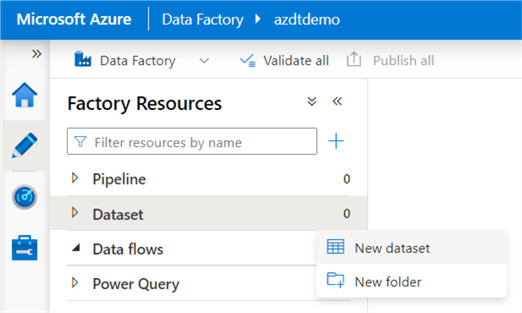
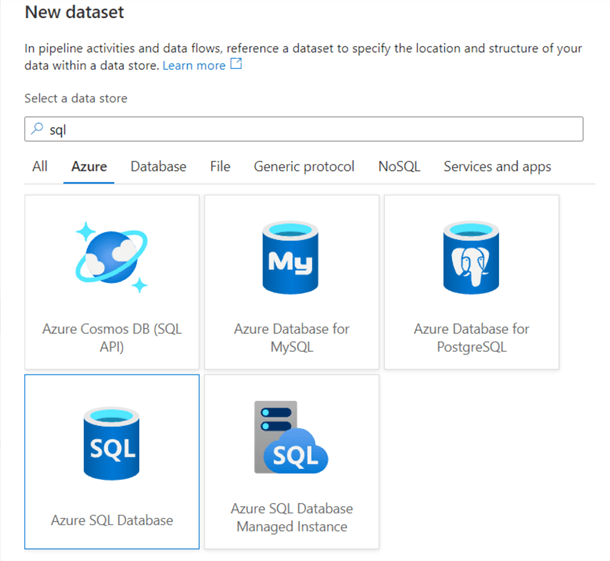
Select Azure SQL Database from the datastore and click Continue.
In the Set properties, select the dataset name and connection information below.
- LinkedService: Select the linked service deployed before for the Azure database.
- Table Name: We enabled CDC for the [Employees] table. The CDC process automatically creates a new CDC table [dbo].[dbo_Employees_CT].

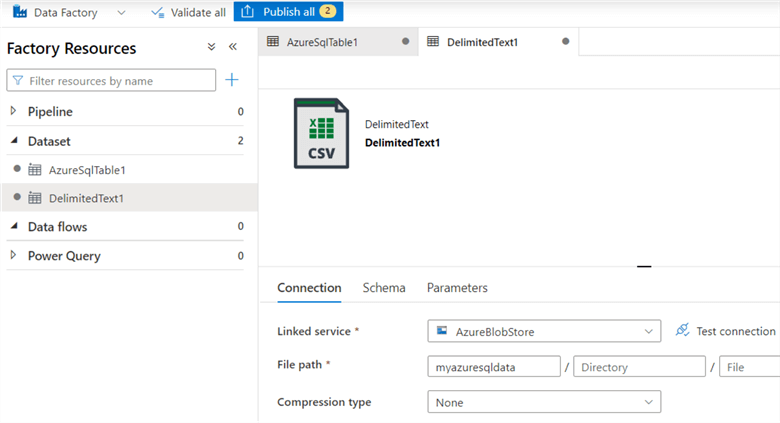
Click Ok, and it creates the dataset [AzureSqlTable1] as shown below.

Create a Dataset for Azure Blob Storage Destination Data
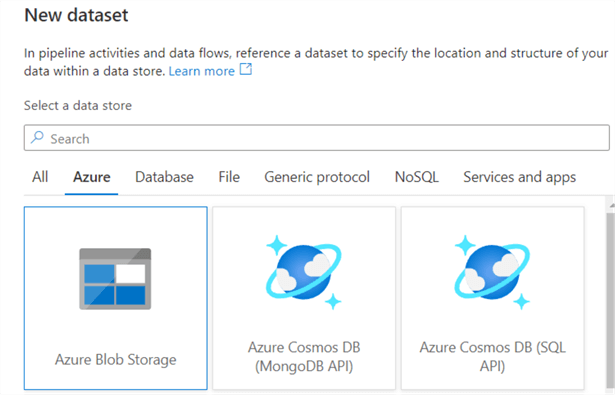
Like the source Azure database dataset, we need to create a dataset representing data copied to the sink data store. Select Azure Blob Storage and click Continue.
Select the data format as delimited text (CSV) and click continue.

Now, we need to set properties for the CSV file. Enter the name, select linked service and enter the container name (in my demo- myazuresqldata) in the file path as shown below.

Create Pipeline to Copy Changed (incremental) Data from Azure SQL Database to Azure Blob Storage
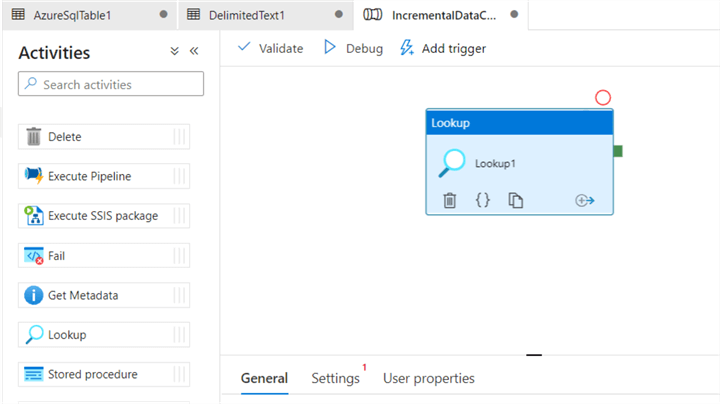
This step creates a pipeline in Azure Data Factory (ADF). The pipeline uses the lookup activity to check the changed records in the source table.
We create a new pipeline in the Data Factory UI and rename it to [IncrementalDataCopyPipeline].

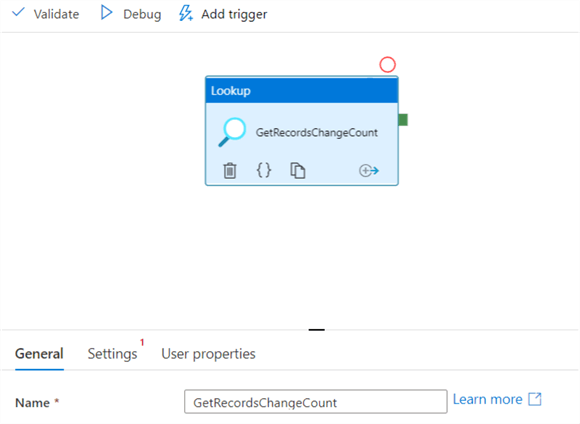
Drag the Lookup activity from the activities toolbox to the pipeline designer surface and rename it to GetRecordsChangedCount. The lookup activity retrieves the number of records in the CDC table for a time window.
As shown below, the lookup activity is renamed to GetRecordsChangeCount.
Click on the settings and enter the following SQL query that uses CDC table-valued functions sys.fn_cdc_get_min_lsn and sys.fn_cdc_map_time_to_lsn.
DECLARE  @from_lsn binary(10), @to_lsn binary(10);
SET @from_lsn =sys.fn_cdc_get_min_lsn('dbo_Employees');
SET @to_lsn = sys.fn_cdc_map_time_to_lsn('largest less than or equal',  GETDATE());
SELECT count(1) changecount FROM cdc.fn_cdc_get_all_changes_dbo_Employees(@from_lsn, @to_lsn, 'all')

After enabling the CDC, we inserted two records in the [Employees] table. Therefore, it returns the 2 records while previewing the data. You can click on the Preview data button to ensure the lookup activity obtains a valid output.

Now, drag and drop the IF CONDITION from the Iteration & Conditions in the activities toolbox.
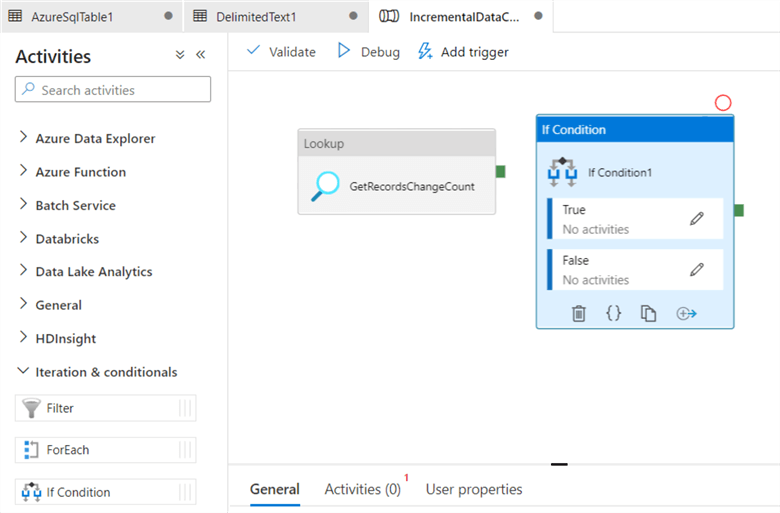
Rename the IF Condition activity to HasChangedRows.

In the expression box of the IF CONDITION enter the following code.
@greater(int(activity('GetRecordsChangeCount').output.firstRow.changecount),0)

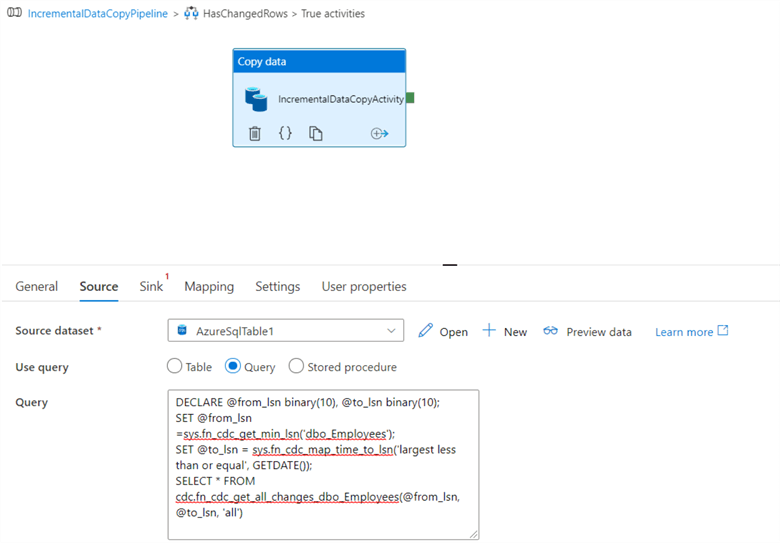
Edit the true condition and drag a copy activity in the pipeline designer surface.

Rename the copy data activity as IncrementalDataCopyActivity.

Click on the source and copy-paste the following SQL query.
DECLARE @from_lsn binary(10), @to_lsn binary(10);
SET @from_lsn =sys.fn_cdc_get_min_lsn('dbo_Employees');
SET @to_lsn = sys.fn_cdc_map_time_to_lsn('largest less than or equal', GETDATE());
SELECT * FROM cdc.fn_cdc_get_all_changes_dbo_Employees(@from_lsn, @to_lsn, 'all')
Click on the Sink tab and choose the Azure Storage dataset for the sink dataset.

Drag the green button from the Lookup activity to the If Condition and connect them like below.

Validate, Publish, and Execute
Click on the Validate icon to verify that the pipeline data flow is configured successfully. As shown below, our pipeline in ADF is validated. It did not report any errors.

Look at the blue button at the top, and it states we need to publish all changes in the Azure Data Factory.

Click on Publish all, and it deploys the package for deployment. You get a message – Publishing completed in the activity bar.

To execute the ADF workflow, we can trigger it immediately or create a new schedule to execute it on a specific schedule.

Click on Add Trigger and Trigger Now.

The Output tab states that all task is successfully executed. It shows the execution time of each item as well.

Now, switch to Azure blob container, and it has a CSV file – data.csv with the Azure SQL Database table data.

Click on the CSV file and download it to view the data.

As shown below, the CSV container has two records that we inserted after enabling the CDC for the [Employees] table.

Let's insert two more records in the [Employees] table in Azure SQL Database and trigger the pipeline in ADF.
insert into Employees
     (Emp_id, first_name, last_name, email, [Location])
 values
     (3, 'Arjun', 'k', 'a.r@gmail.com', 'Jaipur'),
     (4, 'Mohan', 'r', 'b.r@gmail.com', 'Delhi');
Refresh the Azure container and view the contents in the data.csv. You got the incremental data added in the CSV file.

Similarly, you can execute the update and delete statements and view the CSV data after triggering ADF.
UPDATE Employees SET first_name='test' WHERE emp_id=3
DELETE Employees WHERE emp_id=4
The highlighted column helps to understand the DML performed on the CDC table.
- __$operation = 2 : Inserted rows
- __$operation = 4 : Updated row after update
- __$operation = 4 : Row before the update
- __$operation = 1 : Deleted Row

In the downloaded CSV file, we do not have the column headers. Edit the CSV configuration and check on column – First Row as a header to add a column header.

Publish the configuration changes in Azure Data Factory and trigger the execution. You get the column headers in the CSV file downloaded from the Azure Data Storage.

Wrapping up
This article explored exporting the incremental data from Azure SQL Database to Azure using Change Data Capture (CDC). You can customize the pipeline and data flow as per your requirements.
Next Steps
- Refer to these SQL Server Azure Tips.
- Follow the Microsoft official documentation on Azure SQL Database.

Hi! I am Rajendra Gupta, Database Specialist and Architect, helping organizations implement Microsoft SQL Server, Azure, Couchbase, AWS solutions fast and efficiently, fix related issues, and Performance Tuning with over 14 years of experience.
I am the author of the book “DP-300 Administering Relational Database on Microsoft Azure.” I can be reached at: Rajendra.gupta16@gmail.com for any consulting help.
- MSSQLTips Awards:
- Author of the Year – 2022 | Author Contender – 2021/2023/2024 | Champion Award (100+ tips) – 2020