By: Ben Snaidero
Overview
Similar to the previous topic here we will show you a couple different ways you can use SQL Profiler to save your trace data to a file so it can be queried at a later date for analysis.
Explanation
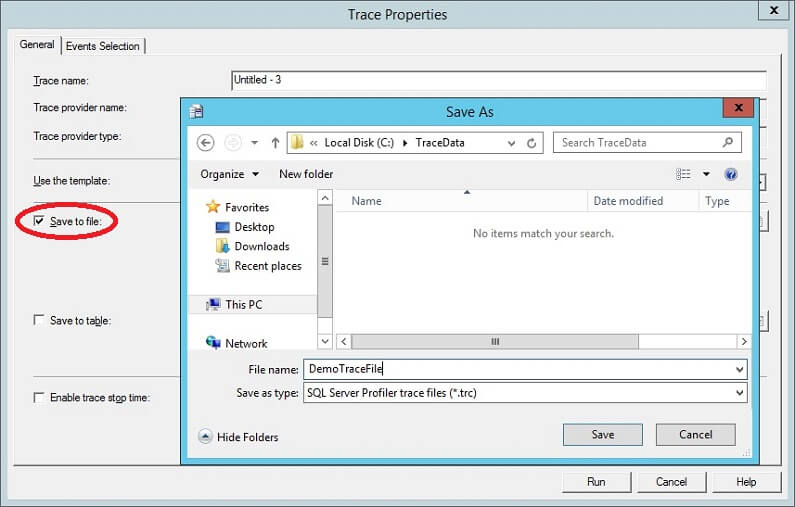
As with saving SQL trace data to a table we can also configure the file output either when configuring the trace or after we have stopped our trace session. If you look at the screen shot below you can see the "Save to file" option circled in red that you can use to set this output destination when configuring your SQL trace. After you select this checkbox you will be prompted with a "Save As" dialog, also shown below, that will allow you to select a location and filename for your trace file.
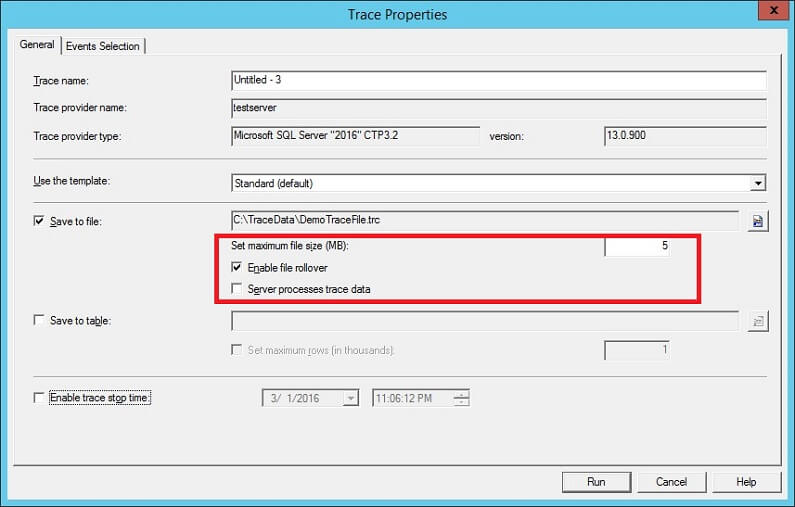
Once you've selected a file and saved it, the dialog box should close and your screen should look like the screenshot below. Notice that we now have some file options available that I have outlined in red. The maximum file size option will limit the size of your trace file and works in conjunction with the file rollover option below it. Without the rollover option selected, if the trace reaches the file size limit it will stop writing trace events to the file. When the file rollover option is checked if the trace reaches this maximum file size limit a new file is created with the same filename as the original trace file with an integer appended, starting with 1 to identify the file sequence. This allows you to essentially capture any amount of trace data given you have space on your file system. The last option in this section "Server processes trace data" tells the service running the trace to process the trace data and not the client application. With this option selected no trace data will ever be skipped even if the server is extremely busy, but note that your server performance may be affected if this happens. I usually leave the defaults as they are below, but will increase the file size if I think I will be collecting a lot of trace data.
Saving SQL Server Trace Data Once the Session is Complete
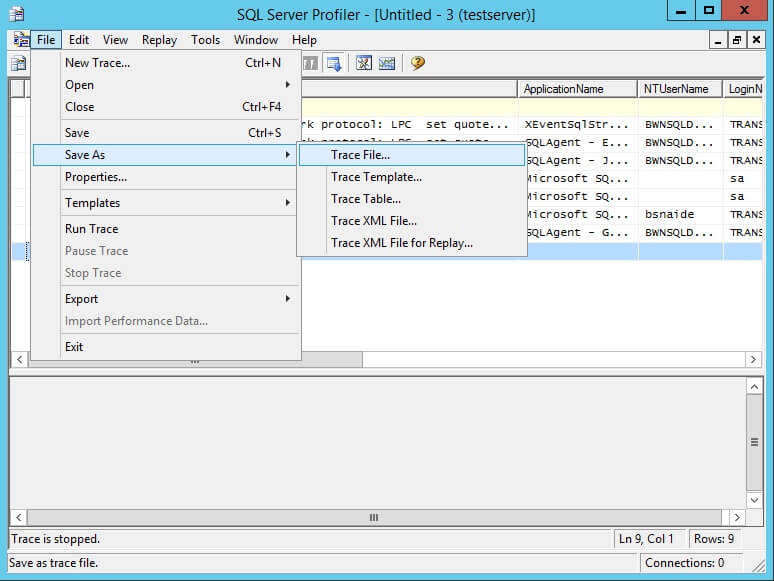
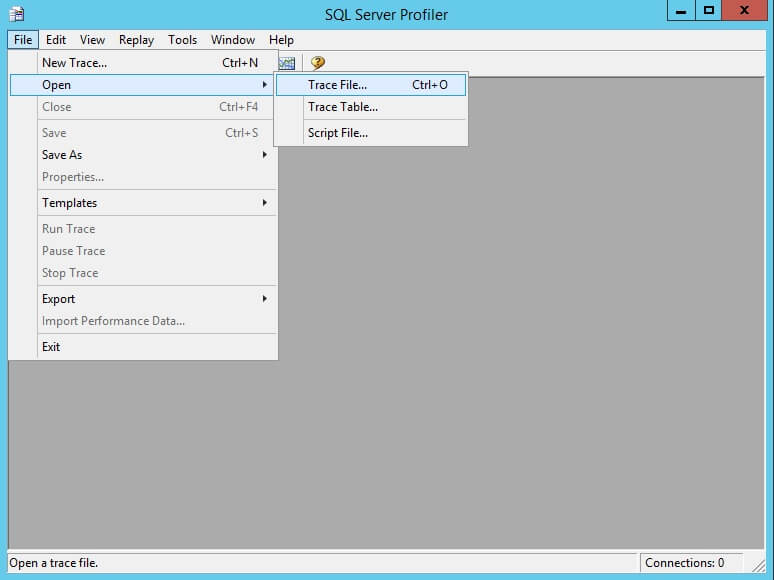
The other option for saving your SQL Trace data to a file is by saving it once your Trace session is complete. Once your Trace has stopped, you can save the data to a file following the same process as the previous topic except you use the "File-Save As-Trace File" menu item shown below. After selecting this you will be presented with the same "Save As" dialog box shown above. As with saving the data to a table, depending on the amount of data in your trace, it may take some time to for all the Trace data to be written to the file. You can check the progress in the status bar at the bottom of the output window.
Querying Data Saved to a SQL Server Trace File
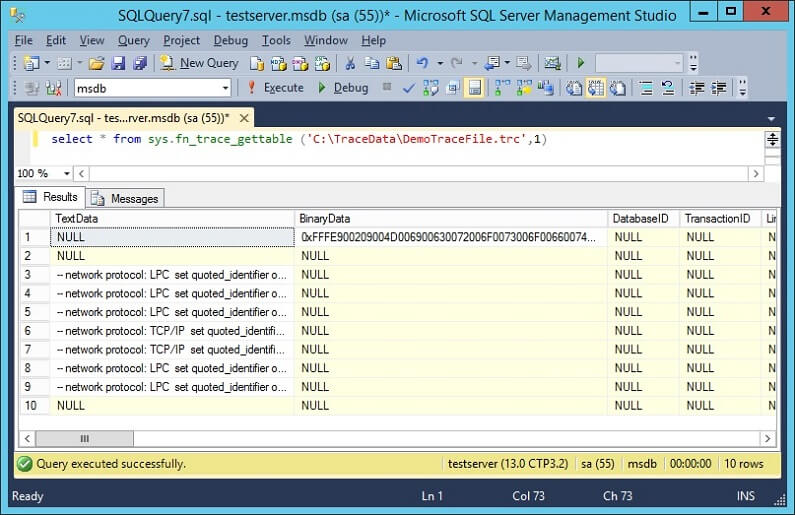
There are a two ways to retrieve data from a trace file. Using whatever query tool you normally use to query your SQL Server database you can use the sys.fn_trace_gettable system function to return your trace data in a tabular format. The function takes two arguments. First is the name of your trace file and the second is the number of rollover files you want to read. If you specify default for the second parameter it will read all the rollover files. Below is a screenshot which shows a sample query and it's output in SSMS.
For those of you that prefer the SQL Profiler output window for viewing trace data, as we did with the trace data stored in a table, you can also start SQL Profiler and open the trace file using the "File-Open-Trace File" menu item as shown below. After you select your trace file it will reload all your trace data into a new output window.
Additional Information
- Full documentation on the sys.fn_trace_gettable function
- Read other tips on the default trace file:
