Problem
When using SQL Server in a Kubernetes Docker container orchestration environment, setting up the pods, services, and other configuration on bare-metal servers is quite complex.
Solution
AWS provides the Amazon Elastic Kubernetes Service (EKS) for running Kubernetes pods in a managed environment. Using EKS shifts the tasks of provisioning, monitoring, scaling, load balancing the cluster to AWS. Furthermore, the serverless Amazon Fargate option does not expose any EC2 instances to a user; server provisioning, compute resource allocation, and server scaling are all managed by AWS. In this article I explain how to run SQL Server on Amazon EKS with Fargate.
Table of contents
- Setting the Environment
- Installing and Configuring AWS CLI
- Installing kubectl
- Installing eksctl
- Creating an EKS Cluster
- Creating a Fargate Profile
- Creating an Elastic File System
- Creating a File System Access Point
- Configuring EKS Resources for SQL Server
- Applying the Configuration to Create EKS Resources
- Exploring the Provisioned EKS Resources
- Connecting to SQL Server with SQL Server Management Studio
- Creating an Example Table
- Deleting the EKS Cluster
- Summary
Setting the Environment
Create an AWS account if you do not already have one. Download and install SQL Server Management Studio (SSMS) on your local machine, if not already installed. Create a folder that is in the PATH environment variable, C:/eks/ for this article.
Installing and Configuring AWS CLI
We need the AWS CLI to configure credentials, and interact with other AWS Services, such as the Elastic File System (EFS). Download the binaries for AWS, and install it on your local machine. Discover its version:
--MSSQLTips.com (CMD)
C:\eks>aws --version
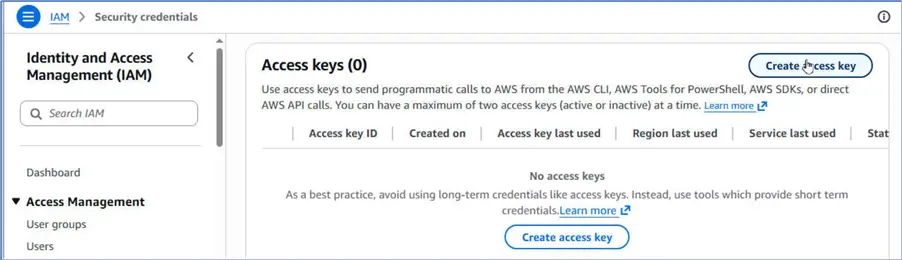
aws-cli/2.34.10 Python/3.13.11 Windows/10 exe/AMD64We need an access key to access AWS services from our local machine. Therefore, navigate to IAM > Security credentials, and click Create access key.
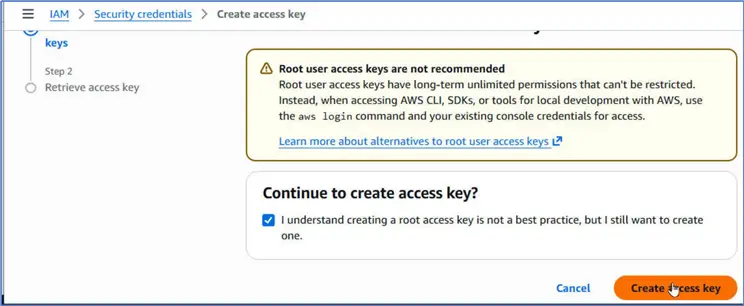
When the Create access key screen is displayed, select the checkbox, and click Create access key.
IAM has created and listed a new access key. It is your turn to retrieve and store it. This is the only time to note the access key; therefore, before closing the dialog, copy and store it in a file for later use.

We are ready to configure the access key on a local machine. Run the command aws configure, and provide the Access Key ID, and Secret Access Key noted earlier when prompted. Provide default region or keep the one in square brackets. Provide a default output format for the format the output is displayed in when using the AWS CLI, or keep the default selection json. Press Enter after providing each value to complete the configuration.
--MSSQLTips.com (CMD)
C:\eks>aws configure
AWS Access Key ID [****************RCEB]: AKIAZZGNSX6OXI4VBA3S
AWS Secret Access Key [****************Y1np]: 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
Default region name [us-east-1]:
Default output format [json]:
Afterward, you can run AWS CLI commands on the local machine to access AWS Services.
Installing kubectl
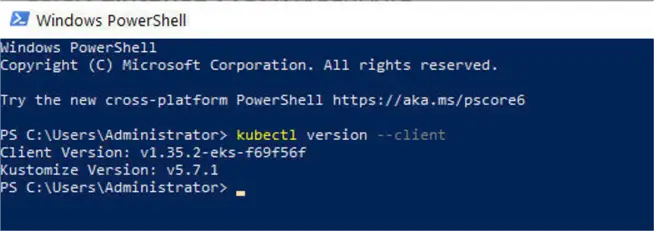
We need the kubectl software command by the same name to interact with and manage AWS EKS cluster objects after creating it. We use it to list pods, for example. Download and install kubectl binaries in the folder that is in the PATH environment variable, C:/eks/ for this article. Verify, it is installed by listing its version:
--MSSQLTips.com (CMD)
PS C:\eks> kubectl version --client
Client Version: v1.35.2-eks-f69f56f
Kustomize Version: v5.7.1
We should use PowerShell to run kubectl and other commands. We prefer it over CMD because it produces object-oriented output and can display JSON output well-formatted. It uses color coding to highlight different components of a command. Once the kubectl binaries are in the PATH, we can use it from any directory.
Installing eksctl
While the kubectl interacts with EKS cluster objects, we need the eksctl tool to interact with the AWS to create, manage, and delete EKS clusters. Download and install eksctl binaries. Install eksctl in a directory that is in PATH, such as the C:/eks directory, so that we can access eksctl from any directory. Discover the eksctl commands once it is installed.
--MSSQLTips.com (CMD)
PS C:\Users\Administrator> eksctl
The official CLI for Amazon EKS
Usage: eksctl [command] [flags]

Commands:
  eksctl create                          Create resource(s)
  eksctl delete                          Delete resource(s)
  eksctl deregister                      Deregister a non-EKS cluster
  eksctl disassociate                    Disassociate resources from a cluster
  eksctl drain                           Drain resource(s)
  eksctl enable                          Enable features in a cluster
  eksctl get                             Get resource(s)
  eksctl help                            Help about any command
  eksctl info                            Output the version of eksctl, kubectl and OS info
  eksctl register                        Register a non-EKS cluster
  eksctl scale                           Scale resources(s)
  eksctl set                             Set values
  eksctl unset                           Unset values
  eksctl update                          Update resource(s)
  eksctl upgrade                         Upgrade resource(s)
  eksctl utils                           Various utils
  eksctl version                         Output the version of eksctl
Creating an EKS Cluster
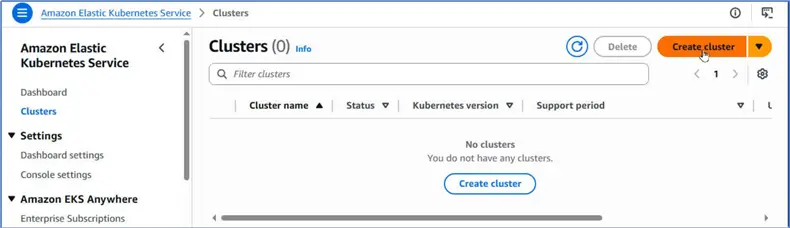
We are ready to create an EKS cluster. Navigate to Amazon Elastic Kubernetes Service > Clusters in the management console. Click Create cluster.
Cluster Configuration
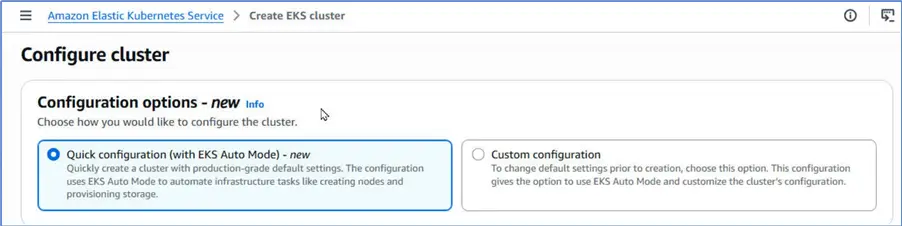
Under Configure cluster, choose Quick configuration, which uses the EKS Auto mode to automate infrastructure tasks.
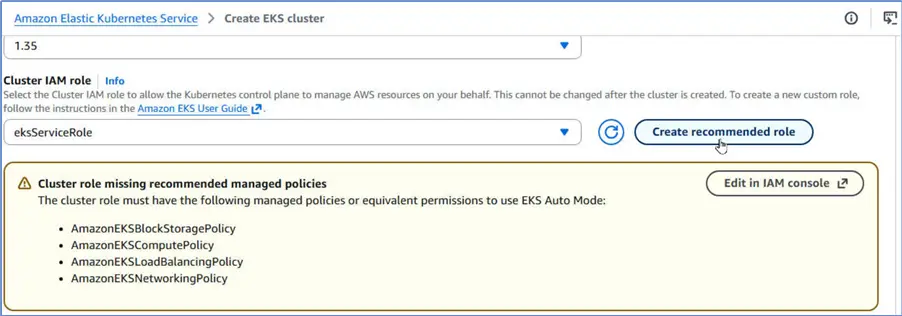
Under Cluster configuration, specify a name (sqlserver-cluster, for example), and select the latest Kubernetes version that the EKS supports.

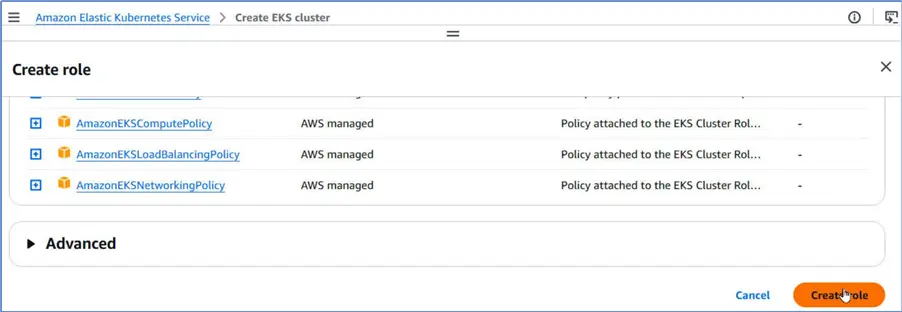
Scroll, and click Create recommended role for Cluster IAM role.
Create Role
The Create role dialog opens with default selections.
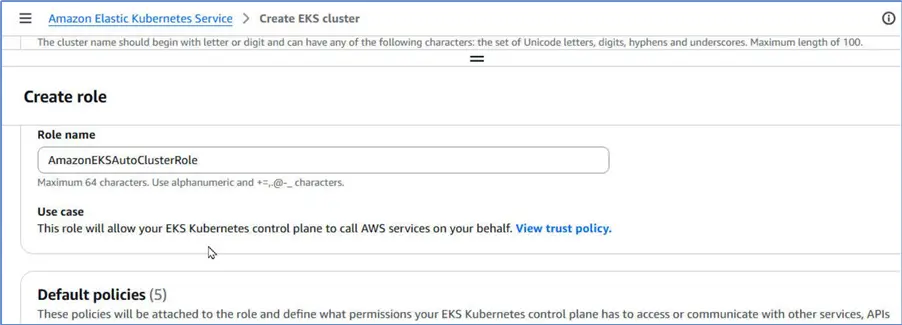
It has already selected the policies that we need to be attached with the role.
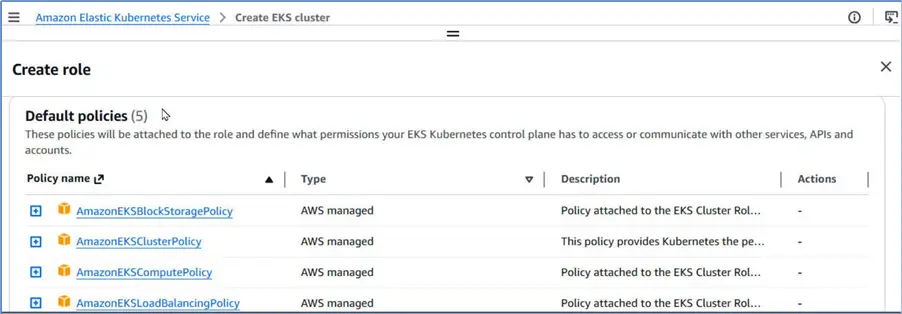
We only need to click Create role.
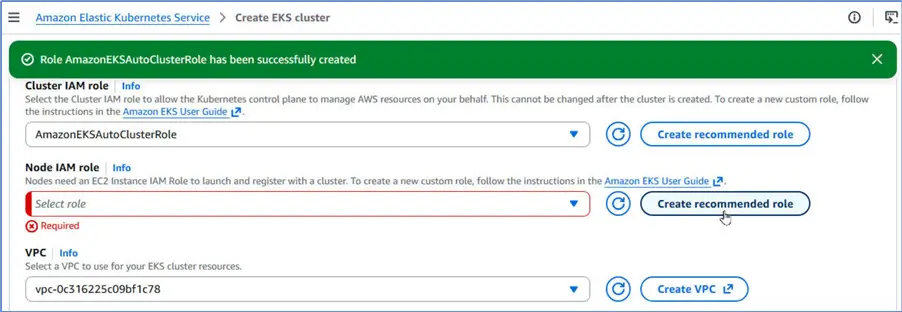
The Cluster IAM role has been created and added the cluster configuration. Under Node IAM role, click Create recommended role.
In the Create role dialog it already provides the role name and default policies.
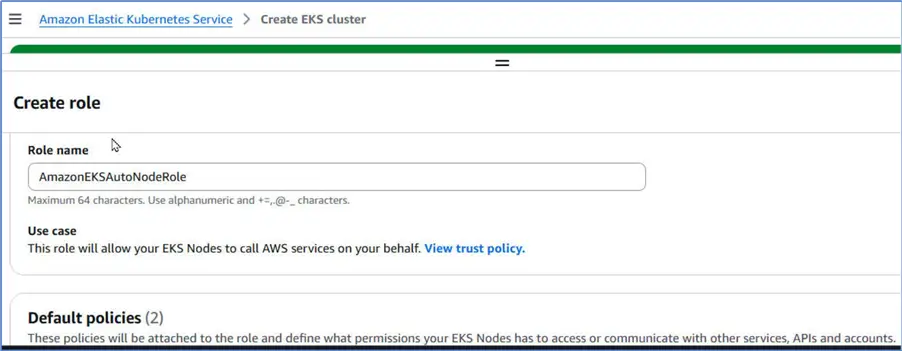
Click Create role.
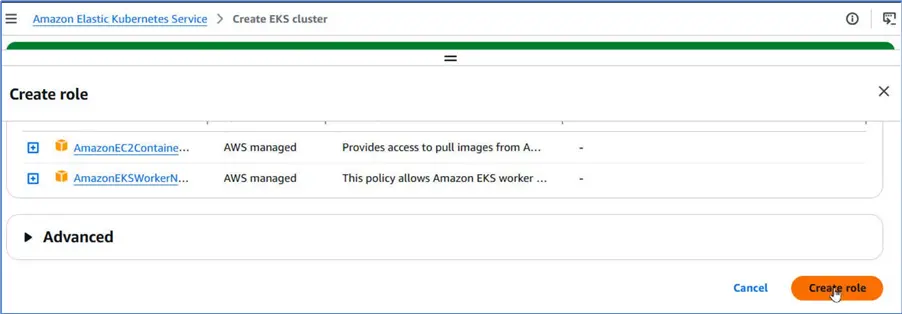
It creates the Node IAM role and adds it to cluster configuration.

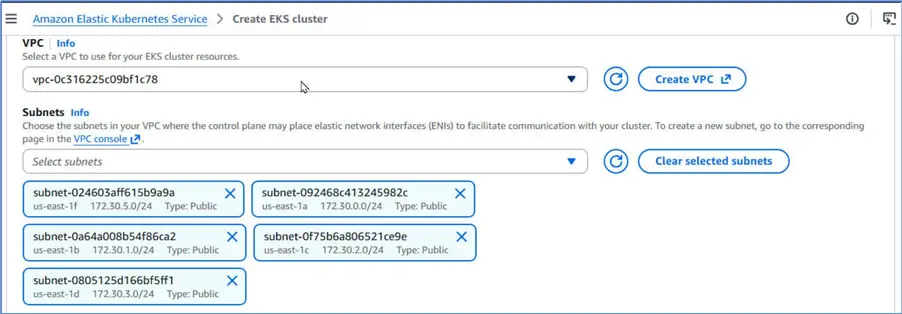
VPC and Subnets
Select a VPC and public Subnets within the VPC.
Review the cluster configuration.

Create Cluster
Click Create to create the cluster.

It starts to create the cluster as indicated by Creating status.

It starts to create an add-on Metrics Server as well.

Once the cluster has been created, its Status changes to Active.
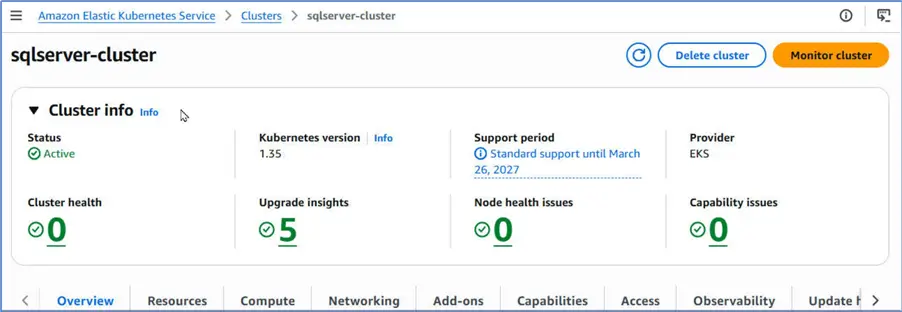
The new cluster has been fully provisioned and has been listed in Clusters table that we started from.

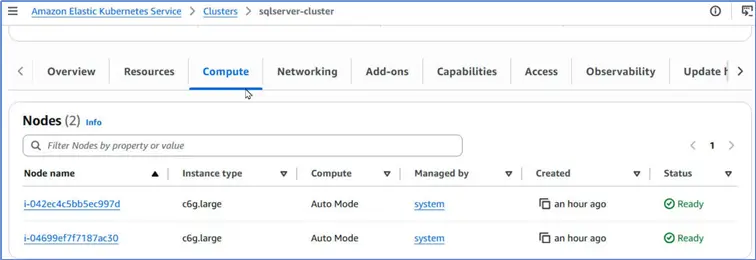
Click Compute tab to discover the compute nodes provisioned automatically. However, we will use the Fargate platform for the SQL Server pods, for which we will create a Fargate profile in the next section. Fargate uses a serverless compute platform that does not expose any compute nodes to the user. It manages the compute internally.
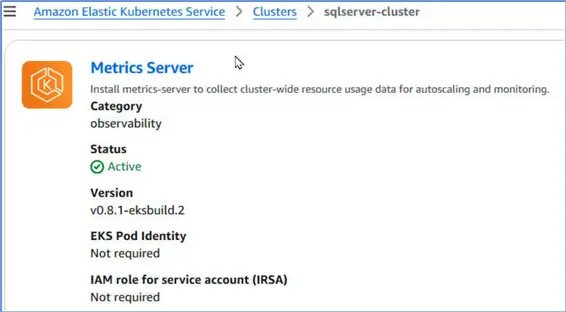
Click Networking tab to discover the VPC, Subnets, security group, and IPv4 range. Click Add-ons tab to discover that the Metrics Server is active.
The API Server endpoint listed under Overview is the endpoint that we can use to interact with the cluster.
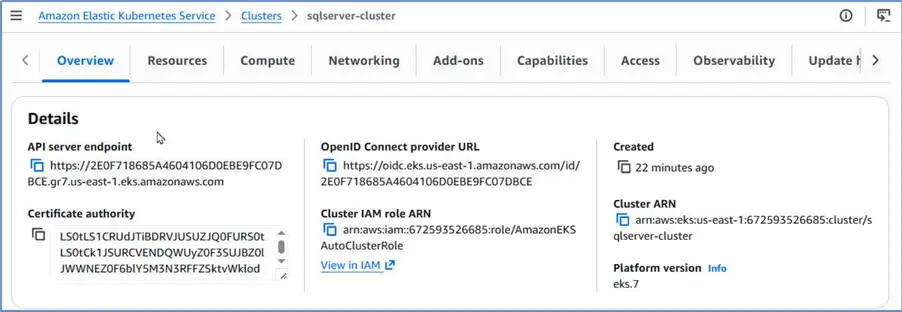
However, we do not typically invoke it explicitly every time we need to interact with cluster. We can configure it in our local configuration file ~/.kube/config with the following AWS CLI command.
--MSSQLTips.com (CMD)
aws eks update-kubeconfig --region us-east-1 --name sqlserver-cluster
Having configured it, we can use the kubectl command to interact with the cluster.

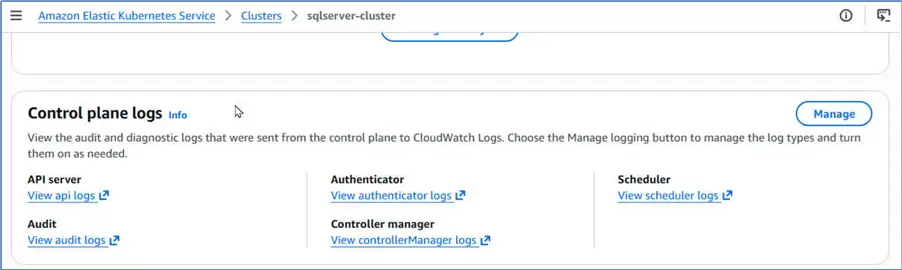
We can manage control plane logs from the cluster overview.
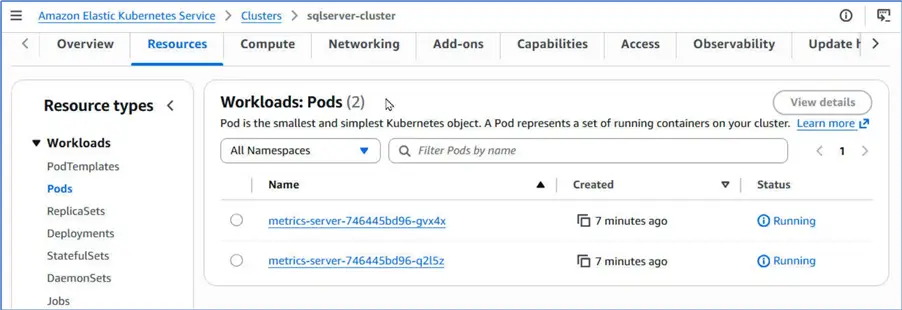
Discover the default cluster resources under Resources tab. We only find two pods for the Metrics Server.
Creating a Fargate Profile
Fargate is a serverless platform. How do we run SQL Server pods on Fargate? Three configurations are essential for running pods on Fargate.
- A Fargate profile that it uses to select the pods to run on Fargate by matching namespaces. First, we associate the Fargate profile with specific Kubernetes/EKS namespaces for selecting pods. Then, we create those namespaces if they do not already exist. Then, we use a pod or stateful set configuration that specifies the same namespace, to create and run SQL Server pods. Fargate automatically select those pods to run on a serverless platform when we match the namespaces of the pods with the namespaces associated with the Fargate profile.
- We need the EKS Server endpoint to accept both private and public connections.
- We need a Fargate Pod execution role that allows Fargate to make API calls to AWS.
Let us fulfill these requirements.
Verifying Network Access
We have already set up the networking; the API server endpoint access header lists Public and private.

Creating or Verifying Fargate Pod Execution Role
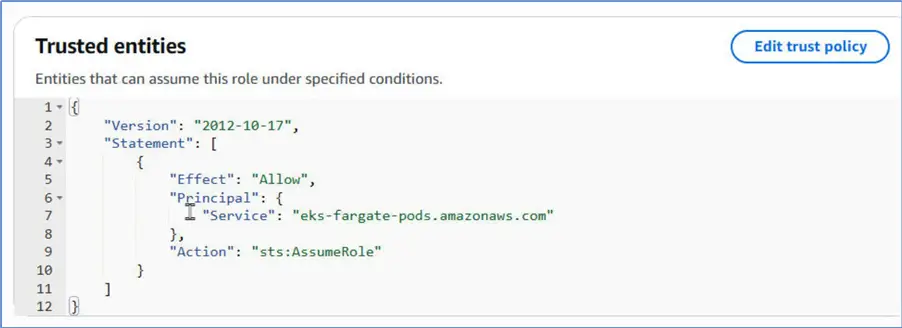
We need to create, or verify that a role that includes the following policy statement exists:
--MSSQLTips.com (JSON)
{
"Version": "2012-10-17",
"Statement": [
{
"Effect": "Allow",
"Principal": {
"Service": "eks-fargate-pods.amazonaws.com"
},
"Action": "sts:AssumeRole"
}
]
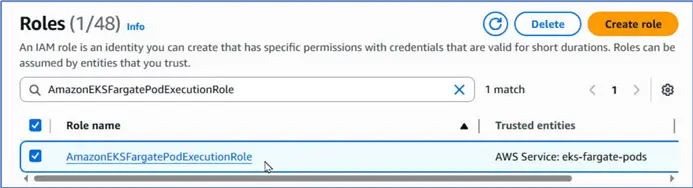
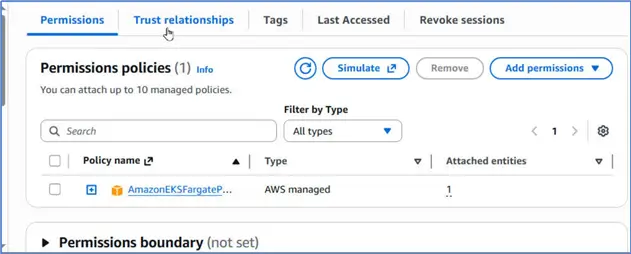
}Let us navigate to IAM > Roles in the management console. Search for the AmazonEKSFargatePodExecutionRole. It does get listed; therefore, we do not need to create one. The Trusted entities column does list the eks-fargate-pods as a service that has permissions.
Further, we can navigate to Trust relationships for the associate policy.
It does list Fargate as a trusted entity.
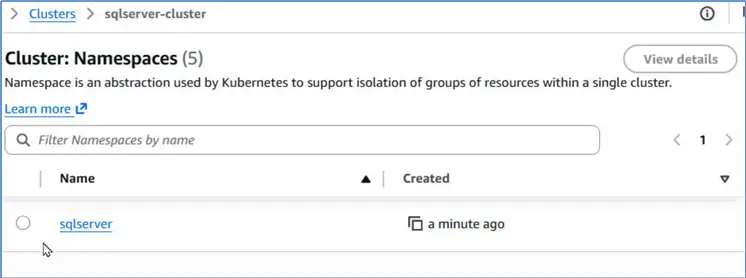
Creating a Namespace
Let’s create a new namespace specifically for running SQL Server pods. Run following kubectl command to create a namespace called sqlserver.
--MSSQLTips.com (CMD)
PS C:\Users\Administrator>kubectl create namespace sqlserver
Verify that the EKS cluster lists the namespace sqlserver.
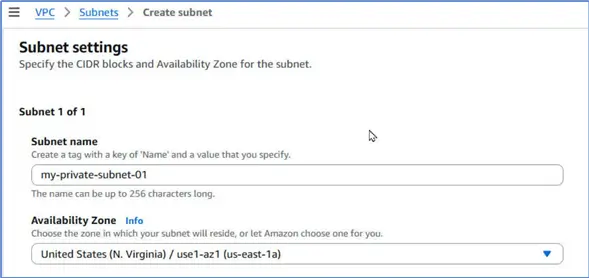
Creating Private Subnets
We need to create private subnets within the VPC that we selected. Fargate only allows private subnets as noted in the Add Fargate Profile wizard.

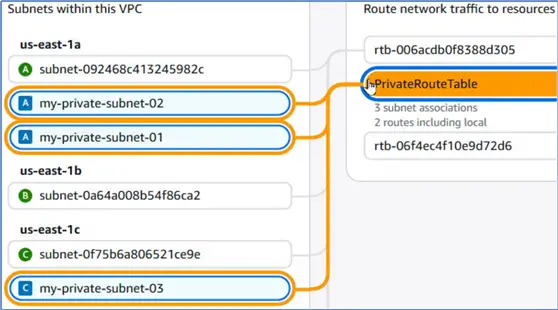
Therefore, navigate to the VPC > Subnets page and click Create subnet to create three new subnets in 2 or 3 three different availability zones.
A Subnet is a private subnet if its associate Route table does not include a Route to an Internet gateway. Let us add a Route to a NAT Gateway instead so that the Fargate can interact with other AWS Services.

We associate this private route table with the three new subnets that we have created to make them private.
Adding a Fargate Profile
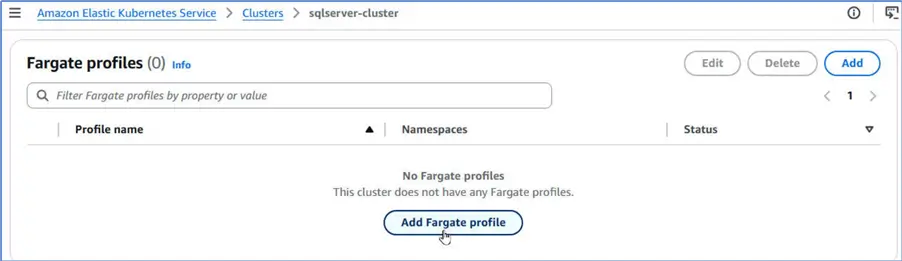
We can create a new Fargate profile after meeting all the prerequisites. Navigate to Compute tab for the EKS cluster and scroll to the Fargate profiles table. Click Add Fargate profile to add a new profile.
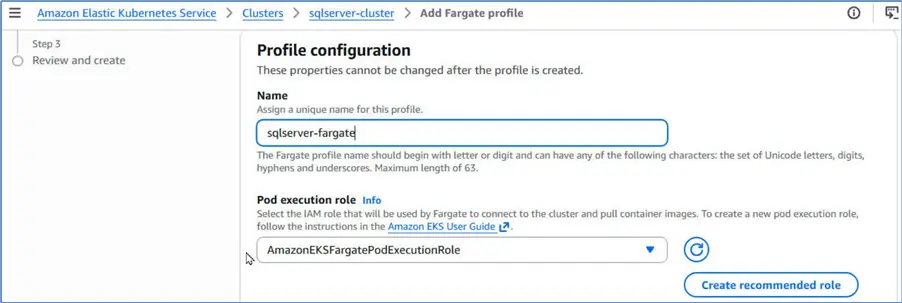
Specify a profile name, and select the pod execution role that we verified.
Select Subnets as the three private subnets that we created.

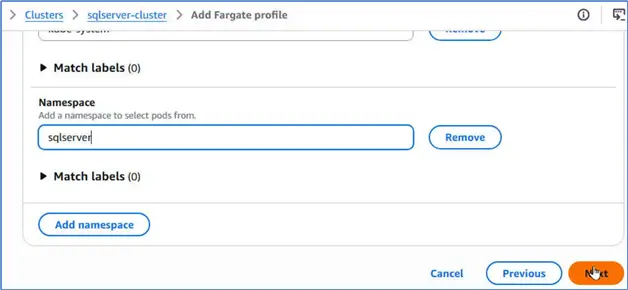
Scroll down and click Next. Configure pod selection by adding namespaces for which Fargate selects pods. Click Add namespace.
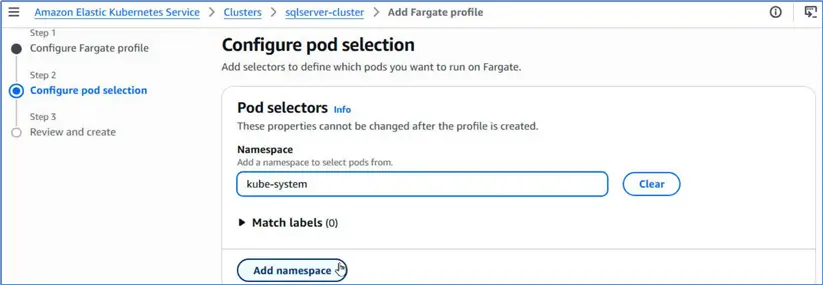
Add the sqlserver namespace. Click Next.
Review the Fargate profile.
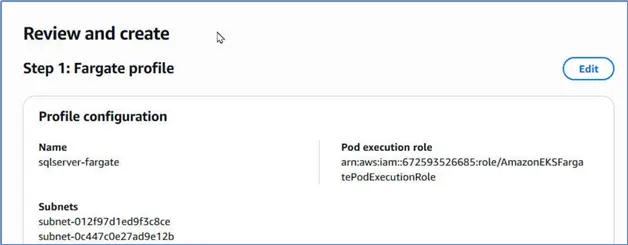
Click Create.

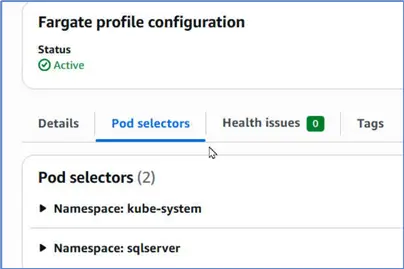
It creates a Fargate profile.
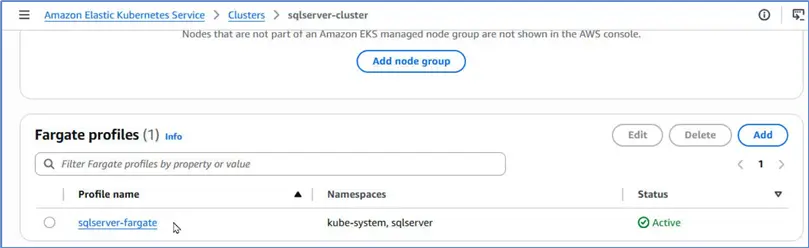
Note the Pod selectors namespaces. We should only use these namespaces when we run the SQL Server pods so that they run on Fargate. Specifically, we will use the sqlserver namespace because the other one is a system namespace.
Creating an Elastic File System
Next, let us create an Elastic File System (EFS) that we use as the storage for the SQL Server. Navigate to Amazon EFS > File systems, and click Create file system.

Specify a file system name and select the same VPC as the one used for the EKS Cluster. Click Create file system.
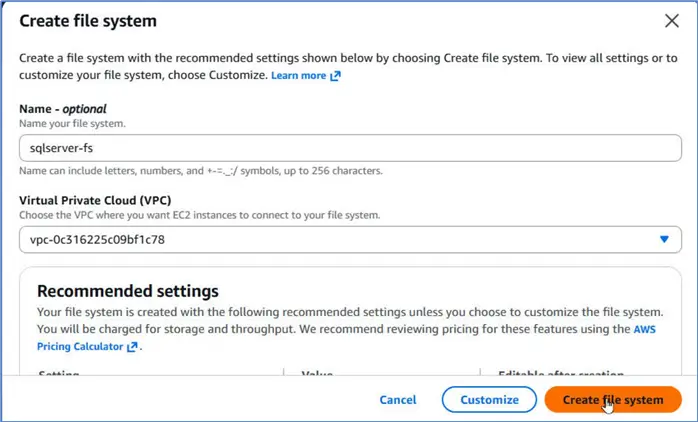
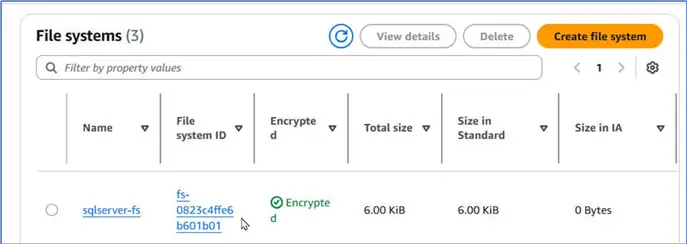
It creates a new file system.
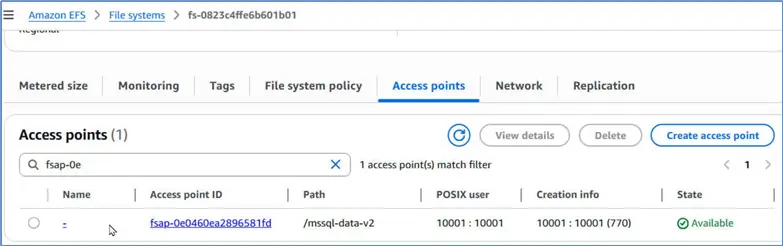
Creating a File System Access Point
Let us create an access point within this file system so that we can make fine-grained access to the file system with all the permissions that we need.
Run the following AWS CLI command in PowerShell to create an access point. Note that we specify the file system id as the one that we just created.
--MSSQLTips.com (CMD)
aws efs create-access-point \
    --file-system-id fs-0823c4ffe6b601b01 \
    --posix-user Uid=10001,Gid=10001 \
    --root-directory "Path=/mssql-data-v2,CreationInfo={OwnerUid=10001,OwnerGid=10001,Permissions=0770}"
It creates a new access point mounted at path /mssql-data-v2 within the file system.
Configuring EKS Resources for SQL Server
Having created an EKS cluster, and the necessary Fargate profile, and the EFS file system, we create the SQL Server pods next. We create three new EKS resources:
- A PersistentVolume abstract resource that represents the cluster’s storage. We specify the filesystem in the volumeHandle in the format file-system-id::access-point-id, which becomes fs-0823c4ffe6b601b01::fsap-0e0460ea2896581fd.
- A PersistentVolumeClaim abstract resource as a user request for specific resources for SQL Server.
- A StatefulSet for SQL Server pods. We configure the Docker image mcr.microsoft.com/mssql/server:2022-latest, port 1433, and environment variables within this.
We use the following configuration file (mssql-fargate.yaml) to declare all these resources.
--MSSQLTips.com (YAML)
---
apiVersion: v1
kind: PersistentVolume
metadata:
  name: mssql-pv
spec:
  capacity:
    storage: 10Gi
  volumeMode: Filesystem
  accessModes:
    - ReadWriteMany
  persistentVolumeReclaimPolicy: Retain
  storageClassName: ""
  csi:
    driver: efs.csi.aws.com
    # UPDATED WITH YOUR NEW ACCESS POINT
    volumeHandle: fs-0823c4ffe6b601b01::fsap-0e0460ea2896581fd

---
apiVersion: v1
kind: PersistentVolumeClaim
metadata:
  name: mssql-data
  namespace: sqlserver
spec:
  accessModes:
    - ReadWriteMany
  storageClassName: ""
  volumeName: mssql-pv
  resources:
    requests:
      storage: 10Gi

---
apiVersion: apps/v1
kind: StatefulSet
metadata:
  name: mssql-2022
  namespace: sqlserver
spec:
  serviceName: "mssql"
  replicas: 1
  selector:
    matchLabels:
      app: mssql
  template:
    metadata:
      labels:
        app: mssql
    spec:
      securityContext:
        fsGroup: 10001
        runAsUser: 10001
        runAsGroup: 10001
      containers:
      - name: mssql
        image: mcr.microsoft.com/mssql/server:2022-latest
        ports:
        - containerPort: 1433
        env:
        - name: ACCEPT_EULA
          value: "Y"
        - name: MSSQL_SA_PASSWORD
          value: "SqlServer@2022"
        - name: MSSQL_PID
          value: "Standard"
        resources:
          requests:
            memory: "4Gi"
            cpu: "1"
        volumeMounts:
        - name: mssql-storage
          mountPath: /var/opt/mssql
      volumes:
      - name: mssql-storage
        persistentVolumeClaim:
          claimName: mssql-data
Note that we specify namespace as sqlserver, which is a namespace associated with the Fargate profile. This is how the SQL Server pod/s will run on Fargate by matching namespace.
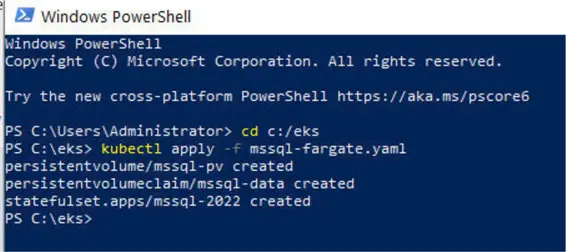
Applying the Configuration to Create EKS Resources
Let us run or apply this configuration file to create the EKS resources for SQL Server. We apply with the following kubectl command. The output lists the resources created.
--MSSQLTips.com (CMD)
PS C:\eks> kubectl apply -f mssql-fargate.yaml
persistentvolume/mssql-pv created
persistentvolumeclaim/mssql-data created
statefulset.apps/mssql-2022 created
We should run kubectl commands in PowerShell for the formatting and color coding it provides.
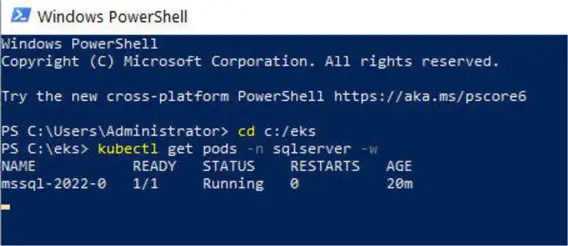
Thereafter, let’s get the pods with the following kubectl command.
--MSSQLTips.com (CMD)
kubectl get pods -n sqlserver -w
The output includes the status (Pending, ContainerCreating, Running)

We can’t connect to the SQL Server till status is Running. We don’t have to keep the PowerShell window open all the time; however, we should verify the SQL Server pod is running before connecting each time.
Exploring the Provisioned EKS Resources
Let’s discover the EKS resources for SQL Server. Workload: Pods lists a new pod for SQL Server.
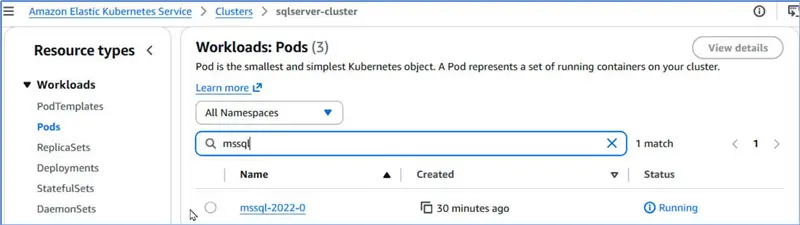
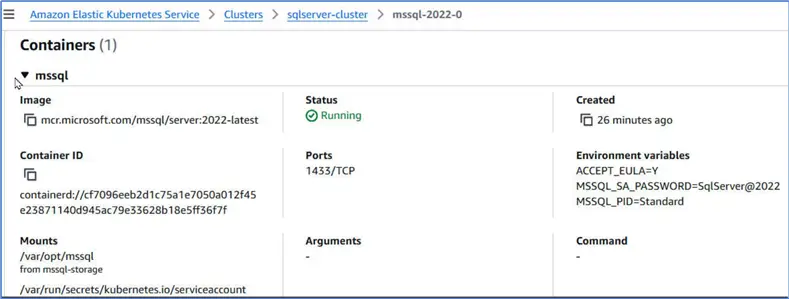
Click on the pod link to list details. Status should be Running. It does run on a Fargate node.

Scroll to list the container for the pod. The container uses the Docker image we provided in the configuration file. Port at which SQL Server accepts connection is TCP/1433. It lists the environment variables if we need to get password.
Connecting to SQL Server with SQL Server Management Studio
When the SQL Server pod is running we can connect to it with SQL Server Management Studio from a local machine.
Setting Up Port Forwarding
We can set up port forwarding from a local machine to pod mssql-2022-0 from local port 1433 to pod port 1433 in namespace sqlserver with the following command.
--MSSQLTips.com (CMD)
kubectl port-forward pod/mssql-2022-0 1433:1433 -n sqlserver
Port forwarding gets set up. We should keep this in this state. Each time we make a new connection, it prints message Handling connection for 1433.

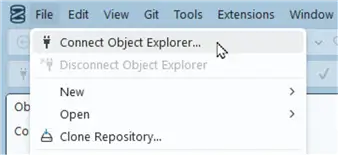
Connecting with SQL Server Management Studio
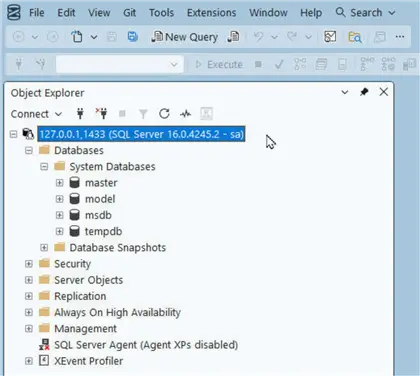
Let’s launch SQL Server Management Studio. Select File > Connect Object Explorer.
Specify connection details in Connect window. Notably, the Server Name is 127.0.0.1,1433 because we have set up port forwarding. Specify password for sa user, and click Connect.

It establishes a connection to SQL Server.
Verifying Connection is to an EKS Pod
How do we know it is not some other SQL Server to which we have connected. Run the following SQL Script in a query editor.
--MSSQLTips.com (T-SQL)

SELECT @@VERSION;
SELECT name, physical_name AS 'FileLocation' FROM sys.master_files;
SELECT @@SERVERNAME AS 'PodName', HOST_NAME() AS 'YourLaptop';
It verifies the server version as the one that matches the Docker image. It lists the file system on the Docker container. Furthermore, it lists the pod name, which is distinct from the local host name.

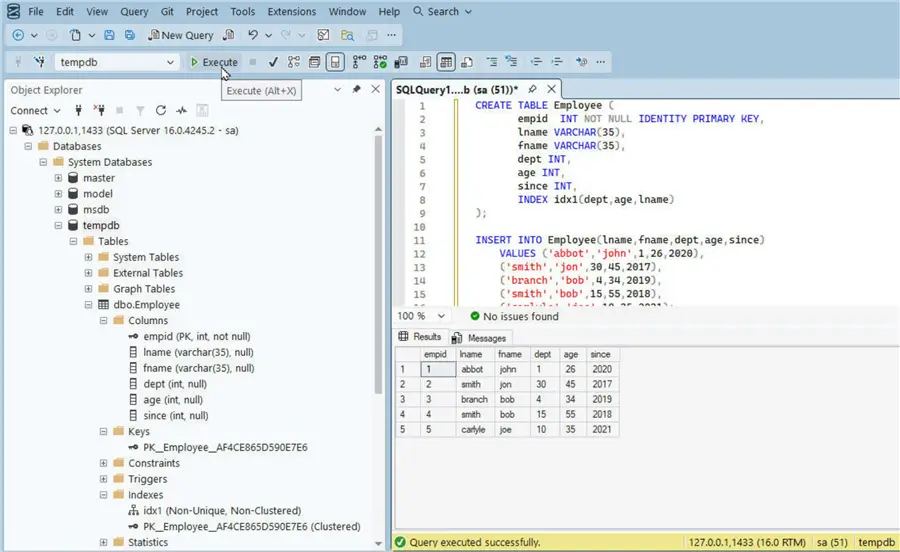
Creating an Example Table
We can start to use the SQL Server running on an EKS cluster without having to manage the cluster infrastructure. Create an example table with the following script:
--MSSQLTips.com (T-SQL)
CREATE TABLE Employee (
empid INT NOT NULL IDENTITY PRIMARY KEY,
lname VARCHAR(35),
fname VARCHAR(35),
dept INT,
age INT,
since INT,
INDEX idx1(dept,age,lname)
);
INSERT INTO Employee(lname,fname,dept,age,since)
VALUES ('abbot','john',1,26,2020),
('smith','jon',30,45,2017),
('branch','bob',4,34,2019),
('smith','bob',15,55,2018),
('carlyle','joe',10,35,2021);
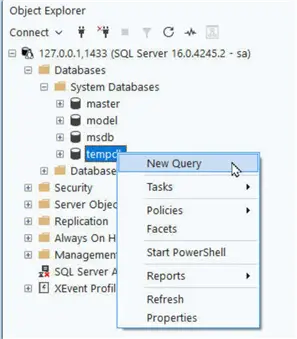
SELECT * FROM Employee; Open a new query editor with a right-click tempdb > New Query.
Run the script to create the table, add table data, and select table data.
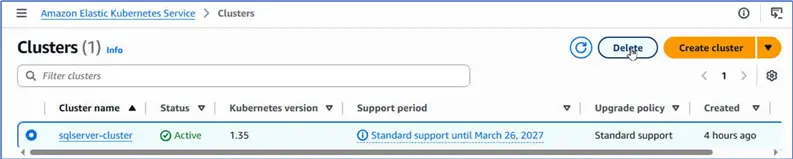
Deleting the EKS Cluster
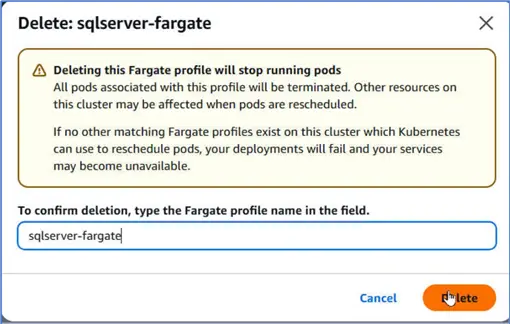
To delete the EKS cluster it must not have any active Fargate profile associated with it. Therefore, first delete the Fargate profile with Delete.

Deleting the Fargate profile will stop all running pods. Confirm deletion and click Delete.
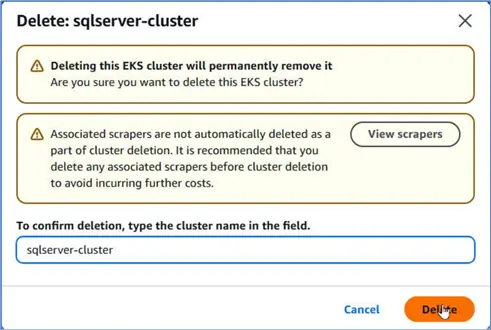
Afterward, select cluster and click Delete to delete it.
Confirm deletion and click Delete.
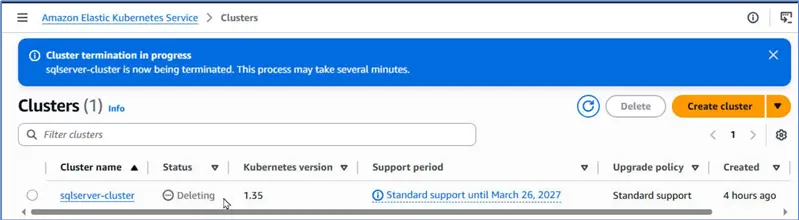
The cluster Status should change to Deleting before it gets deleted.
Summary
In this article, we explain the procedure to use the Amazon Elastic Kubernetes Service (EKS) for running an SQL Server instance. We use the Quick mode, which automates most of the cluster provisioning, using the Fargate serverless platform. We then connect to the SQL Server from a local machine with SQL Server Management Studio, and create an example table.
Next Steps
- Register an Account with AWS
- Download and install SQL Server Management Studio
- Explore the SQL Server Docker images
- Get started with Amazon EKS
- Read up on related articles and documentation:

Deepak Vohra is an Oracle Certified Data Science Professional, and an author of more than 20 books. Hobbies include philately, golf, and cricket.