By: Tim Ford | Comments (41) | Related: > Microsoft Access Integration
Problem
Thus far in this tips series on Access and SQL Server, we have created an ODBC Data Source Name (DSN) using the OLEDB driver for connecting to SQL Server 2000, as well as a System DSN to connect to a SQL Server 2005 instance using the new SNAC (SQL Native Client) driver. This was in preparation for using Microsoft Access as a front-end tool for a SQL Server 2005 database. Though Access can be considered a sub-par application by the relational database elitists, it can be a very capable alternative for querying data from SQL Server without the learning curve associated with Visual Studio. In some respects, it is the perfect tool for the casual business user who wants to drill into and share their data. So what's next?
Solution
In order to connect to Microsoft SQL Server from Microsoft Access you need to set up at least one Linked Table. This table is a pointer to a table in a SQL Server database that is associated with a pre-defined System ODBC Data Source Name (referred to as a DSN from this point forward). In truth, you have many options for setting up Linked Tables from Access; many RDBMSs (Relational Database Management Systems) and Microsoft Office applications for example - even SharePoint and Outlook are options for linking tables back to Microsoft Access. For the purpose of this tip however, we're going to focus exclusively on Microsoft SQL Server. The process from this point forward is compatible with all releases of SQL Server since version 7.0.
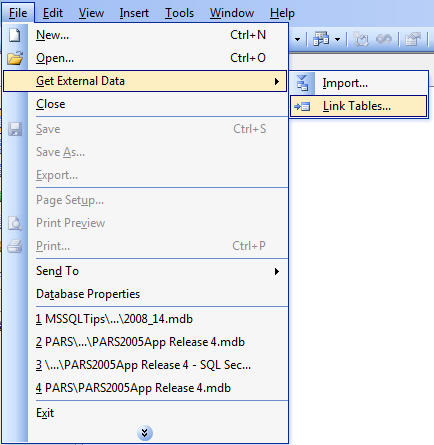
The first step in setting up a linked table is to navigate to the Linked Tables dialog in Access. From the menu bar, select File | Get External Data | Linked Tables as shown below:
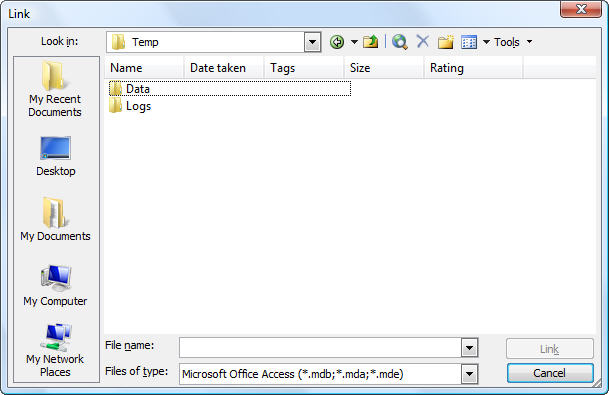
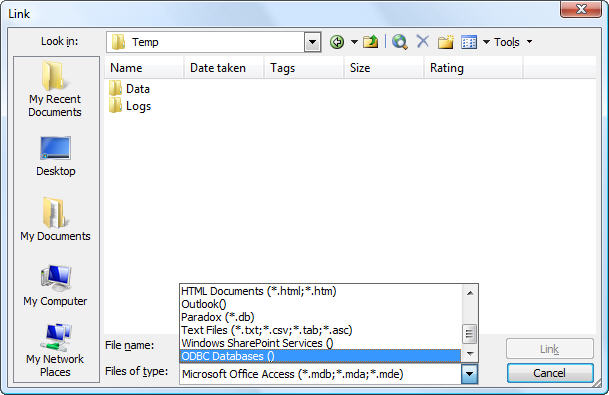
By default, Microsoft Access will want to link to another Access database for it's Linked Table source. Browsing the 'Files of Type' pull-down menu on the bottom left of the interface will give you a general idea of just how broad of a scope is available for Linked Table sources. Since we are focusing on SQL Server as a data source, navigate down the list of 'Files of Type' options and select the 'ODBC Databases()' option. Then click the 'Link' button on the right of the interface.
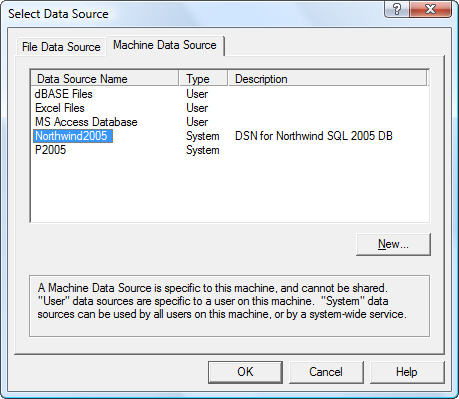
After pressing the 'Link' button, you will be greeted with a dialog for selecting the DSN for linking to Access. If you have been following along on the previous tips in this series (Microsoft Access and SQL Server Integrationand SQL Server SNAC Creation and Configuration) you will see a DSN that has been set up for a SQL Server 2005 database of your choosing. If not, you can create a new one now by clicking the 'New' button on the bottom right of the interface and following the procedures in SQL Server SNAC Creation and Configuration. Once you have either created or identified the proper SQL Server DSN, highlight it and click the 'OK' button.
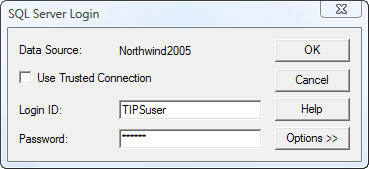
When creating the DSN for this process, you configured it to use either SQL Server or Windows (Trusted) security. You will be prompted again at this point when attempting to make use of the DSN. Select the appropriate security measures to authenticate to the data source referenced in the DSN and click the 'OK' button.
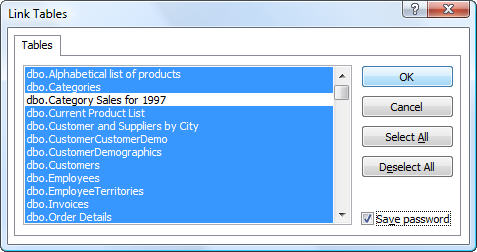
If you have rights to the database associated with the DSN you will be presented with a listing of database objects (note that you are not limited to linking just to tables, but rather views and stored procedures are available options also). We are going to focus strictly on linking to SQL Server tables for this exercise. I am using Northwind as a database source in this tip, so you will see below that I have selected all tables except for the date-specific table 'Category Sales for 1997' in the tables listing on the interface.
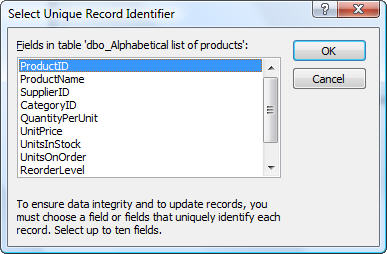
Once selecting the 'OK' button on the previous screen you will be prompted to select a 'Unique Record Identifier' for each table. In a nutshell, you are being asked for the primary key for the table. If you are privy to this information please select the correct field because performance depends on it. If performance is not an issue, you may simply press the Cancel button throughout this process. The table linking will still complete successfully whether you set a Primary Key or not.
Once you have made your way through the previous step you will see a table listing similar to what is below. Make note that Microsoft Access' naming convention process will concatenate the RDBMS schema owner and RDBMS object name in the format of <schema>_<object_name>. You can rename the table in Access after linking and the link will not be broken. However, there will be some minor ramifications in doing so when it comes to using the Microsoft Linked Table Manager which will be highlighted in a future tip.
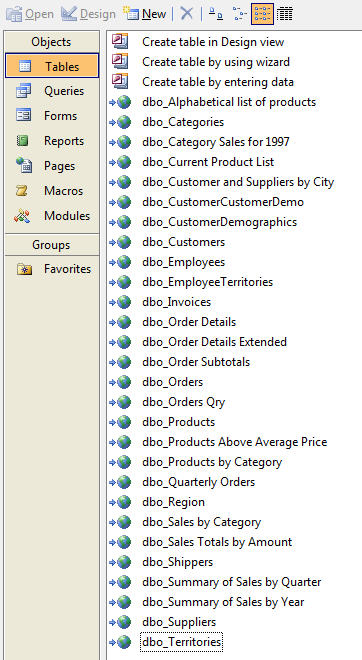
At this point you may utilize the linked tables as though they are native Access objects. You can create queries against them, report off of them, use them as the record source for Access forms and run Visual Basic for Applications (VBA) code against them.
Next Steps
- Review the other tips in this series on SQL Server interaction with Microsoft Access.
- Stay tuned for subsequent tips on creating SQL Pass-Through Queries in Microsoft Access and advanced usage of SQL record sources with Microsoft Access.
- Link one of your existing SQL databases to Access using the process outlined in this tip. Run some queries against it. What does performance look like? Be prepared to answer that question again once we build a pass-through query in our next tip.
About the author
 Tim Ford is a Senior Database Administrator with MindBody.
This author pledges the content of this article is based on professional experience and not AI generated.
View all my tips


