By: Manvendra Singh | Comments (27) | Related: 1 | 2 | 3 | > Database Mirroring
Problem
When using Database Mirroring and if you have not placed your database files for your principal database and mirrored database on an identical path then adding a database file to the principal database is quite different than the normal process. In this case, when you add a database file to a database, your mirroring configuration will be suspended because SQL Server will not be able to create that file on the mirrored server. This will not allow the databases to be in sync and will force mirroring to go into a suspended state.
If the complete path (including drive letter and folder names) for the database files exists on both the principal and mirrored server then you can follow the normal process, but if the paths are different then you would have to follow this process to add a database file to a mirrored database.
In this tip I will describe step by step how to add a database file for a mirrored database that has different drives and/or paths.
Solution
At a high level these are the steps we will take to add a new database file for a mirrored database that has different file paths on the principal and mirror. First remove the mirror partner, then create the database file on the principal server. After that I will take a log backup and restore it on the mirrored server using the WITH MOVE option. Once the restore is done, I will re-establish database mirroring.
NOTE: DO NOT MAKE ANY CHANGES IN PRODUCTION WITHOUT PROPER TESTING IN LOWER-LIFE CYCLE ENVIRNOMENTS
Steps to add new database file to mirrored database
Step 1
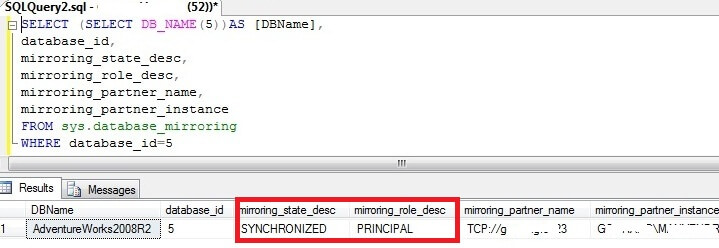
First, we should check the mirroring configuration and partner status. Run the below command on the principal server to get this information. Here we have used database id 5 for our database, you can find your database id for your mirrored database using "sp_helpdb".
SELECT (SELECT DB_NAME(5))AS DBName,database_id,mirroring_state_desc,
mirroring_role_desc,mirroring_partner_name,mirroring_partner_instance
FROM sys.database_mirroring
WHERE database_id=5

Step 2
We can see the mirroring status is synchronized and its mirror partner name. Before moving ahead, we should disable any SQL Server backup jobs to reduce any futher complexity. Otherwise, if any log backup occurs in between you will need to restore all log backups on the mirrored server before establishing the database mirror.
Now we will remove the mirror partner to initiate this file creation process. Run the below command on the principal server to break the mirror.
ALTER DATABASE AdventureWorks2008R2 SET PARTNER OFF

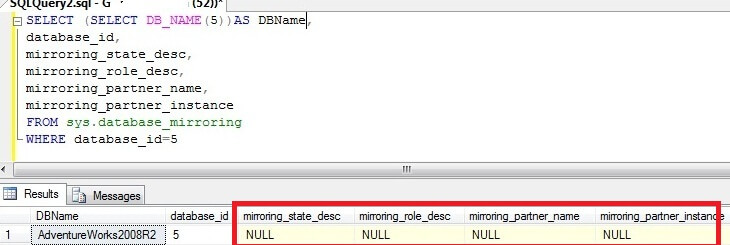
Now you can again check the mirroring configuration with the help of the SQL code in step 1. Once you run step 1 again, the output should be like the screenshot below. You can see the status and partner names are showing NULL, meaning the mirroring configuration is broken. Also your database on the mirrored server will be in a restoring state.

Step 3
Next, create your database file on the principal server. I ran this statement to create a secondary database file on the principal server. You can use the GUI method as well to create this database file.
ALTER DATABASE AdventureWorks2008R2 ADD FILE (NAME = AdventureWorks2008R2_Data2,
FILENAME = 'C:\Program Files\Microsoft SQL Server\MSSQL10_50.MSSQLSERVER\MSSQL\DATA\AdventureWorks2008R2_Data2.ndf',
SIZE = 1000MB, MAXSIZE = UNLIMITED, FILEGROWTH = 10%)

Step 4
Once you have added a new database file on your database, run a log backup that will be restored on the mirrored server.
BACKUP LOG AdventureWorks2008R2
TO DISK = 'C:\AdventureWork2008R2_25Nov20121229.trn'
WITH INIT

Step 5
Before restoring the log backup on the mirrored server, you can check whether your newly created file is captured in the log backup. Run the RESTORE FILELISTONLY statement to get this info.
RESTORE FILELISTONLY
FROM DISK = 'C:\AdventureWork2008R2_25Nov20121229.trn'

We can see that the newly created file is captured in the log backup file, so go ahead and restore this log backup on the mirrored server using the NORECOVERY and MOVE options. We are using the MOVE option to place the file in a different location on our mirrored server.
RESTORE DATABASE AdventureWorks2008R2
FROM DISK = 'C:\AdventureWork2008R2_25Nov20121229.trn'
 WITH NORECOVERY,
 MOVE 'AdventureWorks2008R2_Data2'
  TO 'F:\Program Files\Microsoft SQL Server\MSSQL10_50.MANVENDRA\MSSQL\DATA\AdventureWorks2008R2_Data2.ndf'

Step 6
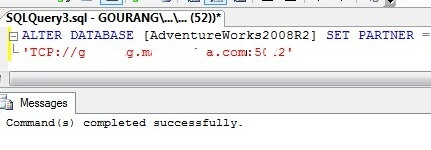
Now the principal database and mirror database have the new database file. Now we should re-establish mirroring between the servers for this database. First, add the partner server on the mirror server. The below SQL code will add the principal server on the mirror server.
ALTER DATABASE [AdventureWorks2008R2] SET PARTNER =
'TCP://PRINCIPALSERVERNAME.DOMAIN.com:5022'

Step 7
Now add the partner server on the principal. Run the below SQL code to add the mirror server to the principal server to resume mirroring.
ALTER DATABASE [AdventureWorks2008R2] SET PARTNER =
'TCP://MIRRORSERVERNAME.DOMAIN.com:5023'

Step 8
Once the above commands are successful, you are done with your task to add a database file to a mirrored database.
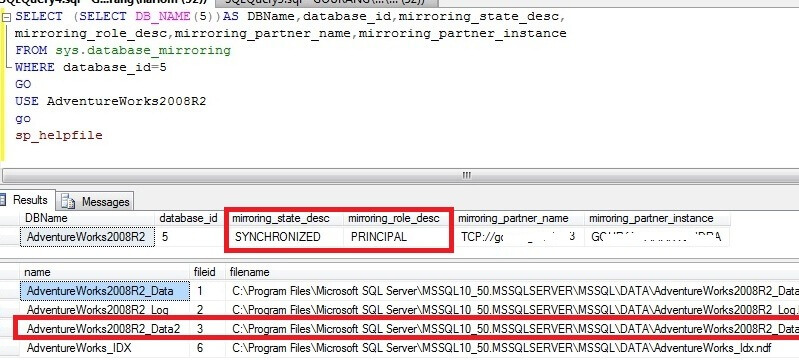
We can check and verify whether the mirroring configuration is established between both databases. Run this SQL statement along with sp_heflpfile on the principal server.
SELECT (SELECT DB_NAME(5))AS DBName,database_id,mirroring_state_desc,
mirroring_role_desc,mirroring_partner_name,mirroring_partner_instance
FROM sys.database_mirroring
WHERE database_id=5
GO
USE AdventureWorks2008R2
go
sp_helpfile

You can also verify on your mirrored server after a failover to check the database properties for the mirrored database.
Next Steps
- Follow this process to add database files on your mirrored database, but before applying this change in production it is highly recommended to test this process in a lower life cycle system.
- If you want to move a database file for a mirrored database then have a look at this tip: How to move a database file of a mirrored database
- Also read more tips on SQL Server Database Mirroring
About the author
 Manvendra Singh has over 5 years of experience with SQL Server and has focused on Database Mirroring, Replication, Log Shipping, etc.
This author pledges the content of this article is based on professional experience and not AI generated.
View all my tips


