By: Dallas Snider | Comments (5) | Related: > Analysis Services Administration
Problem
How can we gain more control over the processing of the Analysis Services objects in SQL Server 2012?
Solution
The Analysis Services Processing Task in SQL Server Integration Services (SSIS) allows for the processing of one to many to all Analysis Services objects in an SSIS package. Once the SSIS package is created, then a job can be created within the SQL Server Management Studio which will allow for scheduling, restarting, alerts and notifications.
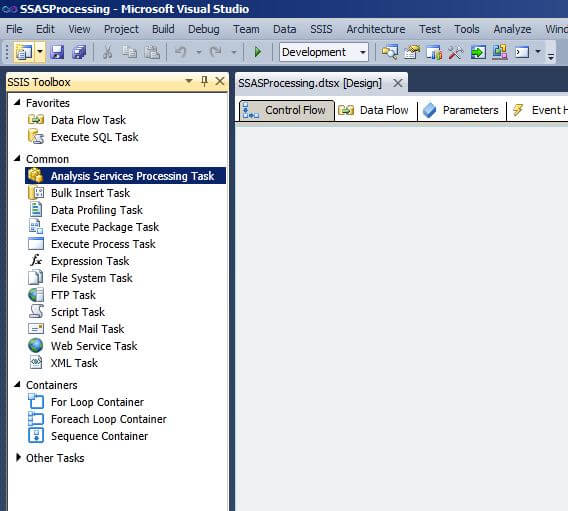
The Analysis Services Processing Task is in the SSIS Toolbox when the Control Flow tab is selected.
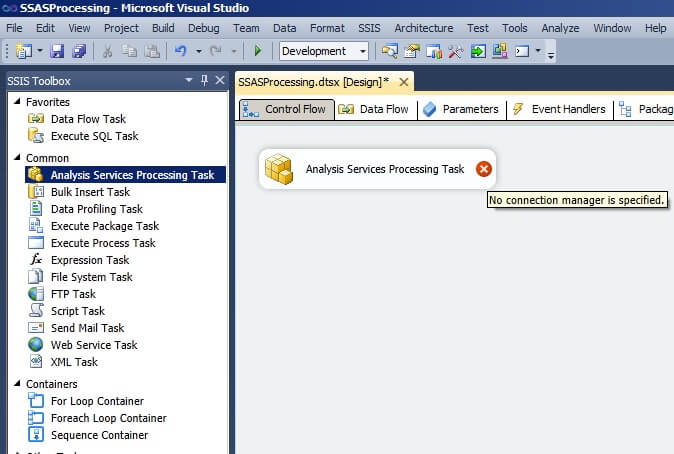
Drag an Analysis Services Processing Task from the SSIS toolbox to the Control Flow palette. The red circle with the white "X" indicates that no connection manager is specified
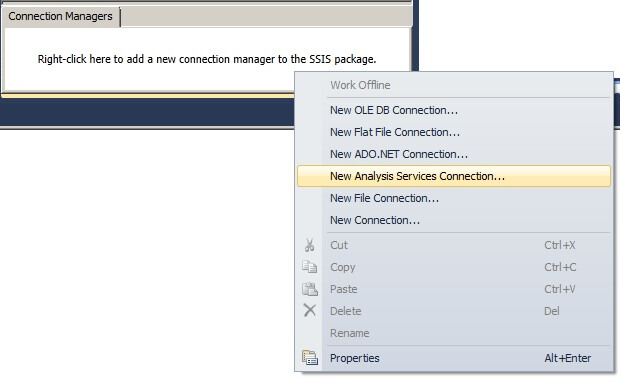
A new connection manager can be created by right-clicking in the Connection Managers window and selecting "New Analysis Services Connection...".
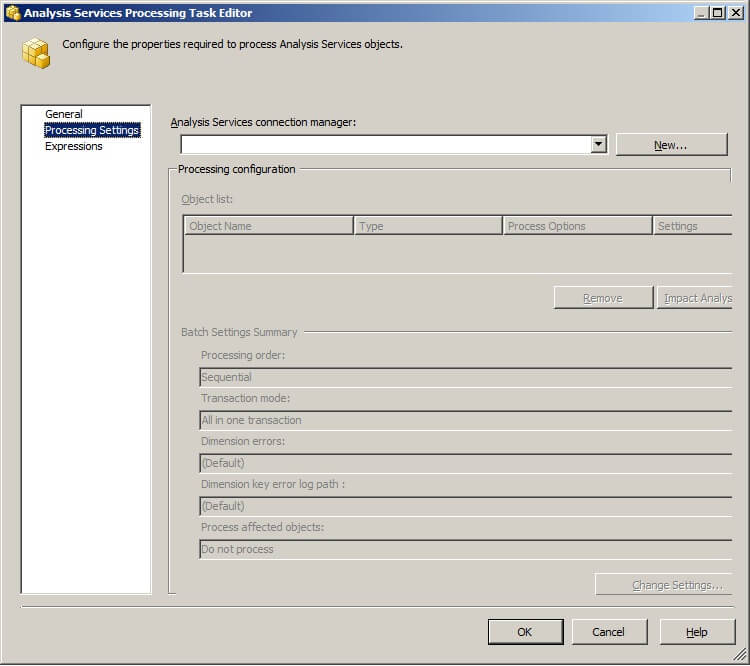
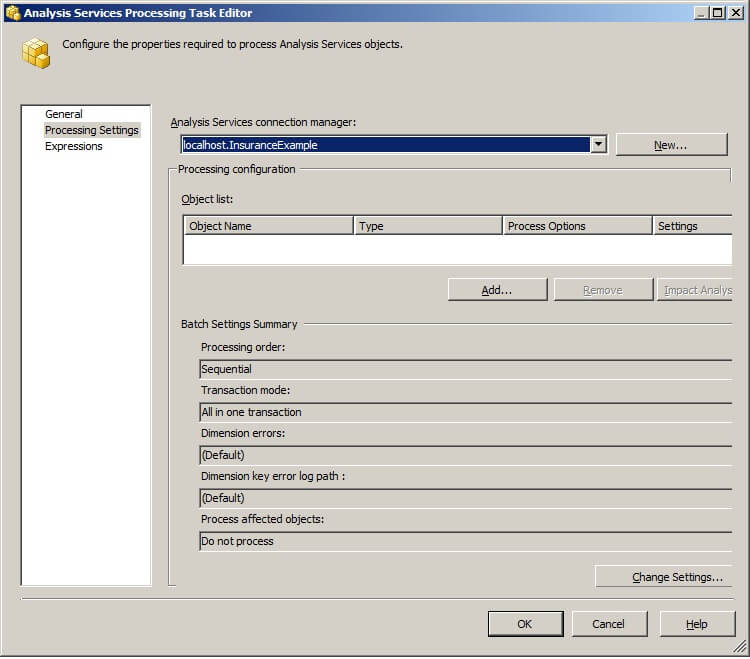
A new connection manager can also be created by double-clicking on the Analysis Services Processing Task, and then clicking on "Processing Settings" in the Analysis Services Processing Task Editor. This will bring up the dialog shown below. Click on "New...".
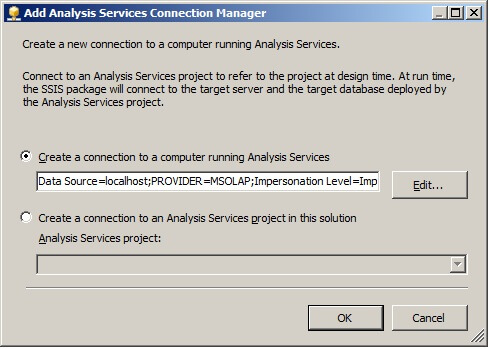
Either method above will display the Add Analysis Services Connection Manager. The connection string can be edited manually or generated by Visual Studio by clicking the "Edit..." button.
In the Connection Manager window, the "Provider:" drop-down box defaults to "Native OLE DB\Microsoft OLE DB Provider for Analysis Services 11.0". The "Initial catalog:" drop-down box lists all of the Analysis Services databases in the server instance. Select an Analysis Services database and then click "Test Connection" to verify the credentials are valid. A message box will pop-up indicating a successful or failed connection test.


If successful, click on "OK" twice to return the focus to the Add Analysis Services Connection Manager.
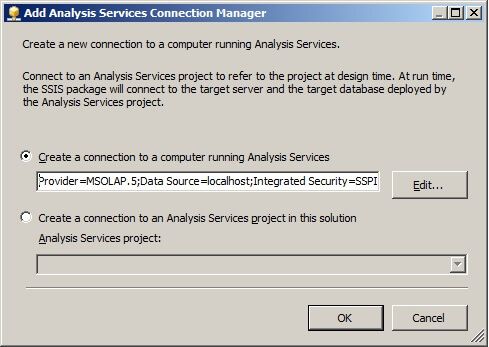
Changes to the connection string will be shown in the text box below the "Create a connection to a computer running Analysis Services" radio button. Click on "OK".
Select the newly created connection manager in the "Analysis Services connection manager:" drop-down box, if the drop-down box is not populated.
Click on the "Add..." button to display the "Add Analysis Services Object window. By default, nothing is selected.
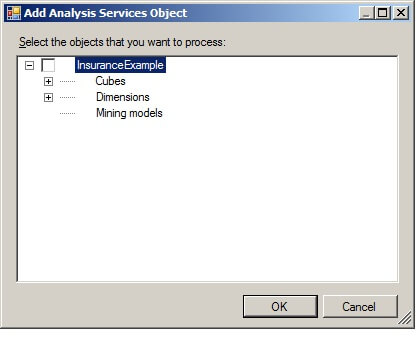
Checking on the top level checkbox will allow for all objects (cubes, measure groups, partitions, dimensions and mining models) to be processed. In this example, there are no Mining models; therefore the box to show or hide the Mining model objects is not displayed.

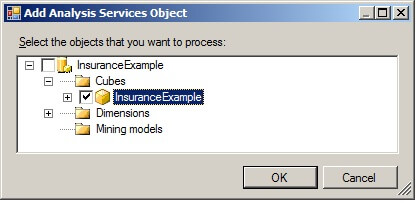
Selecting a checkbox at the cube level will process the cube and all of its objects. In the image below, the InsuranceExample cube will be processed.
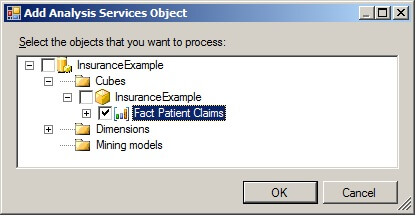
Selecting a checkbox at the measure group level will process the measure group and all of its partitions. In the image below, the Fact Patient Claims measure group will be processed.
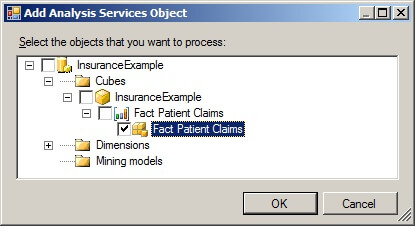
Selecting a checkbox at the partition level will process the specified partitions. In the image below, only one partition exists and it will be processed.
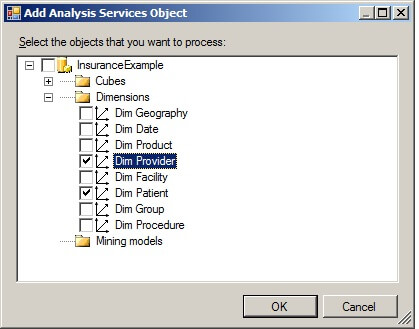
Selecting checkboxes at the dimension level will process the specified dimensions. In the image below, the provider and patient dimensions will be processed.
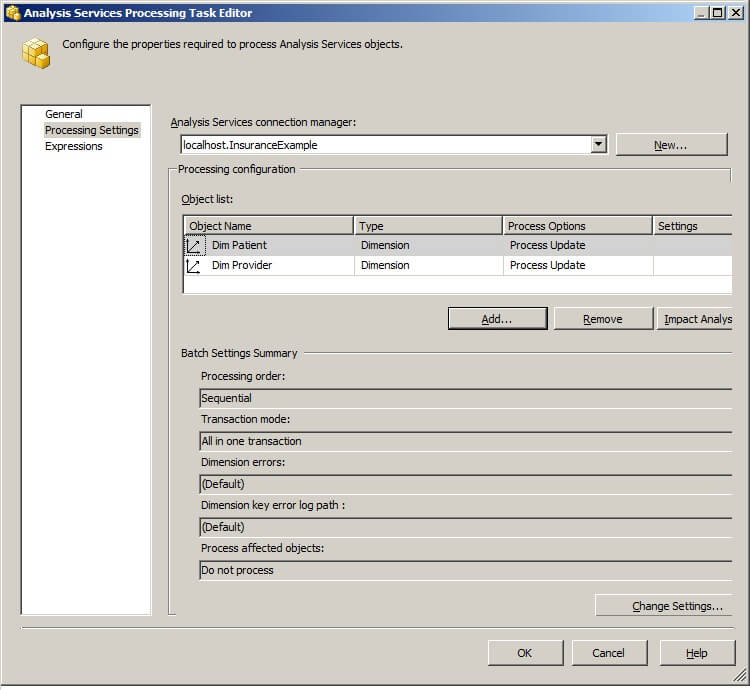
Clicking on "OK", will add the objects to the "Object list:" in the Analysis Services Processing Task Editor. By default, the Process Options for the Dimension type are set to "Process Update".
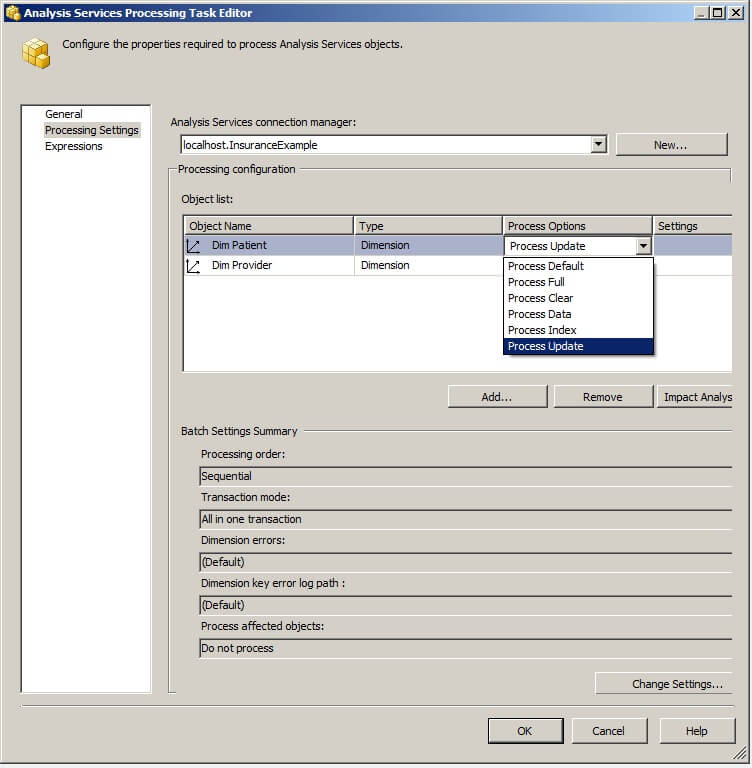
Several processing options for each object are available in the "Process Options" drop-down list box.
Clicking on "Impact Analysis" in the Analysis Services Processing Task Editor will display a list of the objects that will be affected by the processing task. Because the process option for the dimensions is "Process Update", there is nothing displayed in the Object list box as shown below. Clicking on "OK" returns the focus to the Analysis Services Processing Task Editor.
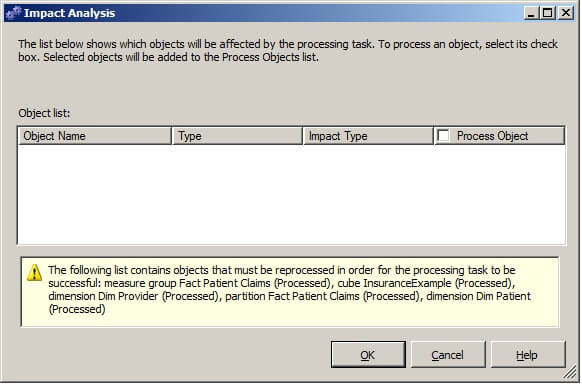
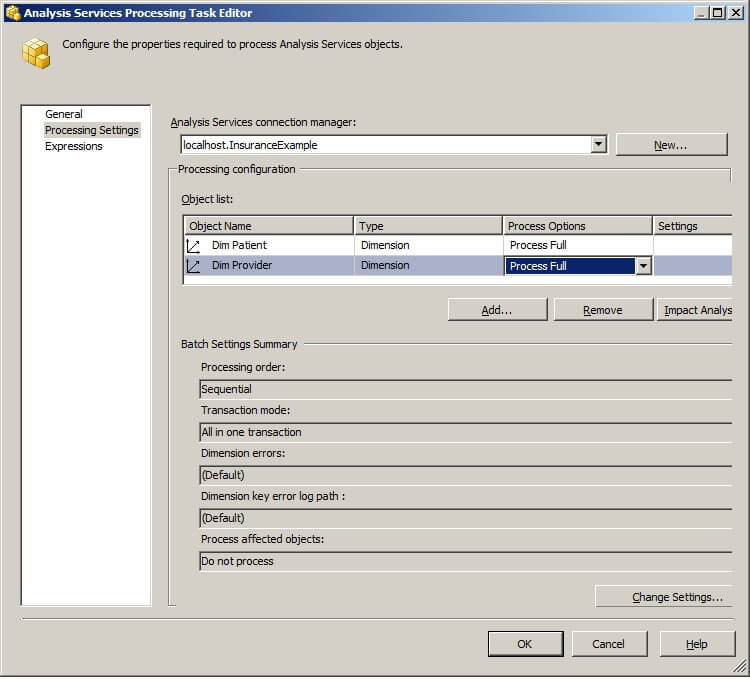
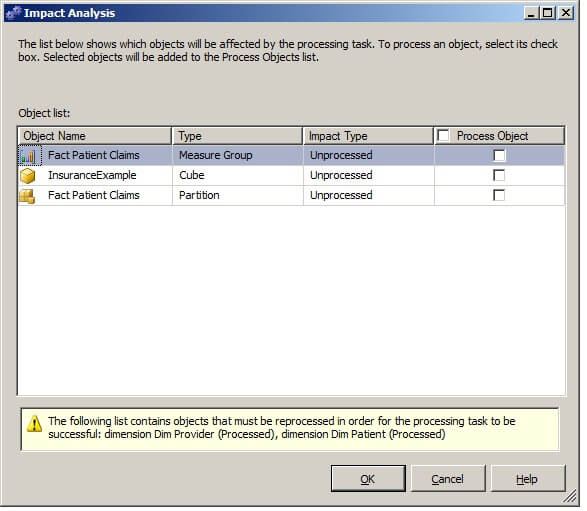
However, when we change the process option for the dimensions to "Process Full" and then click on "Impact Analysis" again, the object list in the Impact Analysis window is populated with the cube, measure group and partition.
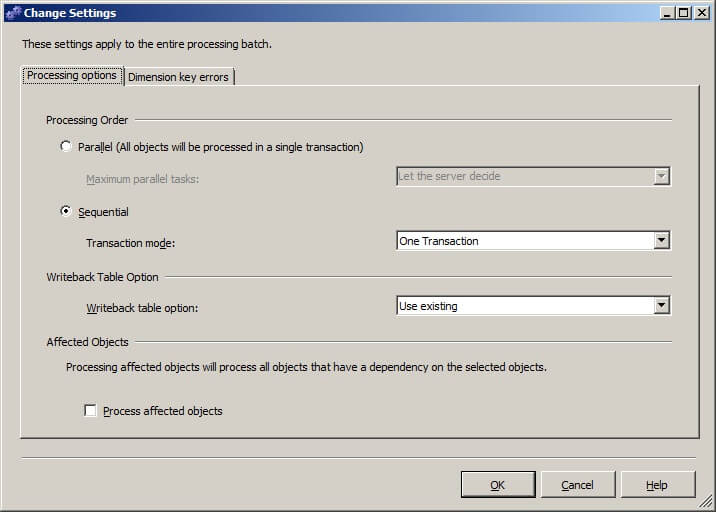
Clicking on "Change Settings..." in the Analysis Services Processing Task Editor will display the Change Settings window. There are two tabs in this window, the "Processing options" tab and the "Dimension key errors" tab. The "Processing options" tab allows for parallel or sequential processing and also for the automatic processing of affected objects.
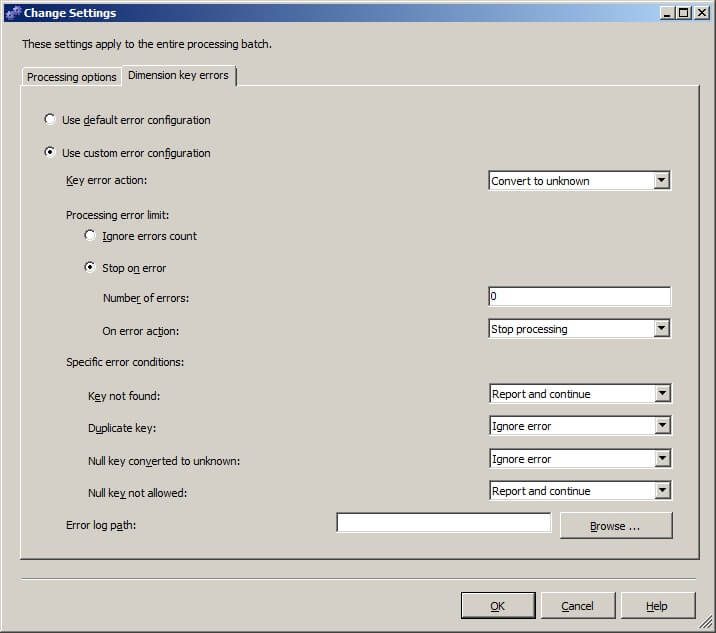
The "Dimension key errors" tab allows for the specification of dimension key error handling. Clicking on "OK" returns the focus to the Analysis Services Processing Task Editor.
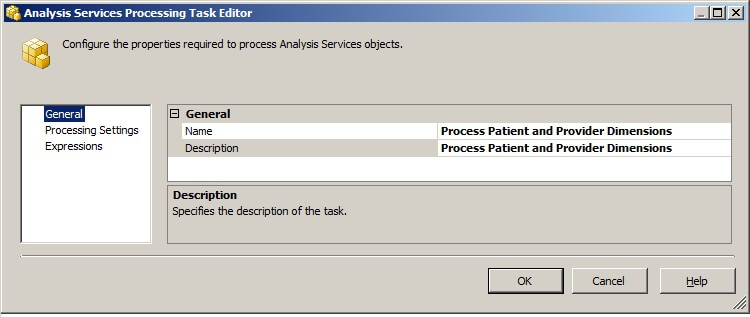
Click on "General" to set the Name and Description of the task. Click on "OK" to return to the Control Flow palette.
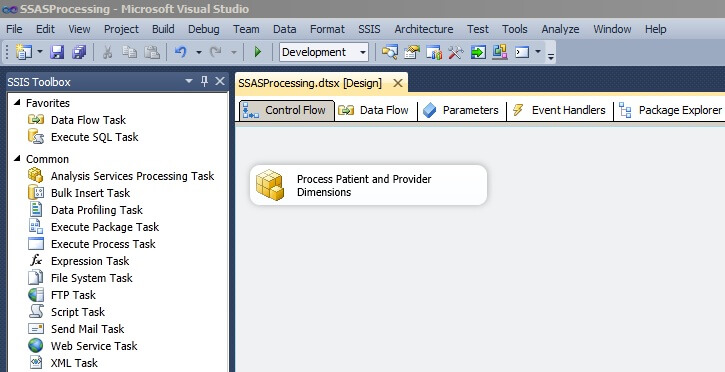
Additional Analysis Services Processing Tasks can be added to ensure complete processing.
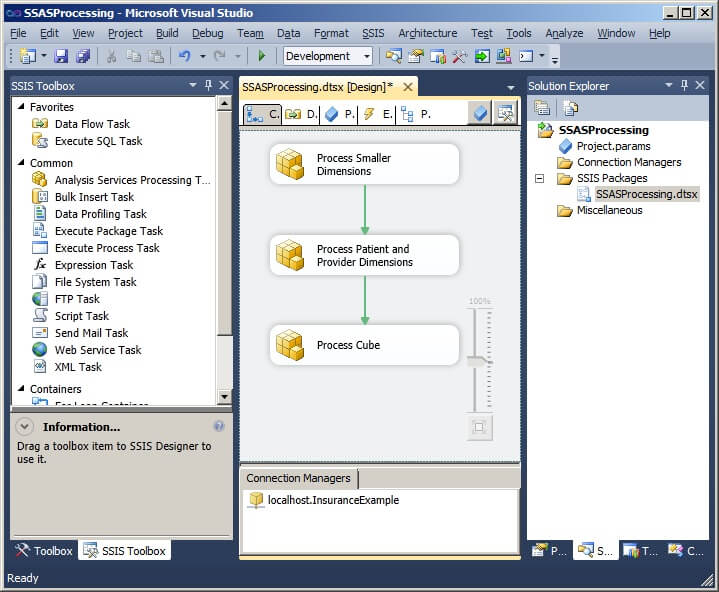
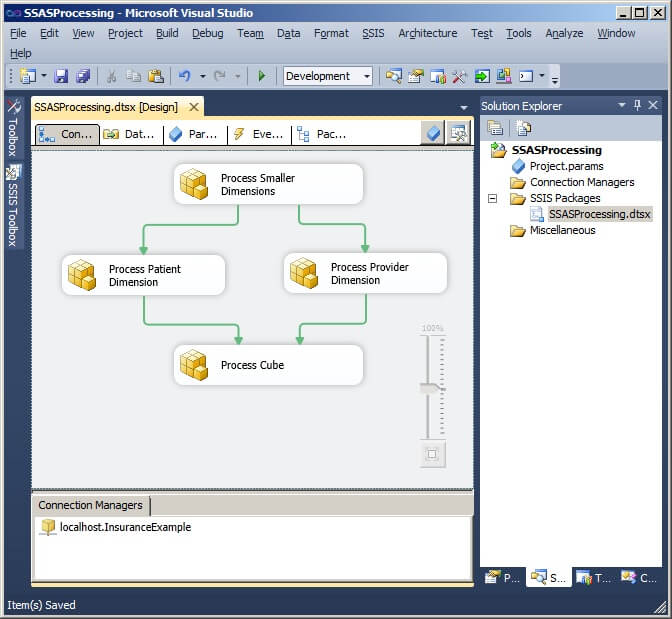
Processing options can be changed and the tasks can be arranged on the palette to optimize performance.
Next Steps
- After completing the above tip, deploy the SSIS package and create a job that will execute the package.
- Experiment with different processing options and arrangements of processing tasks to improve performance.
- Please refer to the following tips for further assistance with SQL Server Analysis Services:
- SQL Server Analysis Services Glossary
- SQL Server Analysis Services (SSAS) Tutorial
About the author
 Dr. Dallas Snider is an Assistant Professor in the Computer Science Department at the University of West Florida and has 18+ years of SQL experience.
This author pledges the content of this article is based on professional experience and not AI generated.
View all my tips


