Problem
SQL Server Integration Services (SSIS) can import data from a fixed width flat text file (i.e. no field delimiters), using the Flat File Source component. When importing this type of file, you must set the field names, field widths, and starting positions ahead of time. Typing in this information when there are only a handful of fields is not too burdensome, but when there are hundreds of fields, manually configuring and validating each field can take a long time. Here is a workaround using an existing import table with table columns already defined. Thank Tim Katheeder for coming up with this workaround.
NOTE: I use the term “field” when referring to positional data in the flat text file (e.g. field Name consist of character positions 1 to 10). The term “column” is used when referencing columnar data in a SQL Server table (e.g. column Name is varchar (10)).
Solution
Background
For one project I worked on, the data came from an old COBOL system. Each row of data had 3,500 characters organized into 530 fields. The text file was 100 MB. So yes, we are talking about a substantial amount of typing to specify the fields to import and defining the table columns where the data will reside.
My preparation consisted of two activities:
a) copying the first few rows of the 100 MB data file into a test file for import development, and
b) using Excel to convert the flat file design specifications into a SQL statement creating an import destination table.
In the example presented here, I created a test file having 3 rows of data with 35 characters representing 5 fields, the design specifications for the test file, and a create table statement based on the test file design specifications.
Example: Test text file
Johnson   1133557712345678140207
Wilson    22446688  352741130522
Anderson  13245768   76543140321
Example: Test file design specifications

Example: Import destination table structure
CREATE TABLE ImportText (
    AcctName varchar (10) DEFAULT ''
    ,AccountNo varchar (8) DEFAULT ''
    ,LastBalance varchar (8) DEFAULT ''
    ,TransDate varchar (6) DEFAULT ''
    ,Filler varchar (3) DEFAULT ''
)
About the Import Destination Table
This tip does not cover how to translate the fixed width flat text file design specifications into a SQL create table query as there are a variety of approaches depending on your particular situation. However, there is one detail that merits special attention. For this fixed width flat file import process to work, the import destination table columns are all defined as text (e.g. VARCHAR). Keeping in mind the source system, COBOL may export a numeric field defined as “s9(6)v99” that is represented by an 8 character field. The “v” in the format is referred to as an implied decimal. This means a flat file field value of “12345678” (8 characters) translates to a table column value of “123456.78” (9 characters). When importing a fixed width flat text file, the field widths must be exact or subsequent fields may receive an incorrect value. By loading all fields as text the individual peculiarities can be addressed on a case-by-case basis. Transforming data from the Import destination table structure to the final table structure is a standard SSIS data transformation.
Example: Import destination table with raw data (ImportText)
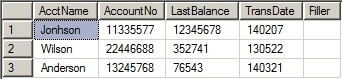
Example: Final table structure
CREATE TABLE ImportFinal (
    AcctName varchar (10) DEFAULT ''
    ,AccountNo varchar (8) DEFAULT ''
    ,LastBalance decimal (9,2)
    ,TransDate smallDateTime
)
Example: Final table with formatted data (ImportFinal)

We’ve described the data we are starting with and how we want the data represented when finished. Here are the steps to make it happen.
Step 1: Create a Data Flow Task
Create a Data Flow task in SSIS to house the workaround.
Step 2: Create and configure an OLE DB Source
a) Double click the Data Flow Task to build the Data Flow.
b) Create an OLE DB Source component.
c) Double click the component to open the OLE DB Source Editor and configure the Connection Manager to point to the import destination table (ImportText).

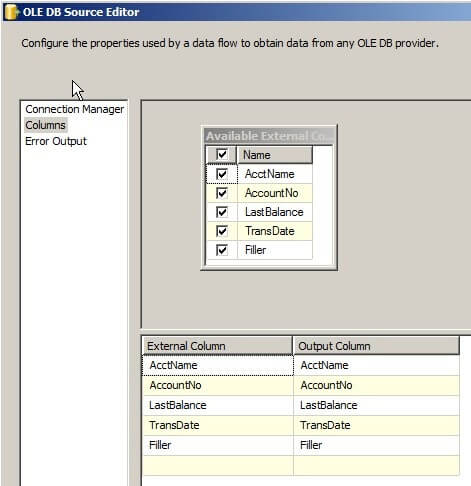
When an OLE DB Source component is configured, SSIS stores the table’s information in the component for reference. Now the import destination table columns (ImportText) are available for reference.
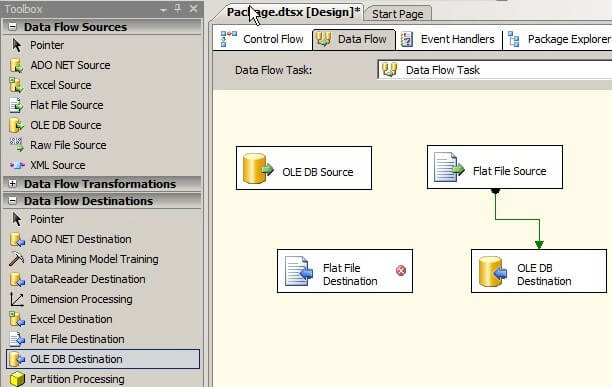
Step 3: Create a Flat File Destination
a) Create a Flat File Destination component.
b) Draw a Data Flow Path between the OLE DB Source component and the Flat File Destination component. Do not open the Flat File Destination component until after the Data Flow Path is established.
After the Flat File Destination component is connected to the OLE DB Source, SSIS automatically copies the column information from the OLE DB Source component (ImportText) to the Flat File Destination component. In other words, the Flat File Destination component now has ImportText table specifications.
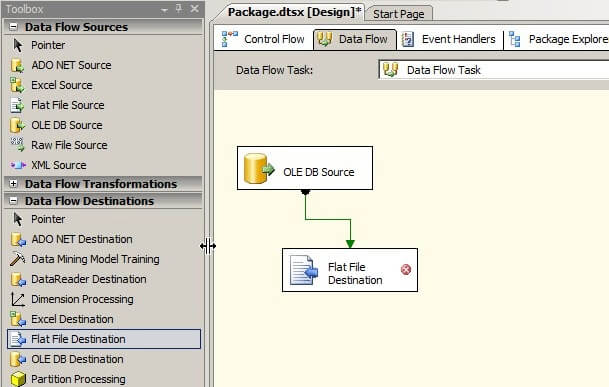
Note: The red circle X in the Flat File Destination component indicates the component configuration is incomplete and will be addressed in the next step.
Step 4: Configure the Flat File Destination
a) Double click the Flat File Destination component to open the Flat File Destination Editor.
b) Click on the New button and the Flat File Format dialog will open.
c) Select the Ragged Right option and click OK.
d) Back in the Flat File Connection Manager Editor, type in “f” as File name, and then close the editor.
e) In the Flat File Destination Editor click on Mappings and you will see the Flat File Destination component configured with the import table specifications. Click OK.
The Ragged Right option is used in step 4c because it is not unusual for data files with large record structures to have varying record lengths. Step 4D is a little misleading as we needed to complete the Flat File Destination component configuration. Once the configuration is done, the OLE DB Source import destination table columns (ImportText) are loaded into the Flat File Destination component. The “f” is not an actual file and was used for configuration purposes only.


Step 5: Create the Flat File Source
a) Create a Flat File Source component.
b) Delete the Data Flow Path between the OLE DB Source component and the Flat File Destination component.
c) Draw a Data Flow Path between the Flat File Source component and the Flat File Destination component. Do not open the Flat File Source component until after the Data Flow Path is established.
d) Open the Flat File Source Editor component to confirm the columns are populated.
Completing step 5d means the Flat File Source component now has the field definitions from the Flat File Destination component courtesy of SSIS automatic import. In other words, the ImportText table column definitions are now the Flat File Source component field definitions.

Note: The red circle X in the Flat File Destination component indicates the component configuration is incomplete due to changing the data source from the OLE DB Source to Flat File Source component.

Step 6: Create and configure the OLE DB Destination
a) Create an OLE DB Destination component.
b) Delete the Data Flow Path between the Flat File Source component and the Flat File Destination component.
c) Draw a Data Flow Path between the Flat File Source component and the OLE DB Destination component.
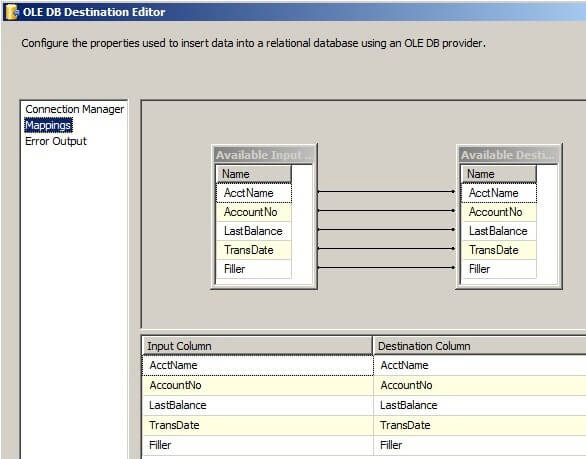
d) Double click the component to open the OLE DB Destination Editor.
e) Configure the OLE DB Destination component Connection Manager to point to the import destination table (ImportText). Select Mappings to confirm the input and destination columns are mapped correctly.
f) Click OK to save the configuration changes.
With the completion of step 6f, the Flat File Source and OLE DB Destination components are compatible and ready for use. Both components are using the test file design specifications.

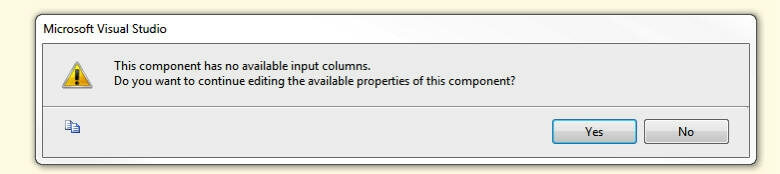
NOTE: If you get this warning, you will need to start over as these steps need to be completed in one session.
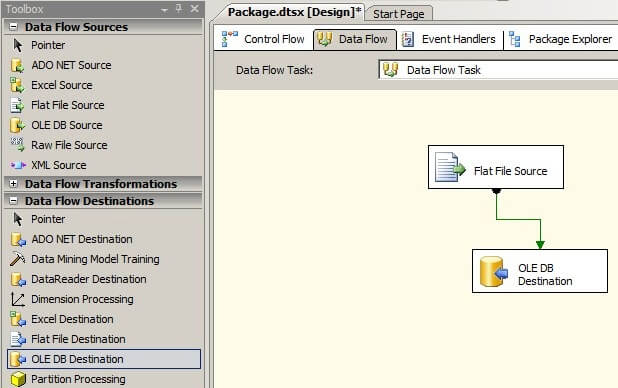
Step 7: Cleanup
The OLE DB Source and Flat File Destination components are no longer needed and can be deleted. The Data Flow Task is ready to import data from a flat file to the defined table.
The imported data is in a text format in the import destination table (ImportText). Transferring the data to the final table structure (ImportFinal) is a typical SSIS transformation activity and not covered here.
Next Steps
Now that you have easy access to the data, the next step is cleaning and transforming the raw text data. Here are some helpful tips on making that happen.
- Understanding Column Properties for a SQL Server Table
- Create SQL Server temporary tables with the correct collation
- New Data Type Conversion Functions in SQL Server 2012

Ron has 30+ years developing and leading software projects. His background runs the gamut from Lisa/Macintosh development (Objective C, Object Pascal) to Windows development (C#, .NET, VBA, Delphi, Java), from data communications (MQ) to data management (Oracle, SQL, MySQL, JDBC). Most of his efforts were marketing applications for an international audience. His most entertaining project was developing software on an Apple II to analyze the effects of a machine smoking cigarettes.