By: Daniel Calbimonte | Comments (3) | Related: More > Integration Services Development
Problem
MariaDB is a derivative of MySQL with the intent to keep this open source as well as compatible with MySQL. Sometimes it is necessary to import objects and data from MariaDB to SQL Server. In this example, we will work through the steps in SQL Server Integration Services (SSIS) to import the table structure and the data.
Solution
Here are the basic requirements to build the solution for this tip:
- SQL Server 2005 or later. In this tip, I am using SQL Server 2014.
- MariaDB should be installed. In this tip, I installed MariaDB and SQL Server on the same machine. You can find the MariaDB installer here.
- In the MariaDB installer, you will find the HeidiSQL which is a great tool to visually create database objects and administer the MariaDB database.
- An ODBC connector for MariaDB is necessary. You can get it here.
- SQL Server Data Tools (SSDT) or Business Intelligence Development Studio (BIDS) is installed.
MariaDB Object and Data Import with SQL Server Integration Services
In order to start, we are going to start the MariaDB database. This section is for newbies to the MariaDB world. I am assuming that you just installed MariaDB and HeidiSQL, but you have not used it.
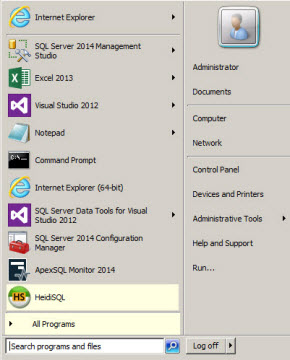
- Start HeidiSQL.
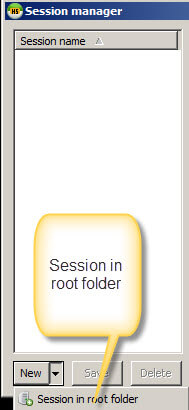
- In the Session manager, select the option new session in root folder.
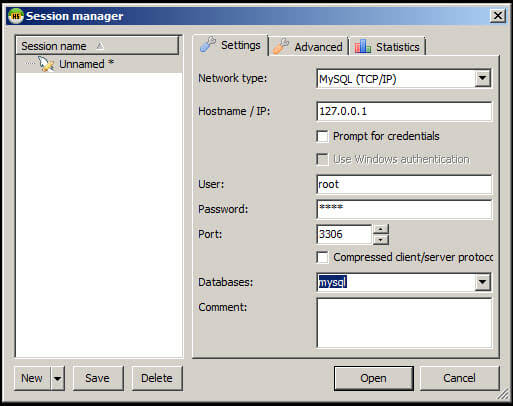
- Specify the root password (when you install MariaDB you will be asked the
password). If it is a local machine, it is OK to use the Hostname 127.0.0.1.
The port by default is 3306. In this example, we will work with the mysql database.
Press the Open Window.
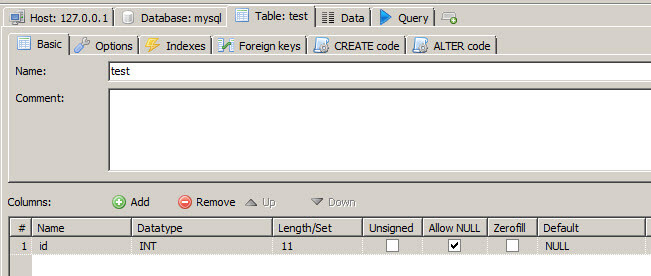
- In the mysql database, right click and select Create new>Table option.

- We will create a table named test and add a column named id.
- Move to the Data Tab and add some rows of data to the table.
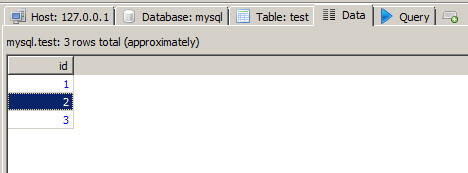
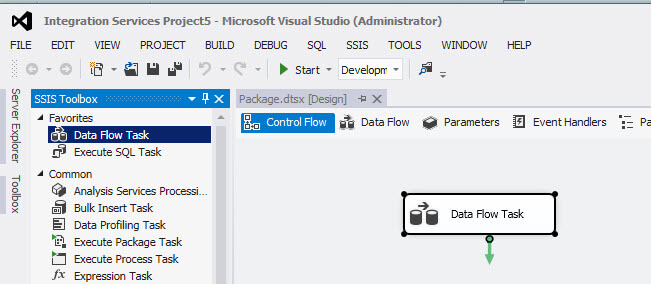
- Once you have created a MariaDB table with data, open SQL Server Data
Tools (SSDT) and create a new SQL Server Integration Project. Drag and drop
the Data Flow Task to the design pane.
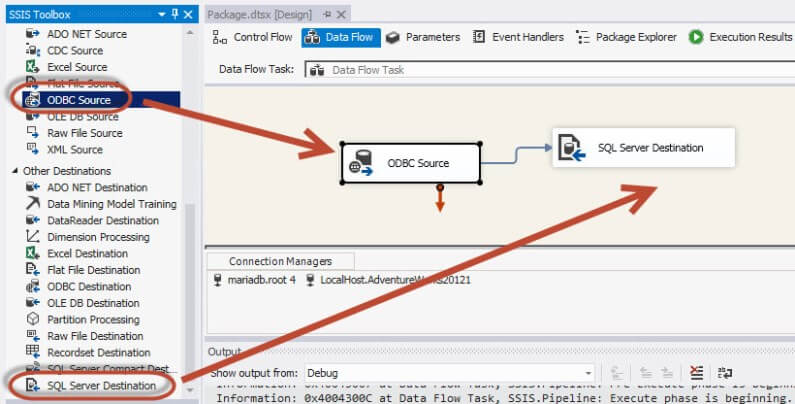
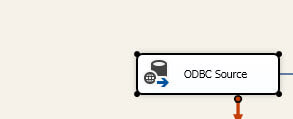
- Double click the Data flow task and drag and drop the ODBC Source and the
SQL Server Destination join both tasks with a precedence constraint.
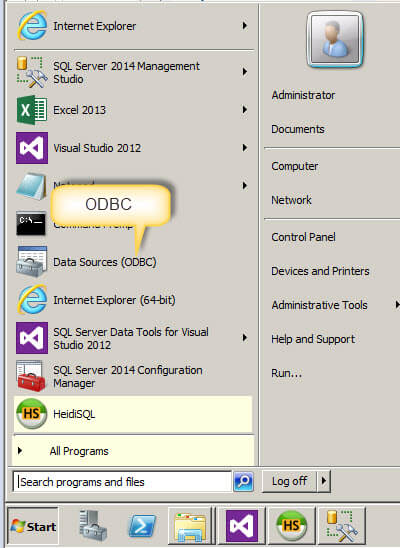
- Before continuing, we need to configure the ODBC for the MariaDB database.
Open the Data Sources (ODBC) on your Windows Server.
- Press the Add Button to add a User Data Source.
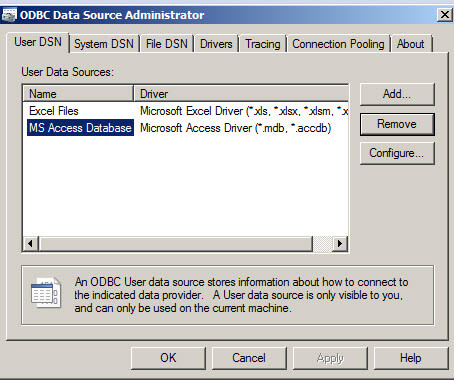
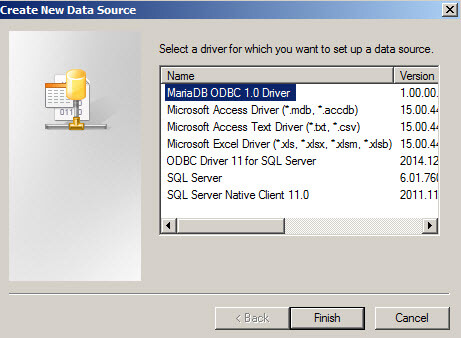
- Select the Maria ODBC 1.0
Driver and press Finish.
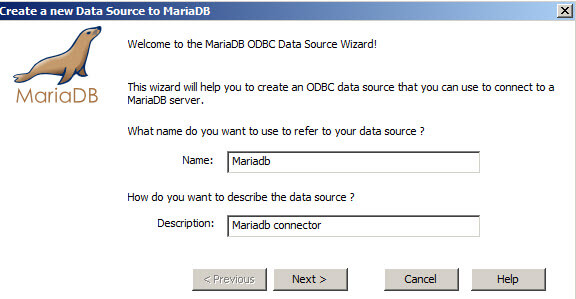
- Add a name to the connection and optionally you can add a description.
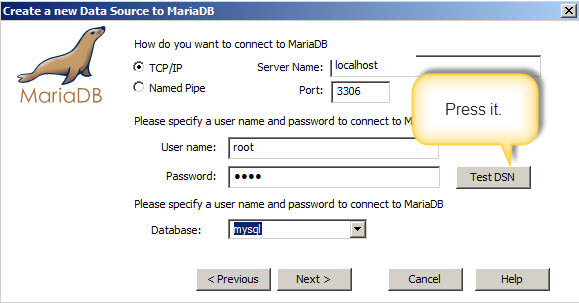
- In this example, we will connect using the TCP/IP protocol, the default
port (3306), the root user with the respective password. The test DSN button
is necessary to activate the Database drop down box with the databases available.
- You can specify the initial configurations of the connection and press Next.
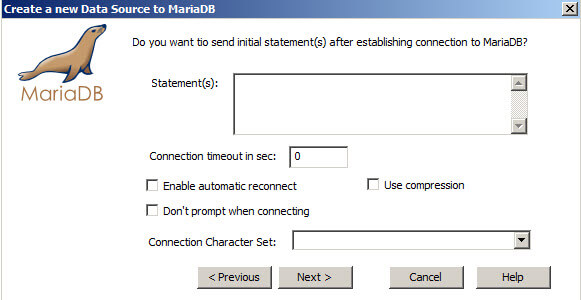
- You can specify the Miscellaneous Options of your preference and press Next.
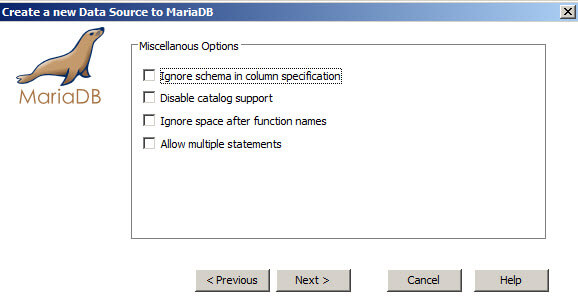
- The same for the cursor options. Once you have checked the options, press
Finish.
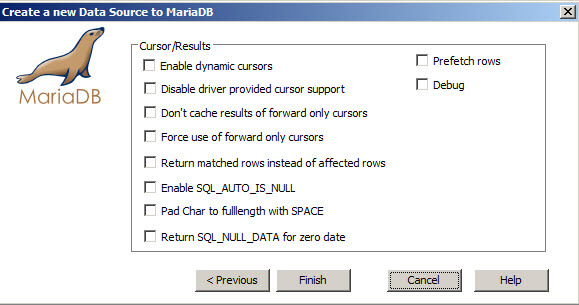
- Now you have just added a new User Data Source. Press OK.
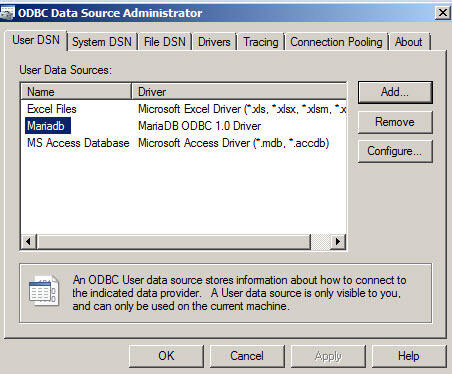
- Return to the SSIS project created on step 9 and double click on the ODBC
Source Task.
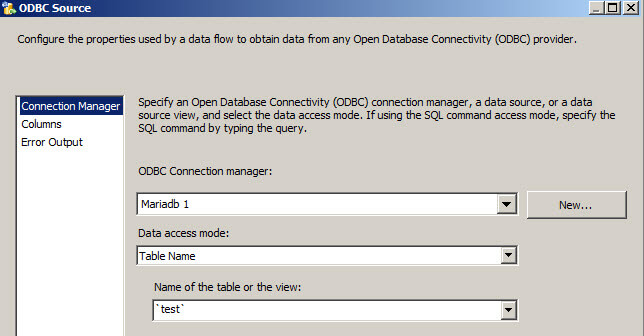
- Press the New button at the right of the ODBC Connection manager combobox.
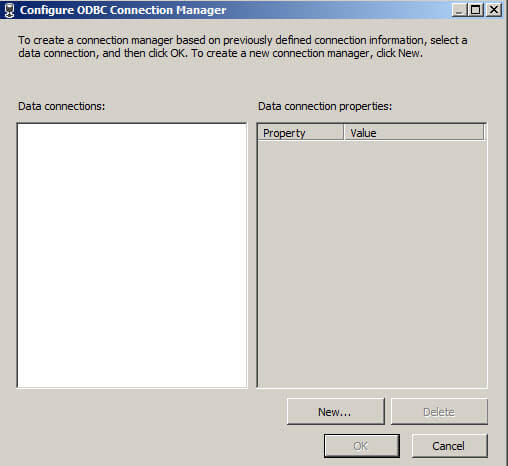
- In the Configure ODBC Connection Manager, press New.
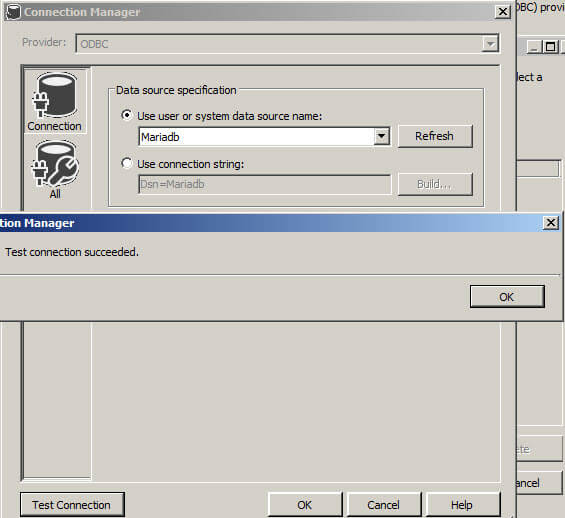
- Select the Mariadb connection created on steps 10-18. Optionally, you can
test the connection with the test connection button and you will receive the
Successful message.
- Select a table name. In this example, the test table created on steps 5-7.
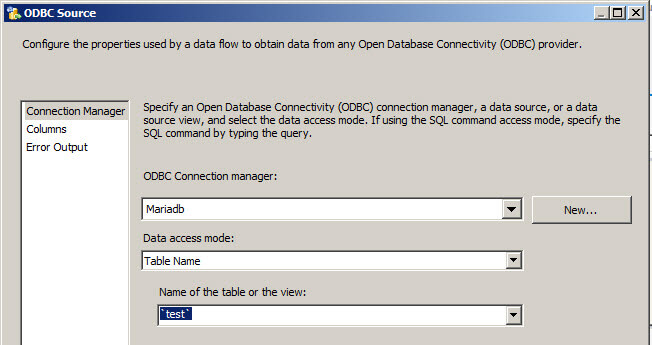
- Now, click on the SQL Server Destination task.
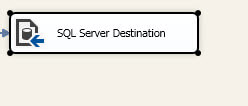
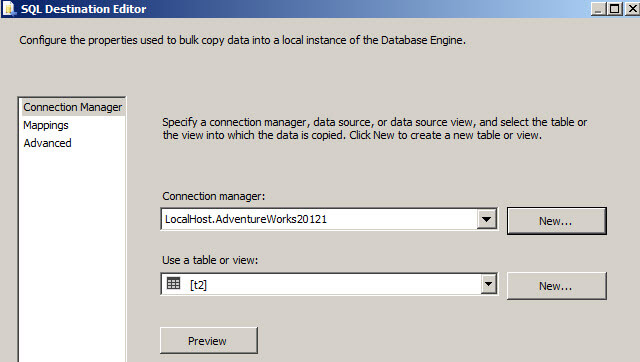
- Press the New button at the right of the Connection Manager.
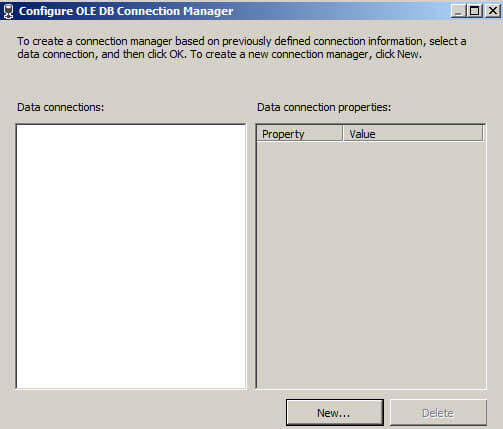
- Press the new button.
- Select the name of the server and database where you want to store the imported
table from the MariaDB database. In this example, we will select the AdventureWorks
database.
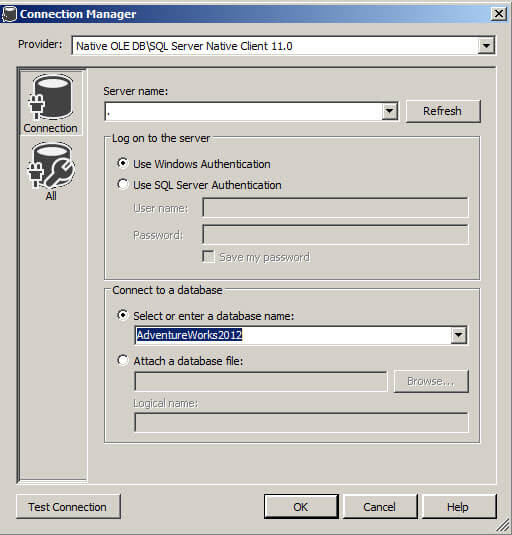
- In the "Use a table or view section", press the new button.
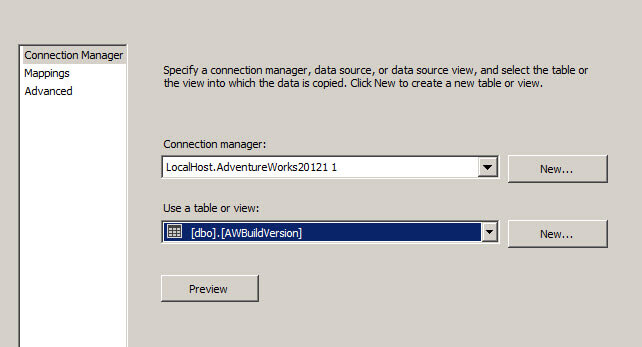
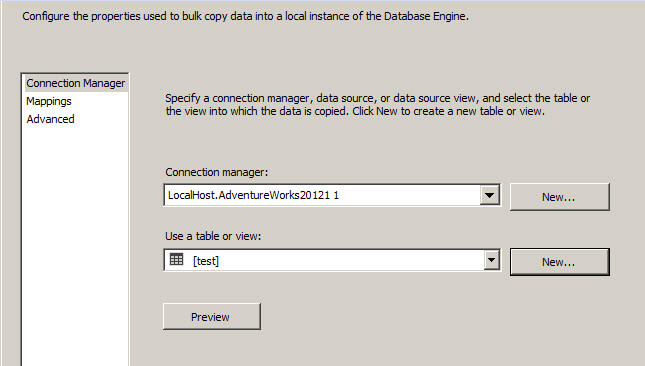
- Modify the table name to be test. The text should be like this:

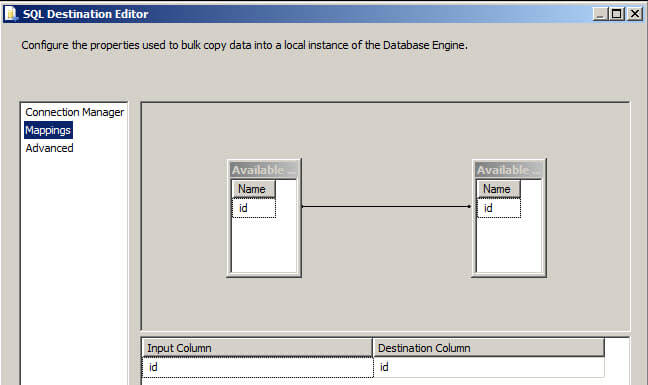
- Now press the Mappings page.
- Make sure that the id columns from the MariaDB and the new table in SQL
Server are mapped.
- Press Start in the SSDT to import the data.
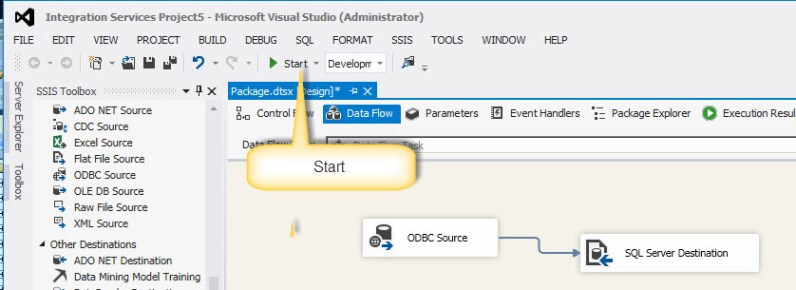
- As you can see, 3 rows were imported. The rows imported are the three rows
created in step 7.

- To verify the table, open the SSMS and in the database selected on step
30, verify the data and compare the results.
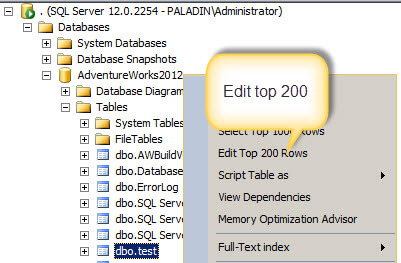
- As you can see, the data was imported successfully from MariaDB to SQL Server.
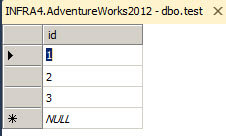
As you can see, you can import tables or views from MariaDB to SQL Server using SSIS. The ODBC Connector was still in beta version when this tip was published, so you may have some problems importing varchars and some special characters, but the MariaDB developers are working on these issues.
Next Steps
For more information, refer to the following links:About the author
 Daniel Calbimonte is a Microsoft SQL Server MVP, Microsoft Certified Trainer and 6-time Microsoft Certified IT Professional. Daniel started his career in 2001 and has worked with SQL Server 6.0 to 2022. Daniel is a DBA as well as specializes in Business Intelligence (SSIS, SSAS, SSRS) technologies.
This author pledges the content of this article is based on professional experience and not AI generated.
View all my tips


