Problem
Some companies have been deploying tier one mission critical applications and databases on Linux because there has been no commercial alternative. The up front initial investment of zero dollars for open source may seem attractive; However, the total cost of ownership includes the number of hours the company staff uses to maintain such systems. This total number can add up quickly. Not to mention that many of these open source databases rank number one in terms of vulnerabilities.
In this tip we look at SQL Server vNext for Linux.
Solution
Microsoft has announced the public preview of SQL Server vNext for Linux and Windows at the Connect() conference last November 2016. Read the ZDNet article by Mary Jo Foley for a summary. Right now, the Community Technology Preview (CTP 1) or public preview is available for developers and early adopters to experiment with.
This preview supports statements in the Microsoft Transact SQL language which are operating system independent. Operating system dependent features such as full text search, replication, stretch db, and polybase are not available with this release. Another article by Mary Jo Foley tells how Microsoft ported the database engine over to Linux using a Platform Abstract Layer derived from project DrawBridge. Over the next few months, the missing core engine features will be added in subsequent releases. The final release date or general availability for SQL Server vNext is sometime in 2017.
Why use the Microsoft SQL Server engine for Linux?
Microsoft has been named the leader in the Gartner Groups Magic Quadrant for Operational Database Management for the last two years. This accolade has been given for the completeness of vision and the ability to execute. Features such as always encrypted, in memory OLTP, polybase and real time operational analytics set the engine apart from both commercial and open source competitors. Last but not least, the Microsoft has had the most secure database engine for almost a decade.
Business Problem
Our boss has asked us to deploy the public preview version of SQL Server on Red Hat Linux using an Azure Virtual Machine.
First, we need to deploy a image of Red Hat Linux using our Azure subscription. We can always use a plain user name and password. However, connections on the internet are not secure. A better scenario is to use the SSH protocol with a public and private key to ensure a secure shell connection.
Second, we need to download and install both the Microsoft SQL Server database engine and client tools. Without the engine, the end user can not create databases. The client tools allow for connectivity of programs as well as local querying. Also, we will need to punch a hole in our firewall to allow for incoming connections.
Last but not least, we need to test the shiny new database engine. We can do this by trying the following: executing a TSQL script for data processing, restore a known database from a backup and execute standard code using a known programming interface. Also, our boss wants us to explain what lessons we learnt during this experiment.
Cryptography Keys
Before we can create a Linux virtual machine in Azure, we need to generate a pair of cryptography keys. The public key will be used to deploy the Linux virtual machine and the private key will be used to securely connect to the server. The set of freeware tools from the PuTTY organization will come in handy for this task. In particular, we are going to use the puttygen executable to generate a SSH-2 RSA key. Click the generate button to start the process. The application uses random mouse movements from the user to generate the pair of keys.

The application will tell you when the keys are ready. I ended up saving both the public and private key in a sub-directory named keys. The image below is a screen shot from Windows Explorer showing the two aptly named files.
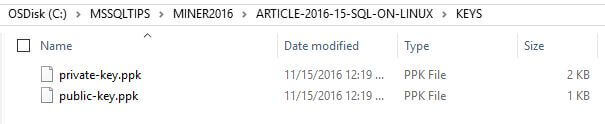
Both the public and private key files are stored as plain old ASCII text. I ended up opening the public key with the notepad++ application to examine the contents. We will need to supply the contents of this file when creating the Linux virtual machine. The next step is to log into the Azure Portal.

Azure Virtual Machines
This tip assumes you have an active Azure Subscription with money to spend and you are familiar with the Azure portal. Our first task is to create an Azure Virtual Machine using the Visual Studio Enterprise subscription that comes with MSDN. Each step listed below is part of the total solution. From the dashboard, just select the Virtual Machines (VM) menu option which uses the Azure Resource Manager (ARM) deployment model. Do not select the Virtual Machines (classic) menu option which uses the older Azure Service Manager (ASM) deployment model. You should now be on the following input screen. Azure documentation uses the term blade(s) as nomenclature for screen(s).

Click the add button at the top to advance to the Gallery screen. Type “red hat enterprise” in the search (filter) box. You should end up with the resulting image below. The Azure documentation for installing SQL Server for Linux assumes version 7.3 of the operating system. However, the prebuilt image in the gallery uses version 7.2. Choosing either one is fine for the deployment.

For some reason, the screen prompts you to confirm this is an ARM deployment model. However, there are some useful links on the screen such as Azure pricing details by product. Click the create button to continue.

Deploying an Azure Virtual Machine
There are four easy steps (screens) that you need to fill in before you can create (deploy) the Red Hat Linux virtual machine (VM) image.
- Basics – configure basic settings.
- Size – choose virtual machine size.
- Settings – configure additional settings.
- Summary – confirm your choices before deployment.
Basics Blade
The basics screen asks for key information about the virtual machine. Listed below are the reasons behind my choices.
The server name should be dictated by a naming convention such as purpose and operating system. In my case, I choose to name the server sql4linux. Your company may already have its own naming conventions that you should follow. Ask around before using mine. Since I wanted the I/O sub system to be fast, I choose to use solid state drives (SSD) as the disk type.
One of my naming conventions for users is to use the initial of the first name plus the full last name. The default user will be called jminer by following these rules. It was previously decided to not use plain text for a password. Choose the SSH public key as the authentication type. We need to copy the ASCII text from the saved public key we previously generated and paste it into the text box.
If you have multiple azure subscriptions, choose the account you want the consumption billed to. In our case, we will be using the Visual Studio Enterprise subscription. The resource group named rg4linux was created to group all the objects for the Linux virtual machine in one logical unit. Deleting this group from the Azure portal removes all objects associated with the machine. To finish our decisions, the location of the virtual machine should be close to the majority of the users. Since I live in New England, I choose to use East US 2 as the location.
The image below shows the above choices that I made. Click the okay button to continue to the next screen.

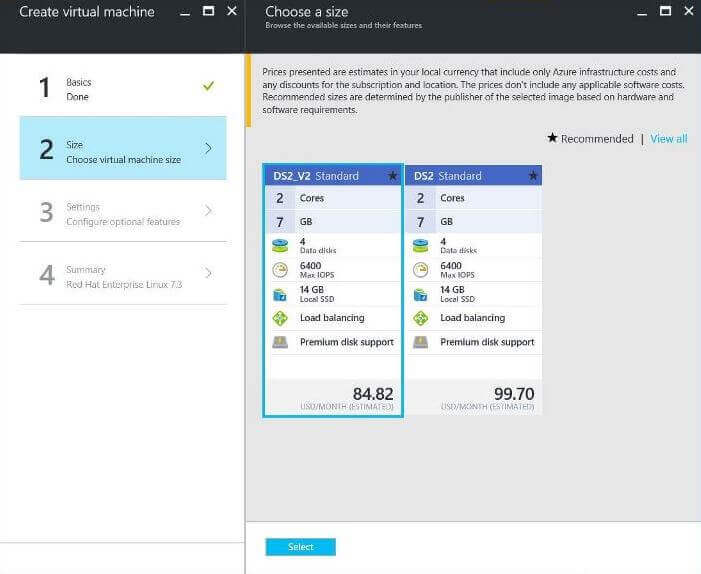
Size Blade
The second screen asks you to select a machine series and machine size. Currently, there are six different series at this time. Four of the classes of virtual machines are equipped with solid state drives. In short, there are 10 different possible size categories to choose from. Please see the table below for a summary. Additional information can be found in the Azure documentation.
Virtual Machine | Description |
|---|---|
| Series | Can be deployed on a variety of hardware types and processors |
| Av2 Series | Second generation hardware for this series. |
| D Series | designed for higher compute power and temporary disk performance |
| Dv2 Series | Second generation hardware for this series. |
| F Series | Same CPU performance as Dv2 Series at lower per-hour cost. |
| G Series | Offers most memory and runs on Intel Xeon E5 V3 family processors |
| DS, DSv2, FS, & GS Series | Same as series about with solid state disks. |
The current requirement for the SQL Server engine on Linux is to have at least 3.5 GB of memory available for this system process. The default choices given below satisfy this requirement. I ended up choosing the lower cost virtual machine since this is just a experiment (test).
Settings Blade
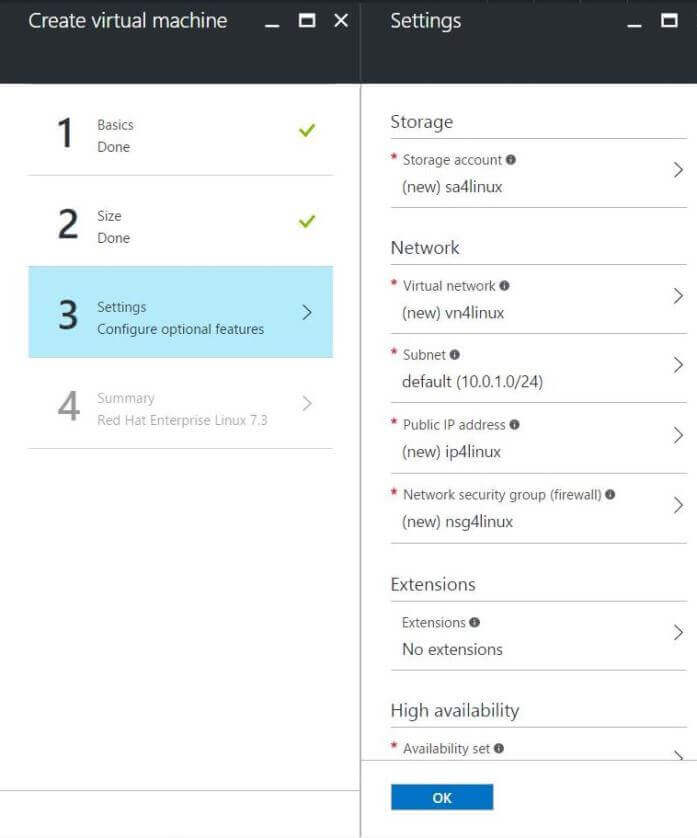
The third screen goes over network and storage choices. The network settings come in to play when you have a solution involving multiple servers and you want to have a virtual network between them. Like anything in Azure, the virtual machine image has to be stored on disk. The Red Hat virtual machine is just a VHD file. This is where the storage account comes in. It will have a container named vhds that will contain this image.
The only modifications that I made to this screen is to rename each object using my naming convention. This comes in handy when you are looking at a ton of objects. In fact, liked objects will be grouped by their prefix.
Summary Blade
The fourth screen asks you to verify your choices. This is your chance to go back and make changes. If you are satisfied with the selections, choose the okay button to start deployment.

Refer to the Azure documentation on deploying Linux Virtual Machines if you have any questions.
Deployment Validation
The process to create the virtual machine depends on how busy the data center is. Usually, the image will be ready in a few minutes. I choose to pin the server to my dashboard for easy access. This will show me the status of the server. Right now, it is deploying the image.

The virtual machine is ready to use when the status changes to running. We will want to double click the box at this time to get the system details.

The overview page has exactly what we want. We need to know the public IP address of the Linux server before we can establish a secure shell connection. From the image below, we will be connecting to address 40.84.28.32.

Establishing A Connection
Our next step is to log into the newly created Red Hat Linux server. Again, the set of freeware tools from the PuTTY organization will come in handy for this task. In particular, we are going to use the putty executable to establish a secure connection using standard terminal emulation. To setup a profile, enter the host ip, 40.84.28.32, for the server. Next choose SSH as the connection type. The last step is to save this profile as the name of the server, sql4linux.

Now we have a saved profile for our server. However, the private key is missing from the equation. Browse through the category choices on the left until you reach the Connection > SSH > Auth node in the tree. Under this node, there will be a screen to choose the private ssh key. Use the browse button to search for this file using a open file dialog box. Do not forget to resave the profile with this updated information.

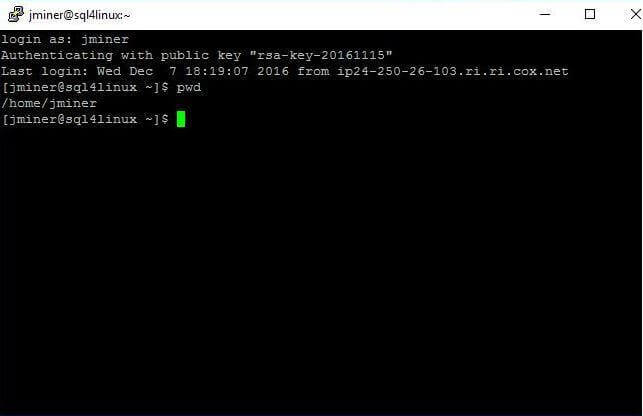
To establish a connection, load the sql4linux profile and click the open button. The first prompt from the operating system is the name of the user. Type jminer as the user name (login as) and hit the enter key. The default command shell is bash for Red Hat Linux. To be effective with Linux, you will have to learn some basic commands. For instance, the pwd command shows the current working directory as the users home directory.
In this section, we learnt how to use the putty executable to create a profile that can be used to connect securely to our Red Hat Server. The next step is to download and install the Microsoft SQL Server engine.
Download, Install & Configure Database Engine
Listed below are the Linux commands needed to download, install and configure the database engine. This task is as exciting as watching paint dry. However, if you skip a step in the painting process, you will end up with a mess on your hands. The same can be said with this process. Each step has been given a descriptive comment. Following the code are screen shots showing the results of each command. If you still get lost, please refer to the online Azure documentation.
#
#  Download, install & configure SQL Server Engine
#
# Step 1 - Enter superuser mode
sudo su
# Step 2 - Download package
curl https://packages.microsoft.com/config/rhel/7/mssql-server.repo
    > /etc/yum.repos.d/mssql-server.repo
# Step 3 - Exit superuser mode
Exit
# Step 4 - Install package
sudo yum install -y mssql-server
# Step 5 - Configure services
sudo /opt/mssql/bin/sqlservr-setup
# Step 6 - Verify services
systemctl status mssql-server
# Step 7 - Configure local firewall
sudo firewall-cmd --zone=public --add-port=1433/tcp --permanent
sudo firewall-cmd --reload
The first three steps are used to download and save the database engine package.
The Linux command shell is kind of like PowerShell when it comes to security. If you do not run the PowerShell ISE as Administrator, you might not have rights to all system directories. The sudo su command tells the operating system to open a nested command shell that has the privileges of the superuser or root account. The command prompt tells you which user is active. The dollar sign ($) is for regular users and the pound sign (#) is for the superusers. The curl command pulls the package from a web server and saves it in a directory that the installer knows about. The exit command terminates the nested command shell.
The image below shows a successful execution of all three steps.

The fourth step uses the yum command to install the database package. You should see a bunch of messages scroll down the screen. At the end of the process, a complete message indicates a successful install.

The fifth step executes the MS SQL Server setup program. You should note that the database engine is installed in the /opt/mssql directory. Right now, we do not have a password for the sa account. Also, we want to start the database service everytime the operating system is booted. Be careful when entering the password since cut and paste do not work. The image below shows a completed configuration.

In the sixth step, we want to verify that the SQL Server engine is indeed running. The systemctl command returns the status of the mssql-server service. The image below shows that it is loaded and enabled.

Every local install of MS SQL Server on windows involves opening a firewall port tcp/ip 1433 for applications to communicate with the database engine. Linux is no different in this case. The seventh and last step is to call the firewall-cmd with the correct parameters. The first call adds the new rule to the configuration file and the second call reloads the rules. If we skip this step, we will not be able to communicate remotely with the database server.

At the end of this section, we now have a Red Hat Linux operating system with a Microsoft SQL Server database engine. However, we do not have remote client connectivity or local tools installed. In the next section, we will complete the build by installing these required components.
Download & Install Server Tools
Listed below are the Linux commands needed to download and install the Microsoft SQL Server tools for Linux. The tools package is composed of the ODBC client drivers and two command line utilities (bcp & sqlcmd). Again, each step has been given a descriptive comment. Following the code are screen shots showing the results of each command. If you still get lost, please refer to the online Azure documentation.
#
#  Download & Install Server Tools
#
# Step 1 - Enter superuser mode
sudo su
# Step 2 - Download package
curl https://packages.microsoft.com/config/rhel/7/prod.repo
    > /etc/yum.repos.d/msprod.repo
# Step 3 - Exit superuser mode
Exit
# Step 4 - Update existing packages
sudo yum update
# Step 5 - Install two packages
sudo yum install mssql-tools unixODBC-utf16-devel
The first three steps are used to download and save the database tools package.
The sudo su command tells the operating system to open a nested command shell that has the privileges of the superuser or root account. The curl command pulls the package from a web server and saves it in a directory that the installer knows about. The exit command terminates the nested command shell. Your terminal session should look like the image below if you execute the commands correctly.

The fourth and fifth steps use the yum command to update and install the database tools. During my experimentation, I noticed the update command may produce errors since it reviews all packages that have been downloaded. A better command line call is to specify the two packages that we need. You will be prompted to okay the install and accept the license agreement. Make sure you type the required key strokes in the right case since Linux is a case sensitive operating system!

Investigating the Completed Install
Before we go any further, let’s introduce a couple of unix commands that are great for navigating the file system. The ls unix command lists the contents of the working directory. This command not only shows files but also directories. The cd unix command changes the working directory. Either specify an existing directory name, the parent directory “..” or the root directory “/”.
We now have a Red Hat Linux operating system with a fully completed Microsoft SQL Server install.
How do we know that everything is working fine?
That is where testing and investigating comes in. The image below shows you the output of each directory when drilling down to the client tools (bcp & sqlcmd). You should note that the database tools are installed in the /opt/mssql-tools/bin directory. There is a symbolic link for each executable so that you do not have to supply all the version information during invocation.

I am assuming you know how to use the sqlcmd utility. You will need the password of the sa account that was created during the setup. One simple test case (query) is to list the id and name of all the databases. Since we do not have any user databases, this command will return just system databases.

To round out our testing with a local secure connection, we want to be familiar with the location of the database files as well as error logs and trace files. The image below shows that both the data and log directories reside in the /var/opt/mssql path. It is not surprising that the data and log files for the master, model, msdb and tempdb databases exist in the data directory. This is where all new user defined database files will be saved with this release. I am hoping that you will be able to use any path in the final release of the product.

Execute Data Processing Script
One of the three tests that our boss wanted executed is sample data processing using a Transact SQL script. Let’s get started on this test.
What will happen if we try to connect to our database server using SSMS on our laptop?
It will fail. A guest (Azure VM) machine is running on some type of host (Azure Portal) server. The details behind the implementation are abstracted unlike the hyper-visor running on Windows 2016 Server in which you have full control. Security is a major concern that Microsoft understands. Therefore, an additional firewall rule has to be created at the network security group level.
The screen shot below shows a new firewall rule that allows traffic on port tcp/ip 1433.

There is a new code branch of the SQL Server Management System (SSMS) for the next version (vNext) of the database engine. This branch will be able to work with both the Windows and Linux engines. I suggest you read this article and download and install the last version. The image below shows us logging into our database on Linux. You will need both the ip address of the server and the sa password to complete this task.

How can a database administrator tell if server is installed on Windows or Linux?
We can easily answer this question by looking at the properties of the server. In the object explorer in SSMS, right click the top server node and click properties. The screen shot below shows our server running on Red Hat Enterprise Linux Server (7.3). It is nice to see the version of the database engine has been increased to 14.0.1.246. However, the root install directory of the database engine does not make sense. It should be a Linux path not a Windows one.
To get this public preview version out the door, certain file system paths had to be defaulted. Thus, even though the binaries are in the /opt/mssql/bin directory, the server properties window states they are in the c:\ directory.

For our data processing test, I am going to leverage the MATH database. Look at my recent article in which I calculate primes numbers. Each object is explained in detail under the “user defined database” section.
Enclosed is the script that can be used to create the database schema. The only change I did to the Linux versus Windows script is to change the path. See code snippet below. Again, the actual path does not make sense since it should be using Linux standards. However, this is what we have to work with in this release. I am looking forward to the next version in which database file pathing uses Linux standards. Also, the ability to store the files in any system directory, as long as the mssql system account has access, would be real nice.
CREATE DATABASE MATH ON PRIMARY
(
    NAME = N'MATH_PRI_DAT',
    FILENAME = N'C:\var\opt\mssql\data\MATH.MDF',
    SIZE = 64MB,
    FILEGROWTH = 8MB
)
LOG ON
(
    NAME = N'MATH_ALL_LOG',
    FILENAME = N'C:\var\opt\mssql\data\MATH.LDF',
    SIZE = 32MB,
    FILEGROWTH = 8MB
)
GO
The image below shows the database schema for the MATH database being created by the TSQL script.

I broke the data processing statements into a separate script. Enclosed is the script that can be used to find the prime numbers in batches of 250,000 new candidates. At the end of the script, it reports the prime numbers found within the total numbers searched.
The output below is from executing the script one time. Another execution will change the results.

To summarize our findings, most databases that use Transact SQL that is operating system independent will require only minor file path changes to get them working with the Linux database engine.
Restore A Test Database
One of the three tests that our boss wanted executed is to restore a sample database. Let’s get started on this test. I have a backup of the Contoso Retail database. This is a sample database provided by Microsoft and can be downloaded here. The first step in the restore process is to stage the backup on the target server.
How can we securely copy a file from my Windows Laptop to the Red Hat Linux server?
I am going to turn to open source tools again. The WinSCP application can transfers files between two systems using secure ftp. The setup of a secure connection profile for this application is very similar to putty application. I will leave the details of this setup for you to learn. The image below shows us transferring the backup file from Windows to Linux.

I am assuming you have a connection to the database using SQL Server Management Studio. Right click the databases node in the object explorer. Launch the restore database wizard. Choose a file device as the source of the backup and browse for the uploaded file. Click OK to start the process. If you are not a database administrator and are curious about every step, see this article on msdn for full details. The screen shot below shows our backup is complete.

If you right click the database node in the object explorer and hit refresh, the restored ContosoRetailDW database will appear.

It is always wise to run a test query against the restored database. The image below shows a simple query returning data from a view.

To sum up this section, the hardest part of restoring a database is copying over a backup from another system.
Execute Standard Code
There are millions of lines of code executing against SQL Server databases every day. It is important that all this code will still run on this newest version of the database engine for Linux. One of the three tests that our boss wanted executed is to execute standard code against a sample database.
To solve this problem, I am going to leverage the PowerShell code that I created in a prior article. Two custom cmdlets that I am going to leverage use the .Net Client library to communicate with SQL Server. Please re-read the sections on “Get Data Set” and “Execute Non Query” for details.
The PowerShell snippet below loads and executes a TSQL script to return information about our database server.
#
# Step 1 - Set path for scripts & images
#
# Set the path
Set-Location "C:\MSSQLTIPS\MINER2016\ARTICLE-2016-15-SQL-ON-LINUX\TSQL"

#
# Step 2 - Show the engine version information
#
# Set connection string
[string]$ConnStr = 'Server=40.84.56.146;Database=MATH;Uid=sa;Pwd=MS#tips$2016;'
# Grab the script
[string]$SqlQry = Get-Content -Delimiter "`n" "get-version-info.sql"
# Show the data
Get-DataSet-SqlDb -ConnStr $ConnStr -SqlQry $SqlQry
The image below shows a successful connection to the Red Hat database server.

Let’s trying creating a view named VW_SUMMARY_INFO in the MATH database. The purpose of this view is to return the prime numbers found within the total numbers searched. The PowerShell snippet below loads and executes the required TSQL script. This script uses dynamic TSQL since I wanted to delete any existing view before creating a new one.
#
# Step 3 - Create summary view
#
# Set connection string
[string]$ConnStr = 'Server=40.84.56.146;Database=MATH;Uid=sa;Pwd=MS#tips$2016;'
# Grab the script
[string]$SqlQry = Get-Content -Delimiter "`n" "create-summary-view.sql"
# Run the script
Exec-NonQuery-SqlDb -ConnStr $ConnStr -SqlQry $SqlQry
Last but not least, we want to retrieve the rows of information from the view by executing a SELECT query.
#
# Step 4 - Show the information from the view
#
# Set connection string
[string]$ConnStr = 'Server=40.84.56.146;Database=MATH;Uid=sa;Pwd=MS#tips$2016;'
# Grab the script
[string]$SqlQry = 'select * from VW_SUMMARY_INFO'
# Show the data
Clear-Host
Get-DataSet-SqlDb -ConnStr $ConnStr -SqlQry $SqlQry
The image below shows the output shown in the PowerShell Integrated Scripting Environment (ISE). The good thing is that these number match the prior output from SQL Server Management Studio (SSMS).

To recap this session, previously written code executes as expected against the SQL Server database engine on Linux. I want to stress again that this is operating system independent (TSQL) code. Support for dependent operating system code will be forthcoming in the months ahead.
Summary
It is a very exciting time to be a Microsoft SQL Server professional. At the Connect() conference in November 2016, Microsoft released the public preview of SQL Server on Linux. This means that Microsoft will be releasing its flagship database product on the Linux operating system in the future.
Today, we execute three main tasks. First, we deployed and configured a image of Red Hat Linux using our Azure subscription. Second, we downloaded and installed both the Microsoft SQL Server database engine and client tools on this image. Third, tested our new database engine by trying the following: executing a TSQL script for data processing, restore a known database from a backup and execute standard code using a known programming interface.
I did not go over the fact that both the Red Hat and Ubuntu versions of Linux are now supported. Also, there is a docker image that can be deployed to any system that supports containers. Containers are supported by Linux, Mac and Windows operating systems. Keep an eye on the documentation for new additions and updates.
In summary, alot more work has to be done so that the Linux version of the database engine has feature parity with the Windows version.
I look forward to the future in which the database engine and tools recognizing Linux file system conventions. There might be some changes to support features dependent on the operating system. Only the product team has these details. However, it is publicly known that Microsoft has chosen to go with open source components like Corosync and Pacemaker for clustering. If your companies standard is to use clustering for High Availability (HA), you might have some learning to do if you are not a Linux person. In short, the future is bright for Microsoft SQL Server professionals.
Next Steps
- Keep up to date with the release candidates for SQL Server on Linux.
- Wait for my next article on newly release features.
- Check out these other SQL Server on Linux tips

John Miner is a Senior Data Architect at Insight Digital Innovation helping corporations solve their business needs with various data platform solutions.
He has over thirty years of data processing experience, and his architecture expertise encompasses all phases of the software project life cycle, including design, development, implementation, and maintenance of systems.
His credentials include undergraduate and graduate degrees in Computer Science from the University of Rhode Island. Also, he has earned certificates from Microsoft for Database Administration (MCDBA), System Administration (MCSA), Data Management & Analytics (MCSE), Data Science (MPP), Databricks Certified, and Fabric Certified.
John has been recognized with the Microsoft MVP award nine times for his outstanding contributions to the Data Platform community.
When he is not busy talking to local user groups or writing blog entries on new technology, he spends time with his wife and daughter enjoying outdoor activities. Some of John’s hobbies include wood working projects, crafting a good beer and playing a game of chess.
- MSSQLTips Awards: Author of the Year – 2019, 2022, 2023 | Champion (100+tips) – 2023
