By: Aaron Nelson | Comments (21) | Related: > Reporting Services Administration
Problem
You need to deploy a large number of reports to an instance of SQL Server Reporting Services (SSRS), be it a new install of SSRS or you just want to automate deploying updates of reports you have developed. The old command line tool for SSRS (RS.exe) was a pain to learn, let alone use. In this tip we cover new PowerShell commands that can simplify this process.
Solution
Back in November 2016 the SSRS team announced the availability of 28 new PowerShell commands for working with SSRS (in Native Mode) available in the PowerShell Gallery and in GitHub. These commands use the SSRS API so a lot of the commands will work with SSRS instances as old as SQL Server 2008 R2, however some of the commands like Register-PowerBI, will only work with a SSRS 2016+ instance.
To download and install these tools from the PowerShell gallery is very simple, just open up PowerShell running in Administrator mode and run this command: Install-Module -Name ReportingServicesTools. If you are running an earlier version of PowerShell (4.0-) you can download the module from the SSRS team's GitHub site just run this command: Invoke-Expression (Invoke-WebRequest https://aka.ms/rstools).
Install-Module -Name ReportingServicesTools

Invoke-Expression (Invoke-WebRequest https://aka.ms/rstools)
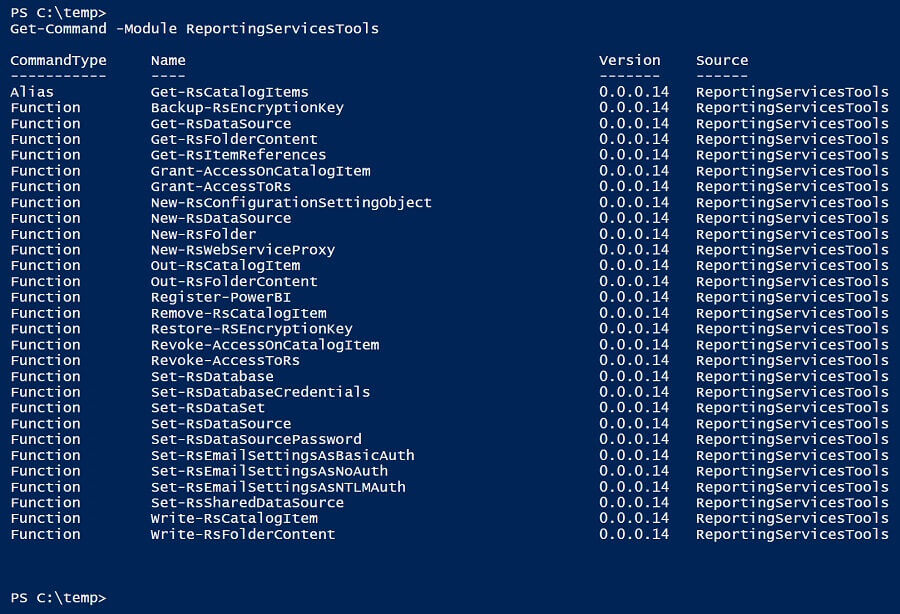
Once installed, you can find a full list of the commands available by running:
Get-Command -Module ReportingServicesTools
The commands can help you administer SSRS, but more importantly they can help you speed up your development lifecycle!
Deploying an Entire Folder Report Items with Write-RsFolderContent
My favorite command out of the entire bunch is Write-RsFolderContent which will let you take an entire folder full of SSRS Reports, Datasets and Data Sources on your machine and deploy them to an SSRS server. Sound too easy? Let's have a look!
Tiger ( blog | twitter ) is the customer success team at Microsoft that focuses on learning customer workloads running on SQL Server, providing guidance to use SQL Server to solve their business challenges and integrate that feedback to enhance the product. The MSSQL Tiger Team has made their SQL Server Performance Dashboard Reports available on GitHub and it is a great example for using this command. You can download the zip file with all of the reports by clicking here, and then unzip them. For this example, I have unzipped the files in a folder called 'MSSQLTips' at the root of my C:\ drive.
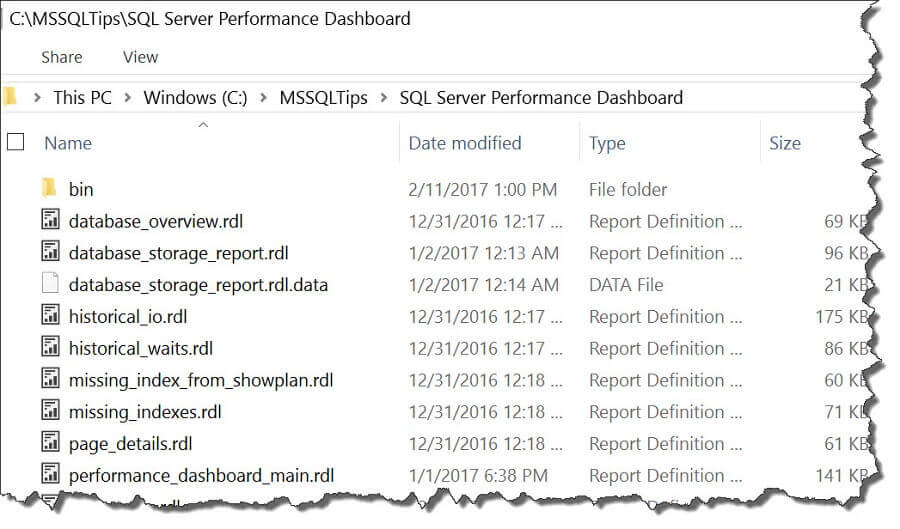
Now, instead of deploying all the reports in that folder to the root of my SSRS instance, I'd like to create a folder at the root, and place the reports under that folder. To do that, we'll use the New-RsFolder command.
New-RsFolder -ReportServerUri http://localhost/ReportServer -Path / -Name MSSQLTips -Verbose
After running that command, you should have an empty folder like below.
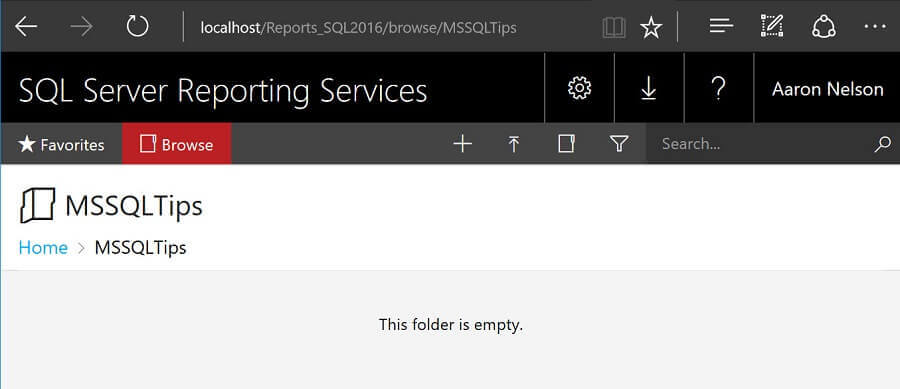
Note: The path to my SSRS instance will be slightly different from the demo code since I am using a named instance of SSRS.
Once my folder is created in SSRS, I'm now ready to deploy all 22 reports that come with the SQL Server Performance Dashboard. For that we'll use Write-RsFolderContent and we need to pass it 3 pieces of information to the following parameters:
- -ReportServerUri (the location of our SSRS instance),
- -Path (the folder with all the reports),
- -Destination (the name of the SSRS folder we want the reports placed under).
Write-RsFolderContent -ReportServerUri http://localhost/ReportServer -Path "C:\MSSQLTips\SQL Server Performance Dashboard\" -Destination /MSSQLTips -Verbose
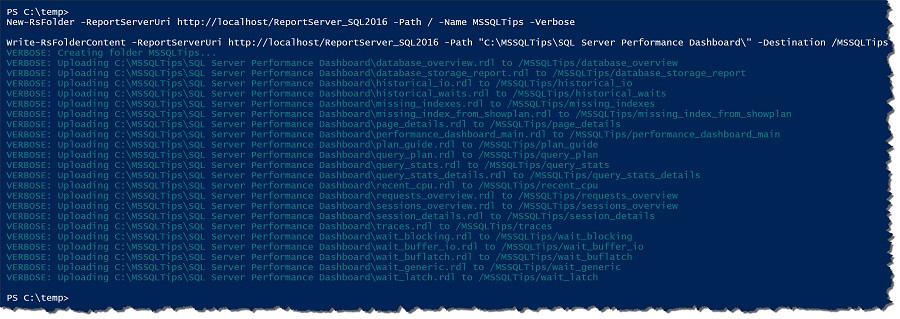
By default, the two commands we have used do not output any information unless an error occurs; to get the output in the screenshot above I added the -Verbose parameter to the end of the commands.
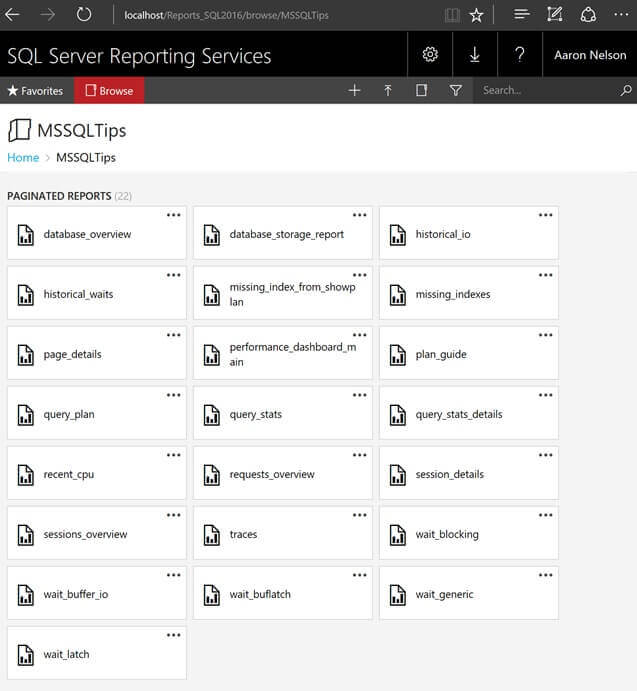
Once the command is finished, we refresh our browser and see that all our reports have deployed.
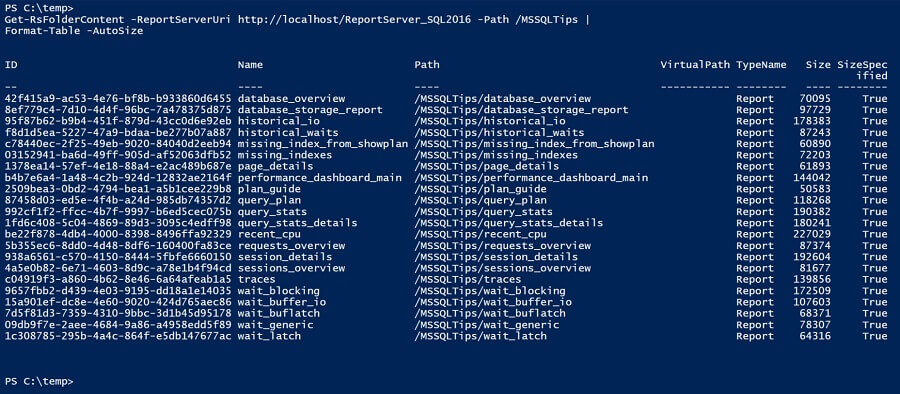
Alternatively, you can use the Get-RsFolderContent command to see that the report objects have been deployed.
Get-RsFolderContent -ReportServerUri http://localhost/ReportServer -Path /MSSQLTips |
Format-Table -AutoSize
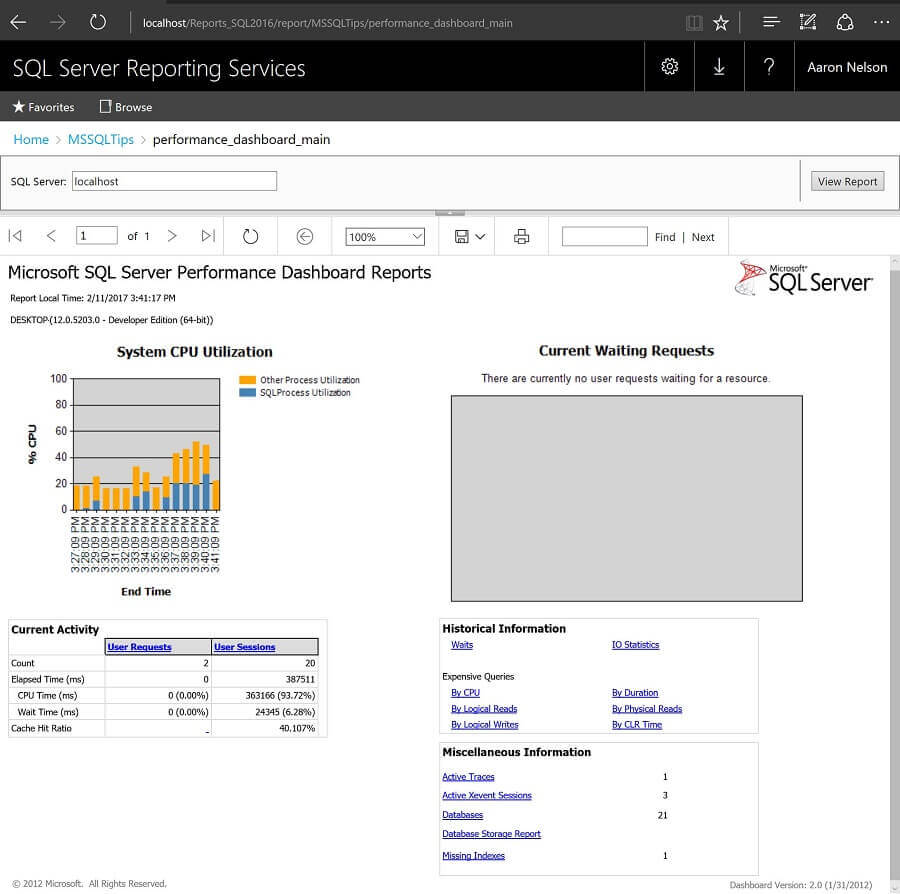
I chose this particular project because you can get the reports running without having to setup and configure a data source after the reports are deployed. Just deploy the "Setup.SQL" file to any servers that you want to run the reports against, and you'll be ready to run the reports. Start at the performance_dashboard_main page, enter the name of the instance you've run the "Setup.SQL" file on, and you'll be able to see a report like the one below.
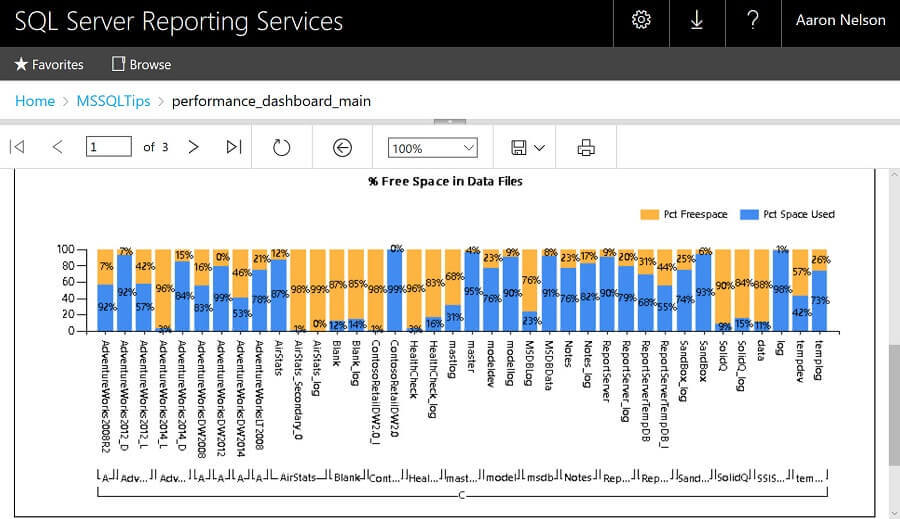
Quick Aside: One of my favorite reports in this package is the database_storage_report. Have a look at what this report looks like when I run it on my machine, you might like it too:
Deploying Individual Report Items with Write-RsCatalogItem
When you need to deploy just a single Report, Dataset, or DataSource you can use the Write-RsCatalogItem command. Here I will deploy the performance_dashboard_main.rdl file to the root of my SSRS server.
Write-RsCatalogItem -ReportServerUri http://localhost/ReportServer -Path "C:\MSSQLTips\SQL Server Performance Dashboard\performance_dashboard_main.rdl" -Destination /
While the performance_dashboard_main report will work if you launch it from there, since we deployed the rest of the SQL Server Performance Dashboard reports under the MSSQLTips folder, clicking on any links in this copy of the report will result in an error. To keep from confusing ourselves, we'll go ahead and remove that report using the Remove-RsCatalogItem command.
Remove-RsCatalogItem -ReportServerUri http://localhost/ReportServer -Path /performance_dashboard_main
Updating Multiple Reports, Datasets, and DataSources with Write-RsCatalogItem
For times when you need to update multiple Reports, Datasets, and/or DataSources, but not the entire folder of those items, you can use the Write-RsCatalogItem command to accomplish this as well. In this scenario, let's say that I had updated all of the reports that have the word 'wait' in them, and I want to upload just those to my SSRS server to test them. I don't want to have to go and remove the old versions of those reports before I deploy the new versions, so I will use the -OverWrite parameter.
You have a couple options of how you could select the multiple files you want to upload to your SSRS instance, some of the most common are:
- A simple comma separated list
- Pipeline in from Out-GridView
- And simply pipelining files into the -Path parameter
We'll start with my favorite, Out-GridView.
Out-GridView
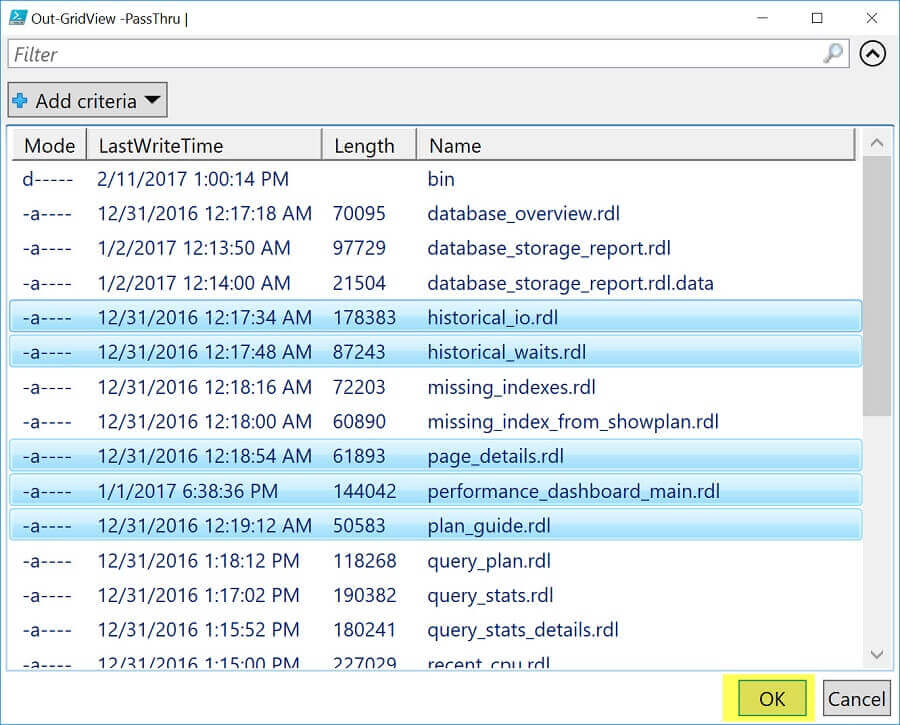
The Out-GridView cmdlet allows you to present the results from PowerShell in a sortable and filterable grid, sort of like the 'Out to Grid' results you're used to in SQL Server Management Studio (SSMS), but better! When you add the -PassThru parameter, it allows you to multi-select rows in the grid, and when you click the 'OK' button it will send only the rows you selected down the pipeline to the next command in the sequence to be processed.
Dir 'C:\MSSQLTips\SQL Server Performance Dashboard\' |
Out-GridView -PassThru |
Write-RsCatalogItem -ReportServerUri http://localhost/ReportServer -Destination /MSSQLTips -OverWrite
Comma Separated List
For the comma separated list example, I'm going to take two reports that I want to deploy, historical_io and historical_waits, and place them into a variable named $Reports first. Behind the scenes, PowerShell is going to automatically turn what seems like two simple strings into an array for me. Then I will pass that $Reports variable to the -Path parameter.
CD 'C:\MSSQLTips\SQL Server Performance Dashboard\'

$Reports = 'historical_io.rdl', 'historical_waits.rdl'
Write-RsCatalogItem -ReportServerUri http://localhost/ReportServer -Path $Reports -Destination /MSSQLTips -OverWrite
Simple Pipelining
At first glance this 'simple pipelining' approach might not seem much different than using the Write-RsFolderContent command that we discussed before, but there are some important differences here that I will call out. The Write-RsFolderContent command is tailor-made for being pointed at a folder of reports that you're developing, and uploading to the folder on SSRS you specify only the .rdl, .rsds and .rsd files, it knows to skip everything else. The Write-RsCatalogItem command on the other hand, will allow you to send it any type of file, but it will error out if it's not an .rdl, .rsds, or .rsd file.
In the example below, I am going to filter the list of .rdl files in the directory, and only have it send the reports that begin with the word "wait" to the Write-RsCatalogItem command. This can help me keep from deploying reports that haven't been changed.
Dir 'C:\MSSQLTips\SQL Server Performance Dashboard\' -Filter wait*.Rdl |
Write-RsCatalogItem -ReportServerUri http://localhost/ReportServer -Destination /MSSQLTips -OverWrite

Another way I could approach this is to pipe my list of files to the Where[-Object] cmdlet and have it only send reports that have been modified since the beginning of the year to the Write-RsCatalogItem command. This could come in handy in times where I'm not sure if I had deployed all of the reports I had touched yet, and wanted to make sure they were all deployed before I started my testing.
Dir 'C:\MSSQLTips\SQL Server Performance Dashboard\' -Filter *.Rdl |
WHERE LastWriteTime -GT 2017-01-01 |
Write-RsCatalogItem -ReportServerUri http://localhost/ReportServer -Destination /MSSQLTips -OverWrite
![SSRSPowerShellCommandsAreHere10 pipe my list of files to the Where[-Object] cmdlet and have it only send reports that have been modified since the beginning of the year to the Write-RsCatalogItem command](/tipimages2/4738_SSRSPowerShellCommandsAreHere10.jpg)
Next Steps
- Download the ReportingServicesTools module from the PowerShell Gallery
- Download & deploy the SQL Server Performance Dashboard Reports with the PowerShell script I contributed to the Tiger Team.
- A Gist with all of the code samples presented in this article is available here
- Check out my other tips about SQL PowerShell on:
About the author
 Aaron Nelson is a Senior SQL Server Architect with over 10 years experience in architecture, BI, development and tuning.
This author pledges the content of this article is based on professional experience and not AI generated.
View all my tips


