By: Matteo Lorini | Comments (4) | Related: More > DBA Best Practices
Problem
In a previous tip, Getting started with source control for SQL Server, we looked at how to setup source control to be used with SQL Server Management Studio. In this tip, we look at how to use source control with SSMS.
Solution
This tip is aimed to show how to use source control with Microsoft Team Foundation Server 2012 in SQL Server Management Studio (SSMS) to check-out and check-in code for co-development amongst SQL Developers. In order to fully follow this tip, please refer to my previous tip - Getting started with source control for SQL Server.
Using Source Control Plug-in Directly from SSMS
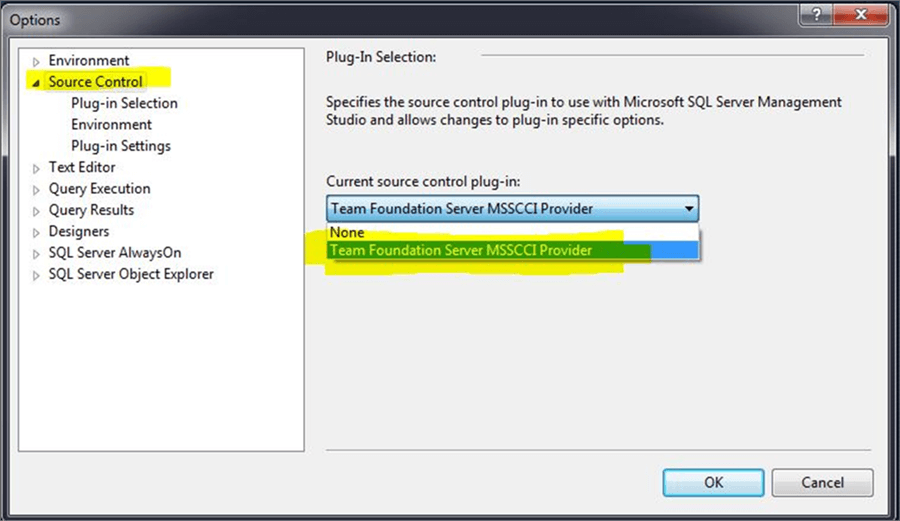
First, let’s check to see if the Source Control Plug-In for SSMS has been installed. In SSMS, on the menus click on Tools > Options and make sure that Team Foundation Server plug-in appears in the “Current source control plug-in” drop down as shown below.
Step 1: Open Project
From the SSMS menu, click on File > Source Control then open our first project by clicking on: “Open from Source Control…” as shown below.

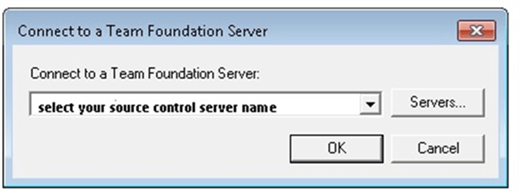
The first time we try to open a project controlled by source control, we have to select our source control server and click OK as shown below.
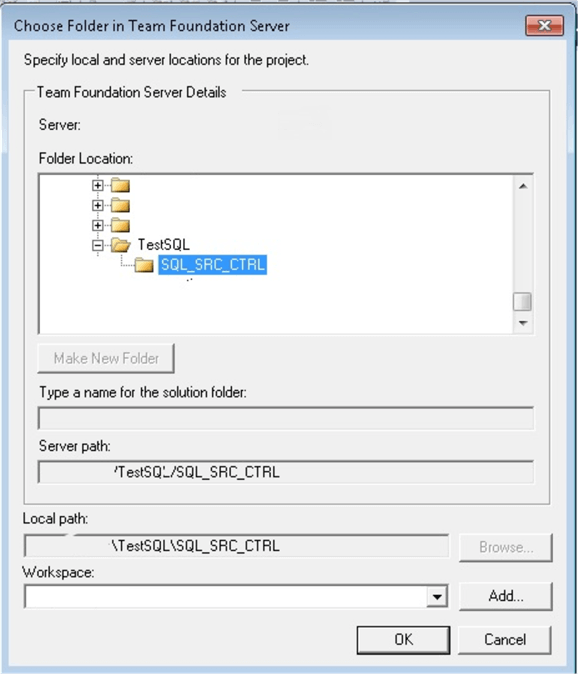
The selection of our first project is quite simple, just click on the folder that contains our files and click OK.
Step 2: Check-out Procedure
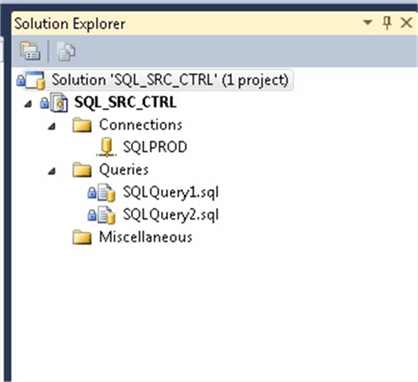
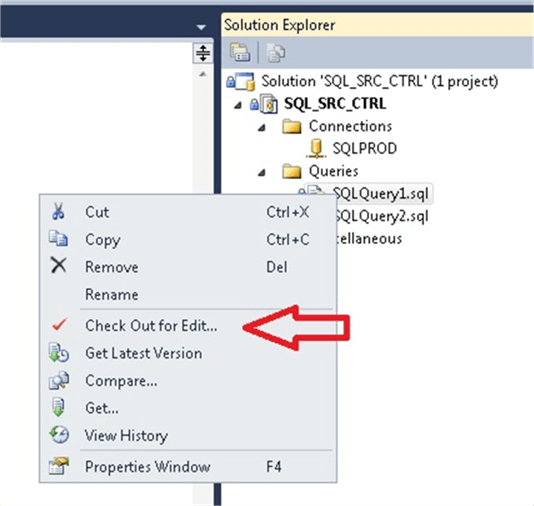
Our project consists of two T-SQL files, please note the lock icon on the left side of the file name. This icon indicates that our files have not been check-out yet. In order to modify them we will have to check them out first.
Right click on the file that we want to edit and select "Check Out for Edit".
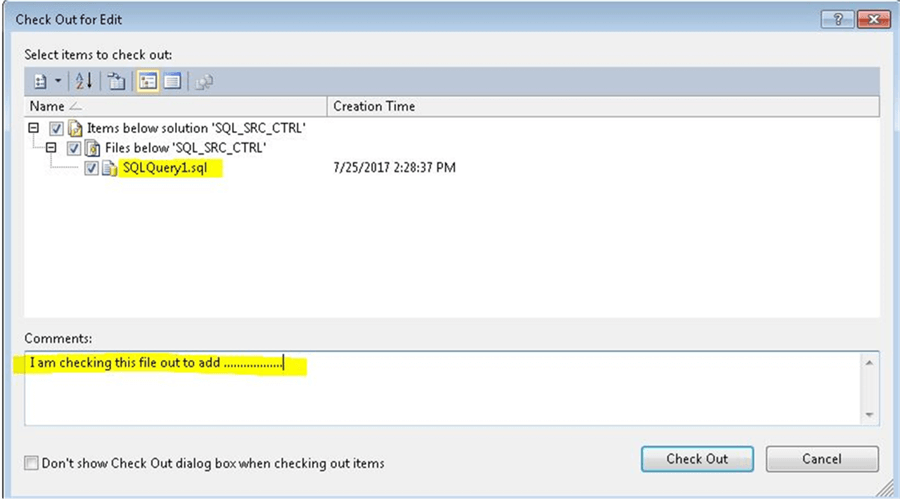
During the check-out process we are free to enter a comment. Please note that the check-out dialog box is a Source Control Dialog Box.
Once the file has been checked out, we can see a red tick on the left side of the file name in Solution Explorer. For the sake of this exercise, let’s add two lines of code (SELECT @@SERVERNAME and @@VERSION) to the file as shown below.

Step 3: Check-in Procedure
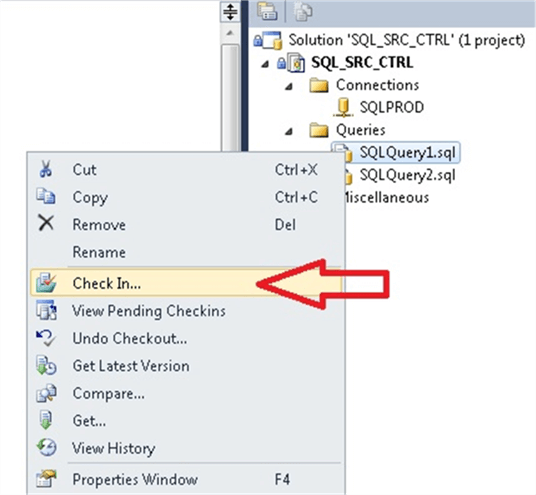
In order to save our changes and make them visible to the rest of the developers, we need to check-in our file. Right click on the file name and select "Check In" as shown below.
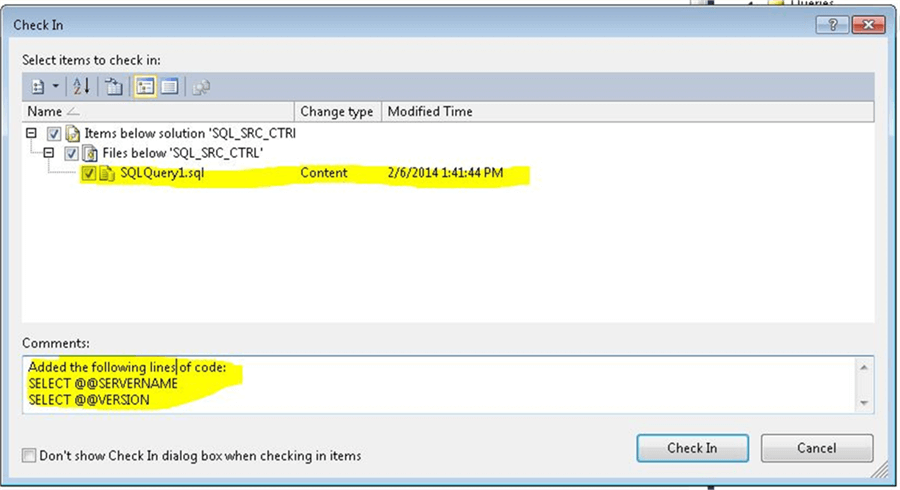
Please note that the source control "Check-In" dialog box will pop-up for us to enter a change comment before clicking on "Check In". At this point comments play an important role, they allow the development team to see what changes were applied by the last person who worked on the code.
Step 4: View Change History
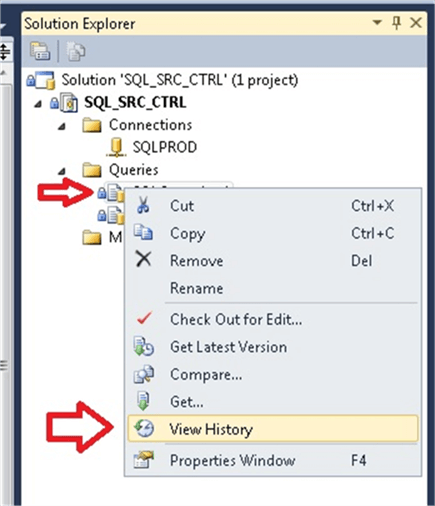
If we want to see all the changes that have been applied to a specific file we can right click on the file name and select "View History" as shown below.
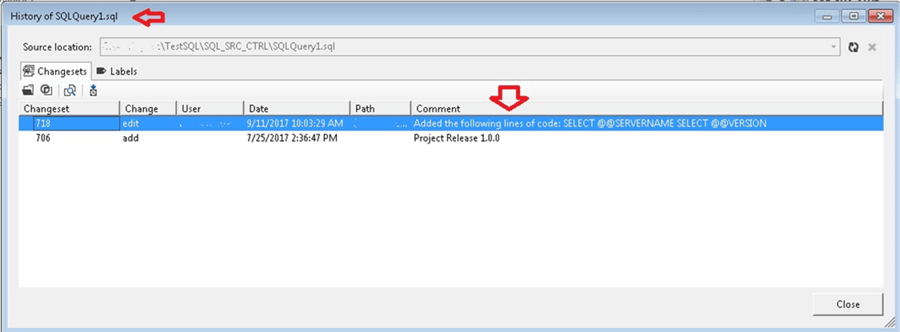
The Source Control dialog box, will show the date that the file was modified, the User (developer) that modified the file and comments pertaining to the code that was modified.
Conclusion
The main advantages of using Source Control are:
- Share code development
- Change track history
- Ability to restore code for a specific change in time
- Automatic code backup by the Source Control Application
Next Steps
- Check out the following resources:
About the author
 Matteo Lorini is a DBA and has been working in IT since 1993. He specializes in SQL Server and also has knowledge of MySQL.
This author pledges the content of this article is based on professional experience and not AI generated.
View all my tips


