Problem
SQL Server Management Studio (SSMS) is the most used tool for SQL Server database development and administration. In this tip we will illustrate some SSMS common tips which will be useful especially for those who are novices in using SSMS.
Solution
Below we are going to show some SSMS tips that will let you work with this tool more confidently. So… let’s start!
Launch SSMS from a Command Prompt
It is possible to launch SQL Server Management Studio from command prompt. To do this, we only need to type ssms in command prompt and press ‘Enter’:

SSMS authentication window opens and you need to choose your SQL Server instance to login.
But ssms allows you to provide more arguments when launching. For instance, you can directly connect to specific database in a specific instance with a specific user by providing these arguments at the command prompt:
ssms -s DBSERVER1 -d TestDB -u TestUser -p 123

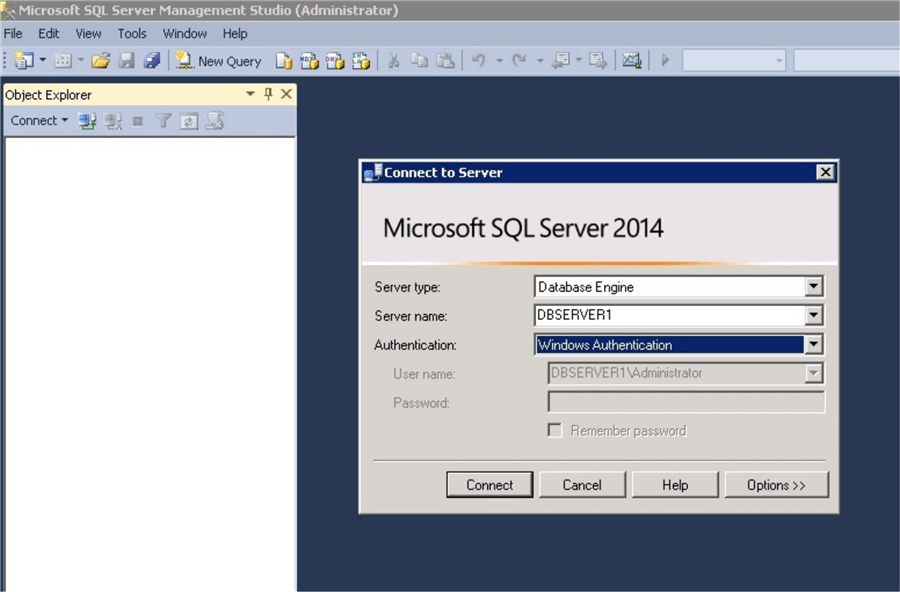
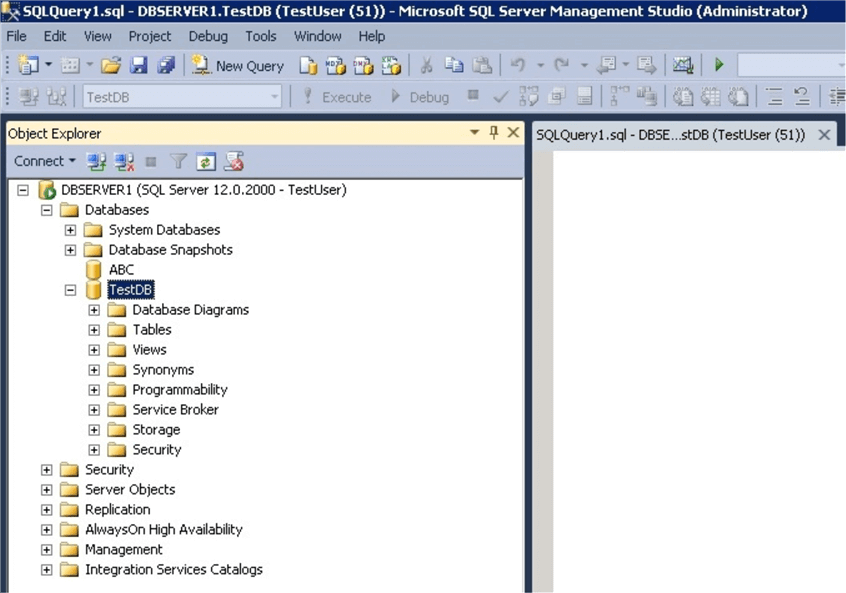
With this command we are connecting to TestDB database in DBSERVER1 using SQL Server authentication:
There are some other options for SSMS, for example you can specify one or more script files to open, specify the script project or solution to open, etc.
Restore the SSMS Default Layout
Have you mixed up the window layout in SSMS and not sure of their original place?

Do you need to restore the SSMS layout to the original state? It can easily be done by clicking “Reset Window Layout” in the “Window” tab as shown below:

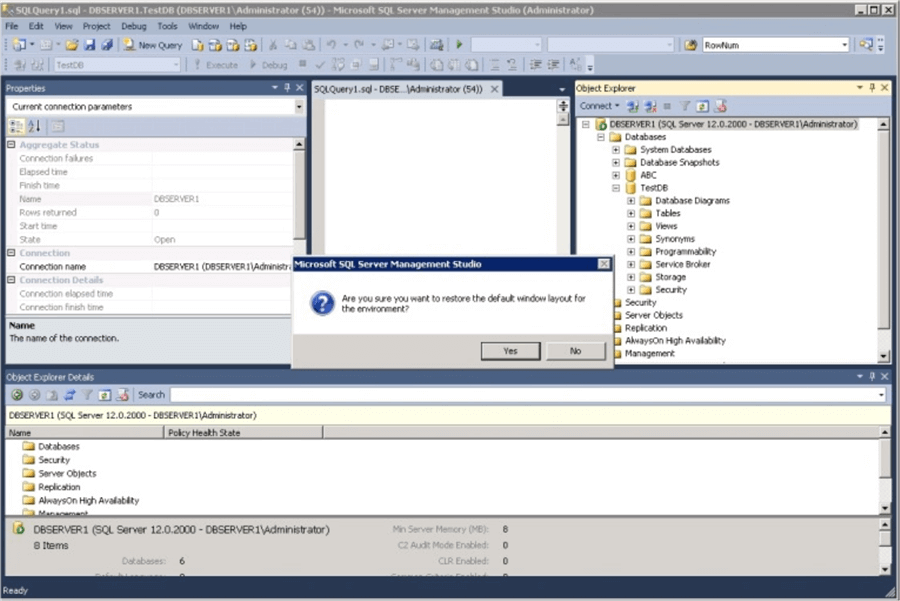
After agreeing to restore the default layout by clicking “Yes”, your SSMS returns to its original appearance:

Change Default Values for Rows to Select or Edit in Management Studio
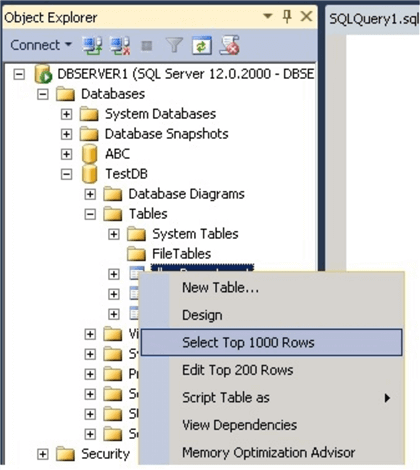
When we try to edit or select rows from a table in SSMS, by default we can edit or select 200 and 1000 rows respectively:
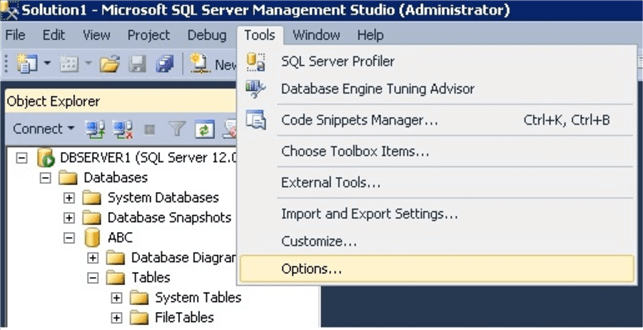
To change these values go to Tools > Options as shown below:

After that we need to choose “SQL Server Object Explorer” > “Commands”:

Then on the right side we can change the corresponding values. For configuring SSMS to allow selecting or editing all rows from table by right-clicking we need to set these values to 0:

Now, we can see that there is no limit for editing or selecting rows:

Allow Saving Changes that Require Table Re-creation
By default, saving the changes, that require table re-creation, is disabled in SSMS. For example when we try to change the TestTable to not allow NULLs for the Value column, we receive the following message:

To allow save changes that requires table re-creation we need to go “Tools” > “Options”:
Then choose “Designers” > “Table and Database Designers”:

On the right side we need to uncheck “Prevent saving changes that require table re-creation”:

After this change we are able to make table changes that require the table to be re-created. It is important to know that allowing changes requiring table re-creation can sometimes be risky and in some specific cases data loss can occur (for example when the Change Tracking feature is enabled).
Work on more than one Query Simultaneously
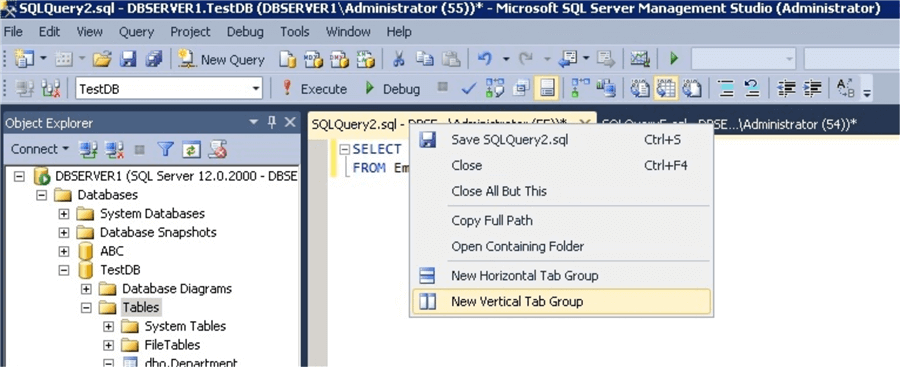
Sometimes we need to work on two or more queries, compare the code and analyze the results. So, it would be better if we are able to see these queries simultaneously. In SSMS it is possible to see queries in parallel by opening them in vertical or horizontal tab groups. For example if we opened two queries and want to see them in parallel in different vertical tabs we can choose “New Vertical Tab Group” by right-clicking on the query heading:
We can do the same by going to “Window” > “New Vertical Tab Group”:

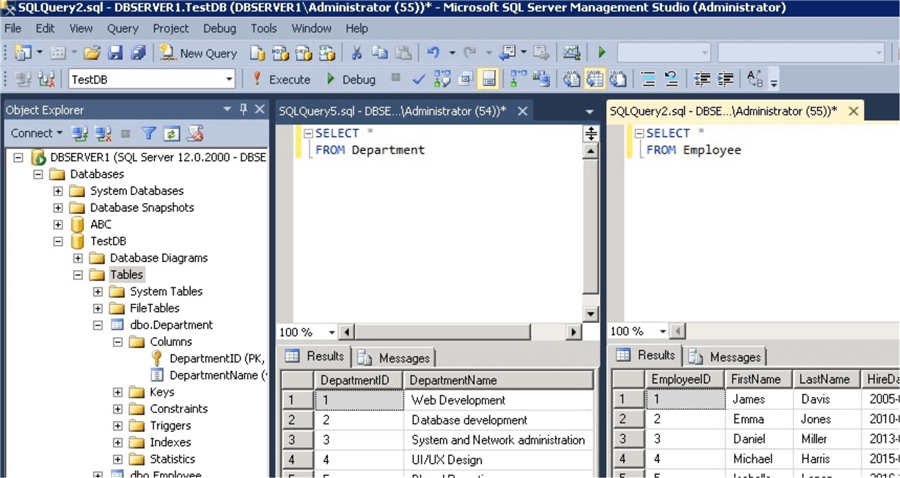
Now we can see both queries simultaneously:
To move the queries windows to different tab groups, right-click on the query heading and choose “Move to Previous Tab Group” (or “Move to Next Tab Group”).
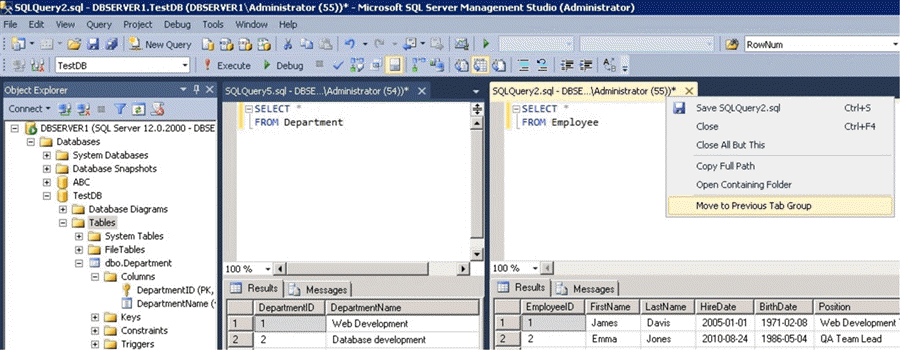
“Move to Previous Tab Group” or “Move to Next Tab Group” is also available in the Window menu. To see queries horizontally we need to choose “New Horizontal Tab Group” as shown below:

Next Steps
- I hope this tip is helpful and improves your productivity with SSMS as a SQL Server DBA or Developer.
- Learn more about SQL Server Management Studio.

Sergey Gigoyan (LinkedIn) is a Senior Technical Architect specializing in data and databases with more than 15 years of experience. Sergey focuses on modern data architectures, database design and development, performance tuning and optimization, high availability solutions, BI development and DW design. He has worked with SQL Server, Oracle, and PostgreSQL databases, as well as cloud-based data solutions (AWS and Azure). Sergey also has extensive experience with modern data stacks such as Snowflake and dbt.
Sergey’s experience spans various industries. He had the privilege of working with IT giants such as Oracle as a Principal Data Engineer and BlackBerry as well as innovative startups. He helped deliver complex database solutions and advanced data strategies.
Sergey is also the author of “Building a Successful Career in IT – How I Did It” where he provides actionable advice on thriving in the ever-evolving IT industry.
- MSSQLTips Awards: Champion (100+ tips) – 2024 | Author of the Year – 2020