Problem
The availability of SQL Server on Linux means I need a secure way to connect to my new server’s command line with a secure, encrypted connection. The last time I used a non-windows server I connected with Telnet or FTP, which communicate in plain text. How can I log on to my Linux server securely?
Solution
Long gone are the days when we can trust plain-text tools like telnet and FTP to connect to remote servers. Passwords and other sensitive that data cross the network in the clear can be sniffed by anyone with a copy of WireShark or similar tool. Secure shell (ssh) and its partners secure copy (scp) and secure FTP (sftp) encrypt the communication between two computers. Using ssh is relatively simple with many resources available to provide the specific details for configuring it on your server. I want to focus on the client side to describe how to simplify creating secure, encrypted session from your desktop client to the server.
There are many, many implementations of the ssh protocol available for Windows and it comes baked in with Linux. One of the most common (and free) tools for Windows is PuTTY. On the Linux desktop ssh is usually installed by default but not hard to install if it is missing. You can securely connect to your Linux server using ssh with a user account and password but it is even more secure to use an ssh key-pair.
Getting the Client
PuTTY
PuTTY is an ssh client written by Simon Tatham and available for free. While the version number is still not to 1.0 it has been around for years and used extensively around the world. There is a Windows .msi file available from the download site (see next steps for the link) which installs in the C:\Program Files (x86)\PuTTY directory by default. It will be helpful to add this directory to your path as you will see later. Installing PuTTY is as simple as running the installer. We’ll learn about configuration in the next section.
Linux ssh/sshd
The ssh (secure shell) utility should already be installed if you are using a Linux desktop. You can type “which sss” on the command line to see if the executable is in your path, if nothing is displayed, use your distro’s package manager to ensure it is installed. On Ubuntu you can try “apt search openssh-client“. On Red Hat use “yum search openssh-client“. If no packages are listed you can install them with “sudo apt-get install openssh-client” or “sudo yum install openssh-client“. You may not have rights on your system to use sudo, in that case ask your sysadmin to install ssh.

Client Configuration
Once your ssh client is installed you will need to configure it to know about your server so you do not have to enter the server’s name and your username every time you want to connect.
PuTTY
PuTTY allows you to configure a set of default settings as well as server-specific settings as desired. I’ll walk you through the basic defaults and set up a single, new server as an example. When PuTTY starts you will see the dialog shown below.

Select “Default Settings” and “Load” then expand “Connection” in the left pane and click “Data”. Enter your username in the Auto-login username field, re-select “Session” in the left pane and click save. Your default login is now set.
Let’s set up an entry for your SQL Server machine. Enter the fully qualified domain name of your server in the Host Name field, then enter an alias for it in the “Saved Sessions” field and click “Save”. The alias will appear in the list, you can click on the alias, click the “Load” button, and click “Open”. A terminal window will open and you will be connected to your server with a password prompt.
Linux ssh client
The Linux command line ssh client uses a text file for configuration, it also ensures the file is sufficiently secured before it will use it. In your home directory create a directory called “.ssh” and change the permissions so only you can use it with “chmod 700 .ssh“. Next create an empty configuration file and secure it, this will take two commands: “touch .ssh/config” and “chmod 600 .ssh/config“. With the editor of your choice (as an experienced Linux admin I know better than to dis your editor) enter three lines into the file and save it. “Host” is an alias for your server, “Hostname” is the FQDN of your server, and “User” is your login account
Host myserver
Hostname myserver.mydomain.com
User myuseraccount
You can now enter “ssh myserver” on the command line to connect to your server and be prompted for your password to log in.
Keys
Usernames and passwords are okay, but using a cryptographic key pair is more secure and can be more convenient when using an agent to manage your key in memory on your local desktop. Once we create a key pair I’ll show you how the ssh agent allows you to securely log into your remote server without having to enter your password.
If you’re not familiar with Public Key Infrastructure (PKI) spend a minute on Wikipedia to get a general idea. In short you have two related cryptographic keys one public and one private, the public key is placed on the servers you want to connect to and you keep the private key, well, private. There are two VERY important things about your private key that you need to remember; first, don’t forget your passphrase because without it your private key is useless, second, never let it out of your control. With your private key and the passphrase anyone can impersonate you. Make sure your passphrase is long and complex but easy for you to remember so if someone steals your key they can’t use brute-force to guess it.
PuTTY
PuTTY comes with a utility called puttygen you can use to create a public/private key pair, you supply a couple of parameters (the defaults are usually sufficient), a passphrase and puttygen outputs two text files containing your two keys. Run puttygen (by default located in C:\Program Files (x86)\PuTTY) and click “Generate”. It will ask you to generate some randomness by moving your mouse around then present you with the following screen to enter a passphrase and confirm it. At the top of the screen is the text representation of your public key, copy and paste it into a text file, you’ll need it later. Then click “Save private key”, this will create a .ppk file with your private key encrypted by your passphrase.

Linux
On the Linux command line you will use the ssh-keygen utility to similarly create the two key files. There are many options for key type, key length, etc. For simplicity I’m sticking with the defaults. In the command line session below I’ve supplied a name for my keypair as well as a passphrase, you will want to keep the key files in your secured .ssh directory. Notice that when I displayed the public key it is the same format as the text that PuTTY displayed. Showing you my public key is safe (even encouraged), as long as I keep my private key private and don’t lose or disclose my passphrase.

Once your keypair is generated, log into your remote server and create a new .ssh directory in your home directory making sure only you can use it set the permissions to 700 (see above!). Inside this new directory create a file called “authorized_keys” and edit it, copying the text of your public key into it. This file should also be secured by setting its permissions to 600. If the file and directory are not sufficiently secure ssh will ignore them!
Using your key
Once your public key has been copied to your server you need to tell your client to use your private key to log in.
PuTTY
Using PuTTY select the Server alias created above from the list and load it, expand “Connection”, then “SSH” in the left pane and click on “Auth”. Next, using the “Browse” button find your private key (the .ppk file created earlier). Finally click back on “Session” and save your new setting.

Linux
On the Linux command line open the .ssh/config file with your editor and add a line pointing to your private key using the “IdentyFile” tag.
Host myserver
Hostname myserver.mydomain.com
User myuseraccount
IdentityFile ~/.ssh/mysqltipsdemo_rsa
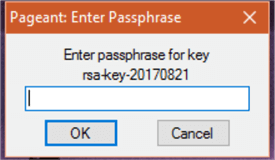
Now when you log into your server, rather than being prompted for your password you will be prompted for the passphrase for your private key. This is probably harder than your password, but in the next section I’ll show you how to use an ssh agent to unlock your private key, then store it in memory until you log out. This will make your logon “passwordless” by requiring you supply your key credential just once when you start up your client computer’s ssh agent.
Using PuTTY pageant
Using an agent to hold your keys in memory simplifies the login process. The agent will ask for your private key passphrase and hold the key unlocked in memory. Once the agent stores your private key it will supply your credential behind the scenes each time it is requested by the remote server.
The agent that comes with PuTTY is called “pageant” and is found in the same directory as the PuTTY client. When you run it the agent stays in the background and its icon will appear in your toolbar. Right-click the icon and select “Add Key” you will be presented with a file selection dialog. Locate and select your private key, you will then be asked for the passphrase.
Once your key is stores you can right-click the icon and choose “View Keys” to see that pageant now knows your key and can supply it on demand. As you can see illustrated below, you may have more than one key as needed.

Now when you run PuTTY and select a server that uses the key stored by pageant it will log you in automatically.
Using ssh-add
If you have a Linux workstation you will use the ssh-add command and the path to your key to add it to the agent. You also need to tell your shell how to find the agent so you need to run a couple of commands. First, to add your private key to the agent, run (for example) ssh-add ~/.ssh/mysqltipsdemo_rsa. You will be prompted to enter your private key’s passphrase. Then run eval `ssh-agent` (note the single back-tick quotes) to set the environmental variables needed for your session to use the agent. Without getting too far in the weeds when you run ssh-agent with no arguments it outputs the commands needed to set up your environment. In order for these commands to be executed in the context of your shell you need to use eval and put the ssh-agent command in back-ticks so its output it consumed by eval and added to your environment. To display which keys have been added by the agent run ssh-add -l which will list the “fingerprints” of the keys stored by the agent. With the config file shown above you can now run ssh myserver and be connected to myserver.mydomain.com without being prompted for your password or key passphrase.

Copying Files
Creating a terminal session is just one use for secure shell encryption. You can also use it to transfer files from your desktop to the server, this is especially useful when you need to transfer files that contain sensitive information. There are free GUI applications that implement secure FTP (sftp) such as WinSCP but I’m going to cover the utility supplied by PuTTY which is command-line based, leaving it to you to explore the other utilities available.
PuTTY
The utility provided by PuTTY is called “psftp” and is also found in the same directory as the PuTTY executable. You can run it by double-clicking it or, if you’ve added the PuTTY directory to your path, typing psftp <hostname> (where <hostname> is the alias for your server) in a cmd window. With the first option you will be prompted to use the open command to connect to your server, if you provide the PuTTY alias you set up you will be automatically connected! The psftp command set is virtually identical to FTP. With the second option you will be connected to your server without being prompted.

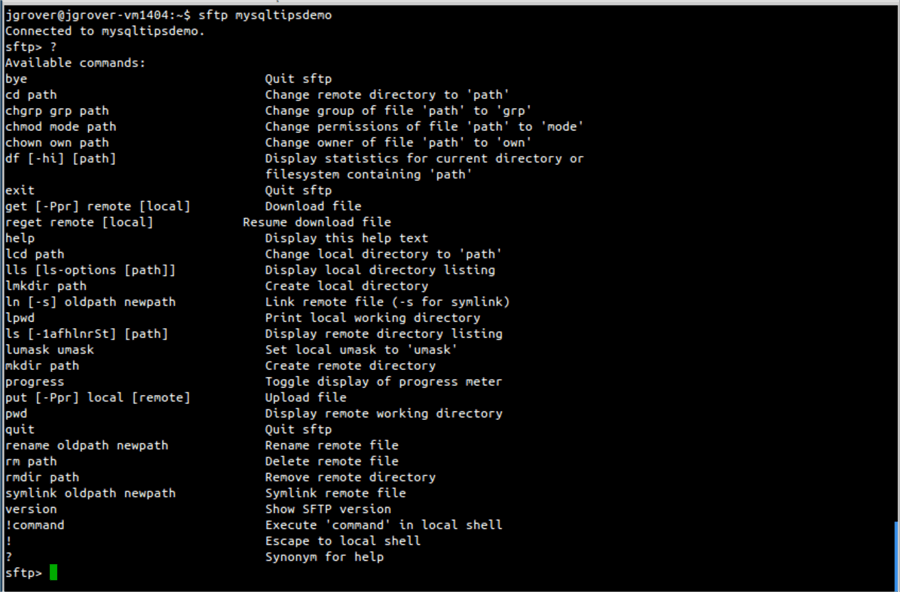
Linux
On the Linux command line use the command sftp <hostname> where <hostname> is the alias for your server. Again the sftp command set is the same as FTP and you can begin transferring files.
Summary
Using the information in this tip you are now able to create a secure, encrypted channel to your Linux server for either a terminal session or to transfer files. By implementing a public/private key pair and using an ssh agent you can connect to your server using an alias as a shortcut without having to re-enter your password every time you want to log in. It’s a little counterintuitive, but this method of connection is just as secure and saves you time. In fact, it can be more secure if you either change your regular password to something very long or if your server is configured to only allow key pair connections, reducing or avoiding the possibility of a password being brute-forced.
Next Steps
- Read about – Getting started with SQL Server on Linux
- Read about – 7 things every SQL Server DBA should know about Linux
- Download PuTTY https://www.chiark.greenend.org.uk/~sgtatham/putty/latest.html
- WinSCP site https://winscp.net/eng/index.php

John Grover is a 25-year IT veteran with experience in industries from (physical) warehousing, and health care to his current position in higher education. His experience with databases started with Oracle but he has crossed over from the “Dark Side” and is now a SQL Server MCITP. John is currently the database team lead for a hybrid SQL Server and Oracle environment at the University of Notre Dame. His experience with SQL Server includes clustering, mirroring and running in a virtual environment.
