Problem
We are migrating a SQL Server on-premises database to the cloud, but some application requirements cannot be fulfilled by Amazon RDS so we are migrating to the Elastic Compute Cloud (EC2) environment. These are mission critical database applications, so we want to implement high availability and disaster recovery in the cloud. Can you please explain the process to do so?
Solution
In this tip we will discuss the prerequisites to create a high availability and disaster recovery solution in the cloud with a Windows Failover Cluster using Amazon Web Services Elastic Compute Cloud (EC2) environment. The goal is to deliver high availability and disaster recovery to protect any kind of failure or disaster.
Hardware and Software Requirements
Even with cloud computing, the requirements are similar to an on-premises deployment, but before you begin to create a Windows Failover Cluster you need to create virtual private could (VPC), subnets, etc. Further, you need to put the Windows Failover Cluster nodes in separate subnets to create a Windows high availability cluster. If you deploy the nodes in same subnet then you are not able to configure the Windows cluster in Amazon web services. With an on-premises deployment we can build the cluster nodes in the same data center or different data center, but with AWS the deployment has to be on separate subnets (availability zones). For an on-premises data center deployment we are responsible to get all of the required hardware, software, storage, licenses, etc., whereas with cloud computing basically you are renting hardware, software, storage and licensing. Amazon AWS provides a wide range of Elastic Compute Cloud (EC2) instance options to meet a variety of business requirements.
Planning the Windows Cluster in EC2
Here I have created three subnets across three availability zones within same region.

The first step to building our Windows Cluster on the Elastic Compute Cloud (EC2) is to create a virtual private could (VPC) with availability zone (subnets). All other Amazon AWS requirements, I have explained in a previous tip about how to build an Enterprise Environment in AWS.
To configure the Windows Failover Cluster server, you need to setup the time zone, change the server name as per your standards, open the firewall ports, update the software and create a domain login account with local and domain admin access.
The networking configuration is quite different compare to an on-premises configuration where you create a Windows Failover Cluster in AWS. In AWS, you must assign IPs from the AWS management console with either the DHCP or static IP configuration. When you configure IP addresses using DHCP you may face duplicate IP issues, but with DHCP you do not need to configure the IPs in the Internet Protocol version 4 properties dialog box. If you want static IPs, then you need to configure IPs in the Internet Protocol version 4 properties dialog box.
Make sure all traffic is allowed between the instances, for simplicity I have allowed all traffic for the VPC range.
Make sure all TCP ports 1433, 1434, 4022, 5022, and 135 are allowed on the Windows Firewall.
Once instances are launched ensure that 3 private IPs are assigned to the same primary ENI (Elastic Network Interfaces).
- One IP address will be used as the primary IP address for the instance.
- A second IP address will act as the WSFC IP resource.
- A third IP address will be used to host the AlwaysOn Availability group listener.
Join all the nodes with the domain controller and let’s name the nodes as: USOHWin16Node01, USOHWin16Node02, USOHWin16Node03.
Note - For production servers please make sure that you are opening the appropriate port number in the firewall and VPC. Here I have allowed all traffic for the VPC range and disabled the firewall in my lab environment.
Step # 1 - Join Nodes with Domain for the EC2 Instance Server
A newly created Elastic Compute Cloud (EC2) instance needs to be part of the domain, along with some prerequisites like: installing .Net Framework 3.5 (or higher) and the Windows failover feature for Windows clustering. In the Amazon AWS network configuration, it’s slightly different as compared to on-premises servers, when you have the domain controller running as a Elastic Compute Cloud (EC2) instance server then the private IPs will be the preferred DNS server and that DNS server information needs to be updated on all the servers’ nodes, after updating all DNS records you will be able to join the server nodes with the domain controller using the domain login account.
Here I will share how to verify and update the DNS records for the Elastic Compute Cloud (EC2) server.
In the Windows Control Panel, go to the Network and Sharing Center and click on Ethernet connection.
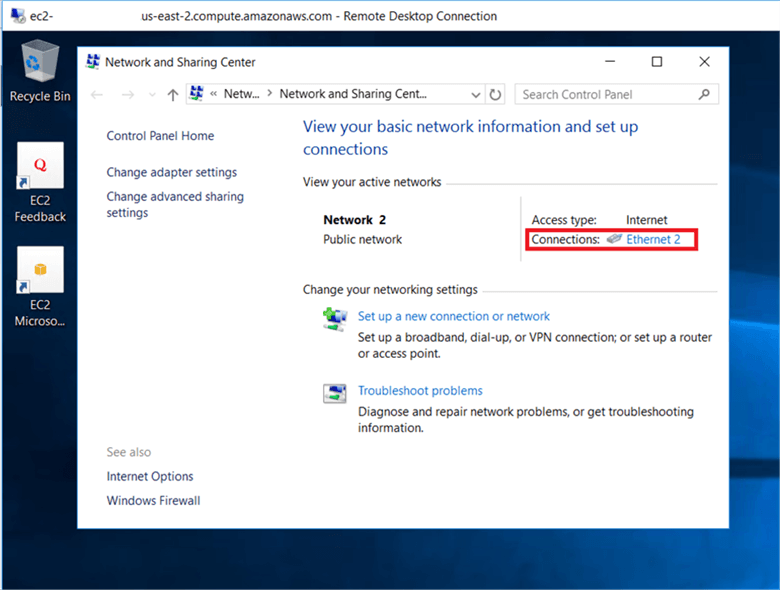
On the Ethernet dialog box, click on details and find IPv4 DNS server then verify your DNS record.

Whenever the server is pointing to another DNS record and it’s correct then you can update from the Network and Sharing Center.
On the Network and Sharing Center page, click on Change adapter settings.

On the Ethernet properties dialog box page, select “Internet Protocol Version 4 (TCP/IPv4)” and click on Properties.
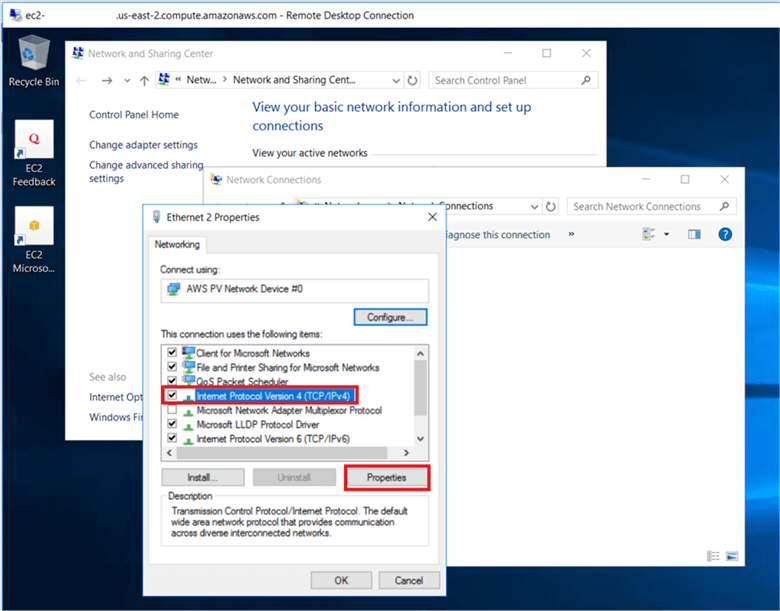
On Internet Protocol Version 4 (TCP/IPv4) dialog box page, click on “Use the following DNS server addresses” and enter the preferred DNS server IP and then click the OK button.

Perform the same steps on all the server nodes to reference the correct DNS server.
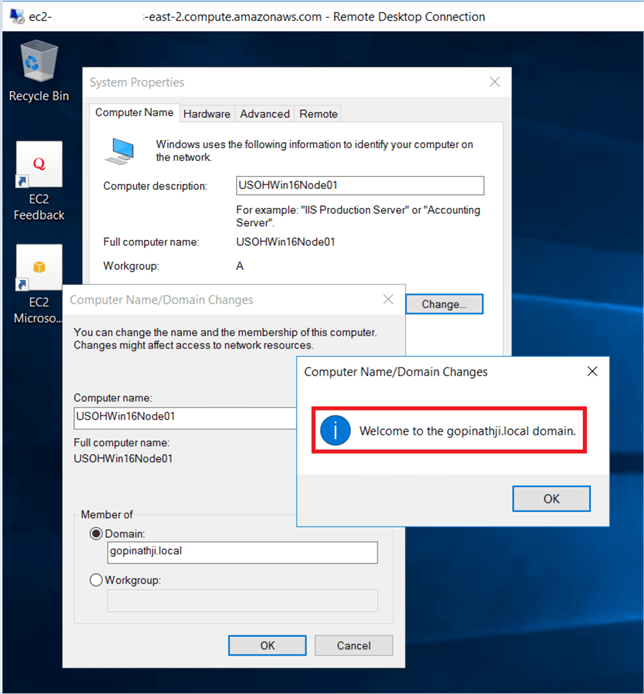
After updating the DNS records on all the server nodes, right click on My Computer and select “System Properties” and click on Change. On the Computer Name/Domain changes dialog box select “Member of domain” and enter the domain name and then click OK.

On the Computer Name/Domain changes dialog box enter your domain login account and password and then click OK.

The welcome message will appear as shown below after the USOHWin16Node01 server node was successfully connected to the domain.
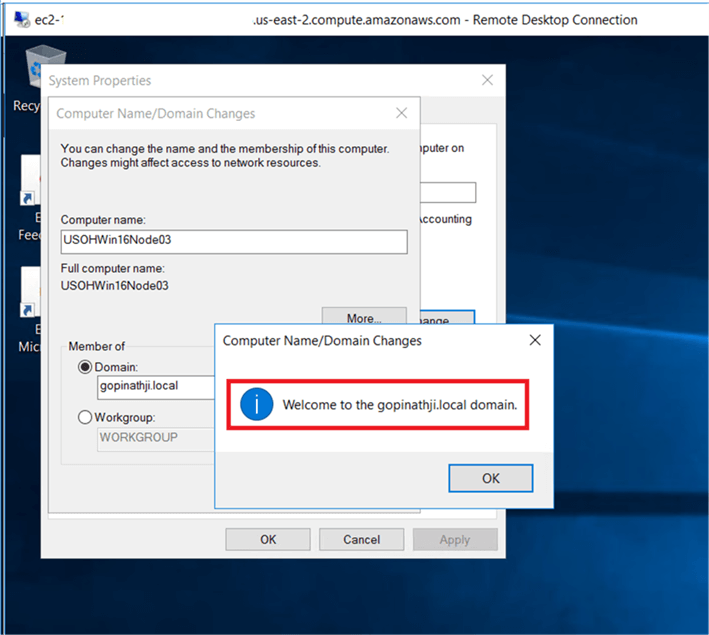
Perform the same steps on all server nodes to join the server nodes to the domain controller.
A welcome message will appear as shown below after the USOHWin16Node02 server node was successfully connected to the domain controller.

The welcome message will appear as shown below after the USOHWin16Node03 server node was successfully connected to the domain controller.
Step # 2 - Install .Net Framework 3.5 and Failover Clustering Features
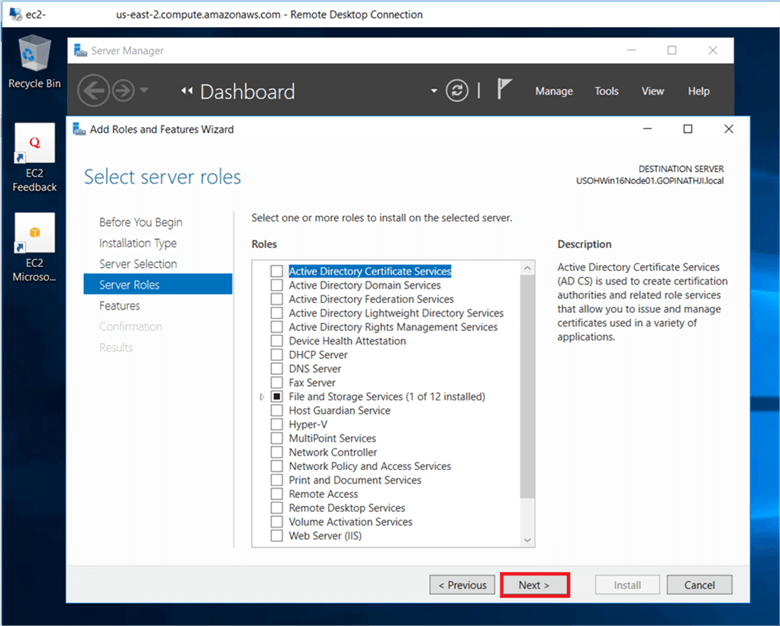
To configure the Windows Failover Cluster, you need to install the .Net framework 3.5 and the failover cluster feature. Go to the server manager dashboard and click on Add roles and features.

Click on the Next button to continue.

On the Installation Type interface, select “Role-based or feature-based installation” then click Next.

On the Select Destination Server dialog box, select a server from the server pool, then click Next.

On the Select Server Roles dialog box, there is no need to select anything, so just click Next.
On Select Feature dialog box select the “.Net Framework 3.5 features” and “Failover Clustering” options then click Next.

On the Confirm Installation Selections dialog box select the “Restart the destination server automatically if required” option and click the Install button.

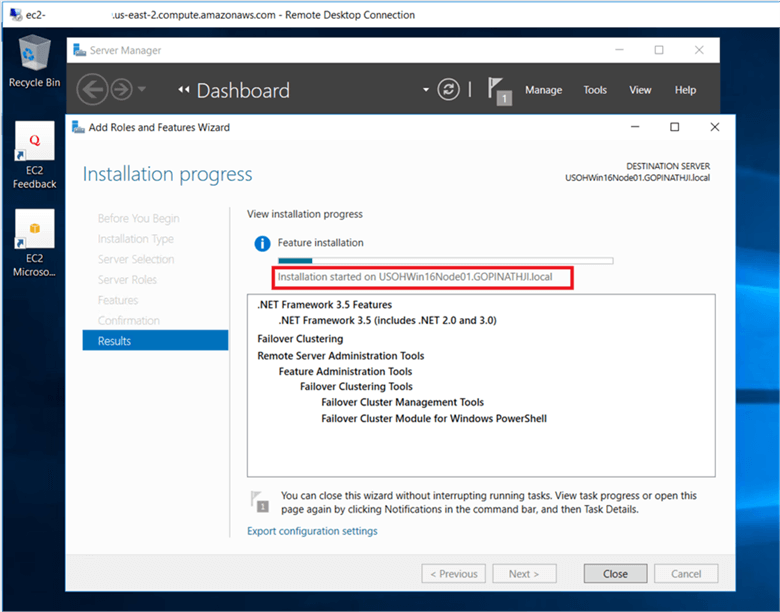
On the Installation Progress dialog box a message appear as shown below indicating the installation is in progress.
On the Installation Progress dialog box, a message will appear after the restart of server USOHWin2016-Node01 saying the installation is complete.

On the Installation Progress dialog box, a message will appear after the restart of server USOHWin2016-Node02 saying installation is complete.

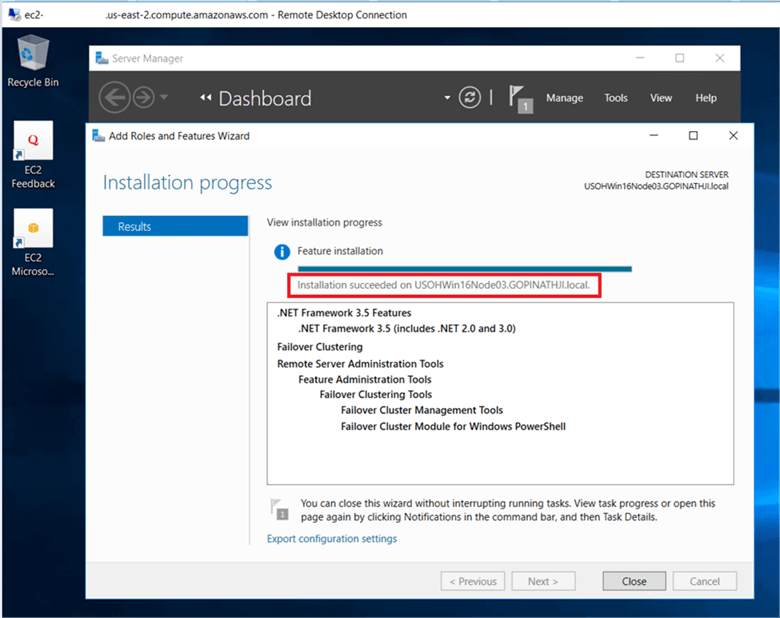
On the Installation Progress dialog box, a message will appear after the restart of server USOHWin2016-Node03 saying installation is complete.
Conclusion
In this tip we:
- Updated the domain controller DNS records on all the nodes
- Joined the nodes with the domain controller
- Installed the .Net Framework 3.5 and the Windows Failover Cluster feature
In Part 2 of this series we will outline the differences between DHCP and static cluster, validate the cluster configuration followed by creating a 3 node cluster in the Elastic Compute Cloud (EC2) on Amazon Web Services (AWS), and configure the file share and disk witness.
Next Steps
- How to build an Enterprise Environment in AWS for SQL Server check here.
- How to build RDS Environment in AWS for SQL Server click here.
- Check out these other cloud related tips.

Pinakin Patel is a SQL Server Admin / AWS Solutions Architect with experience in SQL Server 2000 to 2016. His expertise is implementing SQL Server high availability and disaster recovery solutions including backup and recovery plans, database mirroring, log shipping, replication, clustering and SQL Server Always On Availability Groups across multiple availability zones. Over his career he has been involved with installing, upgrading and configuring SQL Server, designing security plans, performance tuning and monitoring and SQL Server maintenance. As an AWS Solutions Architect he has configured an AWS cloud environment, launched EC2 instances in AWS and SQL Server in AWS. Further he has worked with SQL Server Azure Virtual Machines. Pinakin can be reached at pinakinaws108@gmail.com.