Problem
We created an Azure SQL database using the default collation that was available. Now, there is a requirement to change the collation. Is it possible to change the collation of an Azure SQL database after it is created?
Solution
In the previous tip, you learned how to use the import and export option for the data-tier application to make the collation change to the Azure SQL database. You basically performed the below steps to change the collation in the previous tip.
- Exported the Azure SQL database to an on-premises server
- Change the database collation on the on-premises server
- Exported the on-premises database with new collation
- Finally imported into the Azure server with the new collation
In this tip, we will see how to hack the BACPAC file after it is exported and then re-import it again to the Azure server. So, you avoid having to export the BACPAC file to an on-premises server. This tip assumes you already have an Azure SQL database. If you are new to Azure, try this link: https://azure.microsoft.com/en-us/free/ which will give you $200 credit for a month. Otherwise, logon to your Azure portal: https://portal.azure.com.
As per Microsoft, it is not really possible to change the collation of an Azure SQL database once it is created. You can refer to this Microsoft link where it mentions that “You cannot change the collation for an Azure SQL Database after it is created”. However, there is a Microsoft link which shows how to hack the BACPAC file. We will explore the steps described in the link in detail and try to use the steps described to change the collation of the Azure SQL database and re-import the BACPAC with a new database collation.
Azure SQL Database collation
Here, we have an Azure SQL database named “SQLTips” with the collation “SQL_Latin1_General_CP1_CI_AS” as shown.

As described in the previous tip, you will be unable to change the collation of the database by running this command. Our plan is to change the database collation to “Latin1_General_100_CS_AS_SC”.
USE master;
GO
ALTER DATABASE SQLTips
COLLATE Latin1_General_100_CS_AS_SC
This will generate an error message as shown.
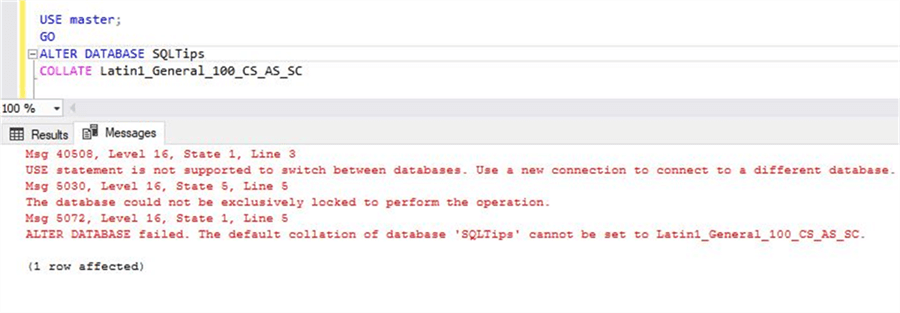
The error says – “The database could not be exclusively locked to perform the operation”. Sometimes, you may have a different error message, but no matter what the error is, you will not be able to change the collation of an Azure SQL database this way.
Change collation of Azure SQL database by hacking the BACPAC
As described earlier, we will describe step by step process from the Microsoft link mentioned earlier.
Export Azure SQL Database to a BACPAC
As a first step, let’s export the Azure SQL database to a BACPAC. Connect to the Azure SQL instance, right click on the Azure SQL database and click on the option to “Export Data-tier application”.

Once you click on “Export Data-tier Application”, you will get this “Introduction” screen where the wizard describes in brief the process to follow. Click on “Next”.

In the next screen, you will get the option to specify the location of the BACPAC file. Provide a file name for the BACPAC file and click on “Next”. Make note of the location of the BACPAC file as you will need it in the next step.

In the next window, you will see the summary section.

Review the details on the screen and click on “Finish”. Once you click on “Finish”, the process of extracting the schema and data begins and this process takes some time to complete based on the size and contents of your Azure SQL database.

Once the process completes, you will see the final confirmation of the process completion as shown.

With this, you have successfully exported the Azure SQL database to a BACPAC.
Rename the BACPAC file to .zip
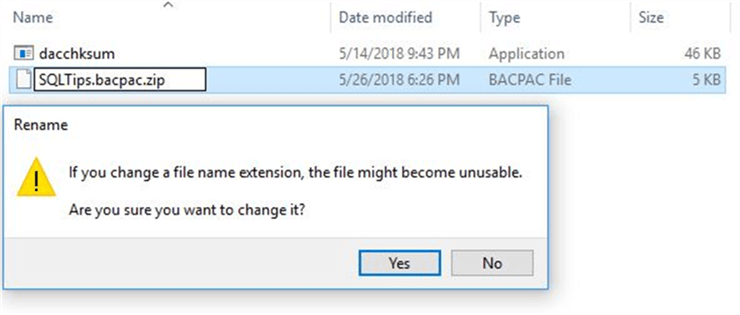
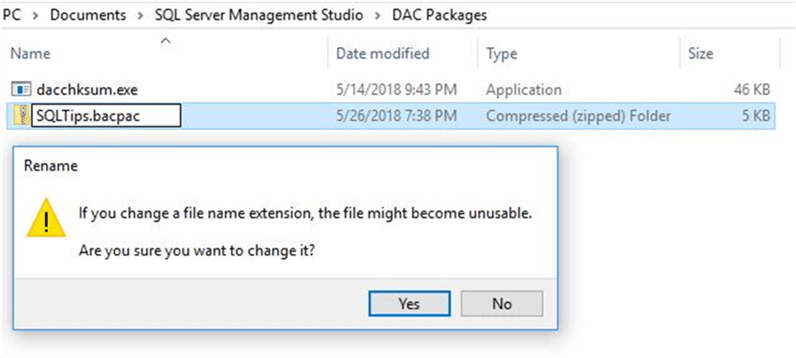
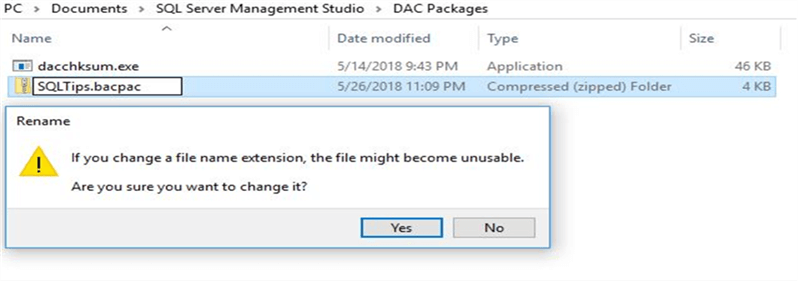
Go to the folder where you have saved your BACPAC file and rename the BACPAC file with a .zip extension.

When you rename the BACPAC file to .Zip extension, you will get a warning as shown. Click on “Yes” to proceed.
Open the zip file and open the model.xml file
You will see the zip file as shown below in your folder.

Double click on the Zip file and open the model.xml file in a notepad.

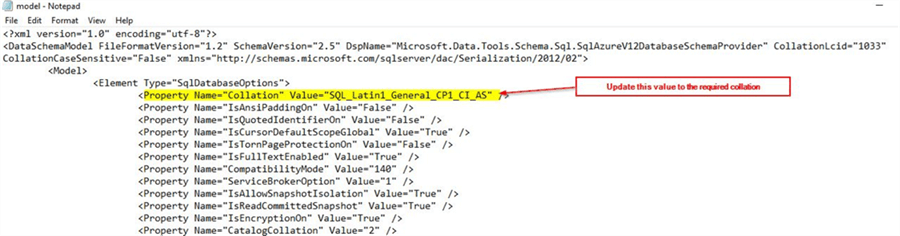
As this model file is an XML document, it may open in your browser when you double click. You may want to copy the model file separately and then use Notepad to open the model file. When you open the model file in Notepad, go to the section where you see the Collation option.
In the screenshot shown, you will see this option where the collation is set to
- Property Name="Collation" Value="SQL_Latin1_General_CP1_CI_AS".
Change this value to the required collation. In our case, it should be like this
- Property Name="Collation" Value="Latin1_General_100_CS_AS_SC"
Once you make this change, save the model.xml file and replace the existing model file in the zip file.
Rename the zip file back to BACPAC extension
You may notice that the .zip file is as shown below.

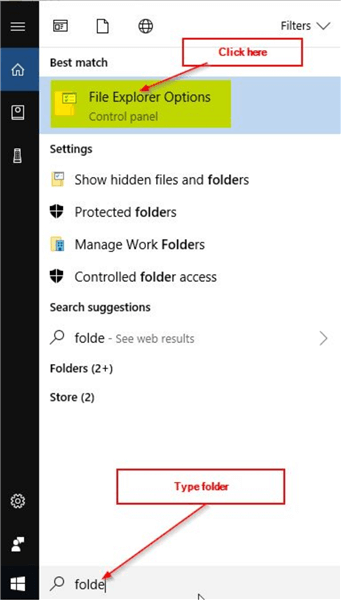
Even though the file is of .zip extension you are not able to see the extension of your file. In order to make the extensions visible for the ease of your use, you can make changes on the folder setting option to view the actual extension of the file. Type “Folder” in the search option as shown and click on “File Explore Options”.
In the “File Explorer Options” section, uncheck the option to “Hide extensions for known file types” and click on “Apply”.

Once you do this and go back to the BACPAC folder, you will be able to view the extension of the BACPAC file.
Remove the .zip extension from the file to leave it to its original .bacpac extension. When you get this warning window, click on “Yes”.
Get checksum value of the new BACPAC file using the dacchksum.exe utility
You can use the dacchksum.exe utility from GitHub in order to get the checksum value of the new BACPAC. Download the dacchksum.exe utility from this link. The link has the below objects. Download the first one from the list.
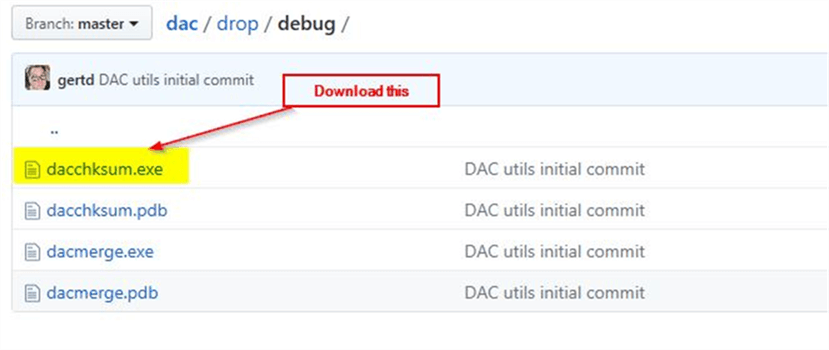
Place the dacchksum.exe on the same folder where you have saved the BACPAC file. Once done, run this command from the command prompt.
dacchksum.exe /i:SQLTips.bacpac
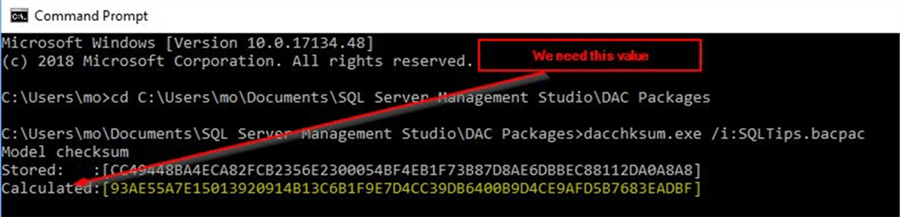
We need to use the value from the “Calculated” section to update the checksum. Copy the contents of the “Calculated” section for later use in the tip.
Rename the BACPAC file back to .zip extension
After getting the checksum value, rename the BACPAC file again with the .zip extension. You will get the warning prompt, click on “Yes” to continue.

Update the new checksum value inside the zip file
Once you click on the zip file, you will see multiple files, one of them is the origin.xml file. Just like how you did previously to update the model.xml, copy the origin.xml file separately and open it in a notepad file.

Once you open the Origin.xml section in the notepad, you will see a section for “checksum” which needs to be updated with the “Calculated” value obtained after running the dacchksum.exe utility.
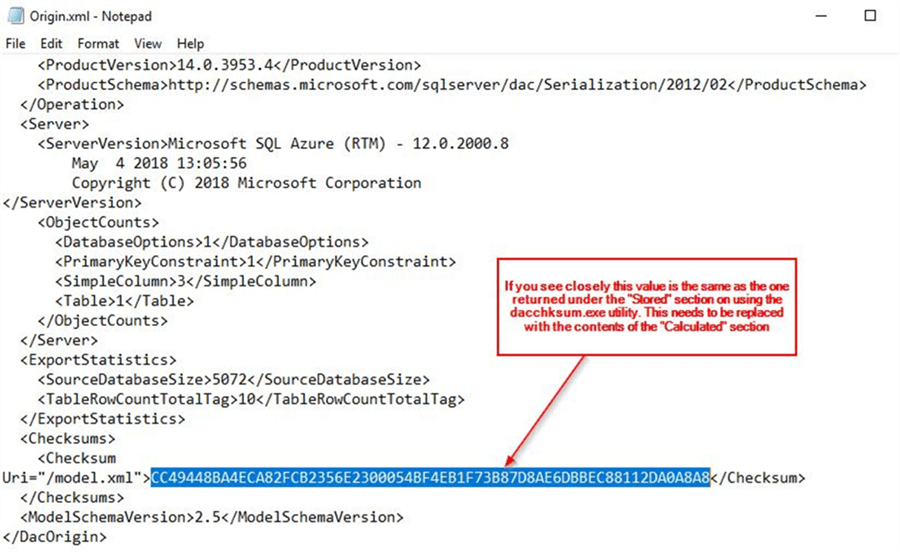
Update the checksum with the contents of the “Calculated” value obtained after running the dacchksum.exe utility. Once done, save the origin.xml with the new checksum and replace the original origin.xml file present in .zip extension.
Rename the .zip extension back to BACPAC
In this step, rename the .zip extension back to BACPAC. On the warning window, click on “Yes” to accept the extension change.
Now, you have a BACPAC file with a new collation and updated checksum. In the last step, we will re-import this BACPAC file to check if the collation is updated.
Import the BACPAC again to the Azure server
Refer the sequence of steps to complete the import process. Right click on the “Databases” option on the Azure server and click on “Import data-tier application”.

In the “Import Settings” section, select the updated BACPAC file to import and click on “Next”.

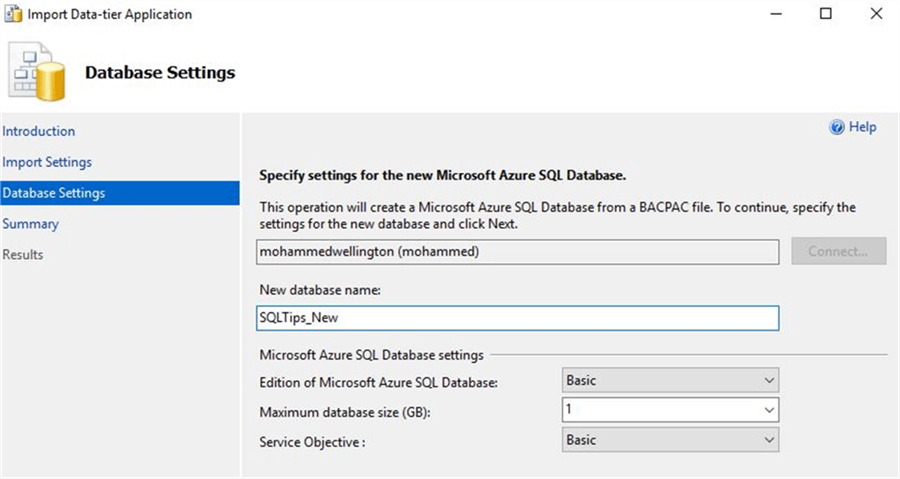
In the next window, specify the database settings for the new Azure SQL database. Once done, click on “Next”.
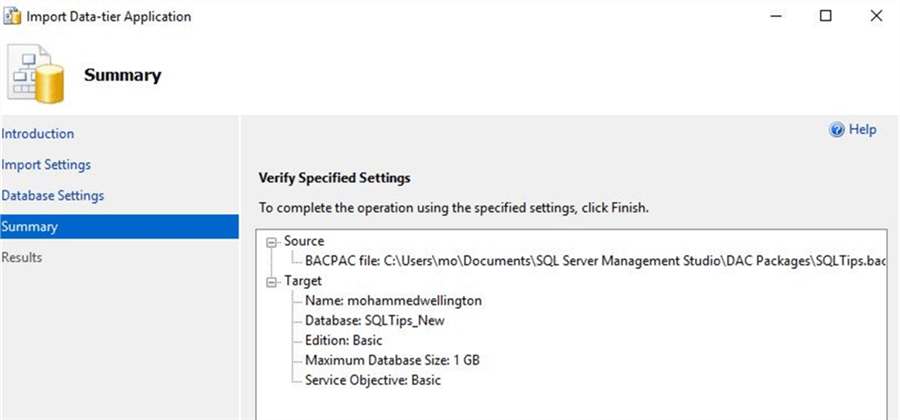
In the next window, you will see the summary section. Review the details and click on “Finish”.
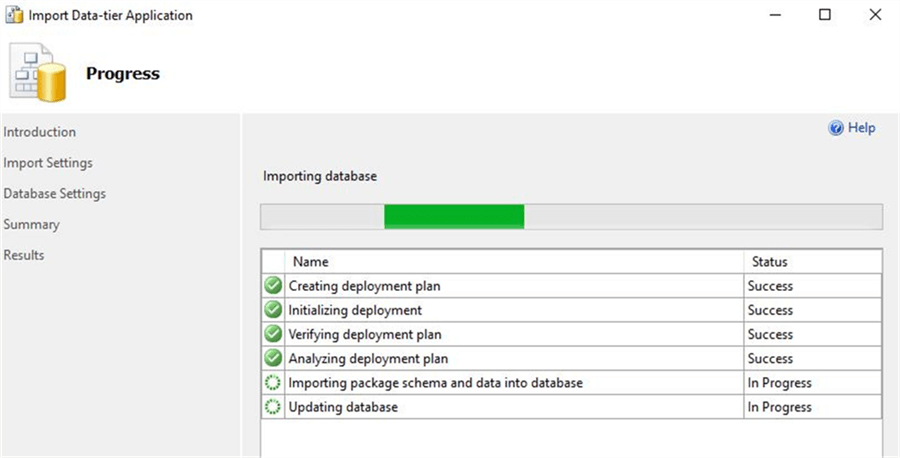
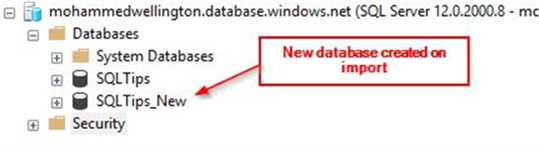
This will start the Import process and you can view the progress of the import tasks. Once the process completes, you will be able to view the new Azure SQL database on the Azure server.
The new Azure SQL database is as shown.
Right click on the new database – “SQLTips_New” to view the collation.

With this, you can see that the Azure SQL database collation has got changed to “Latin1_General_100_CS_AS_SC”
Next Steps
- In the previous tip, you were able to change the collation of the Azure SQL database by a much longer process as you had to export the BACPAC file on to an on-premises server, make collation change on-premises, export from on-premises and re-import on to Azure SQL server.
- In this tip, you were able to apply a work around to change the collation of an Azure SQL database by making changes directly to the BACPAC file
- Try this tip on your own Azure SQL test database
- Try this tip by hacking the BACPAC file of your test Azure database and re-import it again
- To get familiar with Azure, refer the numerous tips available at this link

Mohammed has been a SQL Server DBA since 2005 and has had the opportunity to work on different versions of SQL Server starting from SQL Server 2000 with exposure to Sybase as well. He is based in Wellington, New Zealand and works at Datacom Systems Ltd, as a SQL Database Administrator. He can be reached at: moinu@live.com.
- MSSQLTips Awards: Author of the Year Contender – 2016, 2018-2021 | Achiever (75+ tips) – 2021


@Fran,
Thank you for the feedback.
Regards,
Wow, what an amazing article and one that has resolved a massive issue for us – thanks so much
@Andrew ,
Thank you for sharing.
Regards,
Mohammed
Thanks this helped me and worked for a small database but not for a large one, the import threw errors due to a corrupt zip file.
I found a newer approach where you can copy out the model.xml and use SqlPackage.exe to import the unmodified bacpac file, specifying the custom model.xml via parameter /ModelFilePath: https://techcommunity.microsoft.com/t5/azure-database-support-blog/how-to-change-collation-for-production-azure-sql-databases/ba-p/1723869
Very useful article.