Problem
The adoption of Power BI desktop and Power BI service has been gaining movement ever since it was released five years ago. Power Query is used to import/transform the data into the model and Power View is used to visualize the data in reports.
The ability to load and transform the various data sources using menus makes the tool widely available to business users. The Power Query functional language known as "M" is at the heart of the import process. Having a deeper understanding of the M language helps developers in the cases where the menus cannot.
As a data platform professional, a business user might come to the Information Technology group with a Power Query that takes a long time to process and sometimes fails while transforming data. How can we improve and automate such an ELT process?
Solution
Microsoft announced the preview of the Power Query (PQ) Source for SQL Server Integration Services (SSIS) in the first quarter of 2019. I did take a look at the new data source during the MVP summit in March, 2019. At that time, I did not consider it for my clients since it could only be deployed to Azure SSIS which is part of Azure Data Factory.
Just recently, Microsoft announced the general release of SSIS Projects version 3.3 for Visual Studio 2019 on Christmas Day! I decided to take another look at the Power Query Source during the Holiday season. I was pleasantly surprised that functionality is now supported by both SQL Server Integration Services for 2017 and 2019 as well as Azure SSIS.
Today, any Power Query developed by the business users can now be replaced by an SSIS data flow. This package can be scheduled to run on-premises or in-cloud. Alerting can be added to the package for notification of errors during execution. The data source of the Power BI report can be changed to a pre-processed SQL table instead of the original data source that requires transformation. An UPSERT data movement pattern can guarantee that data is always available for reporting.
Business Problem
There are many more connectors available in Power BI compared to an SSIS package. This announcement is very exciting news. The PQ source will allow developers to gain access to new data sources without having to write custom C# code.
The scraping of data from web pages has been a common practice since the invention of the internet. However, custom code can easily break or produce unexpected results if the source web pages are changed. Today, we are going to examine how to replace the import and transform process in Power Query (M Language) with a SQL Server Integration Services package and database table.
Architectural Overview
January is a fun time for Football fans in the United States. The AFC and NFL playoffs take place during the month of January with teams’ competition for a spot in the Superbowl championship in early February. During the early years (1933-1966) of the football leagues, the regular season standings were used to determine the two teams that would play in the post season game. Starting in 1967, there was a single elimination tournament of the 4 best teams. The number of teams increased over the last 50 years from 4 to 12 teams.
Today, the best six teams of the two conferences make it to the playoffs. The first two teams of each conference receive bye to the divisional or 2nd round. The wild card or 1st round of the playoffs is used to pick two winners out of teams ranked 3 to 6 in each division. The two winners from each divisional round go to the conference championship or 3rd round. The two conference champions compete in one final game for the title of Superbowl winner. Please see Wikipedia for some history around the post season playoffs.

The Office was an American TV series that was popular for almost a decade. Dwight Schrute, our user, has designed a Power BI application that keeps track of a football lottery for the office. One report in the application lists all the historical Superbowl games that have ever happened in the past. The data is currently being scraped from a web page that exists in Wikipedia. You been asked to replace this M Language code with a process in Azure using the new Power Query source for SSIS. The above image depicts the architecture design proposed for this solution.
Azure Objects
Most companies have several environments for a given application. We are going to use two environments to solve our business problem. The development environment will be a single machine called vm4win10. This machine will have all the tools to get our solution developed and modular testing completed.
The production environment will consist of an Azure SQL Server named svr4tips2020, an Azure SQL Database named dbs4tips2020 and an Azure Data Factory named adf4tips2020. The Power BI service will contain a published version of our Superbowl report.

The above image shows the deployment of the four objects in Azure.
Development Machine Configuration
Usually, there is a natural order of how to install the development tools required to build an application. Our project is not different than the rest. The table below has a description of each tool with a link to download the install program.
Please install and configure your environment now.
| Task No | Description | Link |
|---|---|---|
| 1 | Install SQL Server 2019 Developer edition. | Download |
| 2 | Install SQL Server Management Studio | Download |
| 3 | Install Visual Studio Community Edition | Download |
| 4 | Install extensions for SSIS projects | Download |
| 5 | Install Power Query Source for SQL 2017 | Download |
| 6 | Install Power Query Source for SQL 2019 | Download |
The image below shows a bunch of installation programs downloaded into the c:\temp directory. It looks like we might be talking about the Azure Feature Pack for 2019 in a future article.

To recap, deploy the four Azure objects required for the production environment first. Then connect to the virtual development machine using the remote desktop protocol (RDP). Download and install all the tools (components) that are required for the build.
Database Schema
In the past, the Management Studio and database engine were part of one big install process. Today, the database engine is a separate install from management studio and not all database engines reside on a Windows operating system. Therefore, you should be familiar with the SQLCMD utility. The image below shows a very simple query against the database engine in Windows to validate the version of the install. These same steps can be used to validate a database engine installed on Linux.

If you are not familiar with the Windows or Linux command line, put it down as a learning goal for this new year. The open source community that supports languages like Python requires the use of utility programs such as pip.exe to install new components.
The football application has a very simple database schema that can be downloaded here. The image below shows the deployment of the schema to the Azure SQL database. Our production database is ready to go.

Repeat the execution of the Transaction SQL script for the local install of SQL Server 2019 on the development virtual machine. After completion, our development database is ready to go.

In short, the same database schema has been deployed to a Local virtual machine and to the Cloud database service. Next, we can take a look at the Power BI Report that shows historical Superbowl games.
Current Business Report
In the past five years, the New England Patriots have made it to the Superbowl four times. It is sad to see the end of a dynasty in 2020. This year, the Patriots did not make it past the wild card round. Now we know what the final report looks like, let’s take a look at the Power Query behind the data set.

Two M language functions are used to get the data from Wikipedia. The Web.Contents function returns the html page as binary data and the Web.Page parses the data into supported structures. The following image shows the various html elements (tables) that make up the web page. The second entry in the list contains the data that we want. The image below shows the first step in the M-Language statement.

The last five lines in the Super Bowl Championship table contain future games that have not been played yet. These rows can be eliminated from the final data set. We can see in the image below that every column has extra data that is not wanted. For instance, we do not care about the playoff information that is embedded in the Winning and Losing team fields. Ultimately, we want to use the menus of the Power Query editor to create a bunch of M language steps to clean up the data.

The image below shows the final presentation of the data ready for reporting. All extra data has been eliminated from each column (field).

The actual M Language code can be found by choosing “edit queries” from the main tool bar and “advanced editor” for the tool bar on the second window. We can see that 38 lines of code were used to make turn the dirty html data into clean results. I am enclosing a link to this query that will be required when we use the Power Query source with SSIS.

The ultimate goal of the SSIS package is to take the dirty HTML data and save it as pristine data in a SQL table. The image below shows the final information in the data pane of the Power BI Desktop designer.

Now that we have a working Power Query, we can use the M language statement to build out an Extract, Translate and Load package in SSIS.
Visual Studio Project
The Visual Studio 2019 product is a mature integrated development environment that can be used to build many things. Today, we are going to focus on integration services project. Choose the create a new project to continue to the next menu.

The type of supported projects depends on the base install of the IDE and any extensions that have been installed. Since the SSIS extensions were part of the development machine build, we have three templates that can be used to start a project. The import project wizard allows the developer to point to an existing Services catalog and use a package as the basis of a new project. The Azure Enabled project allows the developer to develop and deploy to Azure. The platform as a service (PAAS) offering of the service is available in Azure Data Factory. We want to choose a plain old integration services project as our template. Please see the image below for various template options.

The configuration of project properties is the last step in the process. Choose a project name, a solution name and a directory path to the solution. I decided to create the project in the “c:\projects” directory. If you ever make a mistake, exit the visual studio editor. Go to windows explorer and delete the aptly named directory. Then repeat the process with the configuration that you want.

The above image shows the creation of the PowerQueryExample project on the c drive. The next step is to design the control and data flows required to read the html page, translate the information into records and store the records into a SQL Server table.
Connection Manager
I am assuming the reader has knowledge on how to create control and data flows. Please see either MSSQLTips articles or MSDN documentation to get up to speed with the technology. The connection manager in the design pane is where we define the source and destination connection strings. Right click in the connection managers area to define a new connection. I am going to define the destination first since it is familiar with many readers. I decided to use the Native OLE DB connector for SQL Server. Since the database engine is on the same machine as the development tools, we can use the (local) key word to refer to the server name.
Typical connection string items have to be filled in before a successful test can be conducted. I am totally being lazy and going to use the system administrator (sa) account and password. In the real world, I would define an application account that would have read/write access to the development database. Last but not least, enter dbs4tips2020 as the database name. Always store the password and check the connection before saving. The image below shows typical entries for a destination connection to SQL Server.

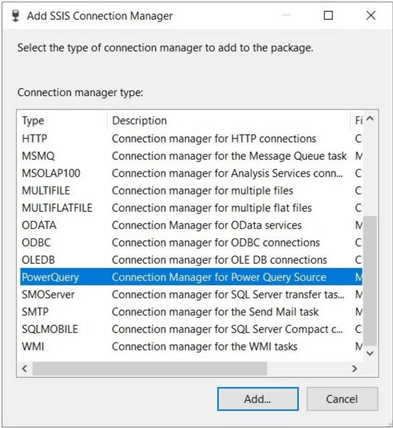
The second connection that we need to make is for the PowerQuery source. The image below shows all the different connection managers available to a SSIS package.
The data entry required for the PQ editor is straight forward. We want to use a Web data source and an Anonymous authentication method. Next, enter the complete URL to the web page. In our case, we want to point to the page on Wikipedia. Last but not least, test the connection before saving the connection. The image below shows only the web source kind. However, Power Query can work with many exciting data sources.

The names given to a default setup using the connection manager are not explicit in nature. I like to use a naming convention when creating objects in the SQL Server Integration Services packages. I choose to name the source connection as CM_PQS4_SUPERBOWL_TEAMS and the destination connection as CM_SQL4_SUPERBOWL_TEAMS. See the image in the next section for details. Now that we have the connections defined, we can start work on the control flow.
Control Flow
As a senior consultant, I see many companies and many developers over the course of one year. Many people do not aptly name their objects and/or comment their code. As a new year’s resolution, please stop the chaos by leaving bread crumbs for the next developer to pick up. You never know, it might be you looking at the failing package in 6 months wondering about the purpose and design of the package.
The package shown below has a simple header (annotation) inserted into the control flow. I have the name of the author, the name of the package, the version of the package and the date that the package was created. I cannot leave out that I am blogging for this site. The purpose section of the header can show a simple outline of the algorithm that you are using. I am going to use three steps to load and maintain the Superbowl table.

The logical package design uses a staging table to store the raw data retrieved from the Power Query source. I suggest using a string data type for each field to prevent conversion errors. Step number one truncates the staging table by using an execute SQL task. Step number two loads the staging table using a custom defined data flow. Step number three UPSERTs the data from the staging to active table. Today, the MERGE statement can be used to implement an insert, update or delete pattern depending upon a comparison of the stage and active tables. Older production systems will have a multi-line stored procedure to implement the same logic. You can notice that I am using a naming convention for all the control tasks.
The image below shows the TRUNCATE TABLE statement being used in the Execute SQL task. This task clears out the staging table. One extremely useful feature in the control flow is the ability to disable tasks that might not have been coded and/or tasks that are being modularly tested. The above image shows two tasks being active.

I decided that the data flow is now ready for testing. So, I can disable the data flow named DFT_LOAD_STAGE_TABLE. Next, I can manually add test data to the staging table. Last, I can execute the package. This is a very simple modular test of step one. The image below shows the success execution of the described package state.

Please stop debugging the SSIS package and get ready to create the data flow. I will not be exploring how to code a UPSERT pattern in T-SQL today since it is not the focus of this article.
Data Flow
Open the data flow design pane and drag the Power Query source to the canvas. The queries section of the editor asks for the M-Language query. Copy and paste the query from our PBI Desktop report. Proceed to the next tab to continue.

Please select the connection manage named CM_PQS4_SUPERBOWL_TEAMS to complete the entry. Proceed to the next and last tab.

The columns section of the editor will display the data if the connection is active. Click the OK button to save the setting of the source control.

The problem with the Power Query source is the supplied data types for the web data source. Since the M language does not know the length of the string, a text data type or very large string is returned. Use the Data Conversion control to reduce the column sizes. I prefixed the newly formatted columns with “c_” so that they stand out. See image below for details.

The final control to place on the data flow is the destination. I am going to use the OLE DB editor to define how the table is going to be loaded. Since the total number of records in the data set is less than 100, I am going to perform a load using INSERTS. If you have a large amount of data to load, choose the fast table (bulk insert) data access mode with a specified batch number. Remember, the whole batch completes or fails as one transaction.

The image below shows the complete data flow with a code header and each object named using a convention. The proof is in the pudding is an old adage to stand bye. We cannot know if the data flow is good without testing.

The image below shows the execute of the completed package. We can see that 53 rows were written to the destination table.

The last test of this package is to verify the data in the destination table. The image below shows the correct data in the SQL Server 2019 table.

Summary
The Power Query source offers a green pasture for SSIS developers that do not like C# code. Any existing Power BI desktop report can be torn apart for the M language code. New data sources can be imported and worked on in the Power Query editor. At the end of the day, the step-by-step menus create a functional M language statement which is at the heart of the import process.
While I did not go into building out details of the development and production environments, these tasks will take some time complete. In the past, many of these tools were part of one big division within Microsoft. The release time lines for these tools were measured in months if not years. In today’s world, these tools are installed as module extensions which allows for shorter release times.
The development of a data flow that leveraged the Power Query source was straight forward. Make sure the package version matches the installed source. If your package is at level 2019, but the Power Query source install was 2017, the new control will not show up in the SSIS toolbox. I did not get to finish this build out with a deployment to the local SSIS catalog. In a future article we will build out a local and Azure SSIS catalog. The scheduling of the package and the deployment of the report to the Power BI service will complete the project.
I hope you liked this article. I want to send a big thank you to the SSIS engineering team at Microsoft for making this article possible. Stayed tuned for talk about the flexible file task, destination and source in a future article.
Next Steps
- Install Azure SSIS for Azure Data Factory and Azure SQL database
- Install Azure SSIS for Azure Data Factory and Azure SQL MI
- Compare and contrast local versus cloud deployment of packages
- What is new in the Azure Feature Pack for SSIS 2019

John Miner is a Senior Data Architect at Insight Digital Innovation helping corporations solve their business needs with various data platform solutions.
He has over thirty years of data processing experience, and his architecture expertise encompasses all phases of the software project life cycle, including design, development, implementation, and maintenance of systems.
His credentials include undergraduate and graduate degrees in Computer Science from the University of Rhode Island. Also, he has earned certificates from Microsoft for Database Administration (MCDBA), System Administration (MCSA), Data Management & Analytics (MCSE), Data Science (MPP), Databricks Certified, and Fabric Certified.
John has been recognized with the Microsoft MVP award nine times for his outstanding contributions to the Data Platform community.
When he is not busy talking to local user groups or writing blog entries on new technology, he spends time with his wife and daughter enjoying outdoor activities. Some of John’s hobbies include wood working projects, crafting a good beer and playing a game of chess.
- MSSQLTips Awards: Author of the Year – 2019, 2022, 2023 | Champion (100+tips) – 2023


Hello Jonh, thank you for your instruction.
I have a question related to your topic. That is I want to deploy the SSIS package using power query connection on SQL Server. I check the version of all services but apparently my sql server did not recognized the Power query connection on Intergration Services Catalogs. Can you give me a hint where I can find instruction for this? Thank you
Thank you, I managed to create multi query/transformations M code but got new issue. I’m getting the error when executing deployed SSIS package from SSMS: can not load PQ connection manager …. when validated the package noticed that PQ connection manager (it’s at the pkg level) does not get deployed. Please help what am i missing?.
Dear Reader,
I was looking at the bottom of the stack of comments, not the top. My bad, life is crazy busy.
Okay, to the question of complex transformations. The M language is a functional language.
You must create one function f(x). But when you build one query upon another you are using f(x), f(y) …
I have not tried multiple tables. So, I can not say it is supported or not. I would think it would be.
I have not tried building f(x) where x = f(y). Nested M queries. Try combining the logic into one M query.
If not possible, then do the main transformation and store it in a temporary place like a staging table 1.
Then apply the transformations to staging table 1. Repeat until the business logic is done.
In short, I did look at wrangling data flows in Azure Data Factory about 18 months ago. They were not ready for prime time. I know some work has been done since then. Just have not had a client that is using them. As for the Power Query Source, I have not had a chance to revisit the control and see if these two complex cases are supported.
I hope this helps. Try it on your own. Send me a personal email on how you make out. I am curious.
Sincerely
John
It’s great but how does it work with multiple queries, tables… when referencing previous transformations. How to change syntax or add multiple PQ task?
This article is very useful. I want to do same thing which is done in this article. But mine is not working. I have API url with token. This url is working in power bi but not in SSIS using power query source task. I am getting error like “(500): Internal Server Error (Microsoft.MashupEngine)” . please your help.