By: Ron L'Esteve | Comments | Related: > DevOps
Problem
In my previous article, Deploy SQL Database from Azure DevOps with an ARM Template and DACPAC File, I discussed how to deploy an Azure SQL Database using Azure DevOps CICD. However, this article does not cover the process of connecting to a source repo and then using this repo in the Azure DevOps CICD pipelines. How can we create and deploy a Visual Studio Database project to Azure SQL Database with Azure DevOps for CICD and a GitHub repository for source control?
Solution
There are a few source-control options within Visual Studio. GitHub is one of these source control options and offers a number of benefits including advanced security options. Integrating multiple applications such as Visual Studio, GitHub, Azure DevOps and Azure SQL Database for a seamless CICD process is a growing need for many enterprises that are on a journey to modernize their data and infrastructure platform.
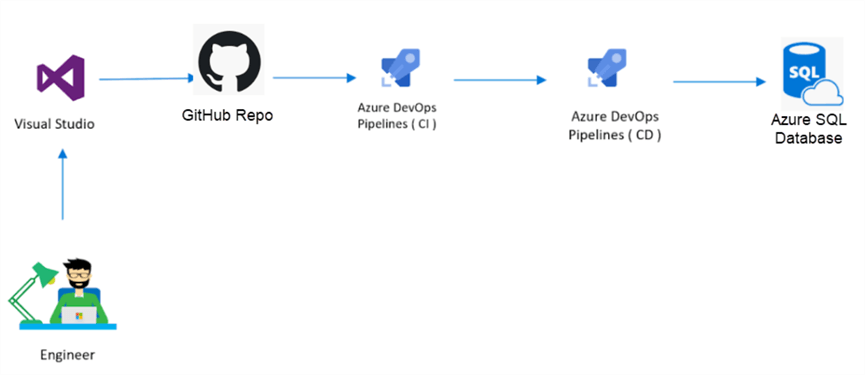
In this article, I will demonstrate an end-to-end solution for the following architectural flow to deploy an AdventureWorksLT2019 database from Visual Studio to an Azure SQL Database through a GitHub repository and then deployed by both an Azure DevOps Build (CI) and Release (CD) Azure pipeline.
Pre-Requisites
1) Visual Studio 2019 with SSDT: See Visual Studio 2019 downloads and Download SQL Server Data Tools (SSDT) for Visual Studio.
2) GitHub Account & Repo: See How to create an account in GitHub and Create a repo.
3) Azure DevOps Account & Project: See Create an organization or project collection.
Create a Visual Studio SQL Database Project
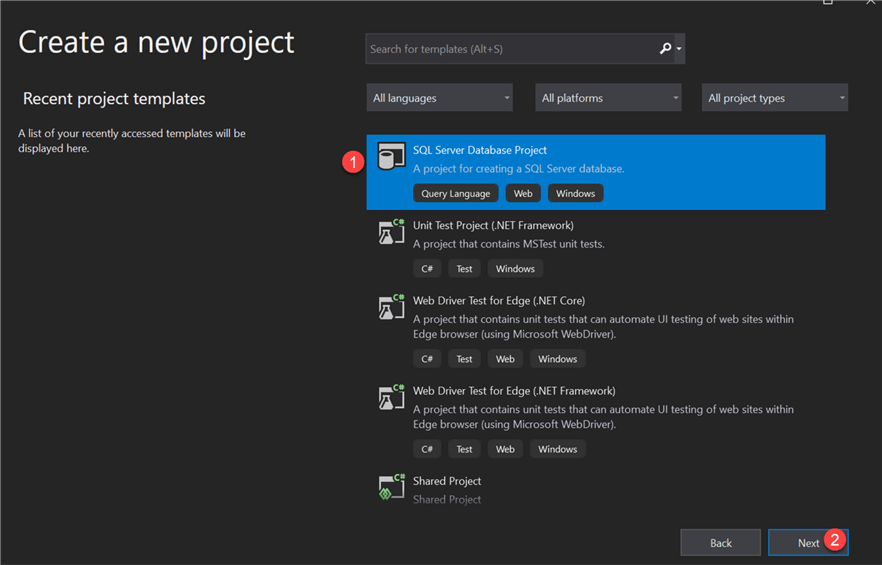
Let’s begin by creating a new SQL Database Project in Visual Studio 2019.
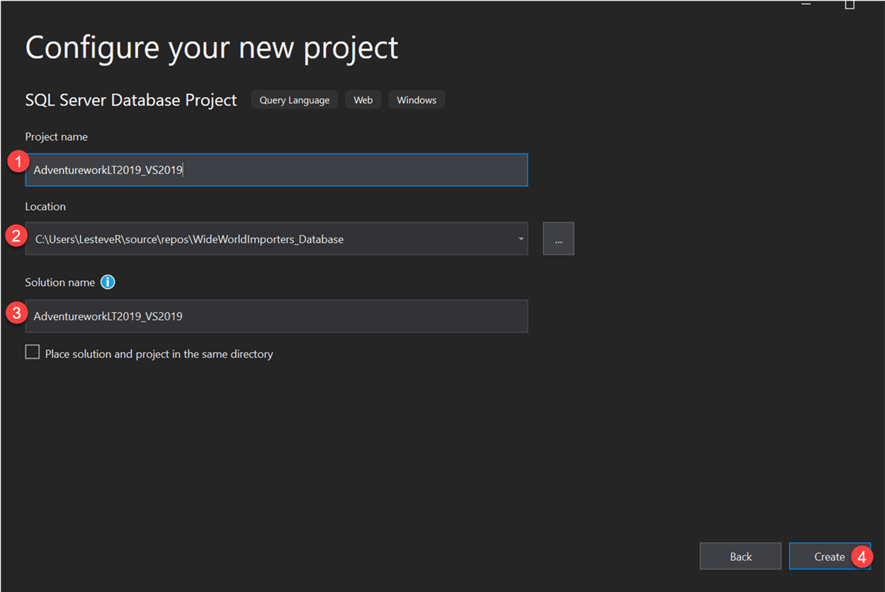
Next, configure and create the project.
Install Visual Studio GitHub Extension
Since this Visual Studio solution will be linked to a GitHub source control repo, install the following GitHub Extension.

Close Visual Studio to complete the GitHub Extension installation.

Import Adventure Works Database
Next, import the AdventureWorksLT2019 dacpac file. For more information on dacpac, see Data-tier applications.
AdventureWorks Sample databases can be downloaded and used for the import process. Notice that the databases are in .bak format and will need to be converted to .bacpac format.
For more information on converting .bak to .bacpac, See Import .BAK file to Azure SQL Database. In short, remember to restore the .bak file and then export it to .bacpac format.
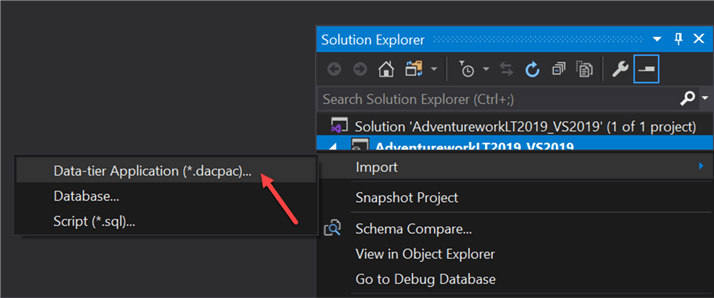
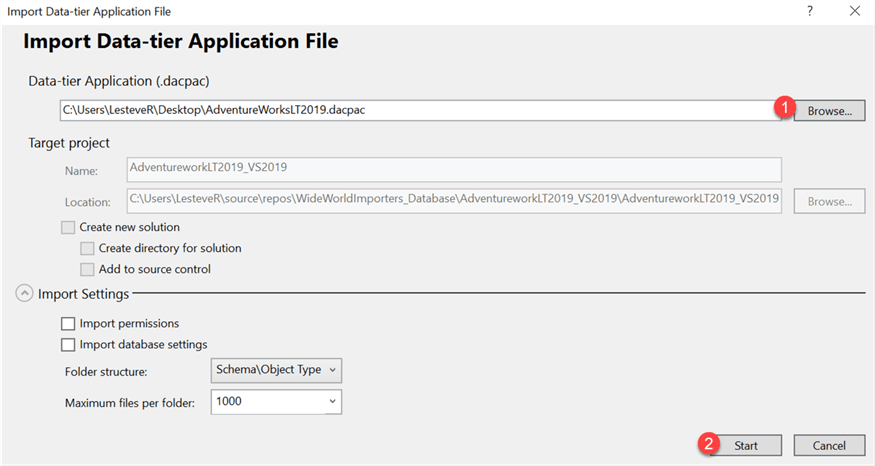
Click Finish.
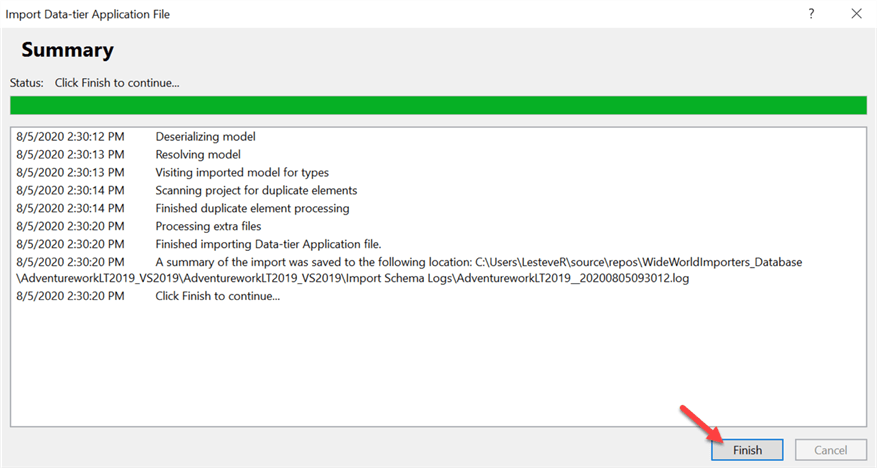
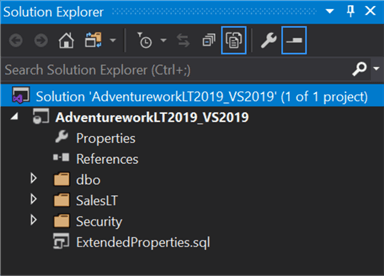
Once the data-tier application is imported, the schemas will be listed as folders in the SQL Server Database project.
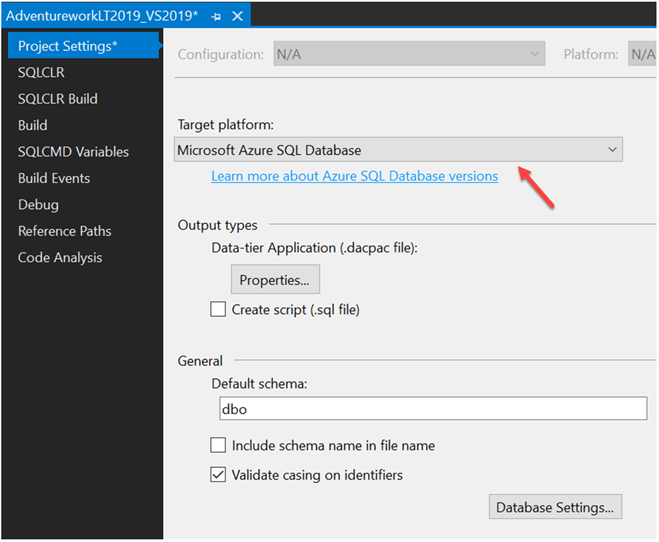
Ensure the database project target platform is set to Microsoft Azure SQL Database from the Database project properties GUI.
Connect to GitHub Repo Source Control
Now that the project had been imported and configured appropriately, add the solution to source control.
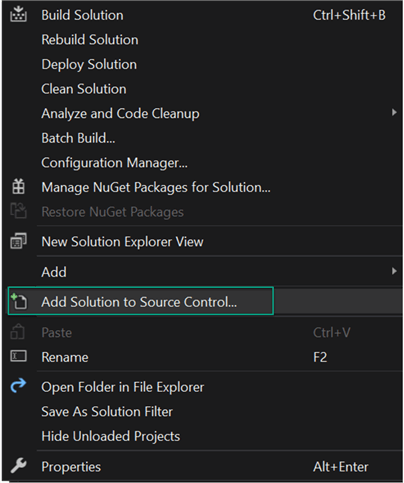
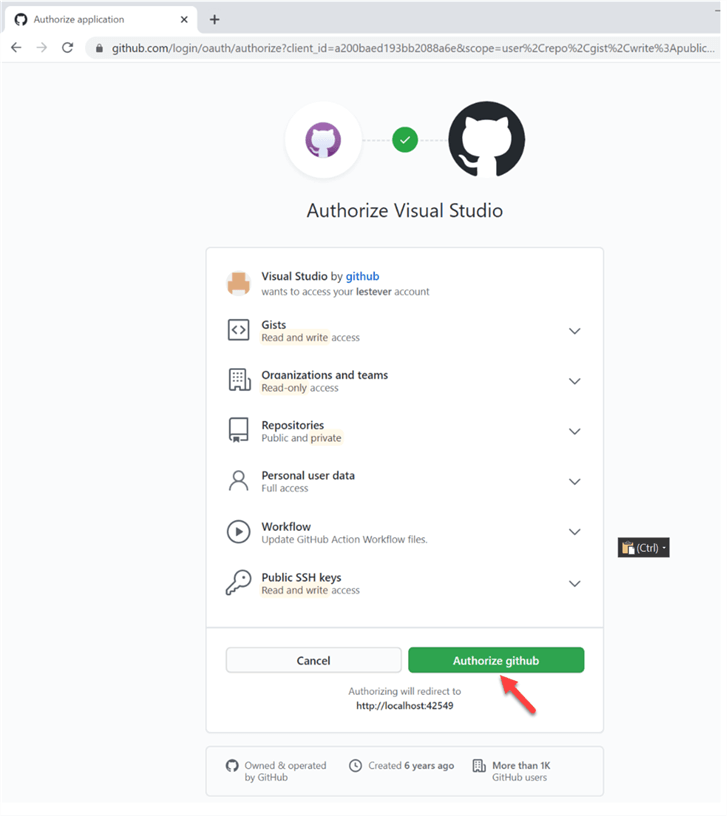
Connect to GitHub from Visual Studio.

A prompt will appear to authorize Visual Studio and GitHub to integrate together.
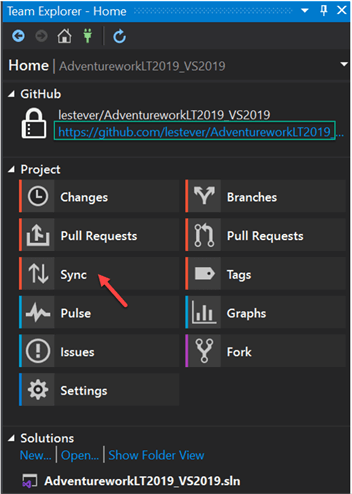
Check-In Visual Studio Solution to GitHub Repo
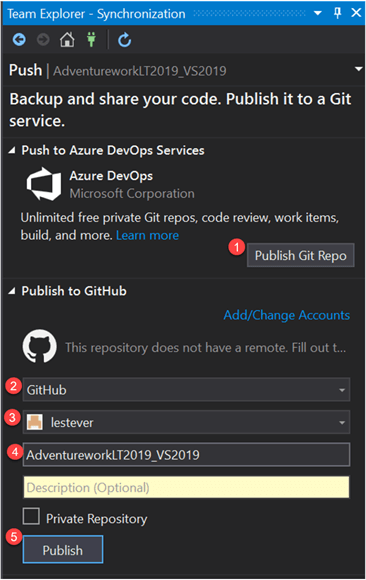
Now that the solution has been added to a GitHub Repo, click home and then sync to check in the solution to the GitHub Repo.
Publish the solution to the desired GitHub repo.
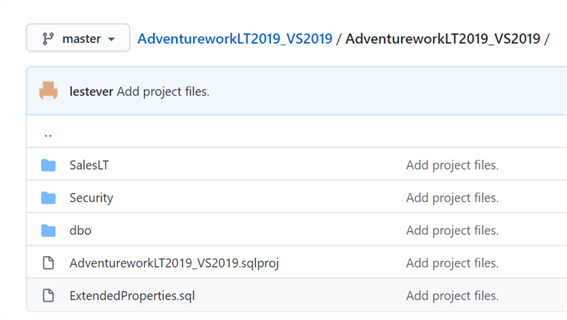
Verify that the solution has been checked into the selected GitHub Repo.
Install Azure Pipelines from GitHub
Now that we have integrated Azure GitHub with Visual Studio, it’s time to now install Azure pipelines from the GitHub Marketplace to integrate GitHub with Azure DevOps.
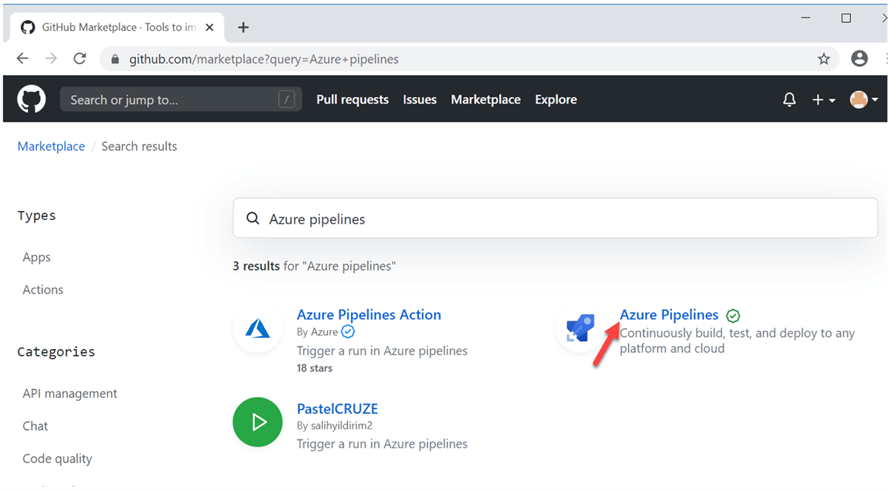
For more on Azure Pipelines, see What is Azure Pipelines?
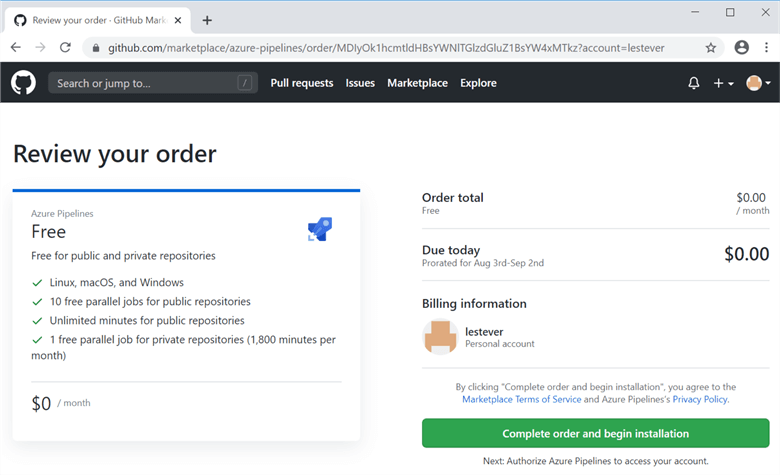
Set up an Azure Pipelines Plan
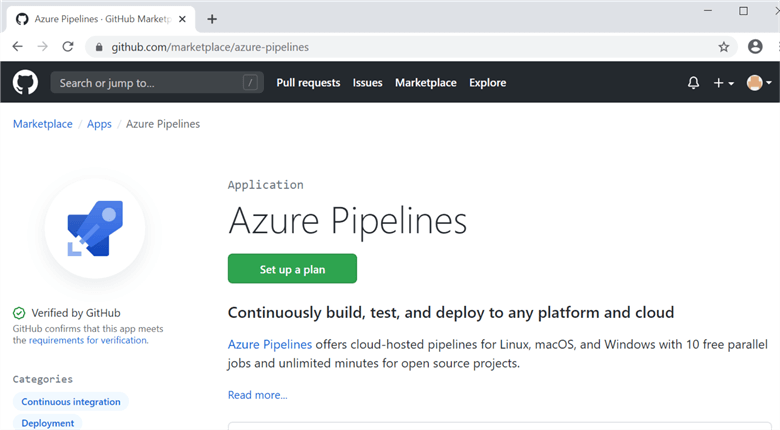
See Pricing for AzureDevOps for more information on Azure pipelines pricing.
For this demo, I have selected the Free account which has the following free benefits.
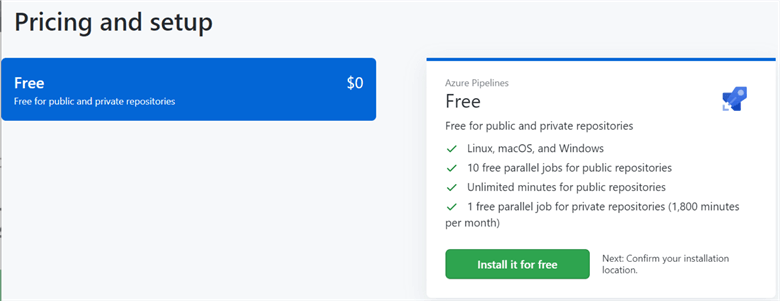
Complete the order and begin the installation.
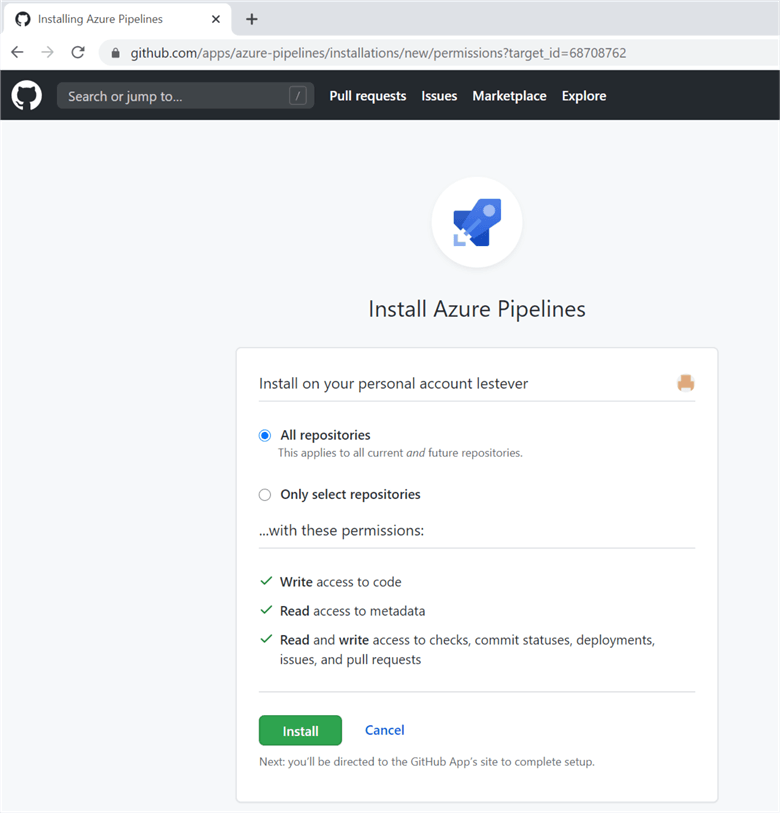
Click Install.
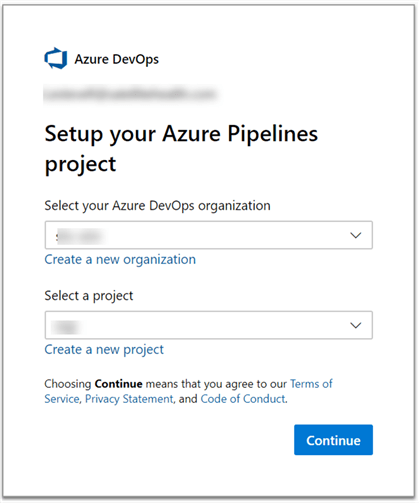
When prompted, select your Azure DevOps pipeline project and organization and click continue.
When prompted, Authorize the integration between Azure pipelines and GitHub.

Build CI Pipeline from GitHub Repo
We’re now ready to create a Build Continuous Integration pipeline from the GitHub Repo.
Use classic editor to create the build pipeline without yaml.
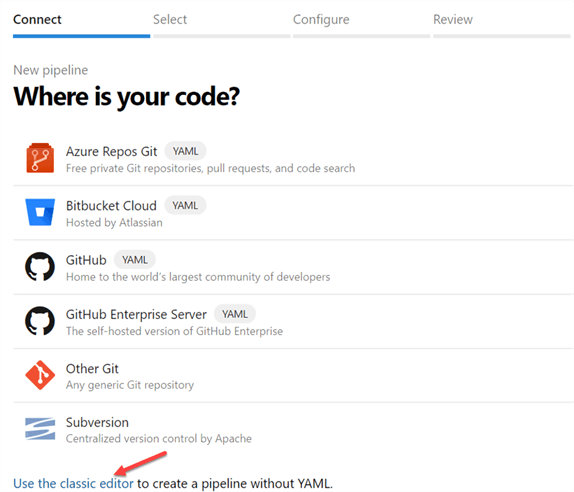
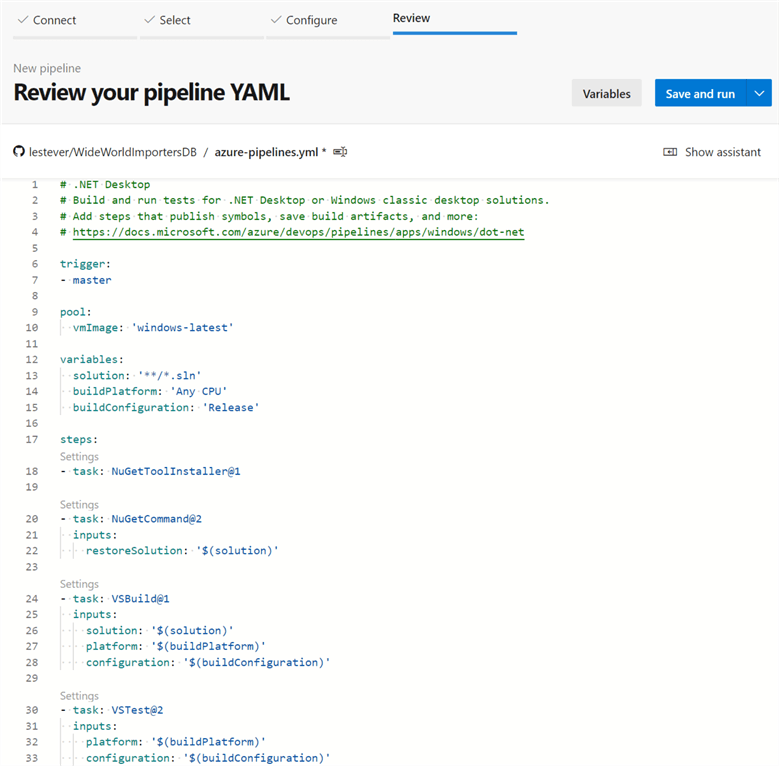
Note that there is also an option to create the pipeline with Yaml and will require yaml code. For more information on YAML, see YAML Tutorial: Everything You Need to Get Started in Minutes.
For this demo, I will only use the classic editor to create the pipeline.
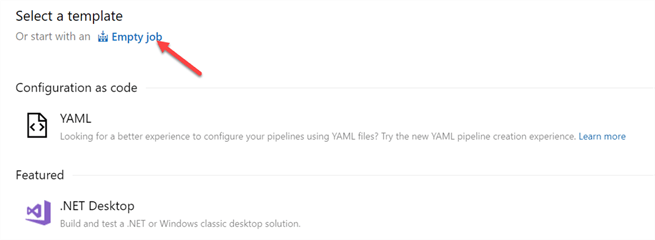
Let’s start with empty job.
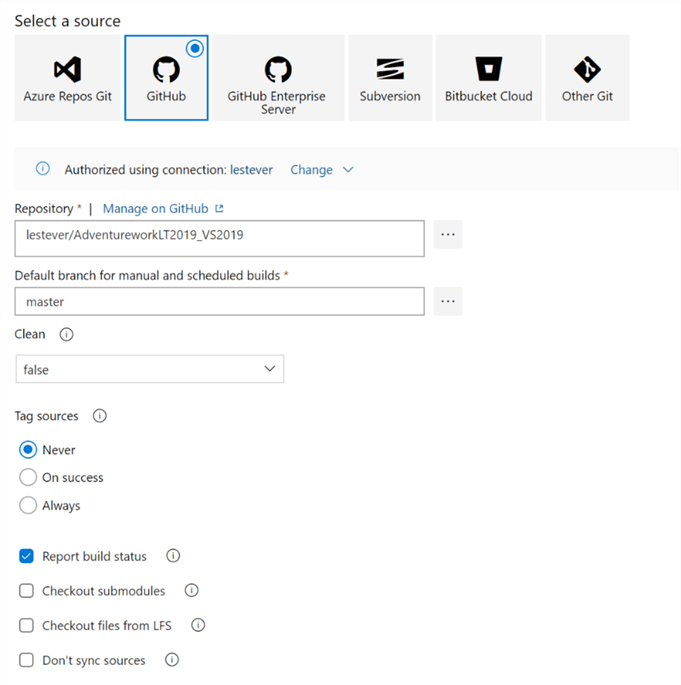
Next, select GitHub as the source. Also, select the repo.
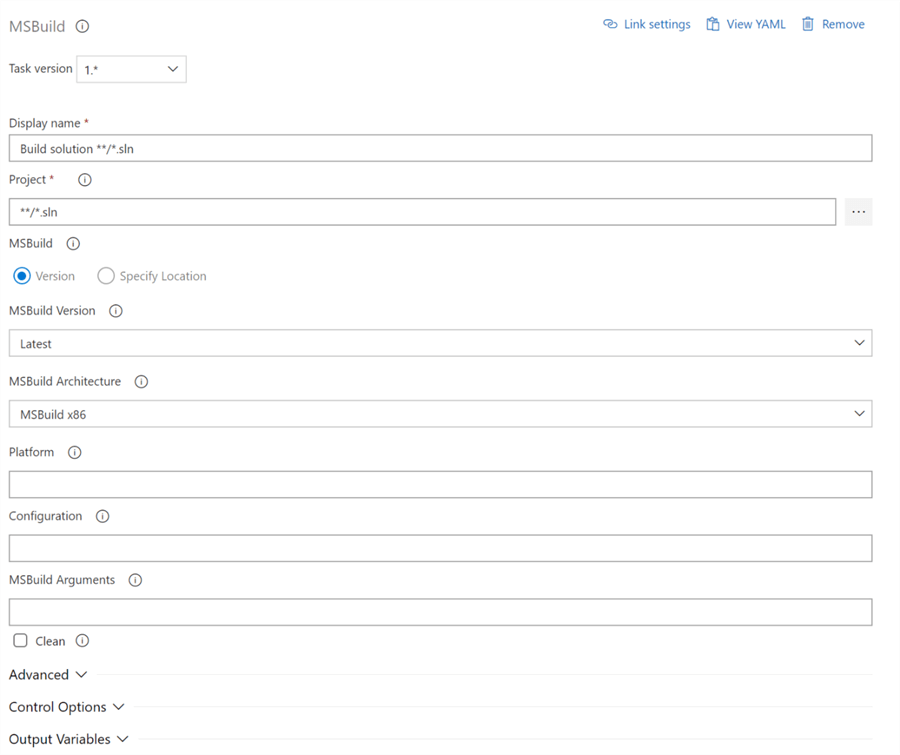
Search for and Add the MSBuild task to the pipeline. This will build the Visual Studio solution. For more information, see MSBuild Task.

Verify the MSBuild Configurations.
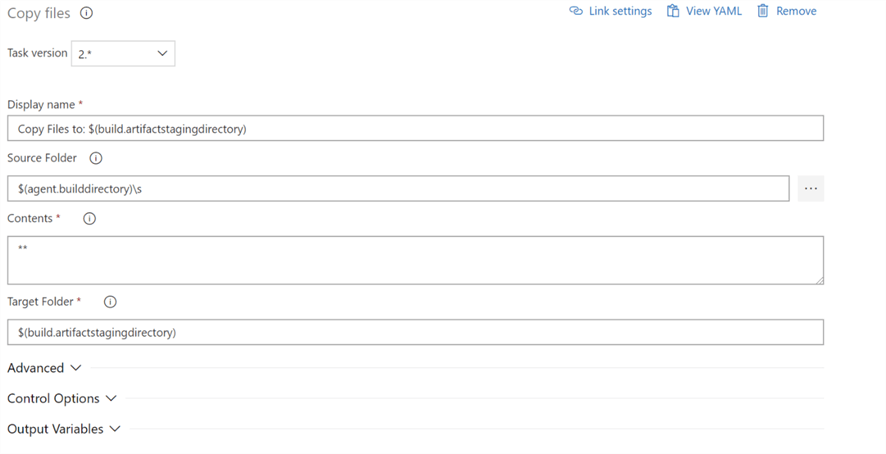
Also, add the Copy files Task which will copy files to the artifact staging directory. For more information, see the Copy files Task.

Verify the configuration options.
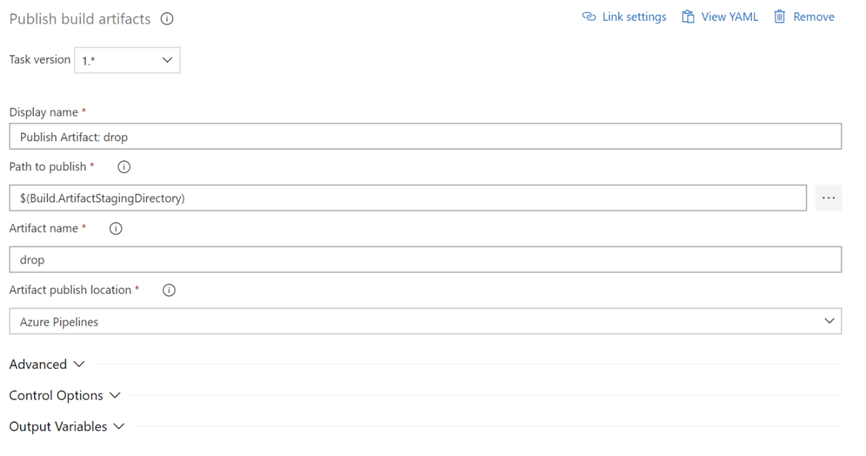
Finally, add a Publish build artifacts task to publish the staging directory artifacts to Azure Pipelines. For more information, see Publish Build Artifact tasks.

Verify the publish build artifact configurations.
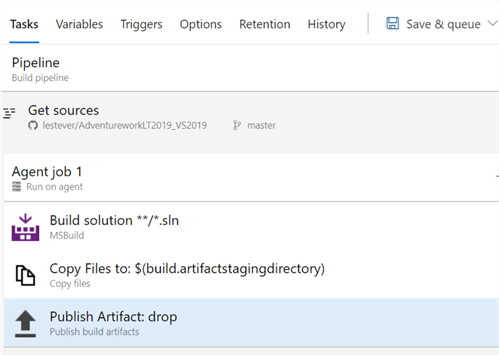
Click save and queue.
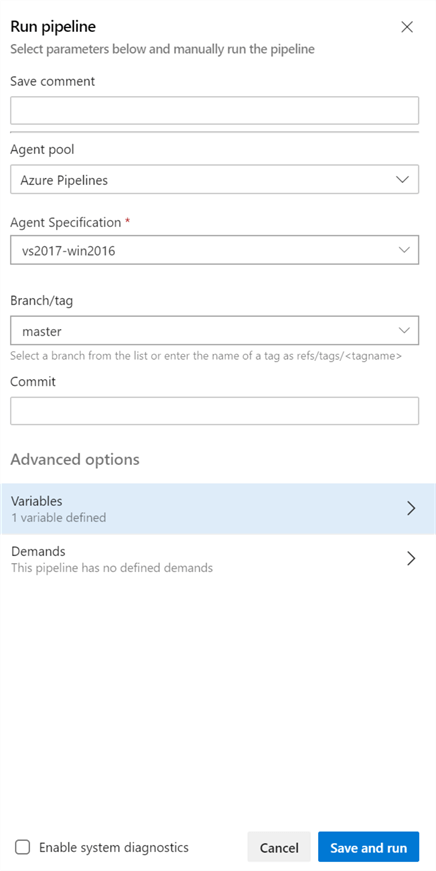
Verify the run pipeline parameters and click save and run.
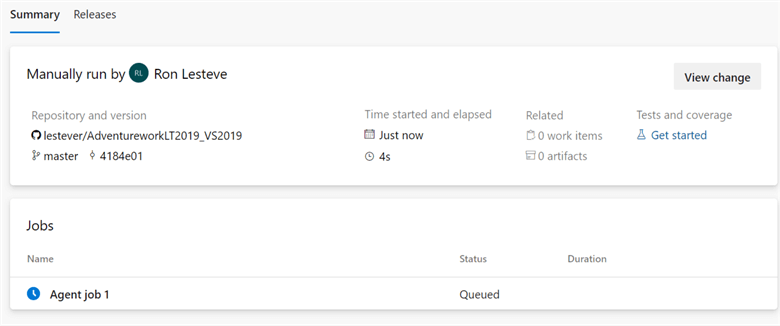
Notice the build pipeline summary which contains details and status of job.
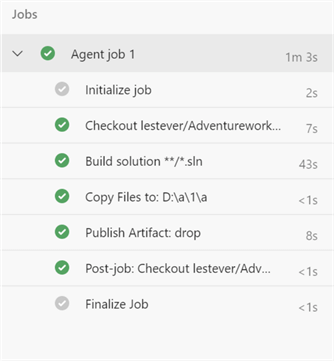
Confirm a successful job status once the Agent job completes.
Release CD Pipeline from DevOps Artifact Repo
Now that the build pipeline has been created and successfully deployed, its time to create a release pipeline.
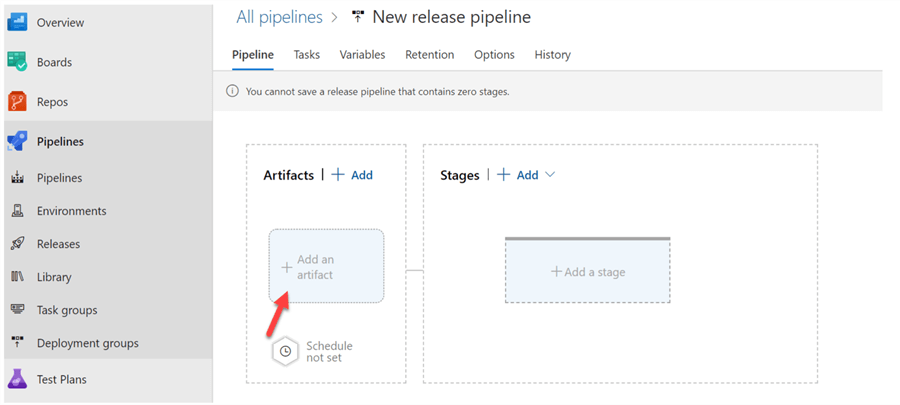
Begin by adding a release pipeline artifact.
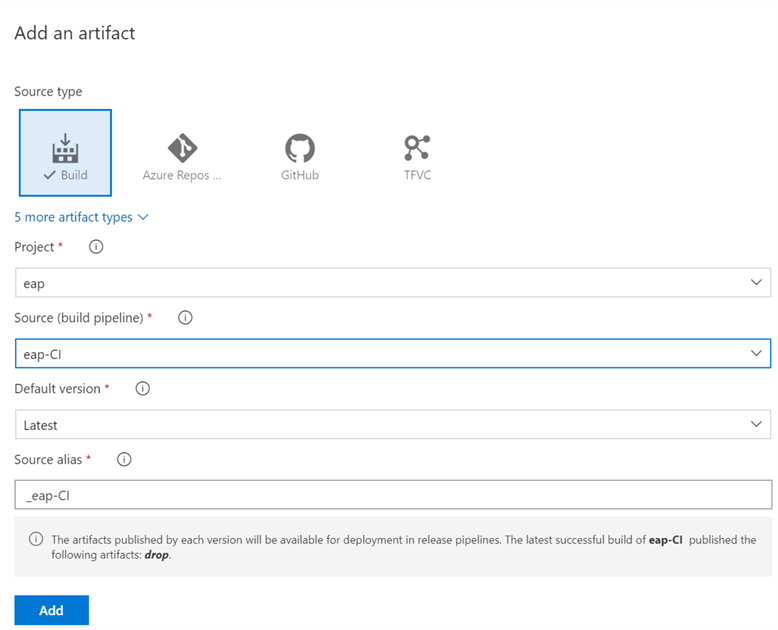
Select the build artifact and click add.
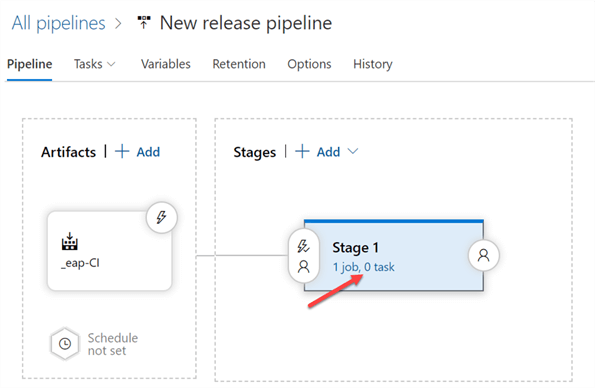
Add an empty job for stage

Verify the Stage properties.

Add a task
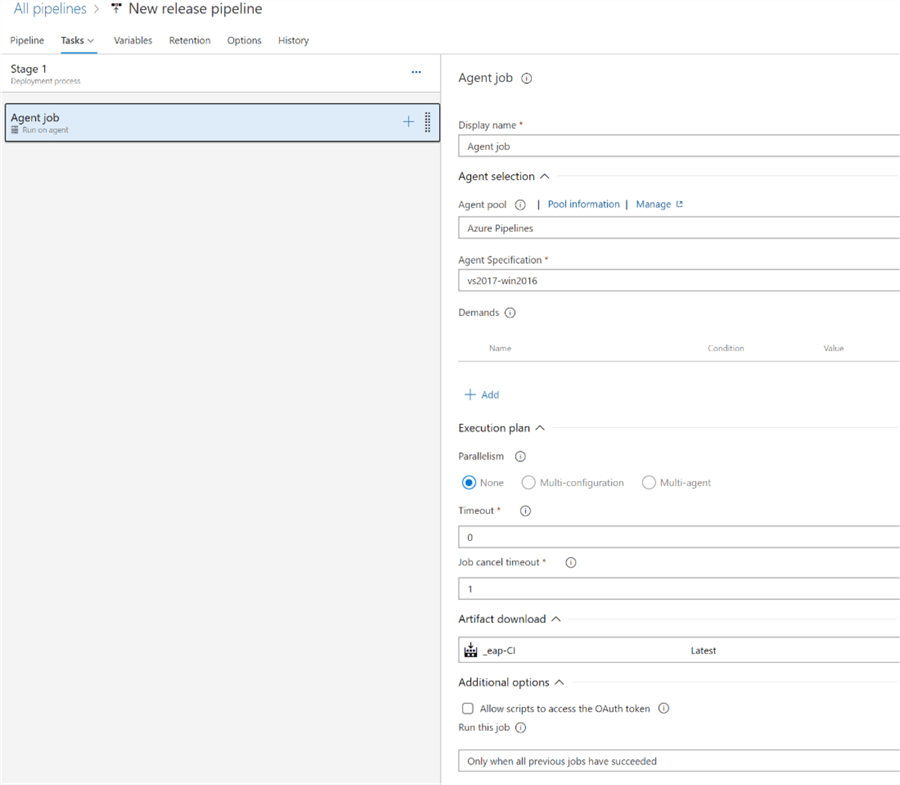
Verify the Agent job details.
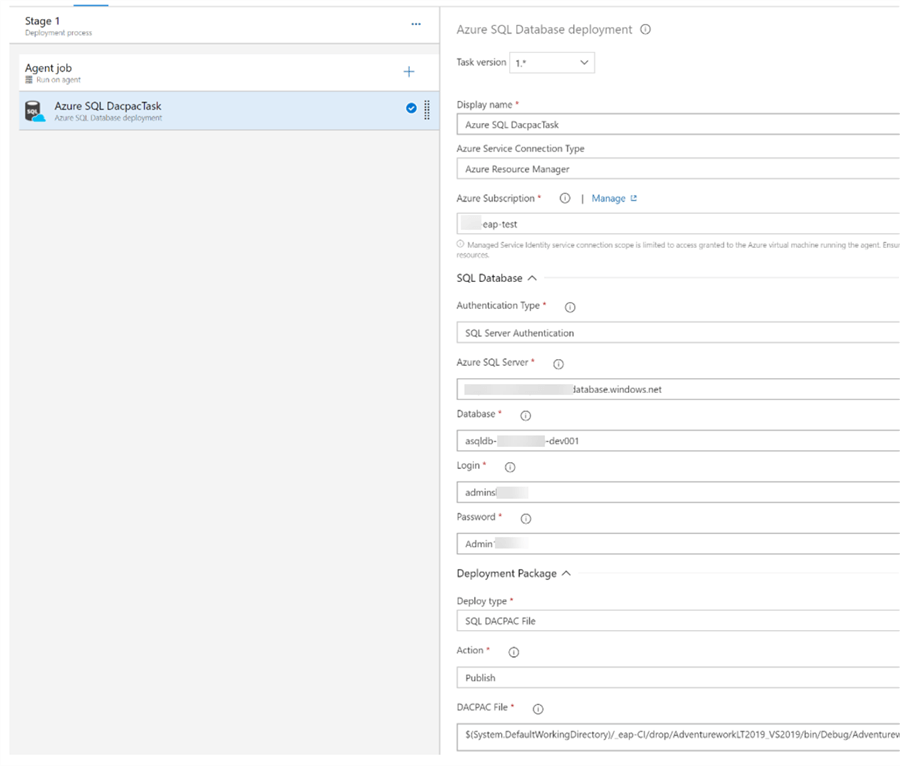
Add the Azure SQL Database deployment task which will deploy the Azure SQL Database using a DACPAC file. For more information, see Azure SQL Database Deployment task

Populate the necessary Azure SQL Database deployment parameters.
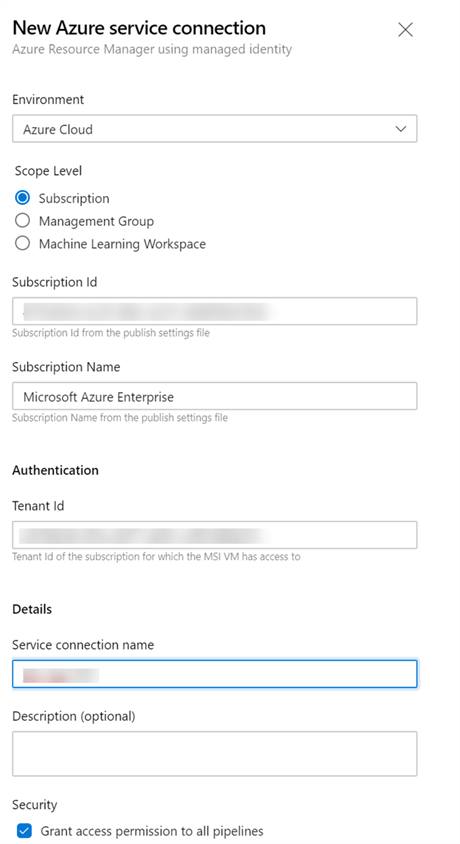
Click manage to connect to your Azure account.
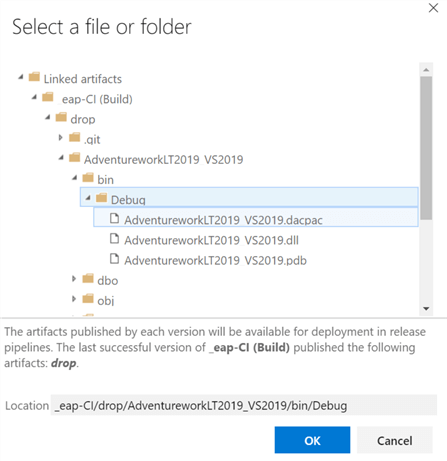
Also, select the AdventureWorks2019LT dacpac file that was built and stored in the artifact drop directory from the previous build pipeline and click OK.
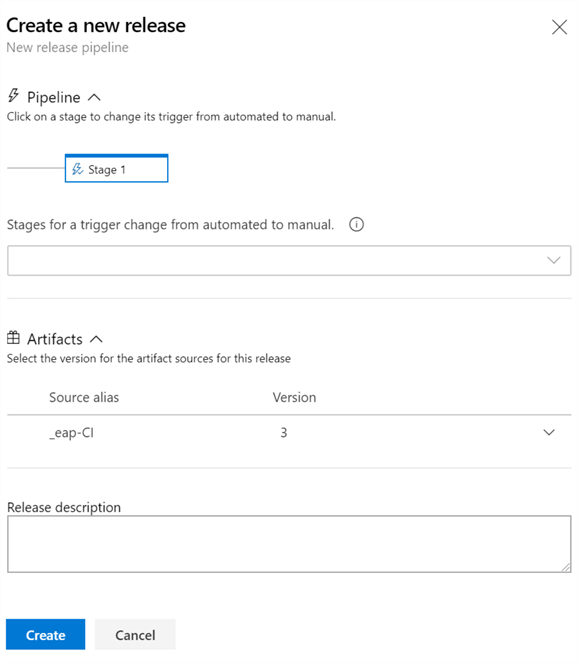
Proceed to create the new release.
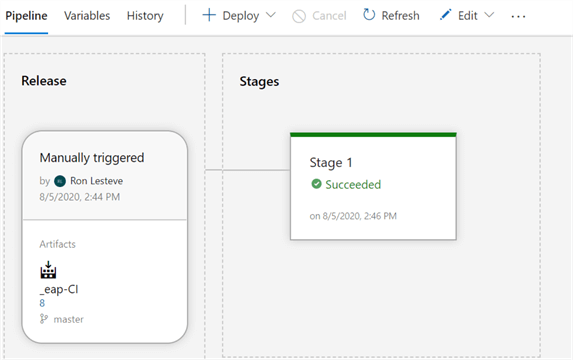
Verify that the release pipeline succeeded.
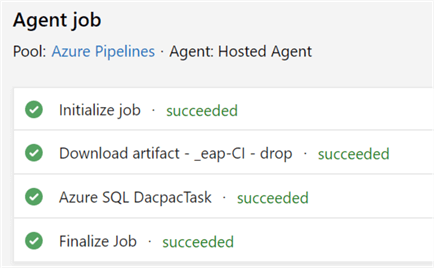
Also, verify the Agent job steps.
Verify Deployed Azure SQL AdventureWorks Database
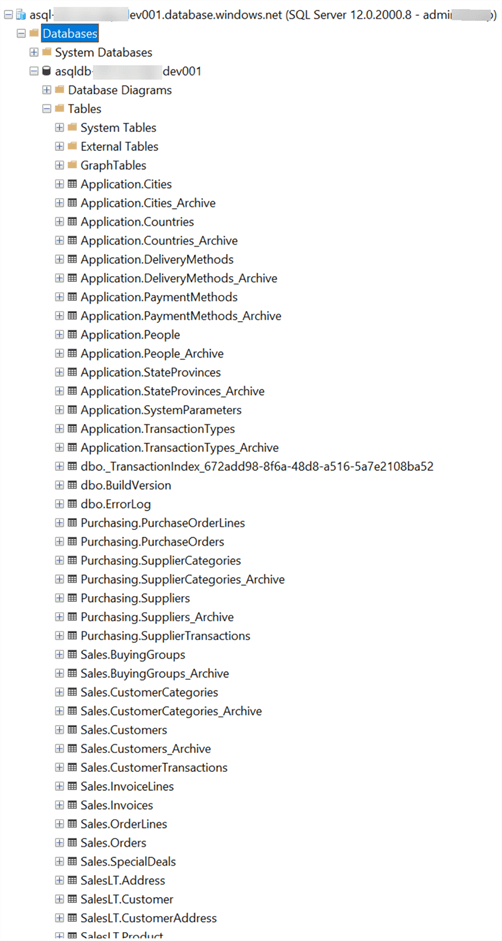
Lastly, log into the Azure SQL Database and verify that the AdventureWorksLT2019 database exists in the specified at deployment.
Next Steps
- For more information on getting started with GitHub for SQL Server, see Getting Started with GitHub for SQL Server.
- For more on building a SQL Server Database in Azure DevOps, see: Build your SQL Server Database.
- Watch the video on Continuous Builds with your GitHub projects using Azure Pipelines.
- Read more on Connecting Azure Boards to GitHub.
- Read more about GitHub integration with Azure Pipelines.
- Read about Continuous Database deployments with Azure DevOps.
- Read about How to Connect a Visual Studio Project to GitHub.
- Read about How to Build GitHub Repos.
About the author
 Ron L'Esteve is a trusted information technology thought leader and professional Author residing in Illinois. He brings over 20 years of IT experience and is well-known for his impactful books and article publications on Data & AI Architecture, Engineering, and Cloud Leadership. Ron completed his Masterís in Business Administration and Finance from Loyola University in Chicago. Ron brings deep tec
This author pledges the content of this article is based on professional experience and not AI generated.
View all my tips


