Problem
Installing SQL Server is not overly complicated, but it is helpful to know what to expect before you walk through the installation process. This tip will show you the various screens and options that are part of the install process for SQL Server.
Solution
We’ll walk through each of the steps of installing SQL Server 2019 Standard Edition on Windows Server 2019 via the GUI. Learn about SQL Server 2019 new features.
Download SQL Server 2019
If you don’t have a copy of SQL Server 2019, you can find links to download the Developer Edition and other trial versions on this page.
Once you have the files downloaded, we can begin the installation process.
Install SQL Server 2019
Windows Directory
- To start the install, double click on setup.exe and the first screen will open

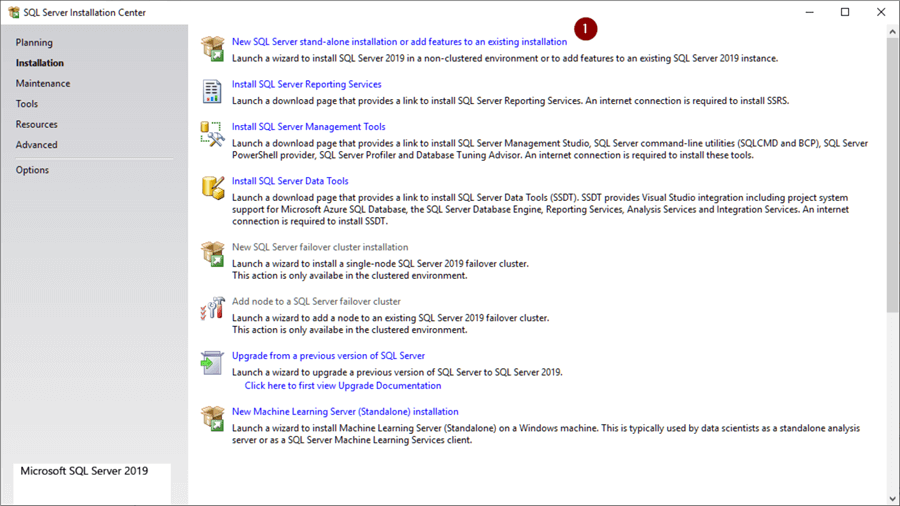
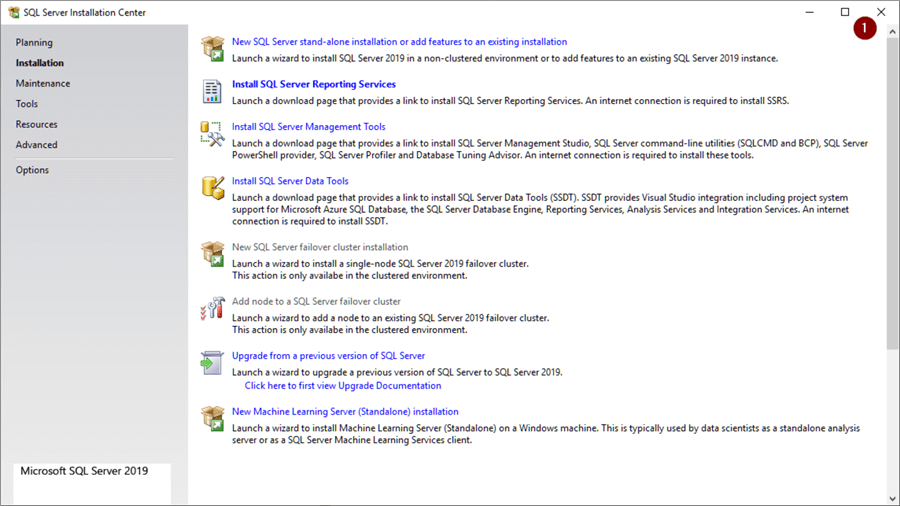
SQL Server Installation Center
- Choose ‘Installation’ from the list on the left side to go to the next screen

SQL Server Installation 2019 Step by Step
- Choose ‘New SQL Server stand-alone installation or add features to an existing installation’ from the list on the right side
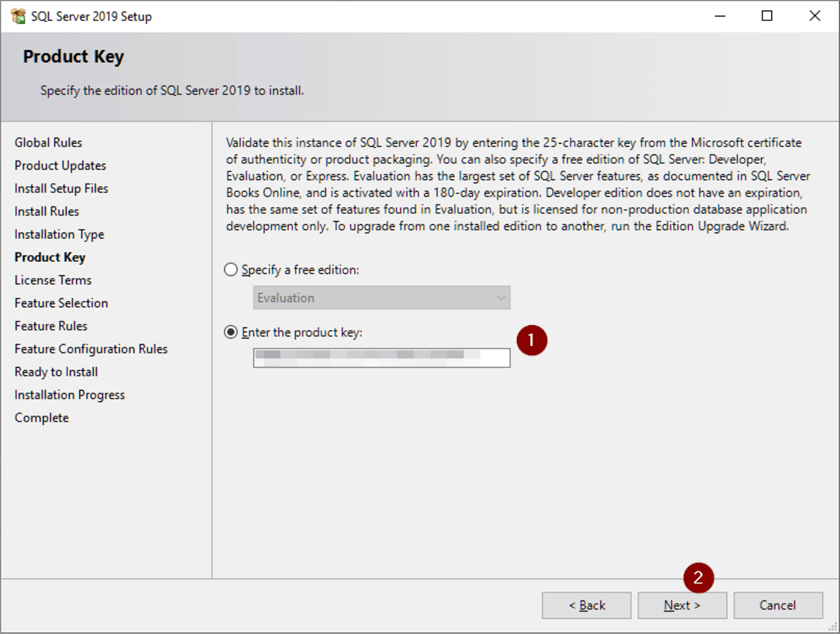
Product Key
- Enter SQL Server 2019 product key or use the free edition
- Next
License Terms
- Check ‘I accept the license terms…’
- Next

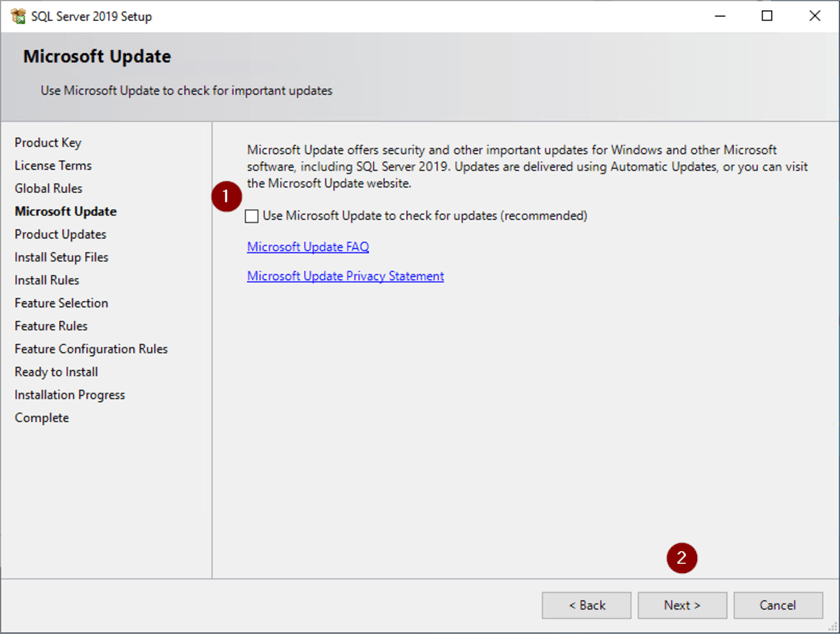
Microsoft Update
- Check ‘Use Microsoft Update to check for updates’ if you want to automatically check, otherwise leave unchecked
- Next
Install Rules
- If there are any issues, click on Warning to get more information. Below the Warning provides a link to what ports need to be open if the Windows Firewall service is running on the machine that you’re installing the SQL Server on
- Next

Feature Selection
- Check off ‘Database Engine Services’ (you would check off any additional features you’re installing here but to keep it simple for this tip we’ll only be installing the database engine)
- Change drives from the default of C:\ otherwise you’ll end up installing everything on C:\
- Next

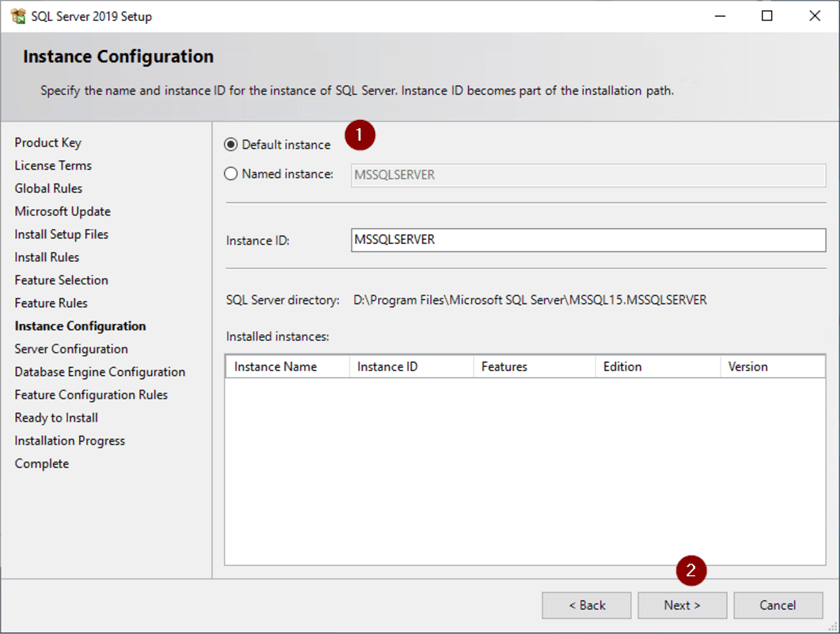
Instance Configuration
- Leave ‘Default instance’ radio button selected to install as the primary instance
- Next
Server Configuration
- Enter Windows Active Directory service account names you want to run the services as
- Set SQL Server SQL Agent and SQL Server Database Engine Startup Type to Automatic to avoid the services not starting on a reboot
- Check on ‘Grant Perform Volume Maintenance Task privilege to SQL Server Engine Service’ – Instant File Initialization (IFI) speeds up file writes by reclaiming disk space without filling that space with zeros – further information on IFI can be found here: Database Instant File Initialization, here: Check SQL Server Instant File Initialization for all Servers and here: Enable SQL Server Instant File Initialization for Time Saving
- Next

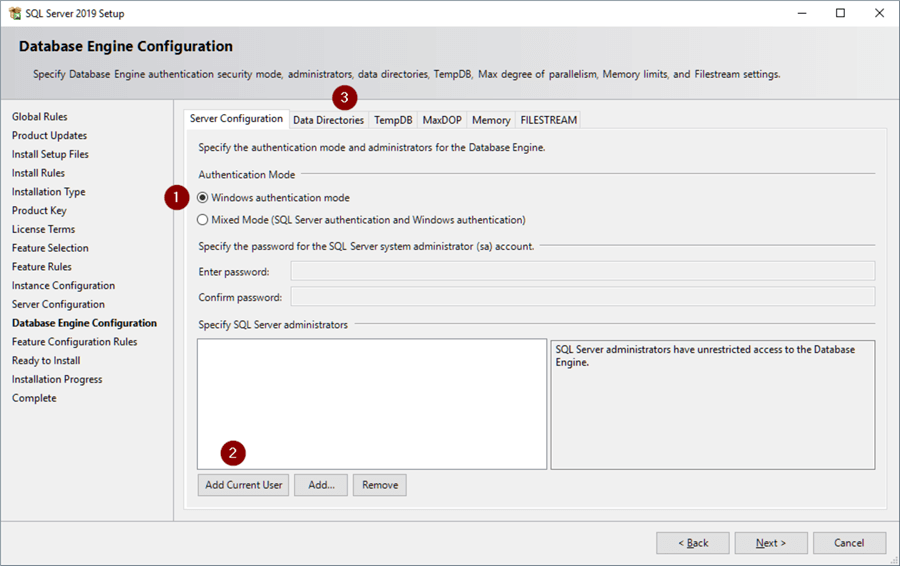
Database Engine Configuration
- Leave the ‘Windows authentication mode’ radio button checked unless you’re sure you need SQL Authentication logins, otherwise select ‘Mixed Mode’ and enter and confirm strong password for the sa login – if in doubt, changing to ‘Mixed Mode’ is easily done after the install – additional information on SQL Server authentication can be found here: Choose an Authentication Mode and here: How to check SQL Server Authentication Mode using T SQL and SSMS
- ‘Add Current User’ to make the current Windows account a SQL Server Administrator – Use ‘Add…’ to add additional logins to the sysadmin security group judiciously as anyone in this group has full rights over the SQL Server and this should not be granted without thought
- Click ‘Data Directories’ tab
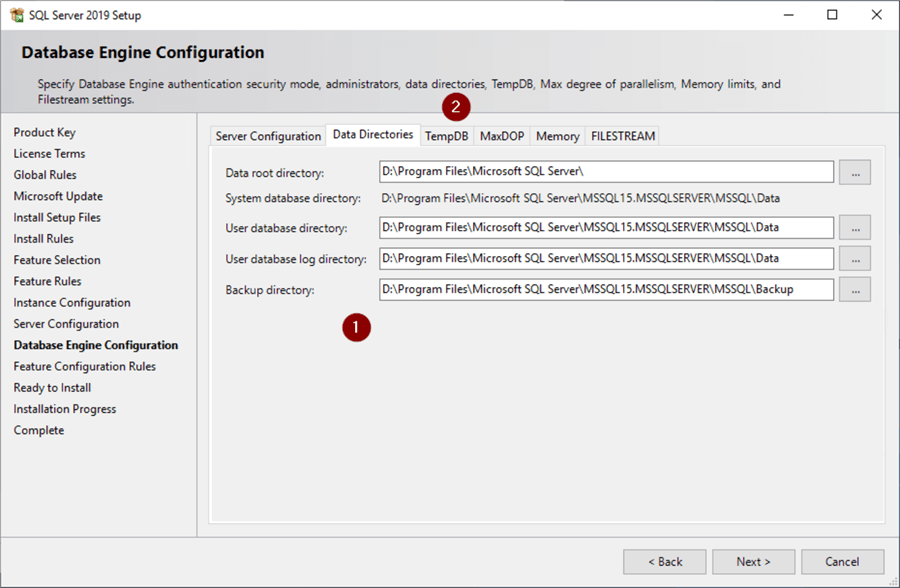
Data and Backup Directories
- Configure your database and backup directories – ideally these are all on separate drives
- Click TempDB tab
TempDB Configuration
- User defined database file sizes are somewhat dependent on workload and as in previous steps we’re installing this on a laptop, but we would normally want Tempdb data and log files on their own volume
- Verify ‘Number of files’ = number of CPU cores in machine up to 8
- Click MaxDOP tab

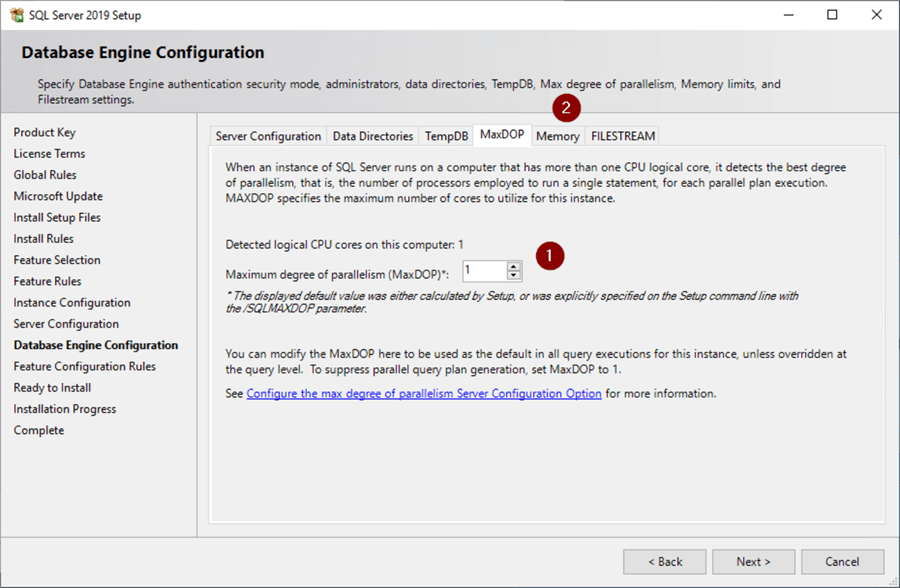
MAXDOP Configuration
- Verify ‘Maximum degree of parallelism (MaxDOP)’ = number of CPU cores in machine – additional information on MaxDOP can be found here: Configure the max degree of parallelism Server Configuration Option and here: What MAXDOP setting should be used for SQL Server
- Click Memory tab
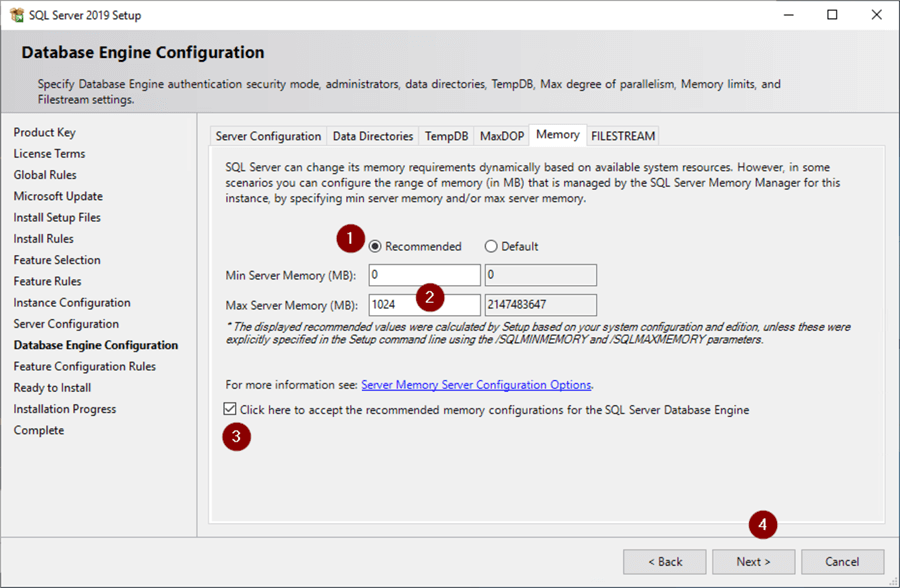
Memory Configuration
- Select ‘Recommended’ radio button
- The machine we’re installing this on only has 5,120 MB (5 GB) of memory and the general rule of thumb is to leave 4096 MB (4 GB) for the operating system – 5,120 MB – 4,096 MB = 1,024 MB so we enter 1024 in the ‘Max Server Memory (MB)’ box – SQL Server will try to get as much memory as it thinks it needs and setting this limit on it ensures the operating system won’t starve for memory
- Check ‘Click here to accept the recommended memory configurations for the SQL Server Database Engine’ box
- Next
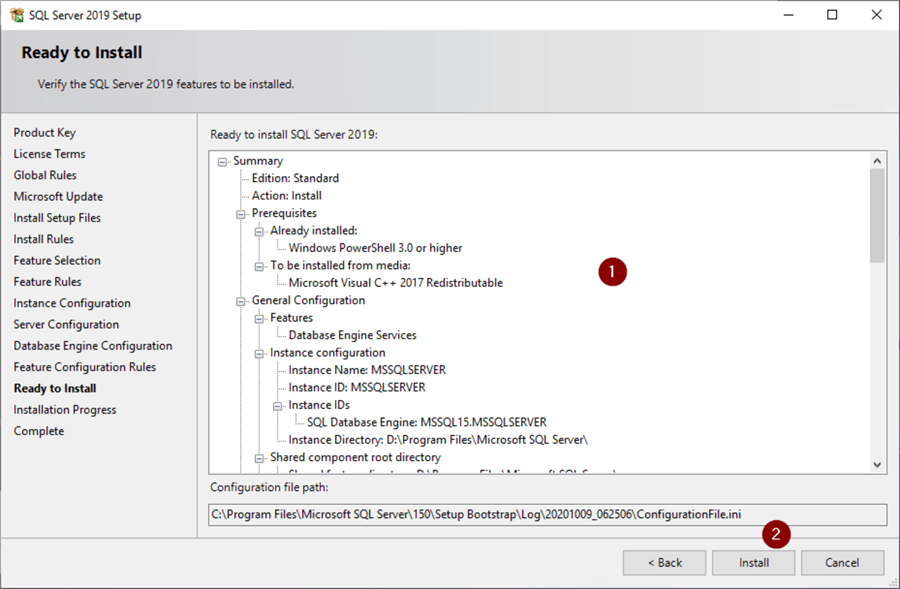
Ready to Install
- Verify configuration
- Install
Complete
- Click link to open setup log file and review for any issues
- Close

Close SQL Server Installation Center
- Click the X to close setup screen
Apply Latest SQL Server Cumulative Update
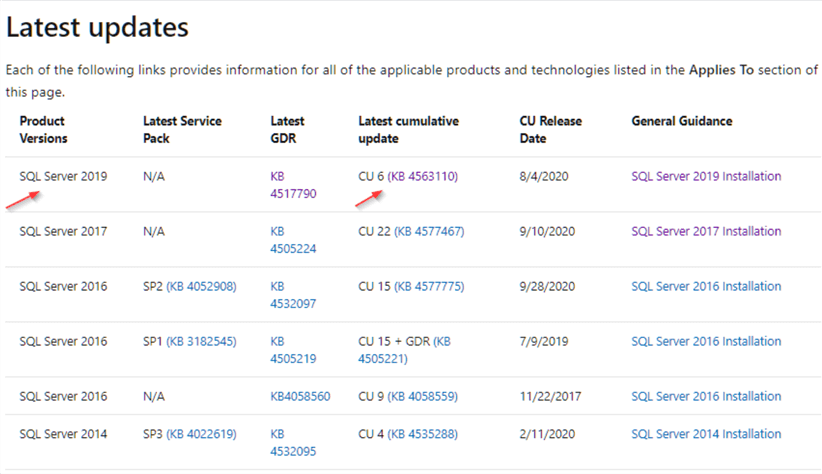
At this point we now have an installed and working SQL Server. However, we are only at the ‘Release to Manufacturing’ (RTM), or basically unpatched patch level. There have been updates since RTM that need to be installed. Previously SQL Server updates consisted of Service Packs (SP) and Cumulative Updates (CU) that had fixes since the latest Service Pack was of SQL Server 2017 there are no more Service Packs, just GDRs (security patches) and CUs applied to the RTM level SQL Server which makes patching a bit easier.
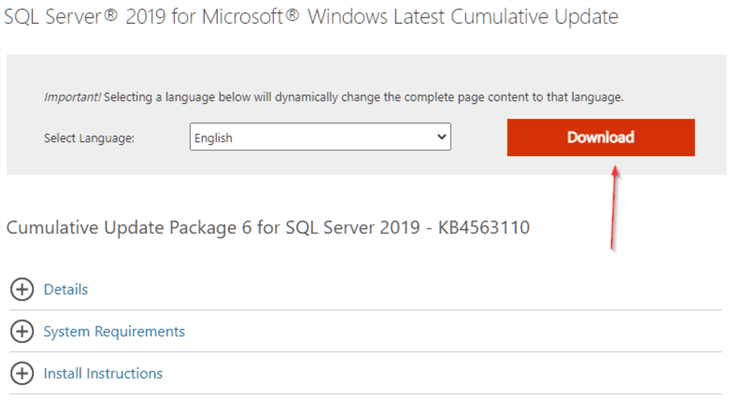
To obtain the latest CU we start here: Latest updates for Microsoft SQL Server and this brings us to the Latest updates for Microsoft SQL Server page. Scrolling down to the ‘Latest updates’ section we find our version then go over to ‘Latest cumulative update’ which is CU6 as of this writing and click on the link.
The link brings us to options for obtaining the CU. I chose the Microsoft Download Center by clicking on that link.
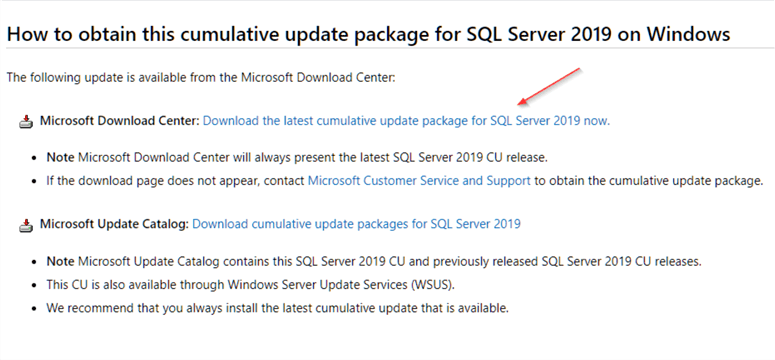
Which in turn brought me to the download page where you click on the Download button.
Wait for the download to complete and double click on the click on the downloaded .exe file to start the CU update.
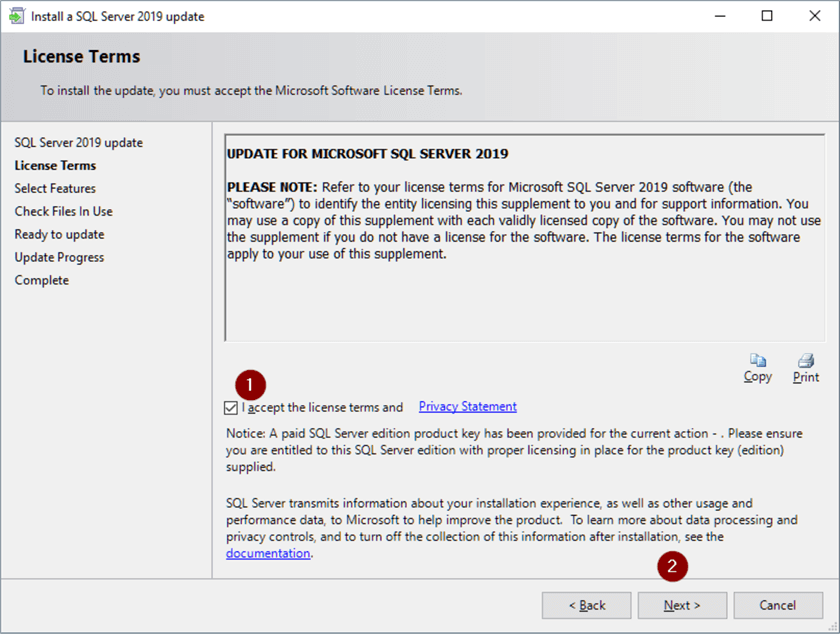
License Terms
- Check off ‘I accept the license terms…’
- Click Next
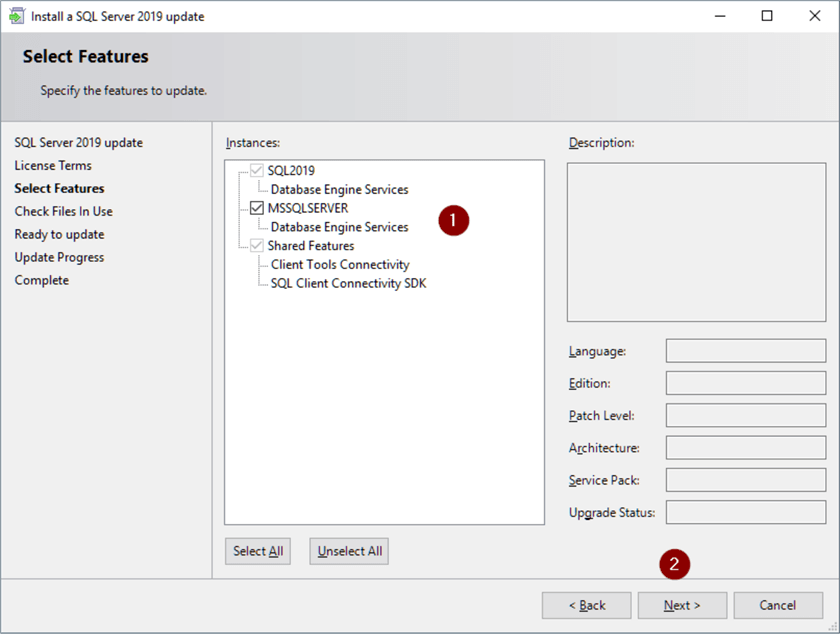
Select Features
- Select Instance you’re updating (if there are other instances of the same version of SQL Server that are below the CU level you’re applying you would see those here)
- Click Next
Check Files In Use
- Let ‘Check Files in Use’ complete
- Click Next

Ready to Update
- Verify configuration
- Click Update

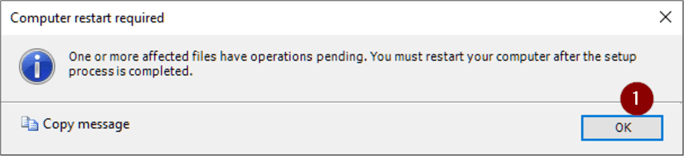
Computer Restart Required
- If you get this box, click OK and reboot after you’re done
Complete
- Click link to open setup log file and review for any issues
- Close

Frequently Asked Questions
For learning and testing that is usually the easiest place to begin. You can try different settings without affecting anyone else. A laptop setup is not a model for production though. A real server needs proper planning for memory, storage, backups, and workload size.
Developer Edition is normally enough for a lab environment. It includes the SQL Server features you are likely to study, and it is available for development and testing. Standard Edition or another licensed edition is needed when the server will run production workloads. The links in SQL Server Downloads Quick Links can help you find the right installer.
No. Install what you need now. For many first installations that means the Database Engine. Adding every available feature makes the server harder to manage and gives you more components to patch later.
A default instance keeps the connection name simple. That works well when the machine will have only one SQL Server installation. A named instance is useful when several instances must run on the same server or when each installation needs its own name.
Windows Authentication is a good starting point when users can connect with their Windows accounts. Mixed Mode adds support for SQL Server logins. Choose it when an application or user really needs that type of login. You can review the current setting later with How to Check SQL Server Authentication Mode Using T-SQL and SSMS.
Keep that list short. A sysadmin can change almost anything on the instance. It is easier to grant more access later than to clean up a server where too many accounts already have full control.
For a test installation you may use a simpler setup. On a shared or production server I prefer dedicated service accounts. They make permissions easier to control and help when you need to trace which service accessed a resource. Avoid using a personal account for SQL Server services.
In many installations it is. It can reduce the time needed for data file growth and database restores. Transaction log growth works differently and does not receive the same benefit. You can check the setting with Check SQL Server Instant File Initialization for All Servers.
Not for a small lab. One drive may be enough there. For a production server it is better to think about data files, log files, backups, and TempDB separately. The final layout depends on the available storage and the workload.
Look at the file count and initial size. Also check where the files will be stored. TempDB is used by many SQL Server operations so leaving it as an afterthought can create problems later.
Review the value suggested by SQL Server Setup rather than skipping the screen. The final setting depends on the hardware and workload. It can always be adjusted later after you have more information. What MAXDOP Setting Should Be Used for SQL Server provides more background.
I would set it soon after installation. Without a limit SQL Server may use most of the available memory and leave too little for Windows or other services. The right value depends on the amount of memory installed and what else runs on the machine.
Not quite. Check for a supported cumulative update and install it after the base setup. Then confirm the SQL Server build number. This saves you from starting with fixes and security updates already out of date.
Connect with SSMS and confirm that the SQL Server services are running. Review the setup log and SQL Server error log. Then check the file locations, memory limit, authentication mode, TempDB settings, and backup path.
SSMS is downloaded and installed separately. You will still want it because it is the main tool used to connect to SQL Server and manage the instance. SQL Server Management Studio 21 Quick Start Guide is a useful next step after the server is installed.
Key Takeaways
- This guide provides a step-by-step process to install SQL Server 2019 on Windows Server 2019 via the GUI.
- Users must download SQL Server 2019, run setup.exe, and follow prompts through installation steps.
- Configuration includes entering a product key, accepting license terms, and selecting features like Database Engine Services.
- Post-installation, applying the latest SQL Server cumulative update is crucial for optimal performance and security.
- For further details on installation and troubleshooting, refer to additional SQL Server install and uninstall tips.
Next Steps
- We’ve covered a basic install of SQL Server 2019 Standard Edition via the GUI and you can find more installation information here: SQL Server Install and Uninstall Tips.
- Download and install SQL Server Management Studio to get started working with SQL Server.
- Check out the SQL Server 2019 resources on MSSQLTips.com.
- Learn about the new SQL Server 2019 features.

Joe Gavin is from Greater Boston and has worked in technology as a Field Service Engineer for an automotive dealer computer system vendor, a Technical Consultant and Operations Analyst with Sybase and SQL Server based database applications in financial services and now works as a SQL Server Database Administrator.
- MSSQLTips Awards:
- Achiever Award (75+ Tips) – 2024 | Author of the Year – 2021 | Author Contender – 2024 |
- Rookie Contender – 2018


i want to download SQL server 2019, 2016 and 2017
Thank you for straightforward and detailed steps!
Glad you found this tip useful Madson.
Method working thanks you, Got Sql Server 2019 Key on HYPEST-KEY, and activated with your method
Geoffrey, I’m afraid I’ve never used MSAs but I’m sure it will work.
Can you use an MSA for the service account information for SQL Server and SQL Server Agent? I have tried and it doesn’t seem to work.
Thanks Madson. Glad it was helpful.
Thank you so much , I got a SQL 2019 Standard key from Keyingo.com, and then follow your steps to install the SQL 2019, it is working good without any problem