By: Manvendra Singh | Updated: 2021-12-02 | Comments (1) | Related: 1 | 2 | 3 | 4 | 5 | 6 | 7 | 8 | 9 | > SQL Server on Linux
Problem
SQL Server Agent is an important feature of SQL Server to schedule and automate activities. To get SQL Agent to work on Linux, there are a few steps you need to take to get it to work. In this tutorial, I will explain the steps to enable and configure SQL Server Agent on a newly installed SQL Server 2019 instance running on RHEL8.1 operating system.
Solution
The SQL Server Agent service is responsible for the job scheduler that is used to schedule and automate database activities.
Note: If you are using SQL Server 2017 CU4 and above including SQL Server 2019 then you just need to enable this feature and you don't need to install it separately whereas if you are running with SQL Server 2017 CU3 and below then you need to install it as a separate package. If you are upgrading from SQL Server 2017 CU3 or below with the Agent installed, SQL Server Agent will be enabled automatically and previous Agent packages will be uninstalled.
Note, this is 9th article in this series, read the previous articles to understand how to install and configure SQL Server 2019 on RHEL 8.1. See the next steps at the end of this article for links to the other articles.
Checking Status of SQL Server Agent
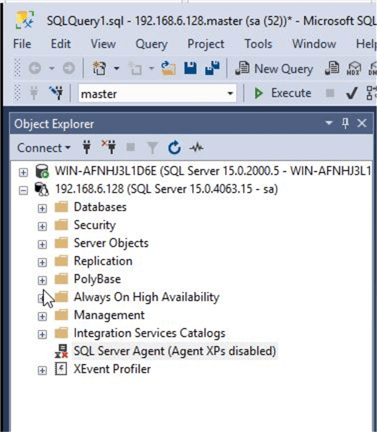
I installed SQL Server 2019 on RHEL 8.1 and now I have connected to that instance remotely using SQL Server Management Studio as shown in the below image.
The SQL Server Agent folder is disabled in the below image.
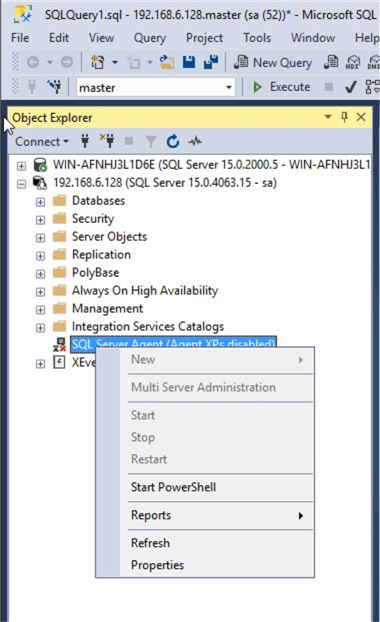
When we right click on SQL Server Agent, we can see this option to start it is grayed out.
The Properties option is enabled and when we try to open the properties page, we get the below error.
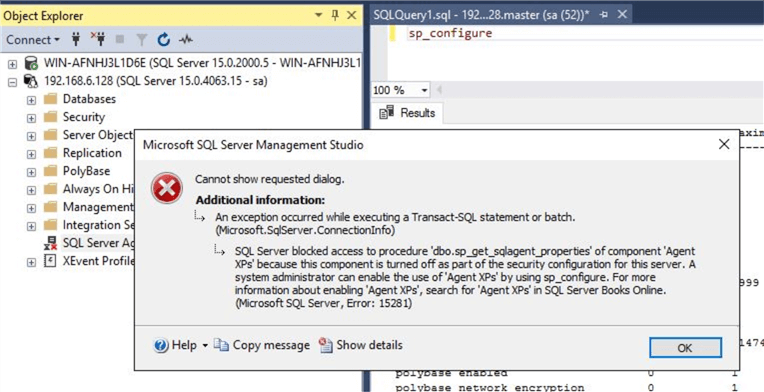
It says the "Agent XPs" for this service are disabled and to use sp_configure to enable.
Enabling SQL Server Agent XPs
Let's check the status of the Agent XPs using the following. We first need to enable the "show advanced options" to be able to see this configuration option.
--Enable advanced options
--Check configured value of Agent XPs
sp_configure 'Show advanced options',1
GO
RECONFIGURE
GO
sp_configure 'Agent XPs'
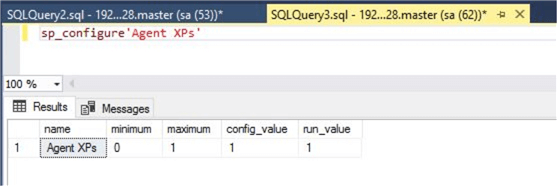
The output shows that Agent XPs are disabled because the run value is set to 0.
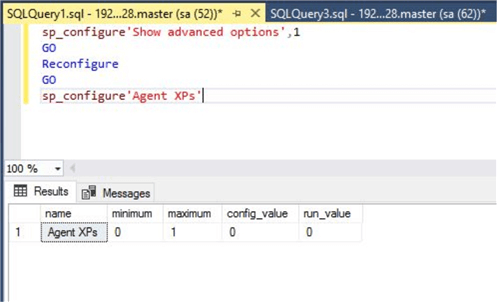
We can try to enable Agent XPs by setting the value to 1 using the below command.
--Enable Agent XPs
sp_configure 'Agent XPs', 1
GO
RECONFIGURE
We can see the change below.
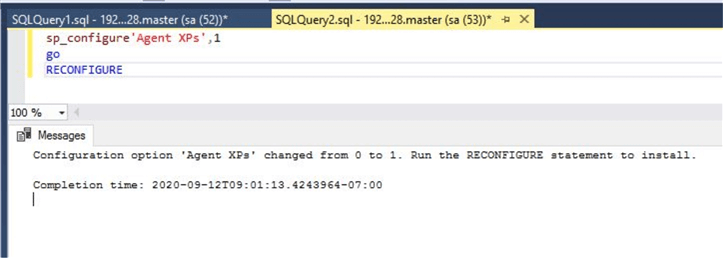
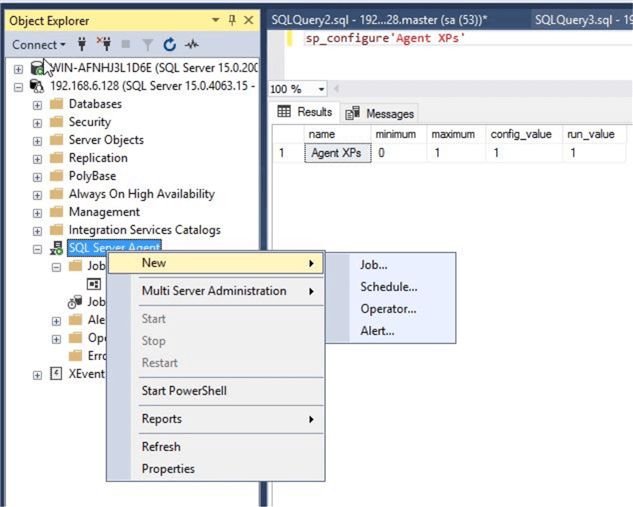
Again, let's check the configured value and we can see the run value is now set to 1.
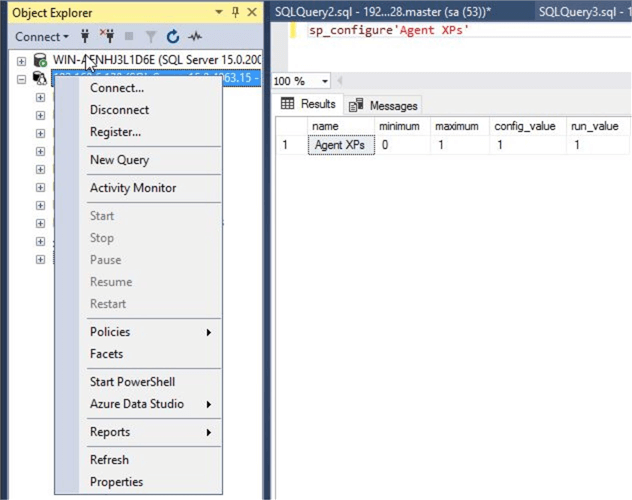
Now, we will check SQL Server Management Studio to validate above changes. Refresh the SQL Server instance node by right clicking on it and selecting Refresh.
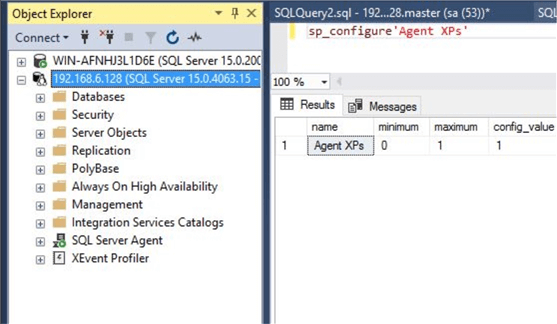
We can see that SQL Server Agent now shows that it is running.
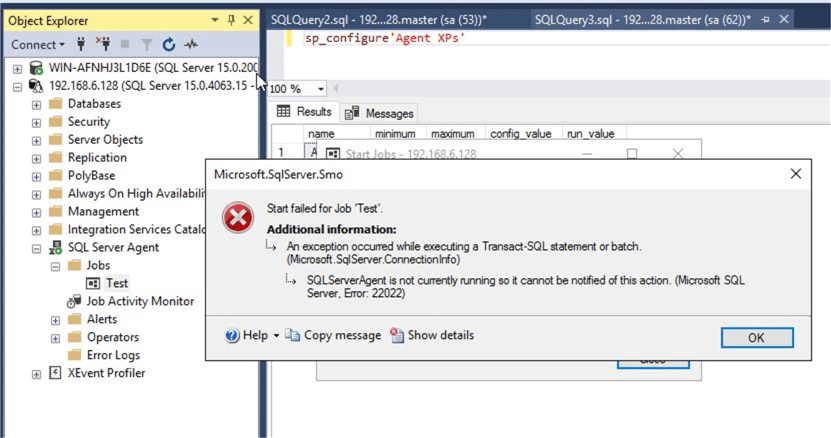
Next, I will create a simple job and run it to ensure SQL Server Agent is fully enabled. I created a Job named "Test" to fetch the SQL Server version, but when I execute this job it throws this error: SQLServerAgent is not currently running so it cannot be notified of this action. (Microsoft SQL Server, Error: 22022).
Something is not working correctly. If we right click on SQL Server Agent, we can see some additional options are enabled, but some are still grayed out.
I did some research on MSDN and found the below steps to enable SQL Server Agent for a Linux based SQL Server instance.
First enable SQL Server Agent using mssql-conf utility by running the below commands on the RHEL system. This command will enable SQL Server Agent after restarting the SQL Server service.
--Enable SQL Server Agent
sudo /opt/mssql/bin/mssql-conf set sqlagent.enable true

--Restart SQL Server
systemctl restart mssql-server
Have a look at above command executions below.

After enabling SQL Server Agent using the above command this still did not help and the job kept failing.
To fix this issue, we need to add the hostname with and without the domain in the /etc/hosts files on the RHEL system. Run the below command to open the host file in a text editor.
--Open hosts file
sudo nano /etc/hosts
Below shows where I added my server name. Enter the password if prompted.

Once you enter the hostname with and without the domain, save the changes as shown below under the red arrow.


Once saved, you can close the hosts file.
Test SQL Agent Job Again
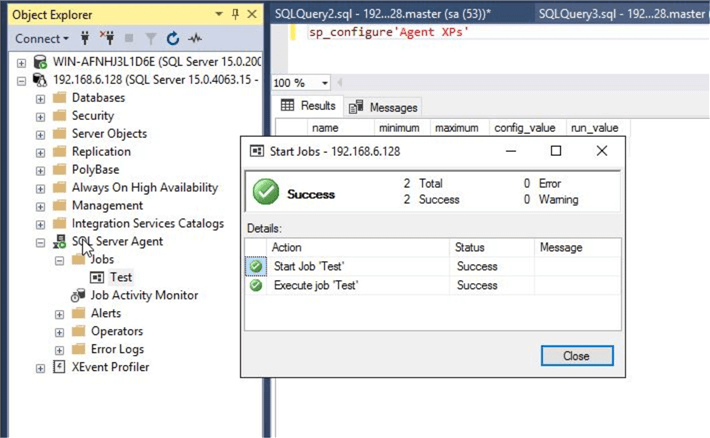
We will test the job again and we can see below that it executed successfully.
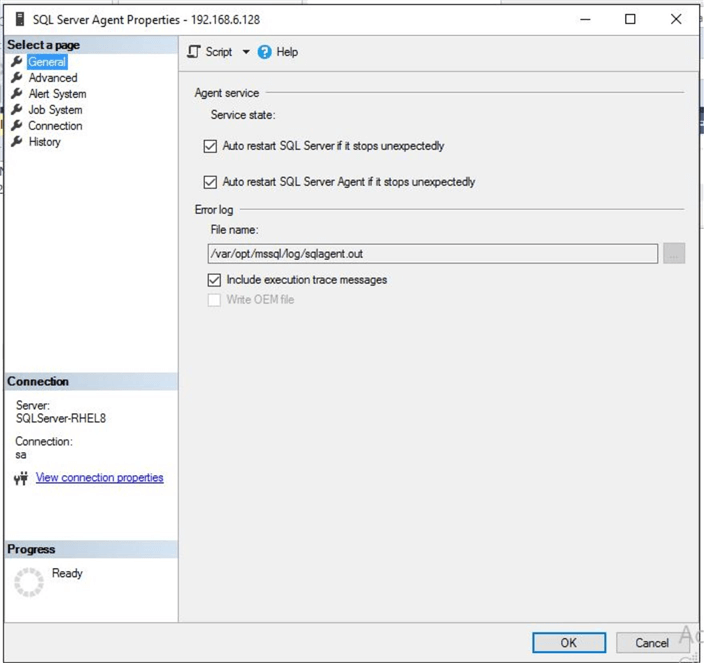
You can also right click on SQL Server Agent and select Properties to show that this is now working too.
Next Steps
Go ahead and schedule your jobs to run automatically based on your desired time and schedule.
- See part 1 of this series to start at the beginning: Install VMware Workstation Pro for SQL Server.
- Read additional tips about SQL Server Agent
About the author
 Manvendra Singh has over 5 years of experience with SQL Server and has focused on Database Mirroring, Replication, Log Shipping, etc.
This author pledges the content of this article is based on professional experience and not AI generated.
View all my tips
Article Last Updated: 2021-12-02


