By: Atif Shehzad | Comments (14) | Related: > Triggers
Problem
Performing DML operations through tested application are always safe and efficient. This process also prevents an accidental update or delete of all rows in a table. In my environment, I have a couple of tables that often require ad-hoc updates of certain values or delete of certain rows. On our development SQL Servers ad-hoc DML operations for various purposes are frequent. Unfortunately, there have been a couple of incidents in when someone accidentally issued a DML command without a WHERE clause, hence affecting the entire table. Is there an efficient way to prevent accidental DML operations without a WHERE clause?
Solution
It is a good idea to prevent accidental DML operations which may affect an entire table. For both accidental UPDATE or DELETE prevention, we make use of triggers in this tip. A new trigger may be created and if a trigger is already defined on the table then it may be altered to embed prevention logic. As an example, let's use the Purchasing.VendorContact table in the AdventureWorks database for this hands on example. Here are the basic steps we are going to follow:
- First, we will create a prevention trigger for UPDATE operations
- Second, we will create a prevention trigger for DELETE operations
- Third, we will verify the prevention functionality for both UPDATE and DELETE triggers
One final note before we get started, it is assumed that a cluster index exists for the table on which these triggers would be implemented.
Create trigger to prevent accidental update of all rows in a table
Currently no trigger is defined on the Purchasing.VendorContact table. First we will create an UPDATE trigger to prevent any accidental update of all rows in table.
--Script # 1: Create UPDATE trigger for SQL Server 2005 and SQL Server 2008

USE AdventureWorks
GO

CREATE TRIGGER [Purchasing].[uPreventWholeUpdate]
ON [Purchasing].[VendorContact]
FOR UPDATE AS
BEGIN
     DECLARE @Count int
     SET @Count = @@ROWCOUNT;

     IF @Count >= (SELECT SUM(row_count)
         FROM sys.dm_db_partition_stats
         WHERE OBJECT_ID = OBJECT_ID('Purchasing.VendorContact' )
         AND index_id = 1)
     BEGIN
         RAISERROR('Cannot update all rows',16,1)
         ROLLBACK TRANSACTION
         RETURN;
     END
END
GO
We have used the sys.dm_db_partition_stats DMV to get find out the number of rows in the table. Since the DMVs where introduced with SQL Server 2005, the following script can be used:
--Script # 2: Create UPDATE trigger for SQL Server 2000

USE AdventureWorks
GO

CREATE TRIGGER [Purchasing].[uPreventWholeUpdate]
ON [Purchasing].[VendorContact]
FOR UPDATE AS
BEGIN
     DECLARE @Count int
     SET @Count = @@ROWCOUNT;

     IF @Count >= (SELECT rowcnt
         FROM sysindexes
         WHERE ID = OBJECT_ID('Purchasing.VendorContact' ))
     BEGIN
         RAISERROR('Cannot update all rows',16,1)
         ROLLBACK TRANSACTION
         RETURN;
     END
END
GO
If an update trigger is already defined on the table, then alter the code above can in inserted into the body of trigger as shown below:
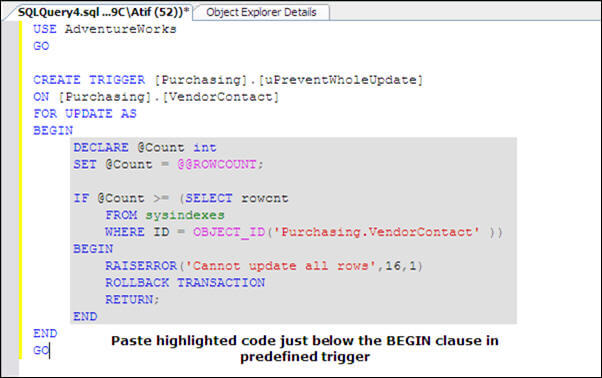
If you have a need to update all of the rows of table, then disable the trigger or ALTER the trigger to prevent the logic from executing.
ALTER trigger to prevent accidental delete of all rows in a table
First we will create a simple delete trigger on the Purchasing.VendorContact, table to show how to modify existing delete trigger later in this tip.
--Script # 3: Create DELETE trigger for SQL Server 2005

USE AdventureWorks
GO

CREATE TRIGGER [Purchasing].[dPredefined]
ON [Purchasing].[VendorContact]
FOR DELETE AS
BEGIN
     /*
     Logic of trigger coded here
     */
     Print 'Previous logic of Trigger is working '
END
GO
Now that a DELETE trigger is defined on the Purchasing.VendorContact table, we can modify the delete trigger to prevent accidental delete of all rows in table. Just ALTER the trigger and paste code for the prevention logic at the beginning of the trigger. Also be sure to change the message generated in the RAISEERROR logic appropriately. Keep in mind that the previous functionality of the user defined trigger will remain intact.
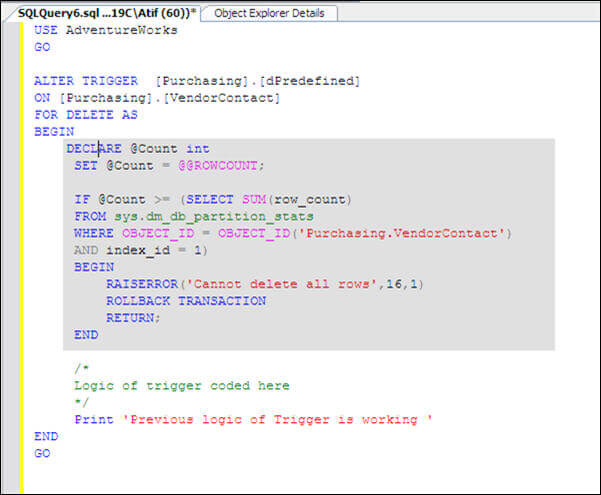
Now that the trigger Purchasing.dPredefined has been modified to prevent a delete operation without a WHERE clause, keep the remaining code intact and it should work without an issue. For SQL Server 2000 instances, make use of dbo.sysindexes table instead of the DMV as mentioned in the script above. If it is required to delete all rows from a table and no logged operations are permitted, then issuing a truncate table command should be more efficient and it should not invoke the trigger logic.
Verify the functionality of UPDATE trigger
Now we have two triggers defined on Purchasing.VendorContact to prevent the a mass update or deletion of all rows in the table, let's verify the desired functionality.
First we will issue an update statement with a WHERE clause.

The update was successful when performed by providing WHERE clause.
Now let us issue the update statement without WHERE clause.
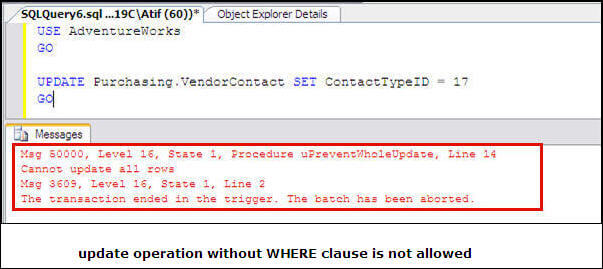
This statement generates an error. You can also verify the data in the table by selecting the rows.
Verify the functionality of DELETE trigger
First we will execute a delete statement with a WHERE clause.
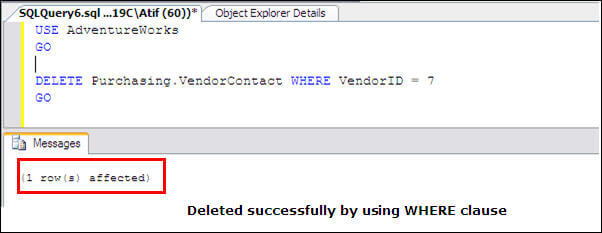
Now to verify the delete prevention of all rows without a WHERE clause, let's issue the delete statement without WHERE clause.
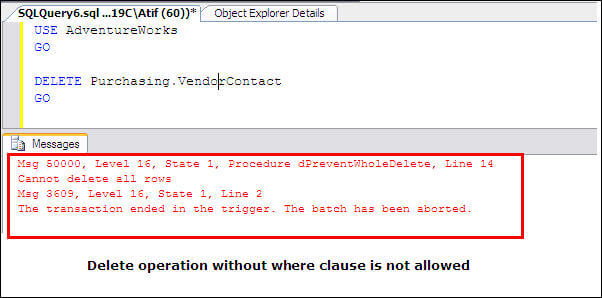
Once again the trigger logic is fired and the delete is prevented. You can also verify the presence of the data subject issuing SELECT statements.
Next Steps
- If the table where you want to create the trigger logic does not have a clustered index then it is necessary for these scripts. It is also beneficial for general data access. Click here to read about creating a clustered index.
- If auto update of statistics is turned off, the rows count still should be accuratein dbo.sysindexes table and the sys.dm_db_partition_stats DMV.
- The trigger logic outlined in this tip could also be used for partitioned tables.
- In the scripts, the raise error statement is used to generate the error. Click here to read further about RAISEERROR in SQL Server Books Online.
- The ROLLBACK command is used to roll back the current transaction. Click here to read about ROLLBACK in SQL Server Books Online.
- Check out these related tips:
About the author
 Atif Shehzad is a passionate SQL Server DBA, technical reviewer and article author.
This author pledges the content of this article is based on professional experience and not AI generated.
View all my tips


