Problem
Creating linked servers is generally a pretty easy thing to do, but the creation of a link server with DB2 is not as simple. To create a linked server to DB2, it requires the SQL DBA to know or guess a lot of parameters that are not familiar or intuitive. In this tip we will walk through the process of setting iup a linked server to DB2.
Solution
In order to successfully create a link server with DB2, you need to download and install Microsoft OLDB Provider for DB2.
The easiest way to create the link server is to use the “Data Access Tool” application, which comes with the Microsoft OLDB Provider for DB2 driver installation. In addition, I recommend that you ask for assistance from your DB2 DBA.
Data Access Tool
The Data Access tool is very easy to use. As soon as the application is launched, click on File -> New -> Data Source and it will show the following screen. Unless the DB2 source platform is known you may need to consult with the DB2 DBA to assist in picking the correct platform.

In the next step, enter the DB2 IP address and TCP port used to connect to DB2.

In the next screen enter the Initial catalog (database you want to connect to), the Package Collection, the Default schema and Default qualifier. Again, if you are unsure consult your DB2 DBA.

Here is another set of parameters that are required to connect to DB2. If you are unsure which options to select, consult your DB2 DBA.
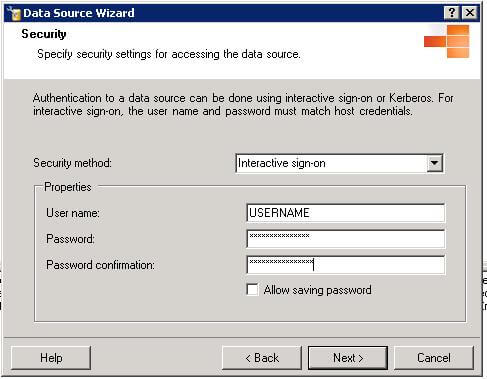
In the next input window we enter the DB2 user that will be used to impersonate our SQL User. This DB2 user will need to have appropriate access rights to DB2 and this user will need to be created by the DB2 DBA.
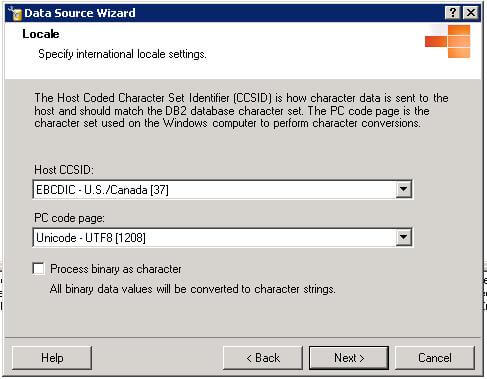
On this screen additional options can be selected. For more information on any of these items, you can click on the Help button.

At the end of the wizard, click on Connect to verify if we have connectivity with DB2. If so, click on Sample Query to make sure we can successfully query DB2.

If we have successfully tested connectivity, we are now ready to create our SQL to DB2 link server.

Right click on the newly created data source and click on Display Connection String. In my case the connection string looks like the following:
Create Linked Server
Finally, we can start the link server wizard.
Right click on Linked Servers and select “New Linked Server…”.
On the New Linked Server window, the linked server can be any name. The provider has to be Microsoft OLDB Provider for DB2. Enter product name as DB2OLDB. In catalog, copy and paste the connection string that was created.
On the Security page, select “be made by using this security context” and enter the DB2 user name and password.

If everything works fine we should be able to see our DB2 link server as shown below.

Next Steps
- The new DB2 UDB can be downloaded from the IBM website http://www.ibm.com/developerworks/downloads/im/udb/ and installed on a variety of platforms such as Windows, Linux and so on.
- Read these additional tips about Linked Servers

Matteo is currently a DBA for one of the largest global electronic payment service providers in the U.S. He has been working in IT since he graduated from college in 1993. Matteo has a Master’s degree in Computer Science, and specializes in MSSQL with a good working knowledge of MySQL as well.
- MSSQLTips Awards: Rising Star (50+ tips) – 2021 | Author Contender – 2020

YES! YES! YES! YES! YES!
This worked on SSMS latest version of October 2021!
But please fix the last image: the string generated should be inserted into the “Provider string” not the “Catalog”