Problem
Sometimes it is necessary to migrate data from Postgres to SQL Server. Unfortunately, there is not too much information on the Internet about this topic. In this tip we will outline the steps to import a single table from Postgres to SQL Server with SQL Server Integration Services.
Solution
In this example, the database used to import data is the ‘Postgres’ database which is installed by default. We will use this database to export data from the students table in Postgres to SQL Server with SQL Server Integration Services.
Here are the prerequisites needed:
- Install the Postgres Database.
- Install the PGAdmin.
- Install the Postgres OLE DB Provider on the machine where SQL Server Integration Services will run, because this will install a Postgres OLE DB provider.
- Install or have access to SQL Server Enterprise or Standard edition. In this example, I am using SQL Server 2008 R2, but SQL Server 2005 is an option as well.
In this example, a table named students will be created in Postgres and then it will be imported to the Adventureworks sample SQL Server database.
Demonstration – Export data from Postgres to SQL Server
Let’s walk through a step by step example to export data from Postgres to SQL Server.
- Open the PostgreSQL>pgAdmin III tool.
- In the pgAdmin III tool, right click on the PostgreSQL instance and select the ‘Connect’ option.
- Specify the login and password. The ‘postgres’ user is a super user created by default. In this tip, the ‘postgres’ user will be used.
- Open the Server tree to PostgreSQL | Databases | postgres | Schemas| public| tables and right click and select New Table.
- In the ‘Name’ field enter ‘Students’ and in the ‘Owner’ combo box, select ‘postgres ‘.
- In the columns Tab, press the ‘Add’ button.
- Add the ‘ID’ column with data type integer and ‘Name’ with the data type character(30)
- Click the ‘Constraints’ tab, select the ‘Primary Key’ option in the combo box and press the ‘Add’ button.
- In the New Primary Key window, select the ‘ID’ column in the combo box and press the ‘Add’ button.
- Click the ‘students’ table in the Object browser and press the View the data in the selected object icon.

- Add data to the Student table.
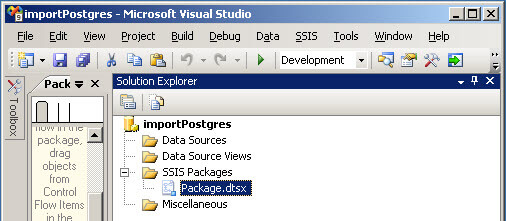
- Now, we have a Student table in Postgres database with data. Now, let’s import the data to SQL Server using the Integration Services. Open the SQL Server Business Intelligence Development Studio and open a new Integration Services Project.
- In the Toolbox drag and drop the Data Flow task to the design pane.
- Double click in the Data flow Task in order to create a Data Flow.
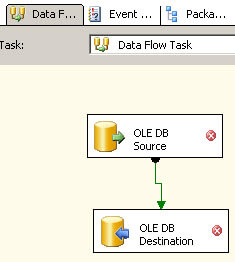
- In the toolbar drag and drop the OLE DB Source and OLE DB Destination and join both tasks with the green arrow.
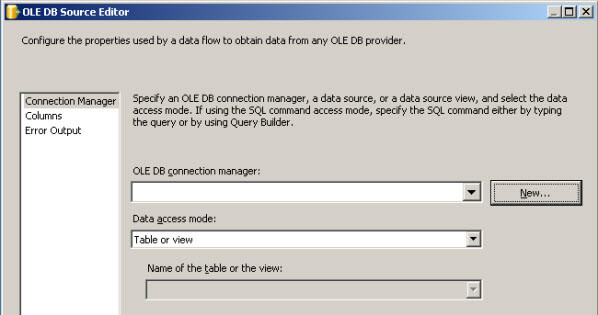
- Double click on the OLE DB Source task and press the New button to create a new OLE DB connection manager..
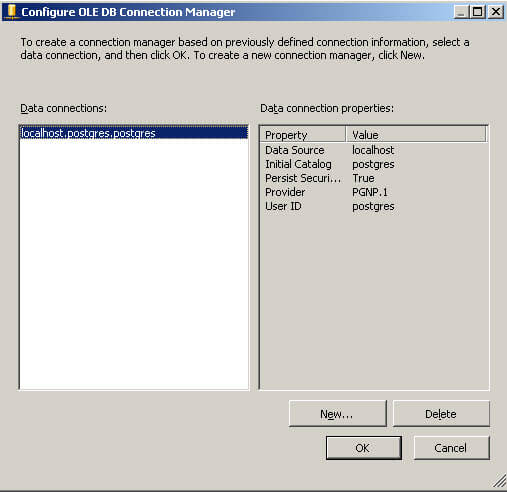
- In the Configure OLE DB Connection Manager, press ‘New’.
- In the Connection Manager, select the Native OLE DB\PostgresSQL Native Provider. Note that this option will be available only if you installed the prerequisites specified at the beginning of this tip.
- In the Server or File name, specify the name of the Postgres Server. In this example, the localhost is used.
- Select the option ‘Use a specific user name and password’.
- Check the allow saving password option.
- In user name specify the user to connect to postgres and the user password. In this example, the postgres user is used.
- In the initial catalog, select the database used to create the table. Remember in step 4, we used the postgres database to create the students table.
- Press OK twice.
- In the OLE DB Source Editor, in the name of the table or the view, select the “public”.”Students” table and press OK.
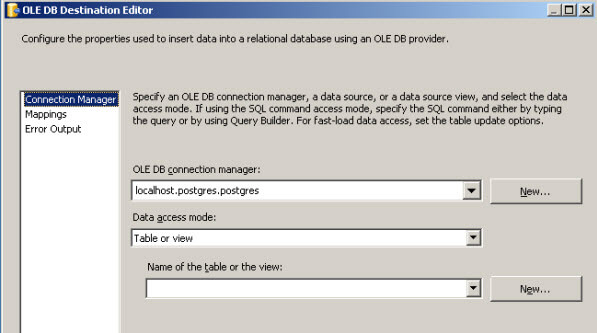
- In the design pane, double click the OLE DB Destination task.
- In the OLE DB connection Manager, press the New button
- In the Configure OLE DB Connection Manager, press ‘New ‘.
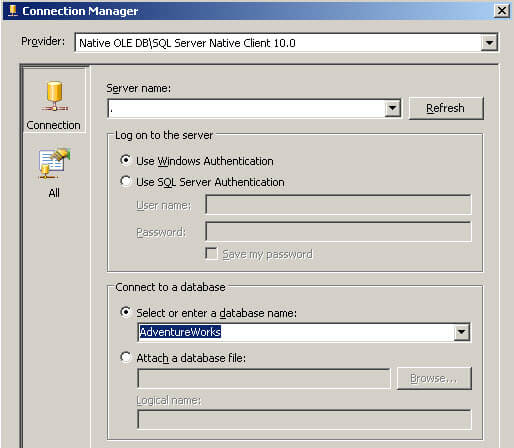
- In the Connection Manager, select the Native OLE DB\SQL Server Native Client .
- In the Server name specify the name of the SQL Server Instance name. In this example, the localhost is used.
- Specify the log on to the server options in order to login to SQL Server. In this example, the windows authentication is used.
- In the select or enter the database name combo box, select the SQL Server database where you want to import the Postgres Students table. In this example, the Adventureworks will be used and press OK.
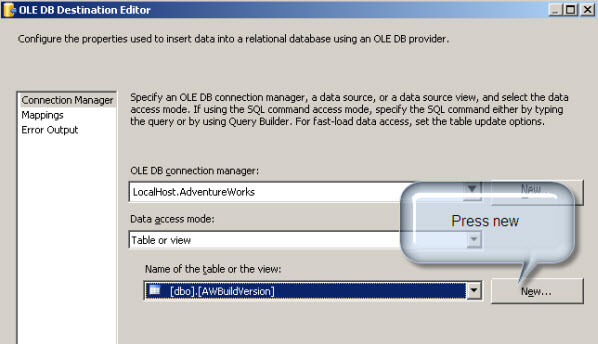
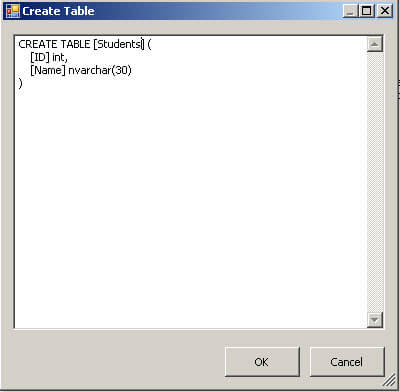
- In the OLE DB Destination Editor, in the Name of the table or view press the New button./li>
- In the Create table windows, use this code and press OK:
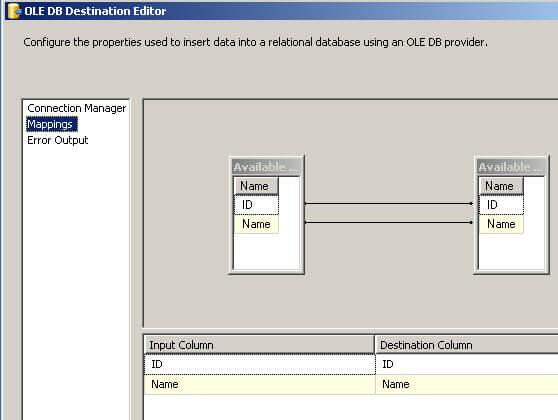
- In the OLE BD Destination Editor, click the Mapping page and press OK
- Now the project is ready to start. Press the start debugging icon. If everything is successful, the tasks should be colored green and the numbers of rows imported should be displayed.
- In order to verify that the table was imported, in SQL Server Management Studio, go to the Adventureworks database (or the database that you select in step 32) and verify that the students table was created. Open the table to verify that the data is correct.
- In this tip, you have learned how to import tables from Postgres to SQL Server.


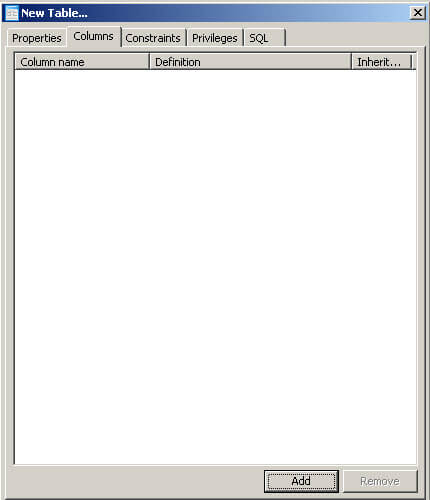


CREATE TABLE [Students] (
    [ID] int,
    [Name] nvarchar(30)
)


Next Steps
- SSSSIS will let you import and export data from multiple data sources. The key is to get the needed OLE DB providers, then the import process is very simple. You can now use the different transformation tasks in SSIS.
- Review the following tips and other resources:
- Connecting to a PostgreSQL Instance Using SQL Server Integration Services
- Postgres web page
- SQL Server Integration Services Tutorial

Daniel Calbimonte is a Microsoft Most Valuable Professional, Microsoft Certified Trainer and Microsoft Certified IT Professional for SQL Server. He is an accomplished SSIS author, teacher at IT Academies and has over 10 years of experience as a QE and developer for SQL Server related software. He has worked for the government, oil companies, web sites, magazines and universities around the world. Daniel also regularly speaks at SQL Servers conferences and blogs.
- MSSQLTips Awards: Author of the Year Contender – 2015-2018, 2022, 2023 | Champion (100+ tips) – 2018


A good article on using those tools to transfer data.
I have developed an alternative tool: SQLpipe. It is an open-source solution that can transfer data from PostgreSQL to SQL Server.
Here is a step by step guide on using it transfer data from PostgreSQL to SQL Server: https://sqlpipe.com/transfer-data-from-postgresql-to-sql-server/