Problem
I have data in multiple Excel files and all my Excel files are placed in the same folder. I want to create a SQL Server Integration Services (SSIS) Package which can read data from multiple Excel files and load the data into a SQL Server destination table. How can I achieve this using SSIS?
Solution
This tip explains how we can read data from multiple Excel files using SSIS and load the data into a SQL Server destination table. Please follow all the steps below to understand the solution.
Step 1 – Folder Creation
Please create a folder named Excel_Exercise on the C:\ Drive, and then please create a child folder named Excel_Source. Let’s create three excel files inside the Excel_Source folder. Please refer to the image below as a reference.

We will add data these three Excel files and then we will read data from all these Excel files using SSIS.
Step 2 – Sample Files
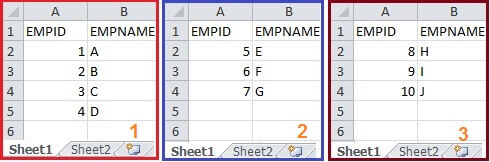
I have already created three empty Excel source files in my previous step. Let’s add data into sheet1 of each Excel file as shown below.
Step 3 – SQL Server Destination Table
Let’s create a destination table in which we will load the data after reading from all three Excel files. Please use the below SQL code to create the table.
USE [AdventureWorksDW2008R2]
GO
CREATE TABLE [dbo].[ImportMultipleExcelFiles](
[EMPID] [int] NULL,
[EMPNAME] [nvarchar](255) NULL
)
GO
Step 4 – SSIS Package Creation
Create a package and name it as ImportMultipleExcelFiles, please refer to the image below.

Step 5 – SSIS Package Variables
Please create a variable named FileName, scope of this variable is ImportMultipleExcelFiles, Data type is String. Please refer to the image below.

Step 6 – SSIS Foreach Loop Container
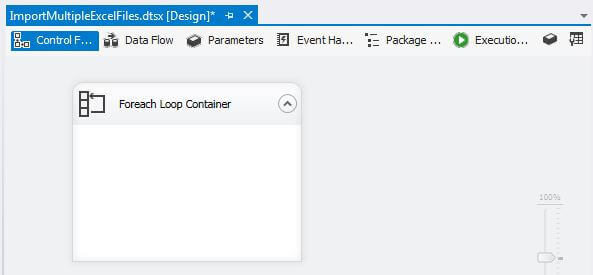
Add a Foreach Loop Container in the Control Flow Task, please refer to the image below.
Step 7 – SSIS Foreach Loop Container Collection
Edit the Foreach Loop Container, in the Collection section change the Enumerator value to “Foreach File Enumerator”. Please refer to the image below.

We have to change the Enumerator configuration as shown below.
- Folder: Provide a complete folder path location where all our Excel source files are stored. We have all Excel files stored in C:\Excel_Exercise\Excel_Source.
- Files: We need to read the Excel files from our source folder, so please enter *.xls in the Files section, this will make sure our SSIS package will read all available .xls files from the source folder. Here * indicates that the Excel file name can be anything, but file extension will be .xls. If we need to read data from a specific Excel file name then we have to configure it accordingly.
- Retrieve File Name: Please select the Fully Qualified radio button. Please refer to the below image for your reference.

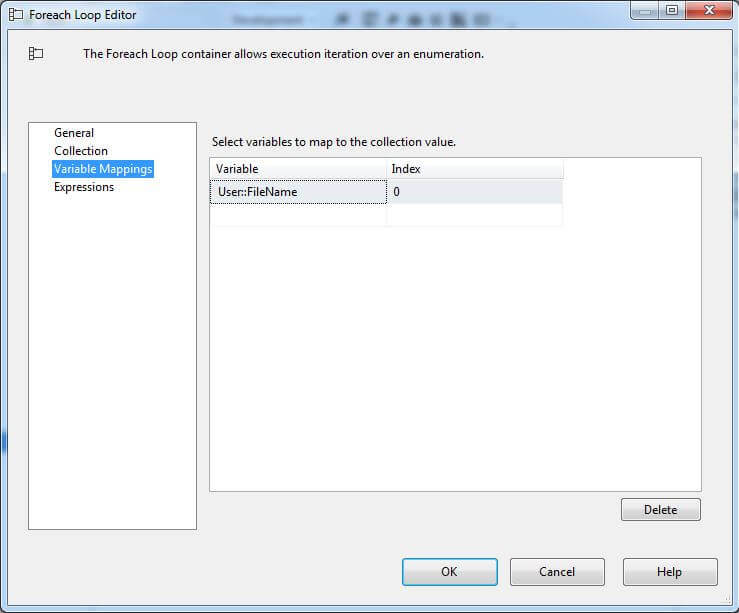
To create variable mappings for the Foreach Loop container, select the “User::FileName” variable and set the Index value to 0 in the Variable Mappings section. Please refer to the image below.
Step 8 – SSIS Data Flow Task
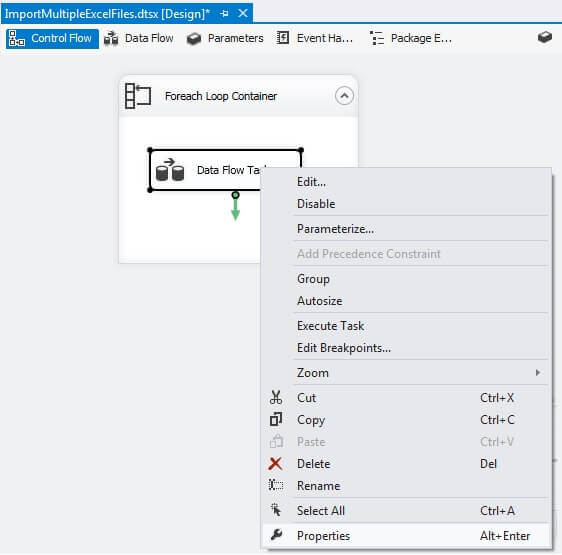
Add a Data Flow Task inside the Foreach Loop Container, please refer to the image below.

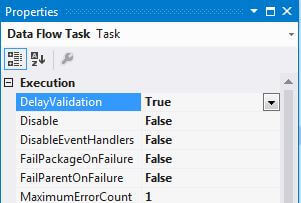
Right click on the recently added Data Flow task and click on Properties, please refer to image below.
Please mark the DelayValidation property to True, please refer to the image below.
Step 9 – Excel Source in Data Flow Task
Add an Excel Source in the Data Flow Task and create a new connection to any of the Excel source files.

In my case I used the First_Excel_Souce.xls, please refer to the image below.
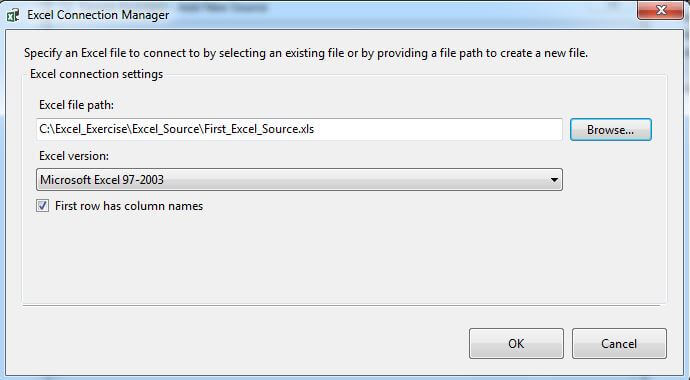
Open the Excel Source Connection and make sure it is configured as the shown below.

Step 10 – OLEDB Destination in Data Flow Task
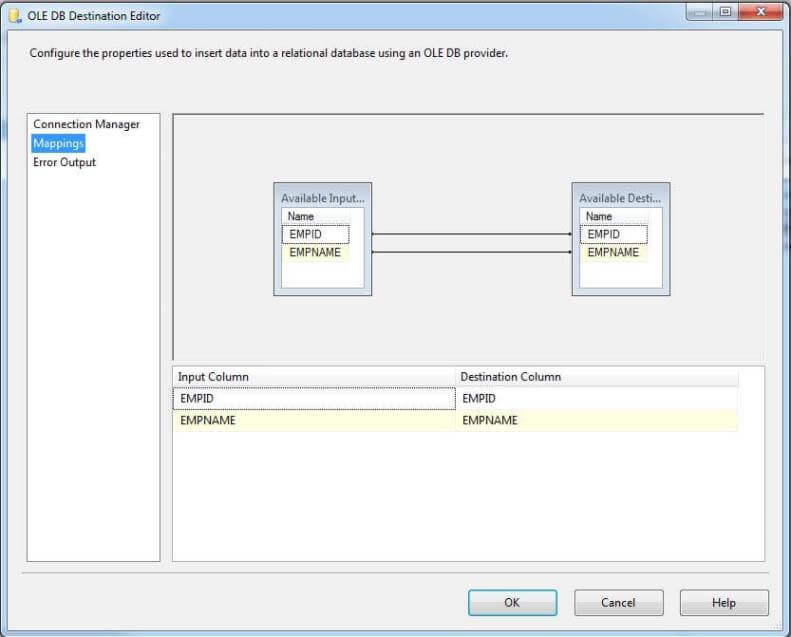
Add an OLE DB Destination task in the Data Flow Task and create a connection to the destination database. Select the destination table (ImportMultipleExcelFiles) and map the available input source columns to the available destination columns. Please refer to the image below.
After adding the OLE DB Destination task, your Data Flow Task should look like the image below.

Step 11 – Configure Dynamic Excel Source Connection
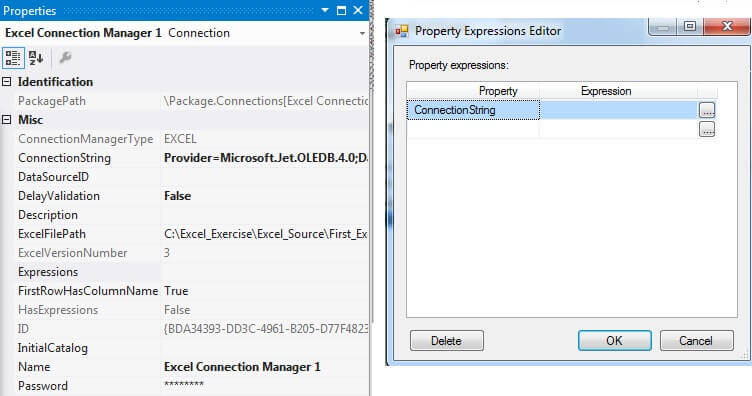
As of now our Excel source connection is fixed to one file named as First_Excel_Source.xls. We have to make the Excel connection dynamic so that it can connect to each Excel file in the source folder. To make the Excel source connection dynamic, please right click on Excel Source Connection and then click on Properties. You can refer to the image below.
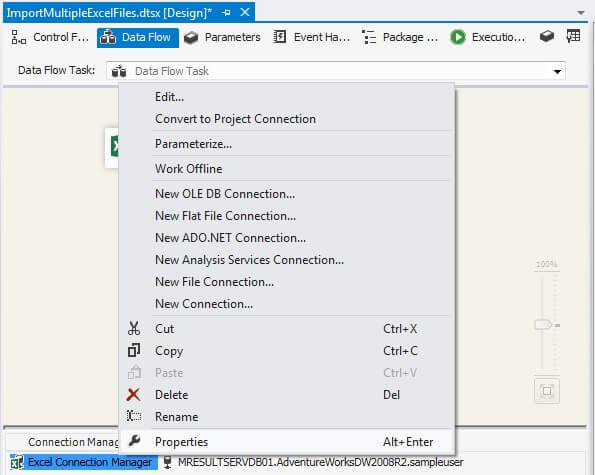
Please expand the Expression Properties, then select the Connection String property and then click on the expression icon. Please refer to the image below.
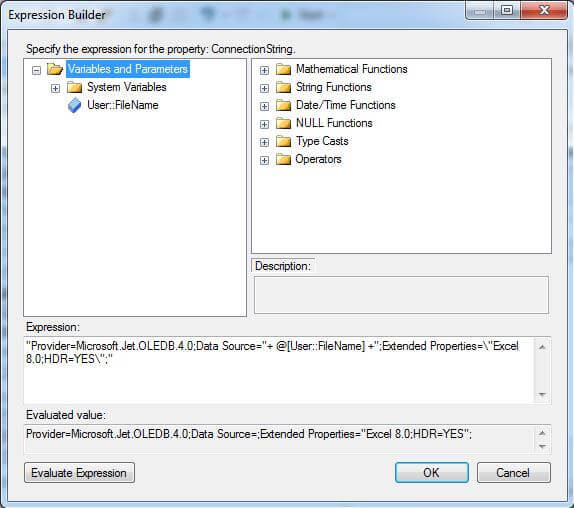
Please copy the below code and paste it in the expression window.
"Provider=Microsoft.Jet.OLEDB.4.0;Data Source="
+@[User::FileName]+";Extended Properties=\"Excel 8.0;HDR=YES\";"
Click on the Evaluate Expression button to sure it doesn’t throw an error then click on the OK button. Please refer to the below image.
Step 12 – Execute SSIS Package
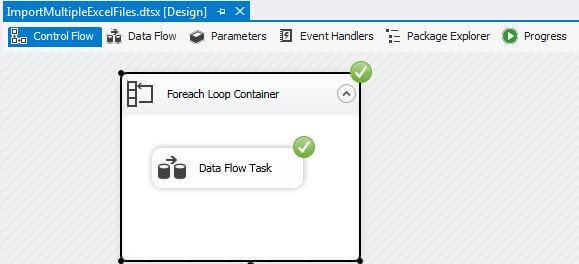
Let’s execute the SSIS package, as you can see from the image below the SSIS package was executed successfully.
Step 13 – Review Final Data
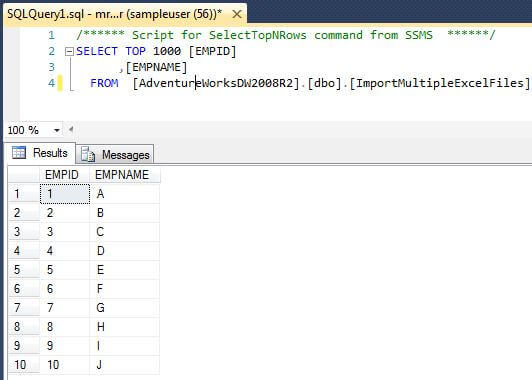
Let’s preview the data in the destination table. As you can see from the image below, the data from all three Excel files is loaded per our requirement.
Next Steps
- Click here to learn how to read data from the nth row in Excel using SSIS
- Excel Export Rows Limitation is one of the issue in SSRS 2008R2. You can find the list of other Excel Export Limitations here
- Check out other tips on SQL Server Reporting Services Parameters
- Check out all of the SQL Server Business Intelligence Tips and Tricks
- Check out my other tips here

Ghanesh Prasad is a Microsoft BI lead developer for an industry leading Indian IT Service Company in Bangalore. He has over 5 years of work experience with Microsoft Business Intelligence and expertise in SQL Server, SQL, T-SQL, SSRS, SSIS, SSAS, and MDX languages. In his organization he is responsible for developing end to end data loading solutions, cube development, report development, migration, testing, deployment and maintenance.
Hi
I was running sample without problem
but low speed ?
Can you Help me
I am a bit late to this, but I set this up as detailed and it worked fine for the first run. Thereafter the package would stop after the first file, but the loop & data flow tasks were still showing the yellow spinning cog. I eventually seem to have fixed this as follows…
1) Created template file with no records, just headers. I then set the full path and filename of this template file as the FileName variable’s default value.
2) As suggested by Abhilash I set the excel connection’s expression for the ExcelFilePath property rather than for the ConnectionString property.
It now appears to be working correctly every time, so just posting here to help anyone else that might be experiencing the same issues. FYI, this is on SQL Server 2017.
Hi,
the schema for each of my excel file is different like they have different no of columns then how to upload the data to SQL.
Hi ,
When i am giving the filename dynamically in expression , it errored out .
i have followed the same steps but still excel connection manager is in error.