Problem
There are times where you might want to export a table’s records, each one into a separate text file. This for example can happen when you have text data in each record and you want to re-create the original files that were initially imported into the table that created these records.
Solution
In order to better understand the solution, let’s consider the following scenario: Every day you run a process that imports a large set of text files (each file’s content is imported as a single record in the database), into a SQL Server table in order be further processed. Additionally, there is a data archiving/cleaning process in place which deletes old files that were successfully imported to the database. Now, the scenario’s requirement is to re-create certain original files by using as source the database table.
Let’s see a simple example by using the below four text files:
testFile1.txt |
|---|
| This is text file 1 which contains different lines of text with code=1 |
testFile2.txt |
|---|
| This is text file 2 which contains different lines of text with code=2 |
testFile3.txt |
|---|
| This is text file 3 which contains different lines of text with code=3 |
testFile4.txt |
|---|
| This is text file 4 which contains different lines of text with code=4 |
Then we create a test database named “TestDB” as well as a table named “FileContents” for storing the above files contents:
CREATE DATABASE TestDB;
GO<br>
USE TestDB;
GO<br>
CREATE TABLE [dbo].[FileContents](
 [id] [int] IDENTITY(1,1) NOT NULL PRIMARY KEY,
 [fileText] [text] NOT NULL,
 [code] [varchar](10) NOT NULL,
 [fileName] [varchar](50) NULL
);
GO
After we import the four text files into the above table and run a SELECT statement against it, we get the below result:

Now let’s consider that the above scenario features hundreds if not thousands of files which are no longer available and we want to re-create the original text files for records with codes equal to “code2” and “code3”. To this end, what we want to do is to read the “FileContents” table, find the records we want based on the given condition, and export each one of these records into separate text files.
The algorithm for implementing the requirement is:
- Temporarily enable xp_cmdshell (you need this for running the BCP command)
- Create temporary table in TestDB database (column must have the same data type as in the original table’s column – in this case Text)
- Get the records (from table “FileContents”) with codes “code2” and “code3” and store them into the cursor
- Iterate through the cursor values and for each value set do the following:
- Delete all records from the temporary table
- Insert the cursor’s current value in the temporary table
- Dynamically construct and execute the BCP command
- Disable xp_cmdshell
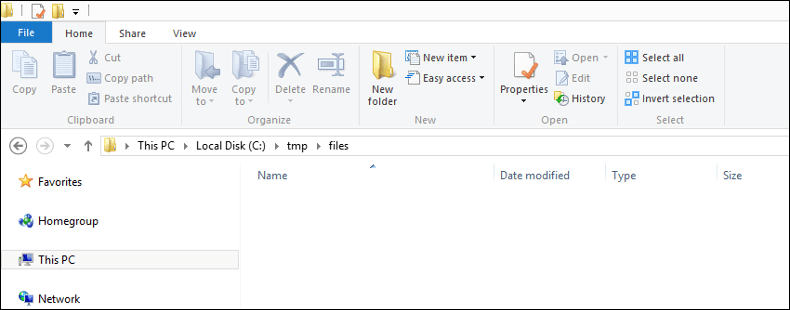
Now let’s check the output directory before running the code. As you can see it is empty:
The algorithm described above is translated to the below T-SQL script:
--Temporarily enable xp_cmdshell
sp_configure 'show advanced options',1;
RECONFIGURE
GO<br>
sp_configure 'xp_cmdshell',1;
RECONFIGURE
GO<br>
--Declare variables
DECLARE @fileText VARCHAR(MAX);
DECLARE @fileName VARCHAR(500) ;
DECLARE @command varchar(1000);<br>
--
--Declare parameters
--
--Here you need to specify the output directory for the files to be created
DECLARE @outputDir VARCHAR(250)='c:\tmp\files\';<br>
--Here you need to specify the SQL instance from which the data will be exported
DECLARE @instanceName VARCHAR(50)='.\SQL2K14'<br>
--Here you specify whether you are connecting to the SQL instance with a
--trusted connection (Windows Authentication) or not
DECLARE @isTrustedConnection BIT=1<br>
--If isTrustedConnection is set to 0 then you will need to
--add username and password for connecting to the SQL Server instance
DECLARE @userName VARCHAR(50)='loginName'
DECLARE @password VARCHAR(50)='password'<br>
--Create temporary table if it does not exist
IF OBJECT_ID('TestDB..tmpSource') IS NULL
CREATE TABLE TestDB..tmpSource(
 [fileText] [TEXT] NULL
);<br>
--Declare cursor and populate with data
DECLARE db_cursor CURSOR FOR
SELECT [fileText], [fileName]
FROM TestDB..FileContents
WHERE [code] IN ('code2', 'code3');<br>
--Open cursor
OPEN db_cursor
FETCH NEXT FROM db_cursor INTO @fileText, @fileName<br>
WHILE @@FETCH_STATUS = 0
BEGIN
    --Clean temporary table
    DELETE FROM TestDB..tmpSource<br>
    --Insert record into temporary table
    INSERT INTO TestDB..tmpSource (fileText) VALUES(@fileText);<br>
    --Dynamically construct the BCP command
    --If the user connects to the SQL instance using a trusted connection
    IF (@isTrustedConnection=1)
       SET @command = 'bcp "SELECT * FROM TestDB..tmpSource" queryout "'+ @outputDir + @fileName + '" -S ' + @instanceName +' -T -c'
    --If the user connects to the SQL instance using username/password
    ELSE
       SET @command = 'bcp "SELECT * FROM TestDB..tmpSource" queryout "'+ @outputDir + @fileName + '" -S ' + @instanceName +' -c -U ' + @userName + ' -P '+ @password<br>
    --Execute the BCP command
    EXEC xp_cmdshell @command, no_output<br>
    --Fetch next records
    FETCH NEXT FROM db_cursor INTO @fileText, @fileName
END<br>
--Close and deallocate cursor
CLOSE db_cursor
DEALLOCATE db_cursor
GO<br>
--Disable xp_cmdshell
sp_configure 'xp_cmdshell',0
RECONFIGURE
GO<br>
sp_configure 'show advanced options',0
RECONFIGURE
GO
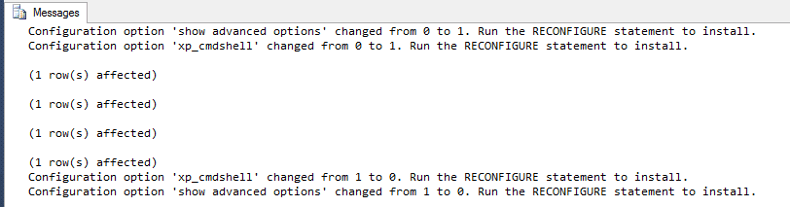
The output we get after running the above script is illustrated in the below screenshot:
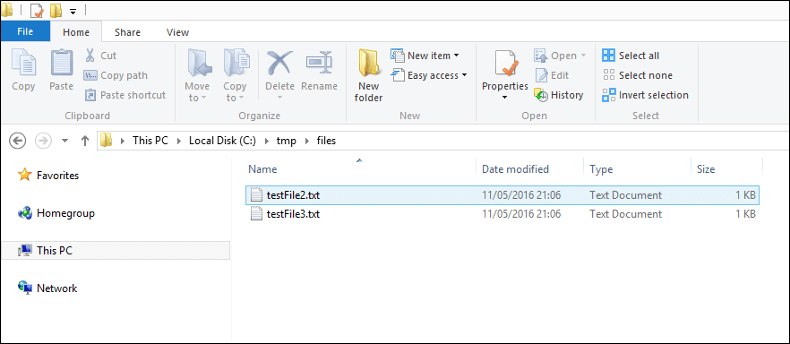
Now, if we check the output directory we can see that the two text files were reconstructed based on the relevant records in the “FileContents” table in the “TestDB” database:
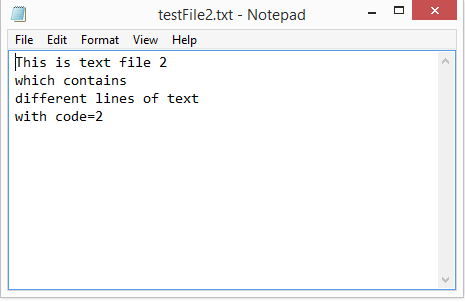
Also, if we check the contents of the two files we can see that they are exactly the same with the original files which were initially imported into the database table:

Next Steps
Review the following tips and other resources:
- Books Online: Import and Export Bulk Data by Using the bcp Utility (SQL Server)
- Tip: Simple way to export SQL Server data to Text Files
- SQL Server Integration Services Tutorial

Artemakis Artemiou is a Senior SQL Server and Software Architect, Author, and a former Microsoft Data Platform MVP (2009-2018). Moreover, he is an Instructor on Udemy where he teaches SQL Server and .NET development. Artemakis has over 15 years of experience in the IT industry in various roles and he is the founder of SQLNetHub. Artemakis is the creator of the well-known software tools Snippets Generator, DBA Security Advisor and In-Memory OLTP Simulator. Artemakis’s official website can be found at aartemiou.com. You can follow Artemakis on Twitter at https://twitter.com/artemakis.


