By: Svetlana Golovko | Comments (3) | Related: > Master Data Services
Problem
We are implementing our first Master Data Services (MDS) model using SQL Server 2014 MDS and want to make sure that users cannot enter data that does not comply with certain business requirements. How can we do this? Are there any data validation rules or checks that could prevent from incorrect data entry?
Solution
In MDS you can implement Business Rules and apply them to the entities. They have some similarity to the constraints in SQL Server (default / check constraints).
These rules could be quite flexible, but the interface for the MDS Business Rules creation is not very intuitive. In this tip we will provide the MDS Business Rules overview and we will show you how to create a simple rule.
SQL Server MDS Business Rules Maintenance Overview
Some of the examples of the Business Rules usage are:
- Make sure that required fields do not have empty values
- Set default values if value is not specified
- Set value based on specific condition (overwrites user input)
- Validates data or sets value in one column based on specific condition
- Validates data or sets value in a column if record was changed
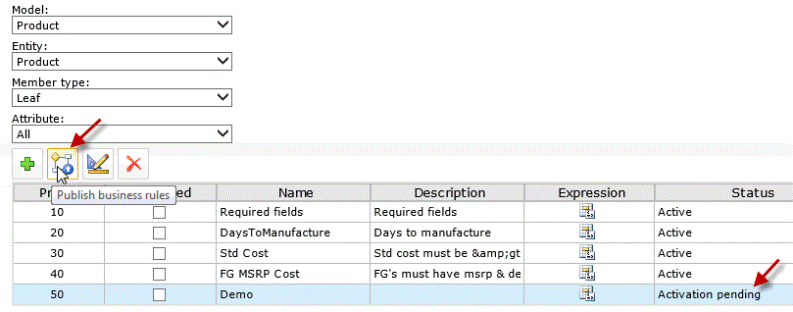
Here are examples from the sample "Product" model provided by Microsoft and the description of icons under the Business Rules Maintenance screen in the MDS Manager:
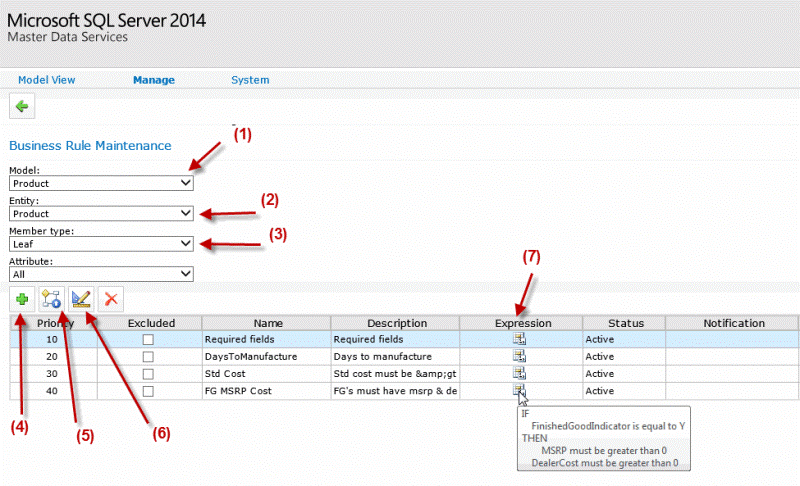
- Model for which you need to create/modify the Business Rules.
- Entity under this model (the Business Rules are not shared between entities).
- Member Type. This is usually "Leaf" (or could be "Consolidated" member type if available).
- Icon to add the new Business Rule.
- Icon to publish/activate the Business Rule.
- Icon to design the Business Rule.
- Final expression pops-up if you mouse over the expression icon in the row.
Other fields:
- Priority - sets order for rules to run. There are other criteria that determine the run order. Read more about "How Business Rules Are Applied" here.
- Excluded - to disable the rule temporarily.
- Description - description of item.
- Status - must be "Active" and not have "Excluded" checked in order for rule to work.
- Notification - user or group who will get notifications in case the Business Rules validation fails.
Business Rules Editor Overview
When you click on the "Add business rule" icon a new line with a new rule will be created and the rule will have a generic name. The priority will be different for every new rule and the rule will have a "Rule not defined" status:
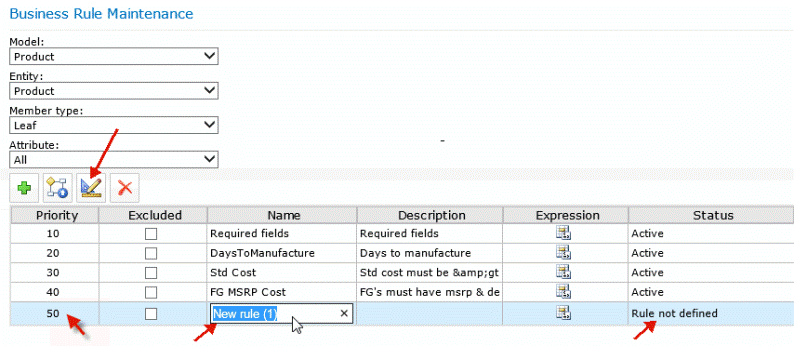
Change the rule's name by double-clicking on it's name.
Let's review the components and other areas of the business rule designer/editor (click on "Edit selected rule" icon):
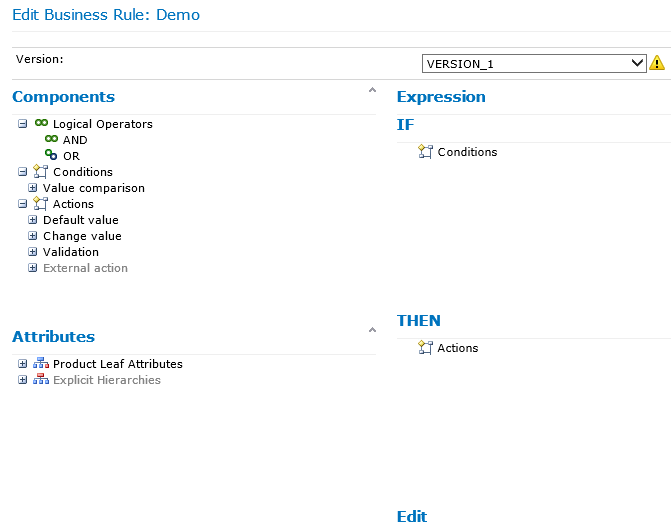
The left side has components and attributes to build the rule and the right side is to build an expression.
Note, an expression itself is actually hidden by default, but you can see it by expanding the Expression section:
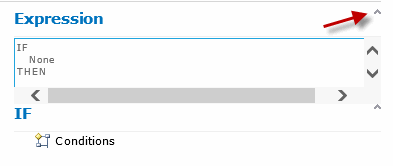
Components
Components have the following structure:
- Logical operators
- AND
- OR
- Conditions
- "Value Comparison". For example, "is equal to", "starts with". The full list of the conditions is listed here.
- Actions have the following actions groups (the full list of the actions
can be found
here)
- "Default value" - sets the default value of an attribute
- "Change value" - updates value of an attribute
- "Validation" - validates actions and can send e-mail if any of the validations are failed. Examples: "is required", "must be equal to". Make sure you understand the difference between "Change Value" and "Validation". "Change Value" will update an attribute. "Validate" will not change the attributes value if a rule is violated, but it will display a validation error.
- "External Action" - usually to initiate an external workflow.
Building an Expression
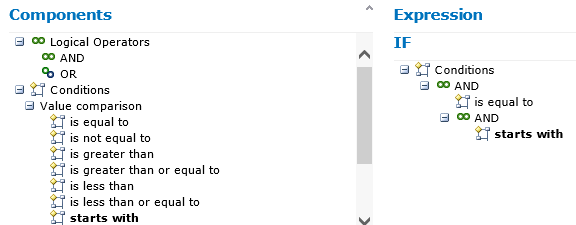
- First you need to specify a condition (or several conditions) when the rule
will be validated. Drag from the "Components" on the right logical operators
and conditions first :
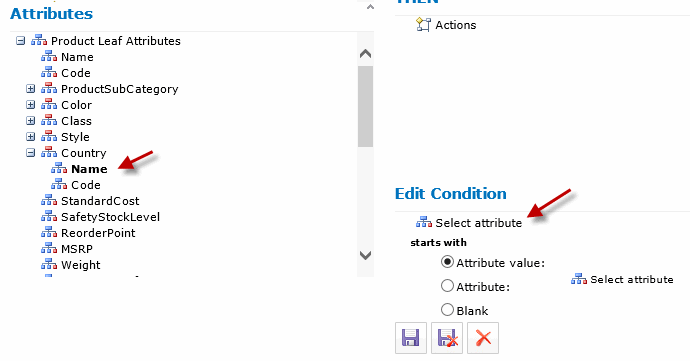
- Drag the "Country/Name" attribute from the list of the attributes to the
"Edit Condition" area and drop it on the "Select attribute" icon:
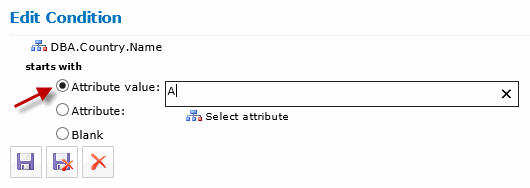
- Set "Country/Name" attribute's value for the "start with" condition:
Click on the "Save" icon.
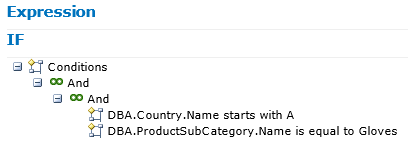
- Repeat the steps for the "is equal to" condition:
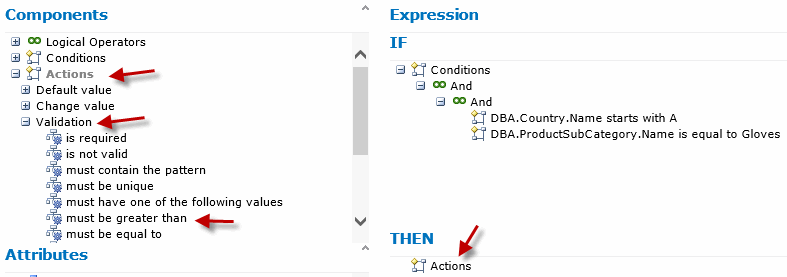
- Now we can specify actions:
- Expand "Actions" under the "Components"
- Select type of action (in our example - "Validation")
- Select type of validation ("must be greater than")
- Drag it to the "Actions" icon on the right side ("THEN"):
- Drag the "StandardCost" attribute to the "Edit Action" section and specify
the attribute's value:
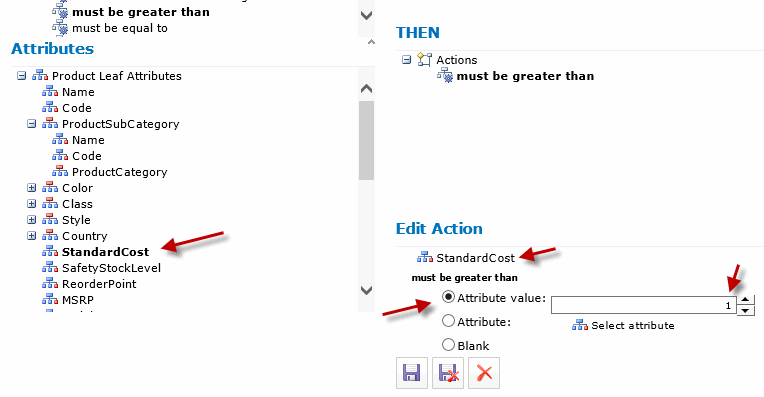
Note, that this section's name changed from "Edit Condition" to "Edit Action" when we selected an action to modify.
Click the "Save" icon. - Here is our final expression for this rule:
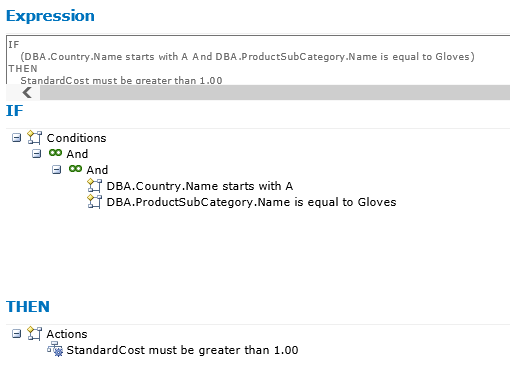
We have completed our Business Rule creation.
Click the "Back" icon on the top of the screen:
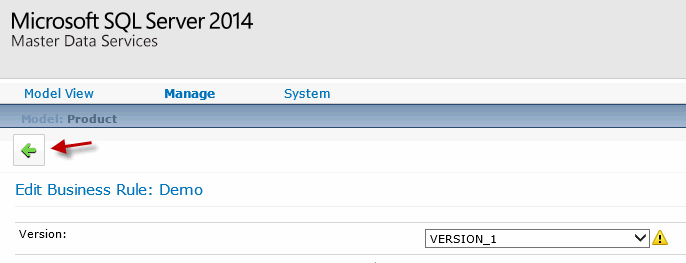
Note, that the new business Rule has an "Activation Pending" status.
Activate the new Business Rule by highlighting the new rule and then by clicking on the "Publish business rules" icon:
Sample "Product" Model Business Rules Examples
Here are the rest of the rules that exist in the sample "Product" model ("Product" entity) provided by Microsoft.
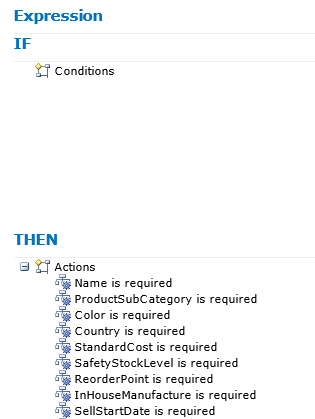
"Required fields" rule
There is no condition. This rule always applies and the fields below are mandatory:
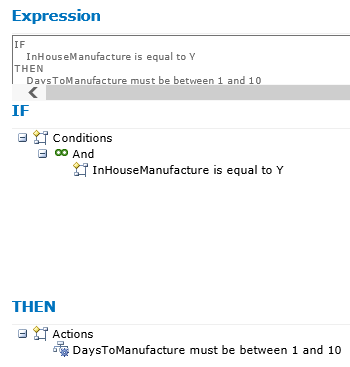
"DaysToManufacture" rule
This rule applies when InHouseManufacture attribute is equals to "1". In this case the value of the DaysToManufacture attribute is getting validated.
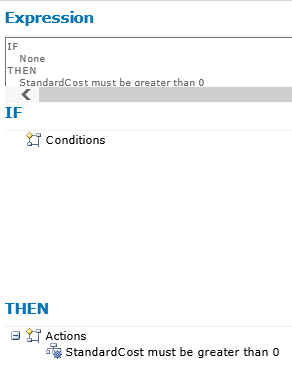
"Std Cost" rule
This rule validates the value of the StandardCost attribute that always has to be greater than "0".
"FG MSRP Cost" rule
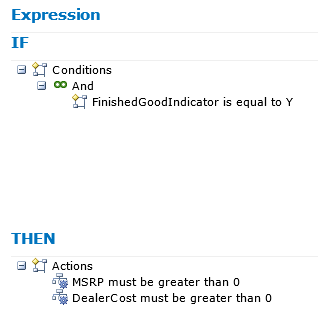
This rule is applicable to members where the FinishedGoodIndicator attribute is equal to "Y". In this case the other two attributes are validated and have to be greater than "0".
In our next tips we will show a couple of more advanced Business Rules and we will explain how Business Rule validations work.
Next Steps
- Read all MDS tips here.
- The steps for the sample models deployment could be found here.
- Check Microsoft resources about MDS.
About the author
 Svetlana Golovko is a DBA with 13 years of the IT experience (including SQL Server and Oracle) with main focus on performance.
 This author pledges the content of this article is based on professional experience and not AI generated.
View all my tips


