Problem
I have explained how to fix this issue in my last two tips (Uninstall and sa login). Here I will explain how to fix this issue in case your sa account is not working or is corrupt. As I mentioned in my last tips that I was installing SQL Server 2014 on a standalone server and I did check all prerequisites and then started installing the SQL Server instance. I did not get any warnings or errors in any rule or during step of the SQL Server installation wizards, but I received the below error at the end of the installation:
The following error has occurred:
Wait on the Database Engine recovery handle failed. Check the SQL Server error log for potential causes.
I had followed each and every pre-check before installing SQL Server, but still received this issue. This tip will help you to fix this issue if you have been completely locked out of SQL Server.
Solution
I have explained how to fix this issue in my last two tips (Uninstall and sa login). The reason behind this error is the account which the user selected on the Server Configuration page to run the SQL Server services during installation is somehow not able to bring the SQL Server database engine services online. During installation of the database engine services, SQL Server tries to bring online database services as an internal process, but due to startup account either being corrupt or not having appropriate privileges, it fails to do so and ultimately the installation fails. There might be a possibility also that someone had tried to install SQL Server previously on this machine, but failed to do so and they have not cleaned the machine during the uninstallation.
Below are the three options which can be used to fix this issue. I have already explained the first two options, see the URLs below. In this tip I will explain how to fix this issue if your sa account is also corrupted and you are not able to login using the sa login with a blank password.
Step 1: Launch SQL Server setup to start the SQL Server installation. Complete all of the required details and click on the next buttons to proceed until the last page of setup. Click on the install button to start the SQL Server installation.
Step 2: The installation progress bar will proceed until the end, but setup will throw the below error during installation.

When you click on the ok button after reading and analyzing this error below, a screen will appear confirming that a few of the features failed to install.

Step 3: As we can see in the above screenshot that the SQL Server database engine failed to install on this machine, but surprisingly the SQL Server services have been created as shown in the Windows Services console. I launched windows services console by running services.msc command. You can see all the SQL Server services in the below screenshot whereas this installation was indicated failure in second screenshot above.

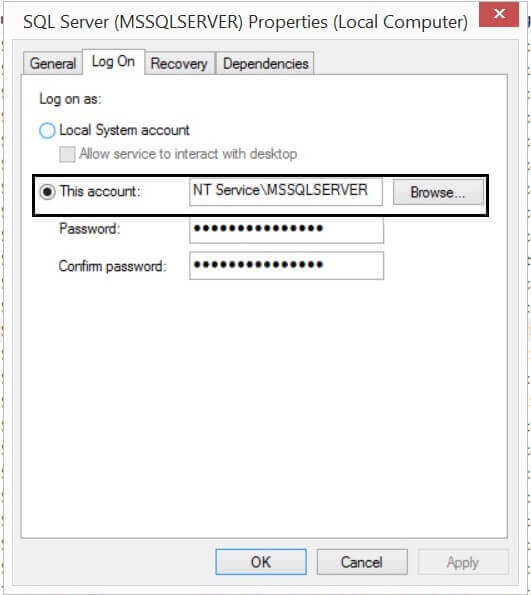
Step 4: You can see that the SQL Server services are stopped and not running so I decided to start them to run SQL Server. When I tried to start the SQL Server service it failed to start showing permission issues. I decided to check the service account of this service. I launched the service property and choose the “Log On” tab. We can see the default service account which is generally used by the SQL Server setup to configure SQL Server services during installation. We have also changed the same service account which is NT Service\MSSQLSERVER to local system to run the installation successful in to our last tip.
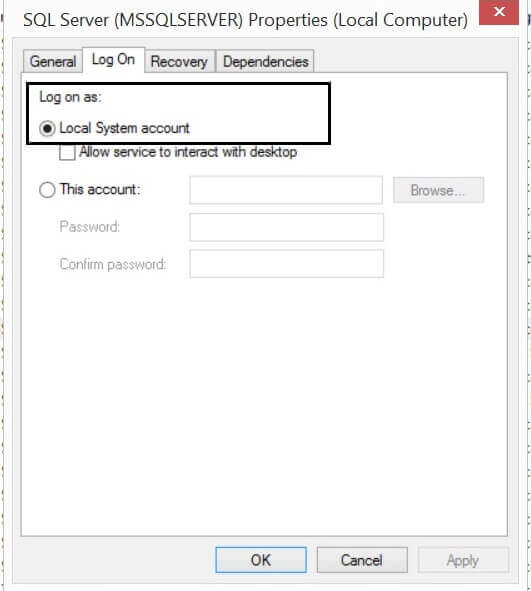
Step 5: Now change this service account to either local system or a valid domain account. Here I have chosen Local system and clicked on OK to apply the changes.
Step 6: Now start the SQL Server service as shown in below screenshot.
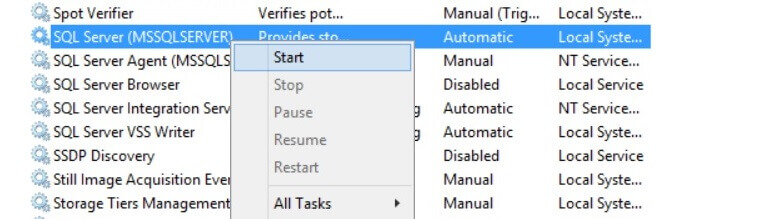
This time it will work and your SQL Server service will come online. Do the same exercise to bring the SQL Server agent service online.

Step 7: Next we will try to connect to the SQL Server instance. Launch SQL Server Management Studio. Enter instance name and click on the Connect button. You can see we will not be able to connect to the SQL Server instance using a windows account, so next we will try to connect using the sa account. This will also not work as I have described in my last tip. We can try to connect using the sa account with a blank password, but in a situation where the sa account is corrupt, the SQL Server instance is completely locked out or the sa account is not working, we are faced with an error when making a database connection. At this point, we still have one option to overcome this issue and that is to change your SQL Server instance in to single user mode and create a login with SQL Server System Admin (sa) rights to gain access to the SQL Server.
Step 8: Since we do not have access to the SQL Server instance to first stop the SQL Server services which we have started in the above steps, we need to take a new approach. Open a command prompt window (Start -> Run -> cmd and press the ‘OK’ button) and navigate to SQL Server’s Binn directory. Run the ‘sqlservr -m’ command to start SQL Server in single user mode from SQL Server’s Binn directory as shown below.

Step 9: Now open a separate command prompt window and connect to your SQL Server instance by using the sqlcmd utility as shown below.

Step 10: We have made a successful connection to the SQL Server instance as shown in the above screenshot. Now you are connected to your SQL Server instance with SYSADMIN rights where you can create a login to gain access to this instance. We have created a login called MSSQLTIPS and assigned it system admin rights as shown below.

Step 11: Once the login is created successfully, close the command prompt and restart the SQL Server services. Now we will validate whether we have reclaimed SQL Server access using MSSQLTIPS login or not. Open another command prompt and connect to the SQL Server using the MSSQLTIPS and login and password. We can see this login has connected to the database server and we can see the databases by running the below command.

You can also validate access via SQL Server Management Studio by checking out the below details.

Next Steps
- Make sure to either disable or change the sa password to secure your database instance.
- Go ahead and create all required logins with necessary access levels.
- Now your SQL Server instance is ready to use.
- Explore more knowledge on SQL Server Database Administration Tips.
- Check out the earlier tips in this series:

Manvendra is a passionate database lover currently working as a Technical Architect at one of the top MNCs. He has extensive experience on all versions of SQL Server since 2000 and has built Big Data skills. He has lead projects on the following database features: Database Mirroring, Always ON, Replication, Log Shipping, Geo-Clustering and Performance Tuning and delivered many SQL Server projects on consolidation, upgrades, heterogeneous replication, HA / DR solutions, automation and major performance tuning projects. You can also follow Manvendra on his blog, Twitter, LinkedIn and Facebook.
- MSSQLTips Awards: Champion (100+ tips) – 2018 | Author Contender – 2015-2018, 2021-2022



Thank you so much!
Hi all!
I had the same problem, but none of this solutions helped me.
I found out that, installation of SQL should be done in English region settings.
Soo… Change Region settings to English (GB), restart PC and during SQL installation select Collation which you want to use.
(SQL installer automatically selects Collation type depending on your OS Region Settings. Double check before proceeding the installation)
BR
Primoz
I was struggling to fix this issue for last 1 week and so many blogs and articles but no use. But never knew the solution would be this simple. Amazing piece of info and well laid. Many Thanks