By: Manvendra Singh | Comments (7) | Related: > Availability Groups
Problem
I described how to configure a SQL Server AlwaysON Availability Group in a multi-subnet environment in a previous tip and in this tip I'll explain how to add a replica to an existing SQL Server AlwaysON Availability Group.
Solution
We have two machines named PRI-DB1 ( IP: 10.X.3.XXX ) and PRI-DB2 ( IP: 10.X.4.XXX ). Both are hosted in same data center and both machines are running Windows Server 2012 R2 Enterprise edition and SQL Server 2014 Enterprise edition. PRI-DB1 is the primary replica and PRI-DB2 is the secondary replica using synchronous-commit mode and the failover mode is set to Automatic with no data loss which can be used for HA in case the primary replica goes down.
A requirement came in to setup a Disaster Recovery (DR) machine for the application which is hosted on the primary replica PRI-DB1. We built a machine named SEC-DB2 ( IP: 172.X.15.XXX ) for the secondary replica which will work as DR for this primary replica. The machine is hosted in a different location, so we have chosen to use asynchronous replication mode and the failover mode is set to manual, which can cause some data loss in case of a disaster.
NOTE : MAKE SURE TO IMPLEMENT THIS SOLUTION IN A LOWER LIFE CYCLE SYSTEM FIRST. DO NOT MAKE ANY CHANGES IN PRODUCTION WITHOUT PROPER TESTING IN A LOWER-LIFE CYCLE ENVIRNOMENT.
Adding a Replica to a SQL Server AlwaysON Availability Group
Step 1: Our very first step is to check and validate the existing AlwaysON configuration by launching the dashboard report from SQL Server Management Studio (SSMS). Right click on the Availability Group (DBAG in our case) and choose "Show Dashboard" to display the AlwaysON dashboard report for this configuration as shown below.
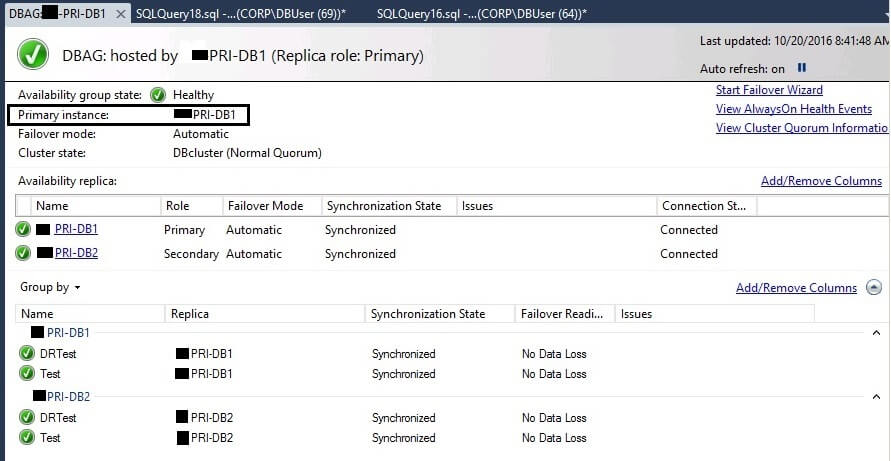
We can see there are only two replicas and their configuration is healthy and synchronized. Now we need to add the third replica to this configuration.
Step 2: The next step is to enable the Windows Server Failover Cluster feature on the DR replica, SEC-DB2, and then add our target DR replica node to the existing Windows Server Failover Cluster. The cluster name is DBCluster. Open the Failover Cluster Manager and right click on "Nodes" and choose "Add Node..." and follow the steps to add the new node.
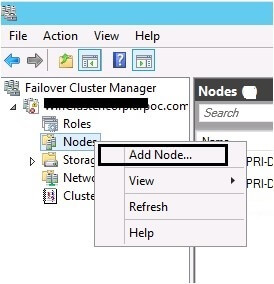
Once the node is added to the Windows cluster, you can see all three nodes in Failover Cluster Manager as shown below.

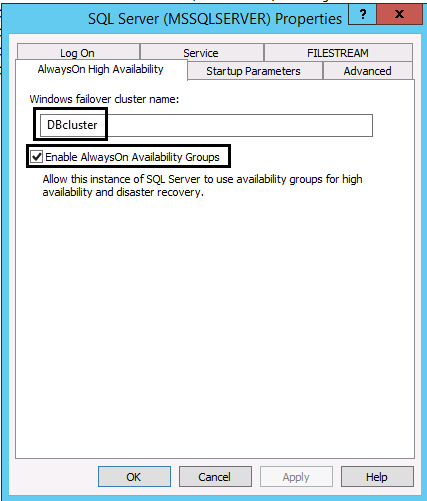
Step 3: Once the node is added, the next step is to enable the SQL Server AlwaysON feature for the SQL Server instance to make it ready for SQL Server AlwaysOn Availability Group creation. Launch the SQL Server Configuration Manger on the target replica SEC-DB2. Right click on the SQL Server service and select properties. Select the "AlwaysOn High Availability" tab and check the box to enable it. You will see the Windows cluster name which will be automatically fetched by this service in the "Windows failover cluster name" section. Click OK to save the changes, and then stop and restart the SQL Server services to apply this change.
Step 4: We already have two databases named DRTest and Test in the Availability Group on the primary replica, now we need to take a full backup and then a transaction log backup of both databases and restore them using the norecovery mode on the target DR replica SEC-DB2 using the same database names to get ready for data synchronization.
Step 5: In SQL Server Management Studio, connect to PRI-DB1 which is our primary replica. Expand the "AlwaysOn High Availability" folder followed by "Availability Groups" folder and then Availability Group name DBAG. You can see three subfolders Availability Replicas, Availability Databases and Availability Group Listeners. Right click on "Availability Replicas" and choose "Add Replica..." as shown in below screenshot.
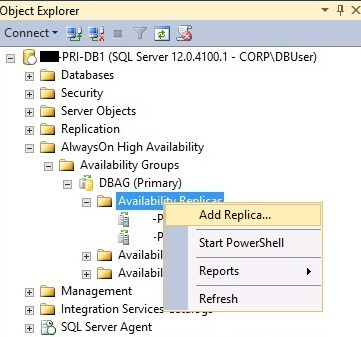
A new window named "Add Replica to Availability Group - DBAG" will appear to proceed with the remaining steps. Click on the Next button to go to the next window.
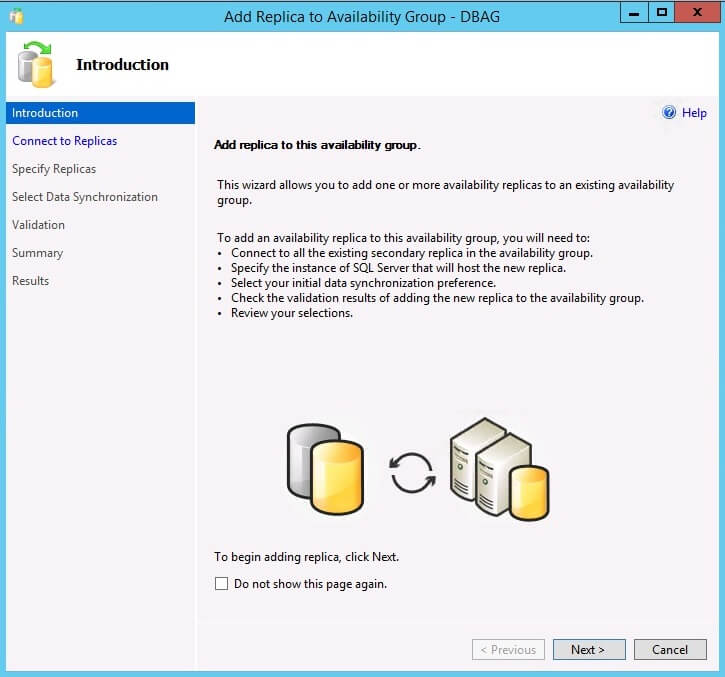
Step 6: On the next window, you will be asked to connect to existing secondary replicas. We have only one secondary replica that is PRI-DB2. Click on the Connect button to connect to the secondary replica.
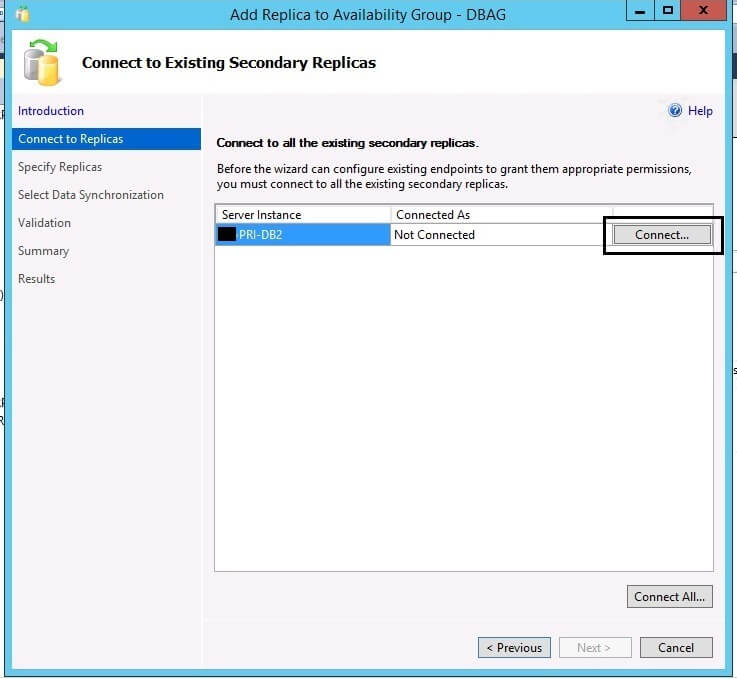
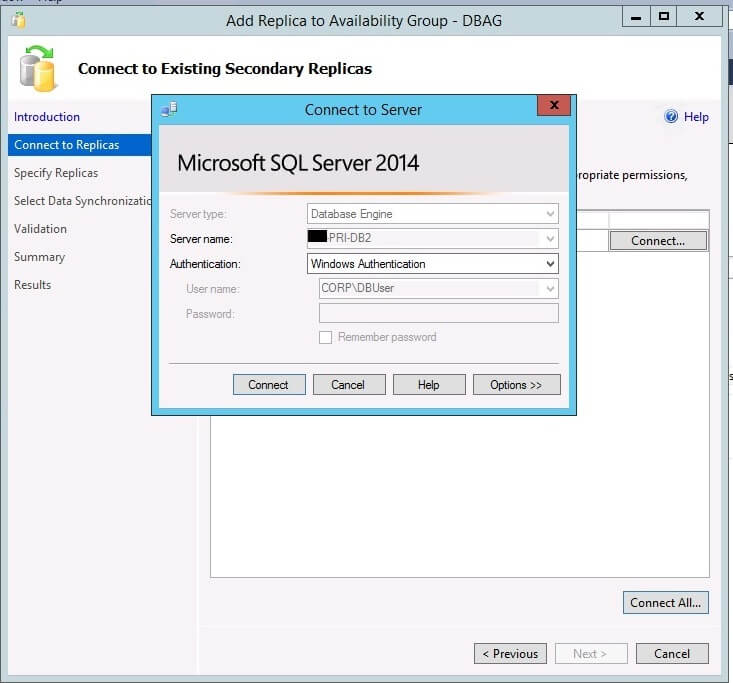
The below window will appear to let you enter the connection details for the secondary replica. Enter all required details and click on the Connect button to make a connection. Once you make a successful connection, click on the Next button to proceed.
Step 7: Now we need to enter the details of target DR replica which needs to be added to the Availability Group DBAG. Click on the "Add Replica..." button to connect to the target DR replica SEC-DB2.
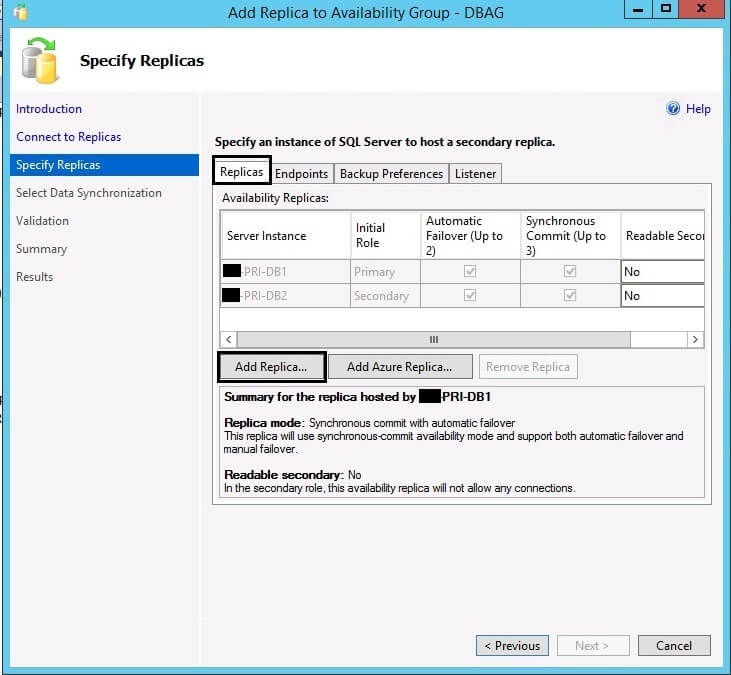
Enter the connection details as shown in the below picture and click on the Connect button to make a connection.
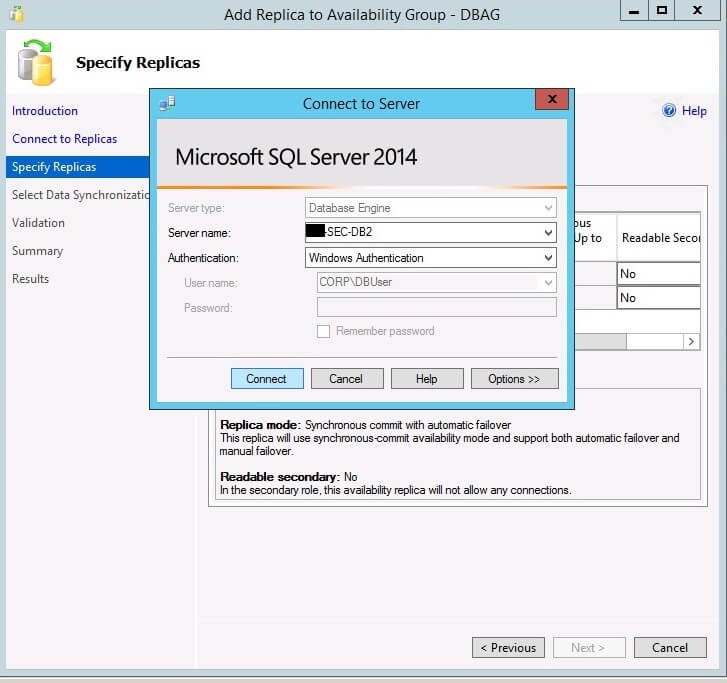
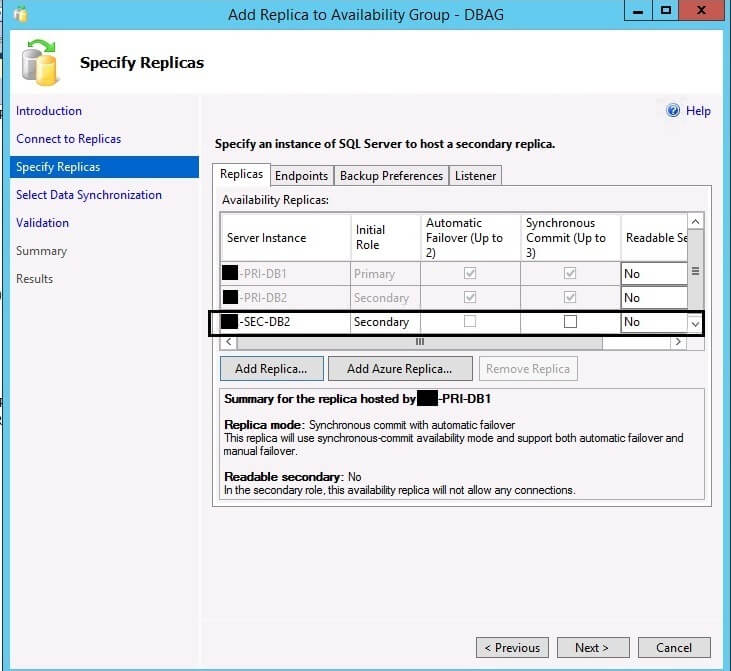
Once our target DR replica is connected, you will see it with the other replicas as shown below. Earlier there was only one replica now there are two. We will use the same listener which was configured earlier for this configuration. You just need to add a virtual IP for this new replica as it belongs to a different subnet. So click on the "Listener" tab and then click on the "Add" button to enter the virtual IP for the existing listener. Now click on the Next button to proceed to the data synchronization page.
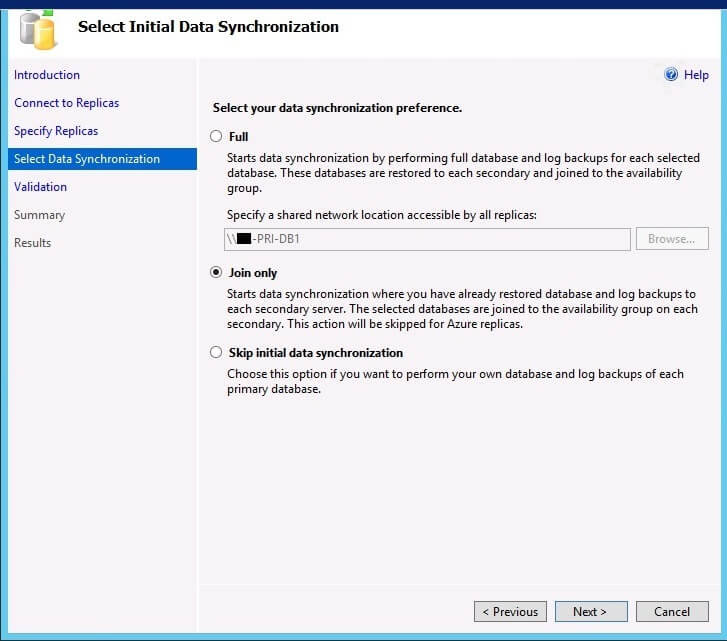
Step 8: We already restored the databases to the target DR replica SEC-DB2 in step 4, so we will choose the "Join Only" option on this page and click Next to proceed.
Step 9: A validation process will run to check the settings as shown below.
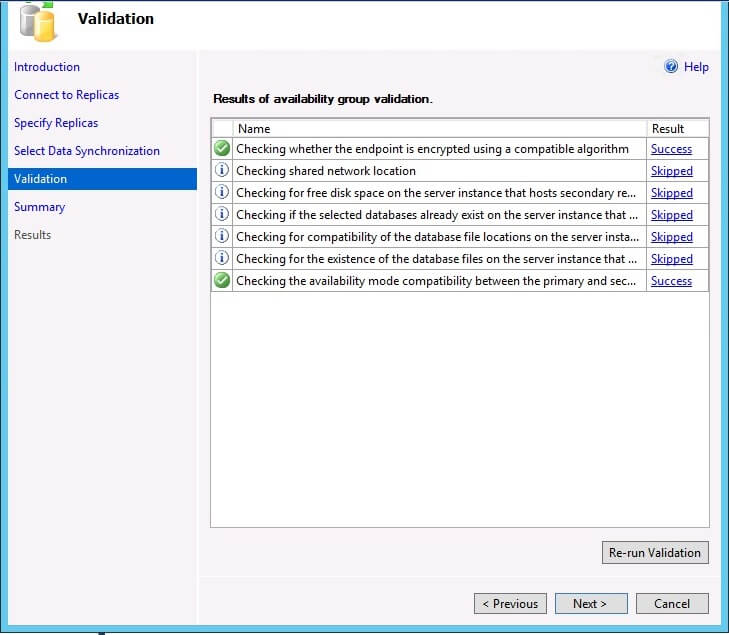
Now click Next to go to the final page which is the summary page where you can recheck all of the details. Then click Finish to complete this configuration.
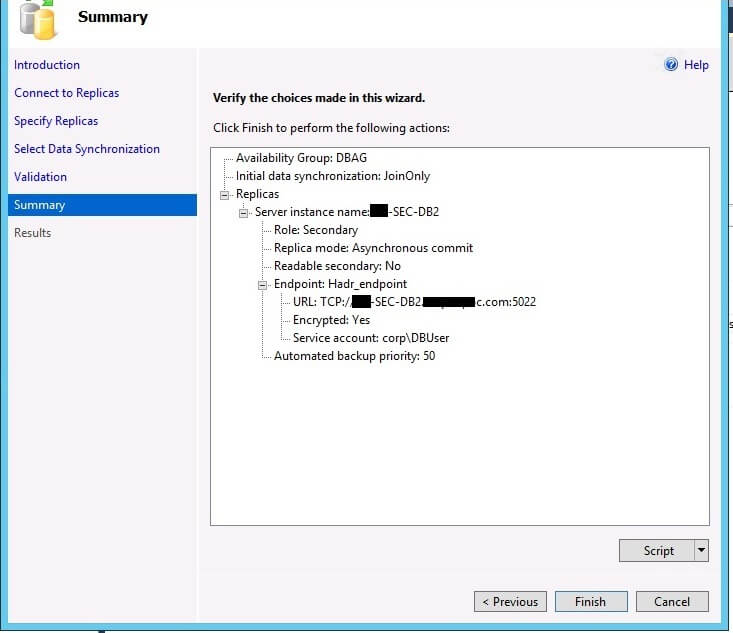
Step 10: When the "Add Replica to Availability Group" wizard runs you will get a summary of all the rules as shown below.
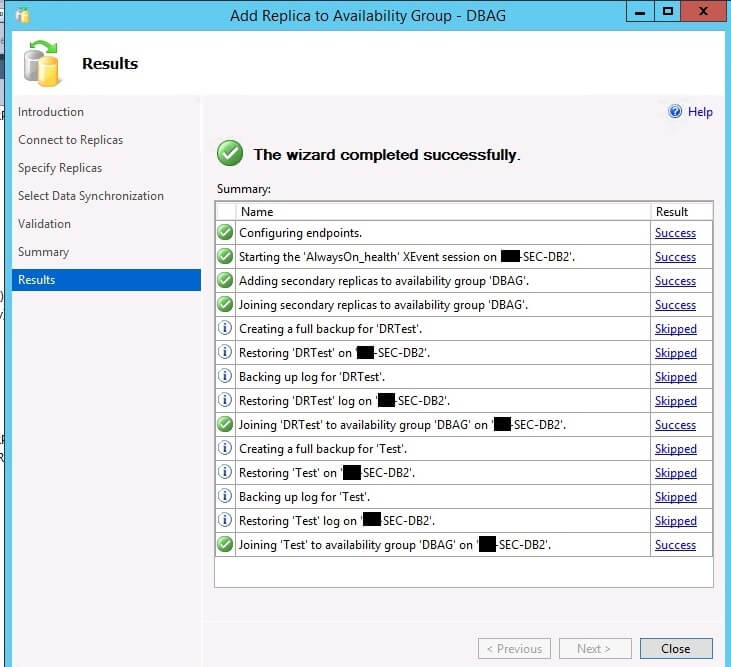
Validate the AlwaysOn Availability Group in SSMS
Once the above wizard finishes successfully, we can validate the AlwaysOn Availability Group in SSMS. Expand the "AlwaysON High Availability" folder followed by "Availability Groups" and then DBAG. Expand the subfolder Availability Replicas to see newly added secondary replica SEC-DB2 as shown in the below picture.
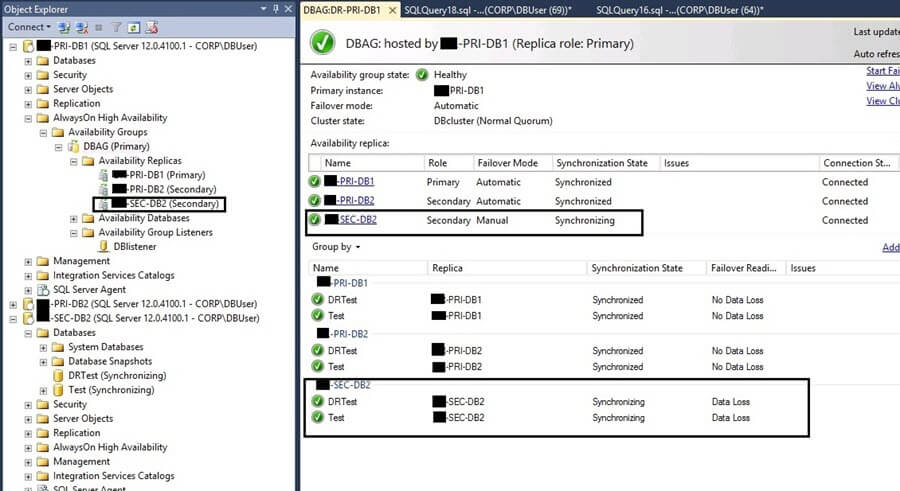
We can also see the dashboard report of this Availability Group on the right side in the above picture.
We can also connect to the secondary replica SEC-DB2 and validate the details in the "AlwaysOn High Availability" folder as shown below.
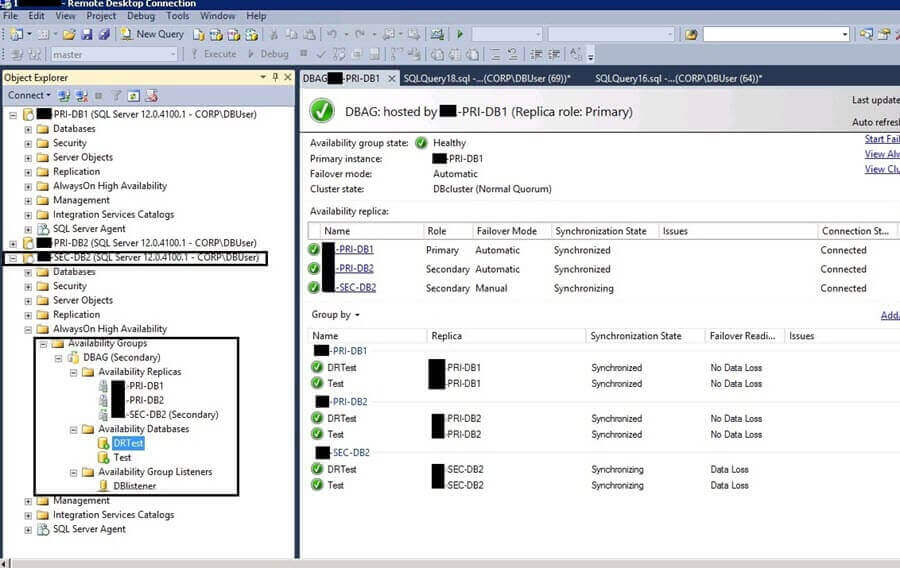
Next Steps
- Now you have two secondary replicas for your primary replica. Your application database has HA as well as DR capability.
- Explore more SQL Server Database Administration Tips.
About the author
 Manvendra Singh has over 5 years of experience with SQL Server and has focused on Database Mirroring, Replication, Log Shipping, etc.
This author pledges the content of this article is based on professional experience and not AI generated.
View all my tips


