Problem
Our organization is starting to deploy more virtual machines on Azure for both testing and DR environments. I would like to create and administer Azure virtual machines using Windows PowerShell. How do I get started?
Solution
In a previous tip on Introduction to Azure PowerShell Modules for the SQL Server DBA Part 1, you looked at using the Azure PowerShell modules to get started with Microsoft Azure, specifically for SQL Server related tasks. Part 2 covers deploying an Azure virtual machine (VM) running a SQL Server instance from an existing image in the Azure VM gallery. Both of those tips used the Azure service management (ASM) deployment model.
In 2014, Microsoft introduced the Azure Resource Management (ARM) deployment model. ARM provides a new way of deploying and managing resources on Azure. The ASM deployment model is still available. But moving forward, it is recommended to use ARM. In fact, the tips on Deploying Azure SQL Database Using Resource Manager PowerShell cmdlets and Deploying Azure SQL Data Warehouse Using Resource Manager both use the ARM deployment model.
As a result of this, the Azure PowerShell modules and cmdlets used in part 1 and part 2 of this series no longer work when you deploy and manage resources on Azure using the ARM deployment model.
In this tip, you will explore working with the ARM-based PowerShell cmdlets in preparation for deploying an Azure VM running a SQL Server instance.
NOTE: The cloud – regardless of the vendor – is constantly evolving. Features are being introduced faster than we can see newer versions of SQL Server. When deciding to deploy resources on the cloud, you need to consider the challenges associated with the introduction of new features. These challenges may include negative impacts on your operational efficiency and staff education. In my case, I had to learn the ARM deployment model and rewrite some of my PowerShell deployment scripts. The same is true for customers who had existing resources on Azure deployed using the ASM deployment model.
Installing the Latest Azure PowerShell Modules
Similar to part 1 of this series, you need to install the latest version of the Azure PowerShell modules to use the ARM-based PowerShell cmdlets. Depending on the version of your Windows operating system, you first need to install the Windows Management Framework 5.0 or higher versions. If you are on a Windows 10 machine, you can skip installation of the Windows Management Framework. But on older Windows operating systems, you may need to install the .NET Framework 4.5 and Windows Management Framework 4.0 prior to installing Windows Management Framework 5.0.
Once you’ve installed the prerequisites, you can proceed to install the Azure PowerShell modules. There are different ways to install the Azure PowerShell modules:
- From the PowerShell Gallery using the cmdlet below
- Using the MSI Installer from GitHub. Choose the latest version of Azure PowerShell. Just don’t get confused between the Azure PowerShell for AzureStack and Azure PowerShell. As of March 2017, the latest version of Azure PowerShell is at v3.7.0
- Using the Web Platform Installer and choosing Azure PowerShell
Install-Module AzureRM #Installs the AzureRM module from the PowerShell Gallery
Once the Azure PowerShell modules have been installed, you can now start working with Azure resources via Windows PowerShell.
NOTE: Regularly check the version of the Azure PowerShell modules that you are working on and make sure to update when necessary. You can check the version of your Azure PowerShell modules by using this PowerShell script block
Get-Module -ListAvailable | Where-Object{ $_.Name -eq 'Azure'}

Working with Azure PowerShell Cmdlets
You may become overwhelmed with the amount of Azure PowerShell cmdlets. For this tip, we will only focus on those that you will need to deploy and manage an Azure VM that runs a SQL Server instance.
Setting up the environment
Let’s start off with accessing your Azure subscription. Use the Add-AzureRmAccount PowerShell cmdlet to add an authenticated Azure account that you can use to run ARM-based PowerShell cmdlets and scripts.
Add-AzureRmAccount
You will be prompted for your Microsoft Azure credentials.
NOTE: You may have seen the Login-AzureRmAccount PowerShell cmdlet in some of the Microsoft documentation, articles and blog posts. This cmdlet is an alias to the Add-AzureRmAccount. You can also use this to accomplish the same task of adding an authenticated Azure account.
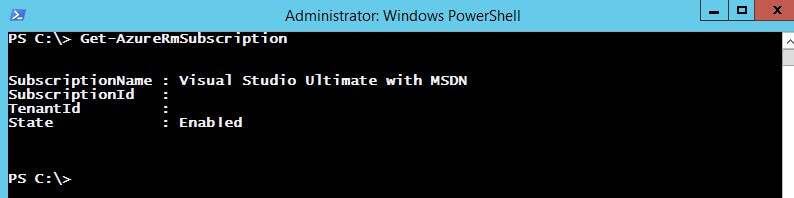
After providing your Azure credentials to your PowerShell session, you can start exploring your Azure subscription. You can use the Get-AzureRmSubscription cmdlet to review the Azure subscription or subscriptions associated with the Azure credentials you provided.
Get-AzureRmSubscription
If you have multiple subscriptions associated with your Azure credentials, you can use the Set-AzureRmContext cmdlet and specify the -SubscriptionID parameter to associate the specific Azure subscription to the current PowerShell session.
Set-AzureRmContext -SubscriptionId 'xxxxxxxx-xxxx-xxxx-xxxx-xxxxxxxxxxxx'
All the PowerShell commands and scripts that you run within the current PowerShell session will be executed against the specified Azure subscription.
Display Available Azure Data Center Regions
Your choice of an Azure data center region can be based on cost, proximity to your business office, availability of an Azure resource or service, disaster recovery requirements or data governance and compliance requirements. Be sure to review the different Azure regions and data centers available worldwide. Microsoft is constantly adding more Azure data centers.
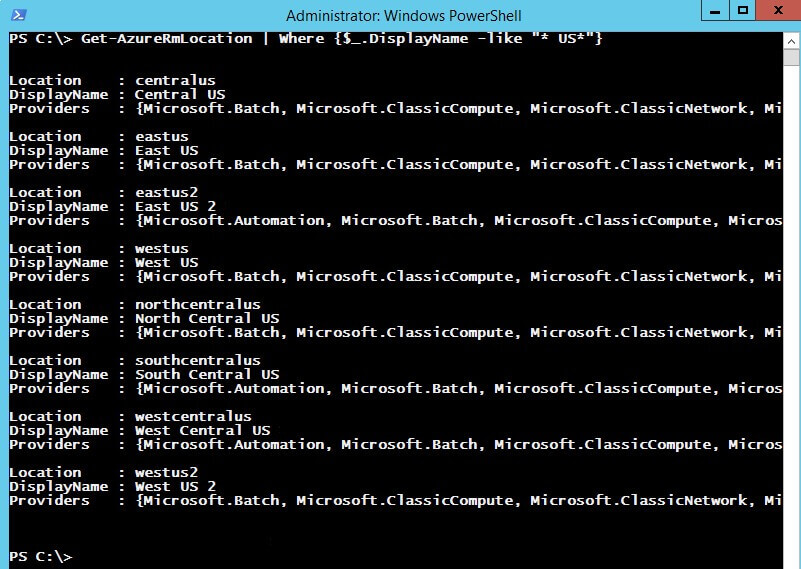
To display a list of Azure data center locations, you can use the Get-AzureRMLocation cmdlet.
Get-AzureRMLocation

Technically, the results you get from the Get-AzureRMLocation cmdlet are data center regions, not their specific locations. But you can refer to the list of the different Azure regions and data centers available worldwide for more details.
You can also use the pipeline and the different PowerShell comparison operators to explore the results of running the cmdlets. For example, if you want to search for available Azure data centers in the US, you can use the Where-Object cmdlet, using the -DisplayName parameter and some text with a wildcard character. Note the blank space after the wildcard character and before the text US. You may get Azure data center regions in Australia if you don’t include the blank space.
Get-AzureRMLocation | Where {$_.DisplayName -like "* US*"}
You will need information about the Azure data center locations when you create your Azure VM.
Creating an Azure Resource Group
ARM-based deployment model introduced the concept of an Azure resource group. A resource group is a logical container that holds related resources for an Azure solution. To understand this better, imagine deploying a SQL Server database in the traditional IT infrastructure. Before you can deploy the database, you have to follow a sequence of tasks. First, you need to build the server and install the operating system. Then, you need to install and configure SQL Server. Only after completing these tasks can you deploy the database. You don’t consider these different components as separate objects but rather related ones that form a single entity – the database needs the SQL Server instance, the SQL Server instance needs the operating system and the operating system needs the server. Similarly, when you deploy a database in an Azure VM running a SQL Server instance, you would need an Azure subscription, a choice of the available Azure data center regions, a VM, a storage account and a virtual network. And this is just the database layer. In a multi-tiered application where you have an application server configured with high availability and resiliency, you can be working with multiple VMs and multiple SQL Server instances – all in the context of a single application.
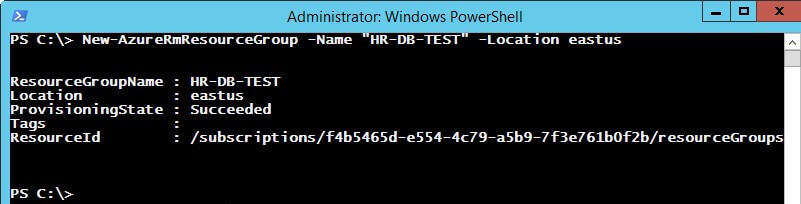
Deploying resources on Azure would require a resource group. You can use the New-AzureRmResourceGroup cmdlet to create a resource group, passing the -Location parameter for the Azure data center region you prefer. The sample code below creates a resource group named HR-DB-TEST in the East US Azure data center region.
New-AzureRmResourceGroup -Name "HR-DB-TEST" -Location "eastus"
Creating an Azure Storage Account
Similar to part 1 of this tip, you would need an Azure storage account to store the VM disks, SQL Server data and log file disks. For this tip, you will create an Azure VM with only a single disk. Keep in mind that the number of disks you need for your Azure VM depends on the IOPs requirements of your SQL Server workload. A future tip will cover how to properly plan and configure Azure storage to meet SQL Server IO performance requirements.
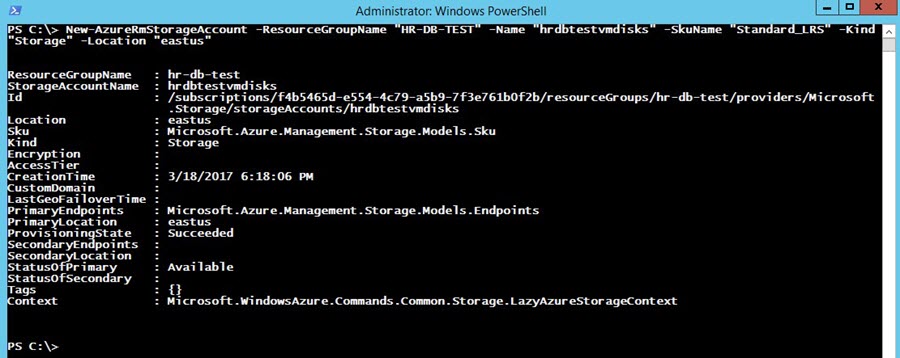
To create an Azure storage account, use the New-AzureRmStorageAccount cmdlet, passing the -ResourceGroupName parameter, the -SkuName parameter, the -Location parameter and the -Kind parameter.
Looking at some of the parameters used in the command:
- -SkuName: the type of storage replication that you want to use. Standard_LRS is for locally redundant storage. Think of this as a type of RAID implementation within an Azure storage scale unit. Additional information about Azure storage replication is available from this Microsoft documentation
- -Kind: the type of storage account for your specific usage. Storage is for general-purpose storage account that gives you access to Azure Storage services such as Tables, Queues, Files, Blobs and Azure VM disks under a single account. Since this will be used for a VM disk, the general-purpose storage account is specified. Additional information about the types of Azure storage accounts is available from this Microsoft documentation.
New-AzureRmStorageAccount -ResourceGroupName "HR-DB-TEST" -Name "hrdbtestvmdisks" -SkuName "Standard_LRS" -Kind "Storage" -Location "eastus"
Note that the name of the Azure storage account follows certain rules that can look like restrictions:
- Between 3 to 4 characters in length
- Use only alphanumeric characters; you can’t use special characters
- Use lower-case letters only
These restrictions are set because accessing resources in an Azure storage account are exposed thru REST APIs and are available to any client applications capable of sending and receiving data via HTTPS endpoints.
Configuring the Network
You might be wondering why you need to perform this task when your role is primarily focused on SQL Server administration. The reality is that SQL Server is dependent on the underlying network infrastructure. While the goal of this task is not to become an expert in network administration, it is important to understand how your SQL Server VM will participate in a much larger network environment.
SIDE NOTE: As you do more work with the cloud, you will be required to understand the different external components that SQL Server depend on – storage, networking, operating system, etc. It’s the reason why cloud professionals are becoming more in-demand – they need to know a lot.
Every Azure VM that you create requires at least one virtual network adapter, a public or a private IP address assigned to that virtual network adapter, a virtual network that represents how servers and services within your Azure resources communicate with one another, and a network subnet. An overview of Azure virtual networks is available from this Microsoft documentation. It will be a good idea to get your network administrators involved in performing this task. They can guide you thru the process of configuring networking for your Azure resources, especially if you intend to deploy a hybrid cloud solution.
Start with creating the Azure virtual subnet configuration using the New-AzureRmVirtualNetworkSubnetConfig cmdlet. Assign the output of this cmdlet to a variable as it will be used in subsequent tasks.
$vNETSubnetConfig = New-AzureRmVirtualNetworkSubnetConfig -Name "HR-VNet-Config" -AddressPrefix "172.16.0.0/24"
Again, you don’t need to be an expert in TCP/IP addressing to properly perform this task. But if you tell your network administrators that you will assign a 172.16.0.0/24 for your Azure virtual subnet, they will understand that you will provide a range of IP addresses from 172.16.0.1 – 172.16.0.254 with a subnet mask of 255.255.255.0. They will also let you know if there might be potential IP addressing conflicts using this configuration if you decide to stretch your local network to Azure.
Next, you need to create the Azure virtual network using the New-AzureRmVirtualNetwork cmdlet. You will need the Azure virtual subnet configuration you created in the previous task. To simplify the command, use the output of the New-AzureRmVirtualNetworkSubnetConfig cmdlet assigned to a variable – $vNETSubnetConfig – in the -Subnet parameter. Similarly, assign the output of this cmdlet to a variable as it will be used in subsequent tasks.
$HR-TEST-vNET = New-AzureRmVirtualNetwork -Name "HR-VNet" -ResourceGroupName "HR-DB-TEST" -Location "eastus" -AddressPrefix "172.16.0.0/24" -Subnet $vNETSubnetConfig
Once the Azure virtual network is created, you can then create an IP address that you can assign to the Azure VM. For this tip, you will use a dynamic public IP address from the IP address range you’ve configured for the Azure virtual network subnet. You can use the New-AzureRmPublicIpAddress cmdlet for this task. Using a public IP address allows you to access the Azure VM from the public Internet.
NOTE: This is only used for testing purposes and not recommended for security reasons. What is recommended is to assign private IP addresses to your Azure VMs and create either a site-to-site VPN connection or an ExpressRoute connection between your on-premises network and the Azure virtual network so that only authorized users can have access.
$HR-DB-TEST-publicIP = New-AzureRmPublicIpAddress -Name "HR-DB-TEST-PublicIP" -ResourceGroupName "HR-DB-TEST" -Location "eastus" -AllocationMethod "Dynamic"
After creating the IP address, you can create the virtual network adapter that you can attach to your Azure VM. Use the New-AzureRmNetworkInterface cmdlet to create the virtual network adapter. Again, to simplify the command, use the output of the New-AzureRmVirtualNetwork cmdlet assigned to a variable – $HR-TEST-vNET – in the -SubnetId parameter and the output of the New-AzureRmPublicIpAddress cmdlet assigned to a variable – $HR-DB-TEST-publicIP – in the -PublicIpAddressId parameter. Similarly, assign the output of this cmdlet to a variable as it will be used in subsequent tasks.
$HR-DB-TEST-vNIC = New-AzureRmNetworkInterface -Name "HR-DB-TEST-vNIC" -ResourceGroupName "HR-DB-TEST" -Location "eastus" -SubnetId $HR-TEST-vNET.Subnets[0].Id -PublicIpAddressId $HR-DB-TEST-publicIP.Id
At this point, you have already created the following resources on Azure
- a resource group
- a storage account
- a virtual network configuration
- a virtual network
- a public IP address
- a virtual network adapter
You might be wondering why there are too many resources that you have to create and configure when all you need to do is create an Azure VM running a SQL Server instance. The fact that you are being made aware of all these resources and components just to deploy a SQL Server instance means that you have a better understanding of the different dependencies that SQL Server rely on. This empowers you as a SQL Server administrator to better perform tasks such as designing solutions, optimizing performance and troubleshooting issues. More importantly, it prepares you to become a better cloud solutions professional.
In the next tip in this series, you will go thru the process of creating the Azure VM running a SQL Server instance from the existing images available from the Azure VM gallery You will assign the network configuration you’ve prepared in this tip to the Azure VM and configure the Azure storage container where you will store the Azure VM disk. Once the Azure VM is created, you will test connectivity via Remote Desktop.
Next Steps
- Read an overview of Azure Resource Manager
- Review the list of available Azure Resource Manager PowerShell cmdlets
- Read the Introduction to Microsoft Azure Storage documentation
- Read about virtual networks in Microsoft Azure

Edwin M. Sarmiento is the Managing Director of 15C, a consulting and training company that specializes on designing, implementing and supporting SQL Server infrastructures. He is a Microsoft SQL Server MVP and Microsoft Certified Master from Ottawa, Canada specializing in high availability, disaster recovery and system infrastructures running on the Microsoft server technology stack ranging from Active Directory to SharePoint and anything in between. He is very passionate about technology but has interests in music, professional and organizational development, and leadership and management matters when not working with databases. Edwin lives up to his primary mission statement: “To help people and organizations grow and develop their full potential.”
- MSSQLTips Awards: Champion Award (100+ tips) – 2017 | Author of the Year Contender – 2020, 2017


