By: Rajendra Gupta | Comments (1) | Related: > Tools
Problem
Microsoft released SQL Server 2017 with many new features, including expanded operating system support, graph database capability, Python support, automatic database tuning, SSIS Scale Out support, BI enhancements, and more.
Recently Microsoft released a cross-platform command-line tool to interact with SQL Server called MSSQL-cli. In this tip, we will explore the installation and features of MSSQL-cli.
Solution
MSSQL-cli is a newly introduced interactive command line tool to run a query on a SQL Server database with many important features. It is an open source tool that works on cross-platform operating systems. MSSQL-cli is written in Python and based on the popular command-line interface projects pgcli and mycli. Microsoft released it under the open source BSD 3-clause license and its source code can be found on GitHub. The tool is officially supported on Windows, Linux, and MacOS, and it is compatible with Python versions 2.7, 3.4 and above.
Before we explore this interactive tool MSSQL-cli, let's see how to install it.
Installation of MSSQL-cli
As discussed above, MSSQL-cli is based on Python, it uses a preferred installer program (pip) to install MSSQL-cli. Pip is a package management system used to install and manage software packages written in Python. Python is not installed by default on Windows, so we need to install Python before installing the MSSQL-cli command line utility.
Python Installation
The latest Python installation package can be downloaded from Python installation link.
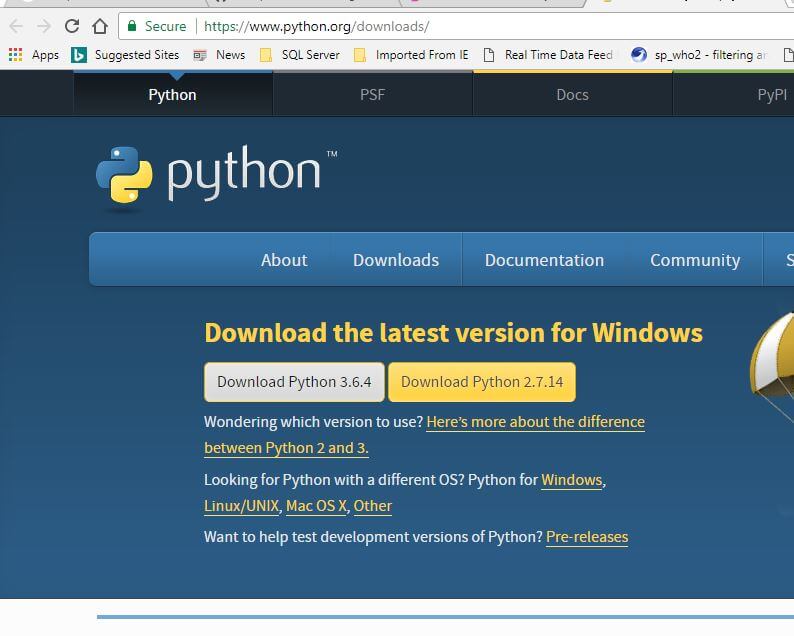
MSSQL-cli is compatible with Python versions 2.7, 3.4, and above. In this demo, I am installing the latest version, Python 3.6.4. Click on Download Python 3.6.4 and once the installation file is downloaded, double-click on it to launch the setup process.
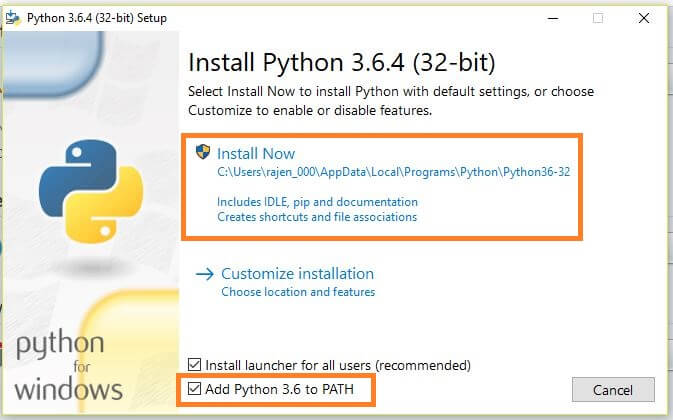
Ensure the checkbox at the bottom 'Add the Python 3.6 to PATH' is selected. Now click on the Install Python with default settings. We can also use the customize installation, but the default is recommended.
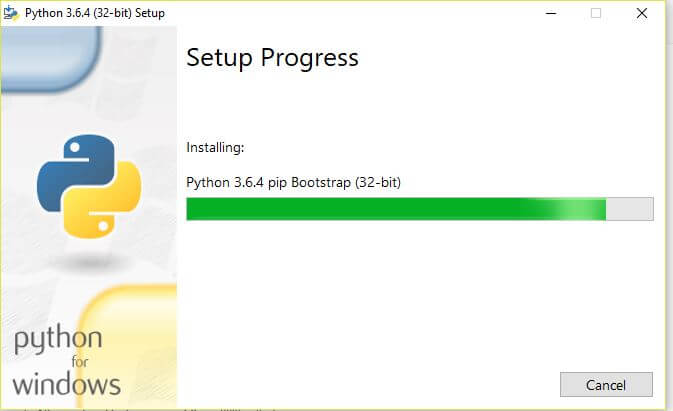
Once we start the installation, we can see the setup progress of various components.
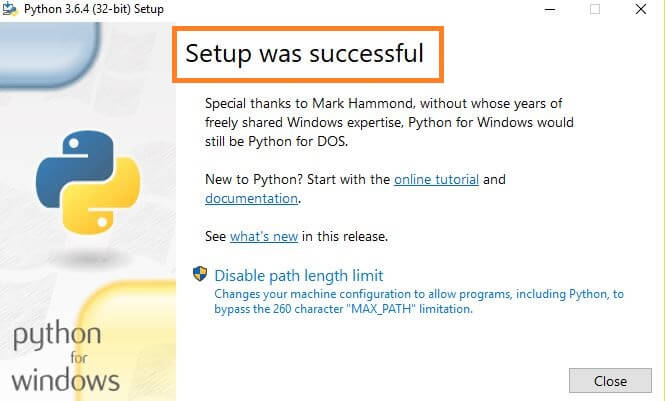
Installation is complete for Python as shown below.
MSSQL-cli installation
Once Python is installed, open a command prompt as an administrator and execute the following command to install MSSQL-cli.
pip install mssql-cli
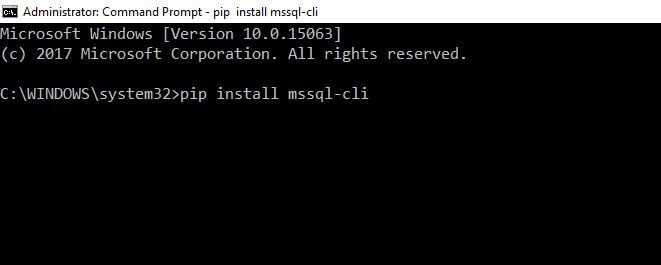
Once we press enter, the download process starts for MSSQL-cli.

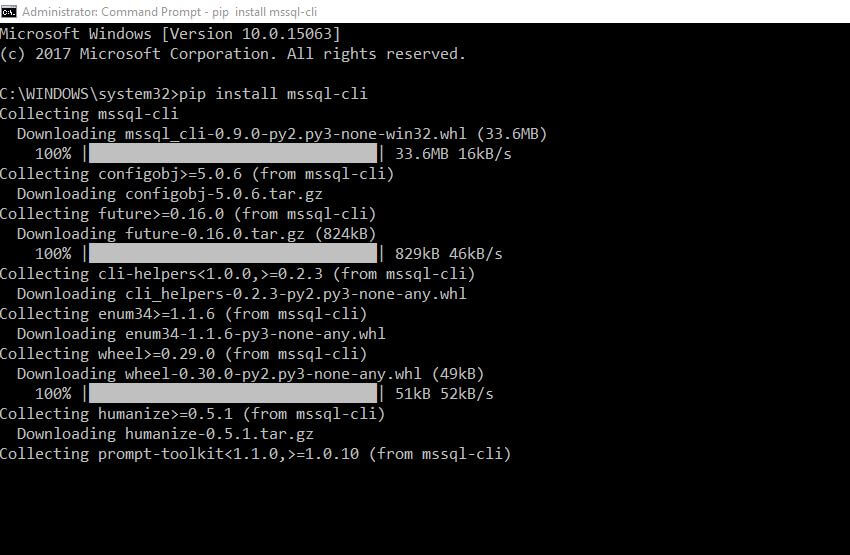
While downloading it shows the download percentage, download speed, size, etc.

It downloads multiple package files automatically as shown below.
Once set up is complete, it gives a successfully installed Pygments message.
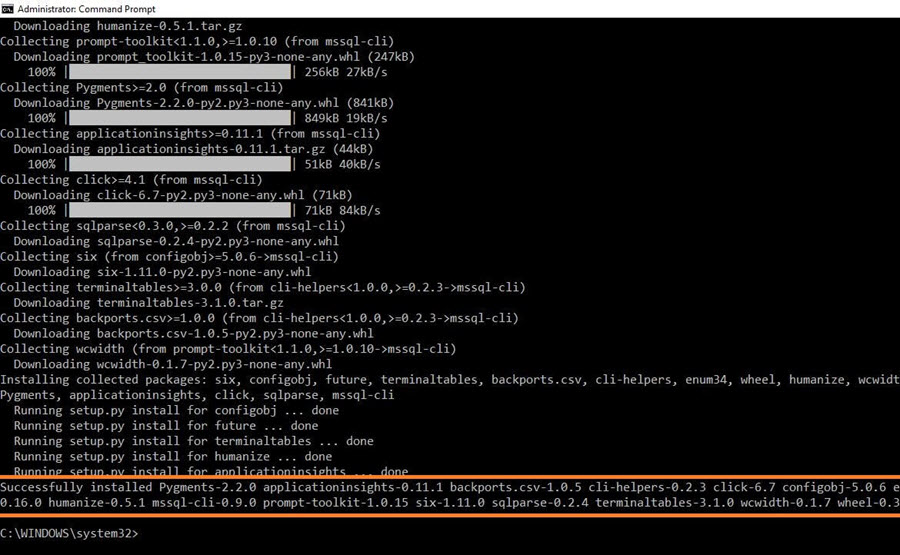
Now at this stage, MSSQL-cli installation is complete. To verify and launch it, we need to run the below command.
mssql-cli --help
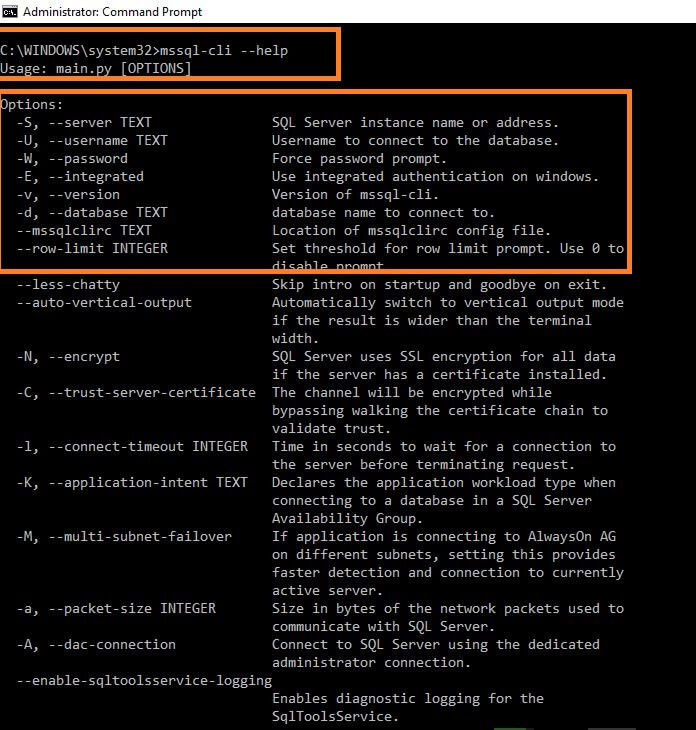
It shows the various options available with MSSQL-cli. Some of the important options are:
- -S: SQL Server Instance Name
- -U: User Name to connect with SQL Server Instance
- -W: Force password prompt to enter user password
- -E: To use Windows Integrated authentication
- -d: If we want to connect to a specific database, we can specify here. Default will connect to master database.
- -M: If the application is connecting to an AlwaysOn AG on different subnets, setting this provides a faster detection and connection to the active server.
- -A: To connect SQL Server using a Dedicated Administrator Connection.
Explore MSSQL-cli interactive command line utility
Let’s connect to SQL Server. To connect to SQL Server using SQL authentication, we need to provide a username and password as specified below.
mssql-cli -S 'server Name' -U 'user name'
Once we click enter, it asks for the password. Since we have not specified a database name, the default connects to the master database.
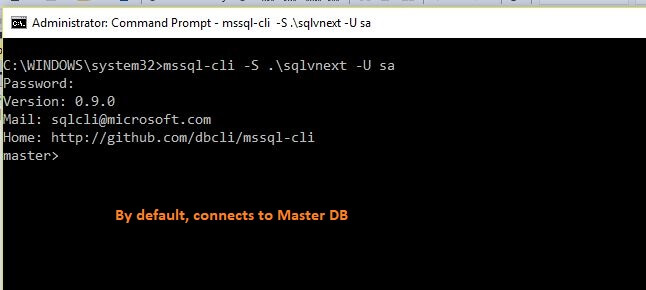
To connect SQL Server using Windows authentication, use the -E option.
mssql-cli -S 'server Name' -E
By default it connects to master database, if we want to connect to a specific database, use the below command.
mssql-cli -S 'server Name' -d 'database Name' -U sa

Features of MSSQL-cli
Now once we are connected to SQL Server using MSSQL-cli, the beauty of it starts. Important features of MSSQL-cli are:
- Auto-completion: MSSQL-cli starts to suggest completion as soon as the user starts to type a SQL command. It shows the suggestion in the current context of the database, table, operation, etc. For example, it will show only the table name from the current database after the FROM keyword and column names after the WHERE keyword are scoped to the current table.
- Syntax highlighting: The SQL statements entered are automatically syntax highlighted.
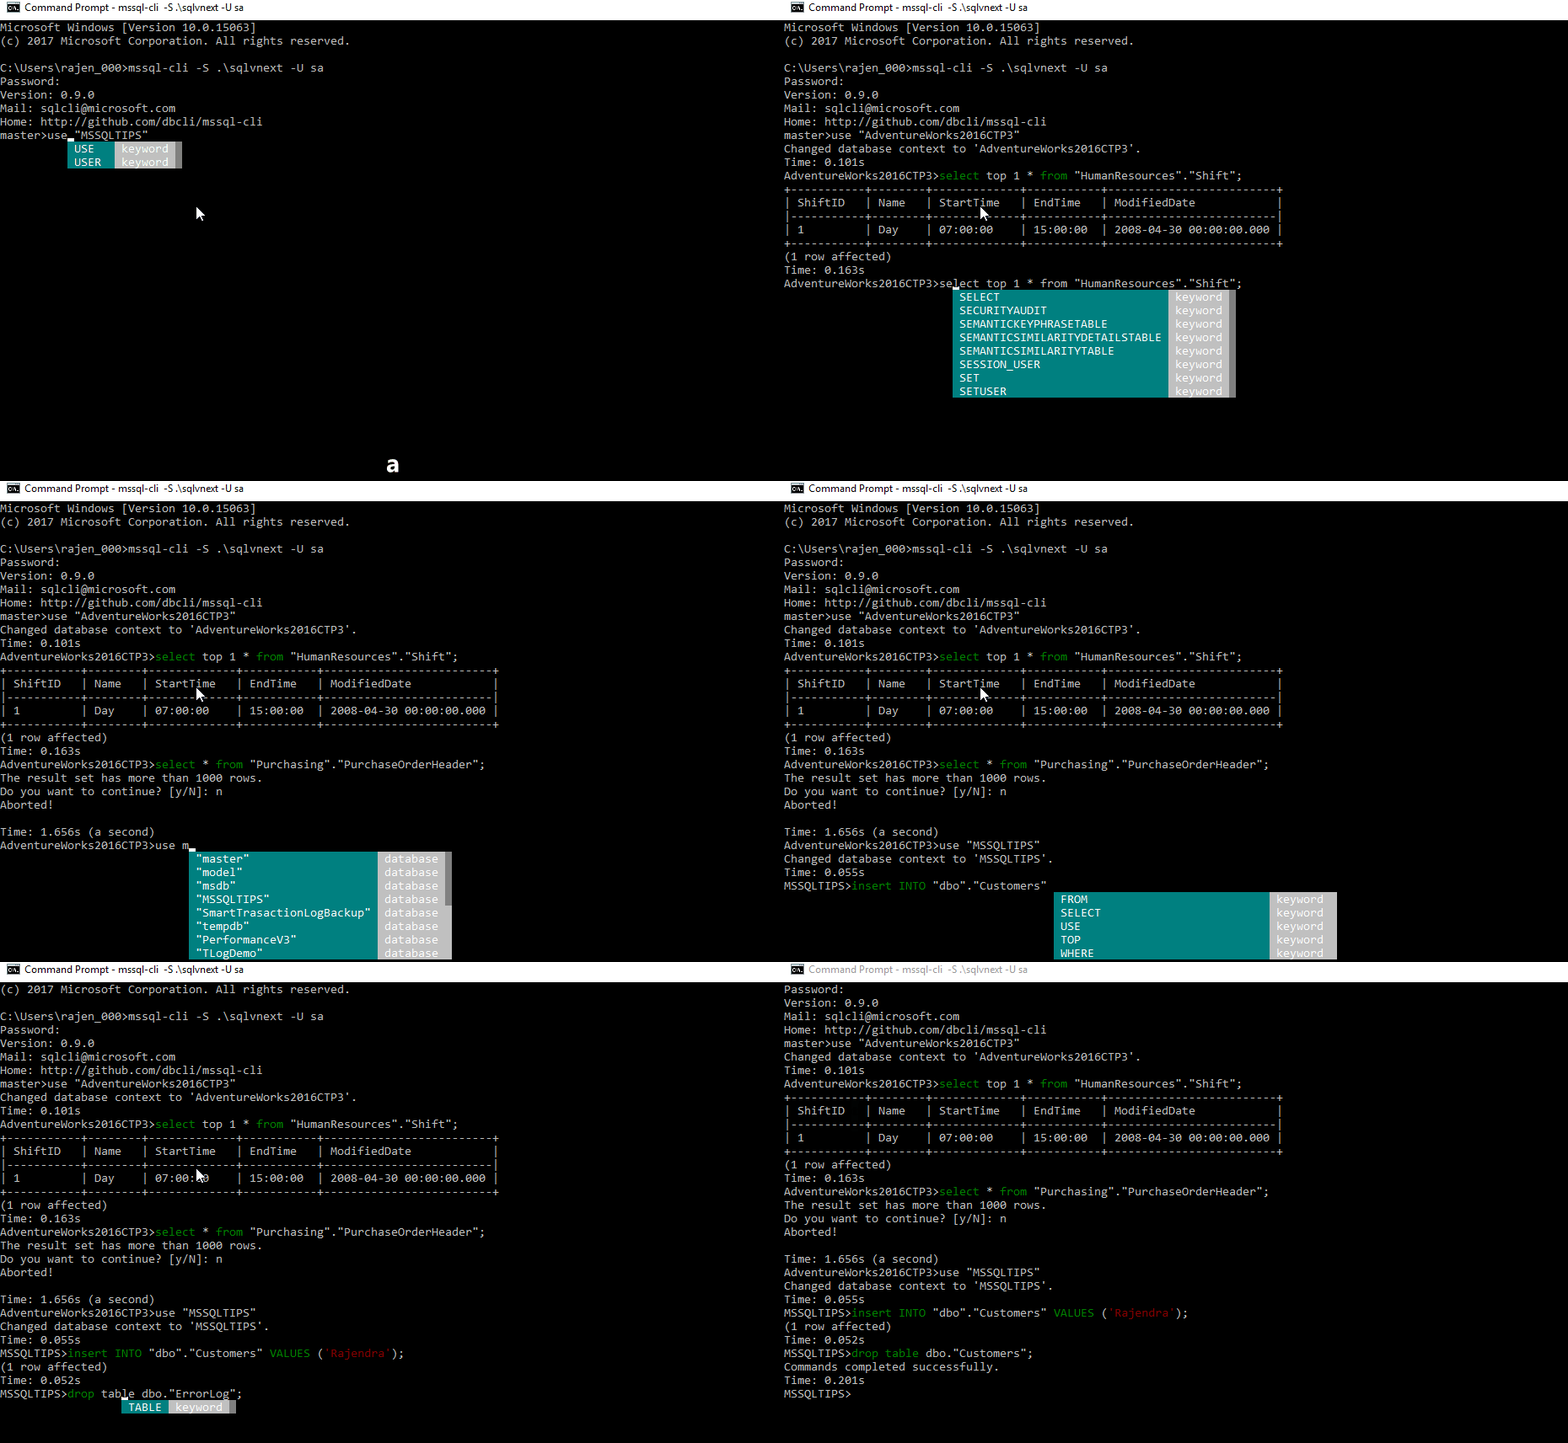
In the example below, we can see a demo of the MSSQL-cli.
In the demo we can see:
- Auto-completion of queries along with syntax highlighting
- It remembers the query history which we used previously to quickly write the query.
- If the query result set has more records than the row limit, it will prompt asking “The result set has more than [row limit] rows. Do you want to continue? [y/N]:“. Entering “N” will abort the query and “y” will return the result set.
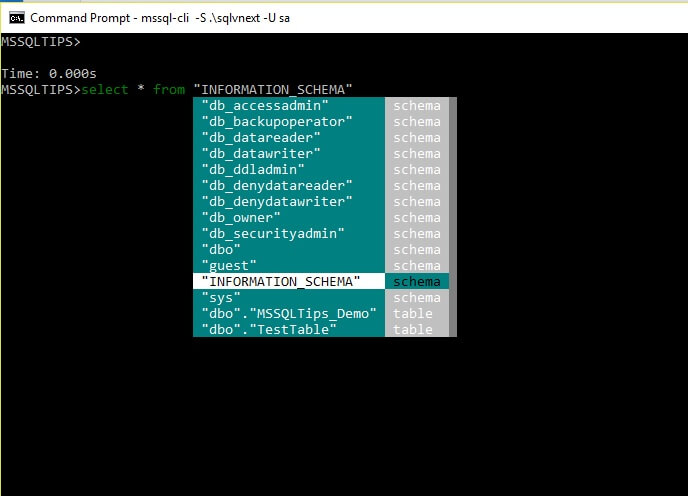
- Auto-escaping: Sometimes a table name needs to be escaped because it has white spaces or it is named after a SQL keyword. This is automatically done by MSSQL-cli. The suggestions in the auto-completion menu are automatically escaped when needed.
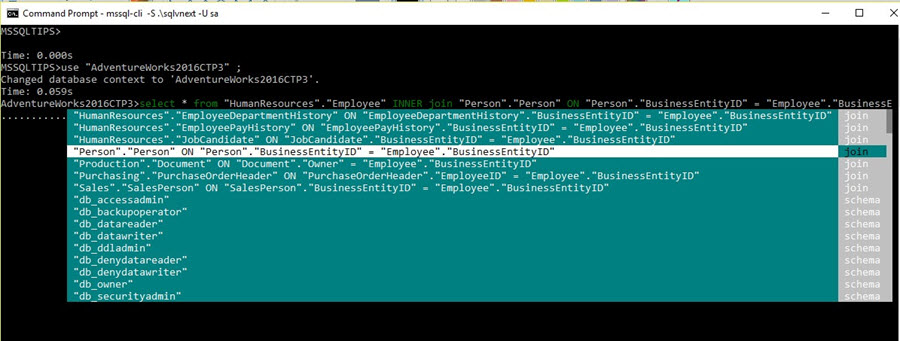
- Join Suggestion: MSSQL-cli automatically gives suggestions for queries having a join operator. We can easily select the join options, it makes query writing quick and efficient.
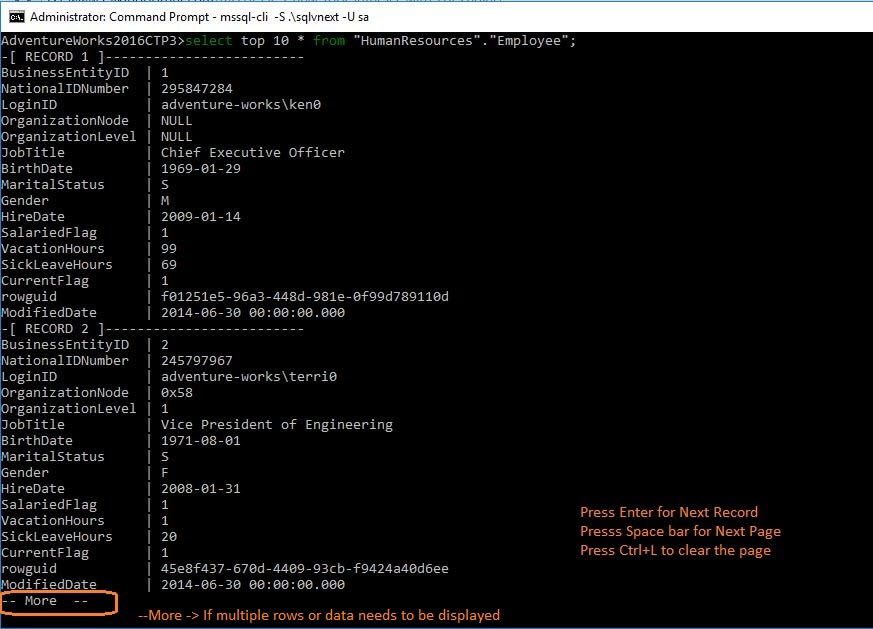
If the result set is big and requires multiple pages to view it, we can use:
- Enter: To view next record
- Space Bar: To view Next Page
- CTRL+ L: To clear the page
Microsoft has released a nice command-line client for SQL Server that is user-friendly, easy to use and an open source license. Explore more about MSSQL-cli features and learn to use it in your environment.
Next Steps
- MSSQL-cli installation guide for multiple operating systems.
- Explore SQL Server 2017 What's new in SQL Server 2017
- Read more about SQL Server 2017 tips.
- Explore Database Scope Options in SQL Server
About the author
 Rajendra Gupta is a Consultant DBA with 14+ years of extensive experience in database administration including large critical OLAP, OLTP, Reporting and SharePoint databases.
This author pledges the content of this article is based on professional experience and not AI generated.
View all my tips


