By: Rajendra Gupta | Comments | Related: > SQL Server on Linux
Problem
SQL Server 2017 works on both Windows and Linux operating systems. Database administrators should have hands-on experience for both Windows and Linux for SQL Server. In this tip, we will install the SQL Server database engine and SQL Server Agent on an Oracle VM VirtualBox running Red Hat Linux. You can read the first part of this tip series we created an Oracle VM VirtualBox and installed RHEL.
Solution
Before proceeding with this tip you should check out this tip to install Oracle VM VirtualBox or build your own Linux server using Red Hat Linux.
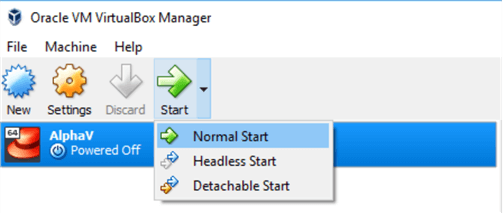
In the previous tip we created a virtual server named 'AlphaV'. To start the Oracle VM VirtualBox, click on Start > Normal Start.
We can see the below screen after logging into the machine with the root user.

I am going to use PuTTY to install SQL Server on this VM. PuTTY is a free and open-source terminal emulator, serial console and network file transfer application. It supports several network protocols, including SCP, SSH, Telnet and raw socket connections.
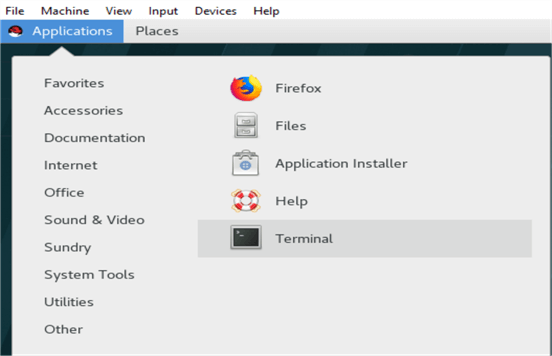
We can connect to the server using putty with the hostname or IP address. Launch Terminal from the Applications.
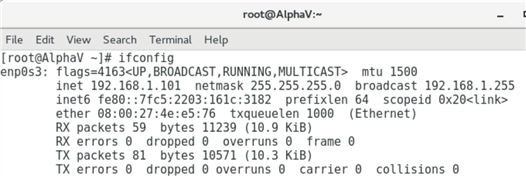
We can get the IP address using the ifconfig command as shown below. We can see below it is 192.168.1.101.
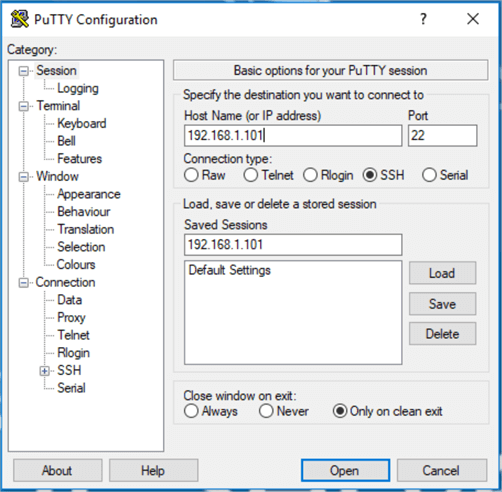
Enter the Hostname or IP address and connect to the server using PuTTY.
Once connected, we get the below screen. In the top bar, it shows we are connected as root@AlphaV.

Note: You may get the below message in Linux when installing SQL Server.
This system is registered with an entitlement server but is not receiving updates. You can use subscription-manager to assign subscriptions.
To resolve the message, we need to run the below commands and register the server to get updates from Red Hat. Provide the username and password by which we have registered with Red Hat.
# subscription-manager register

After registering, run the below command to subscribe to the entitlement.
# subscription-manager attach --auto

Before installing SQL Server, it is always best to check for any SQL Server service status. Although we installed a fresh OS and it is not running any applications, however, it is recommended to check the services before the installation of SQL Server.
# systemctl status mssql-server
As expected, we can see that mssql-server.service could not be found.

In the next step, we need to check for the SQL Server repository if it is already there. Use the below script to check.
# sudo ls -lrt /etc/yum.repos.d
We did not find anything related to the SQL Server related repository. It should be available after downloading from the Microsoft site.

When you install SQL Server on Linux, we need to configure a Microsoft repository to acquire the database engine package, mssql-server, and related SQL Server packages.
| Repository | Name | Description |
| CU | mssql-server-2017 | SQL Server 2017 Cumulative Update (CU) repository. |
We will execute curl commands to download the installation packages from the Microsoft website to this Linux server. Curl is a tool to transfer data from or to a server, using one of the supported protocols (HTTP, HTTPS, FTP, FTPS, SCP, SFTP, TELNET, LDAP). The command works without user interaction.
# sudo curl -o/etc/yum.repos.d/mssql-server.repo https://packages.microsoft.com/config/rhel/7/mssql-server-2017.repo
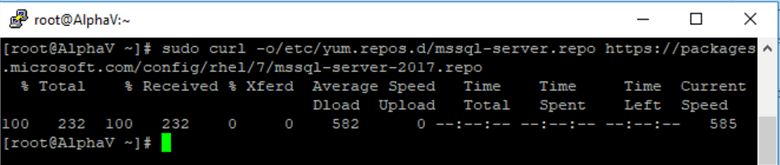
Now we should be able to see the SQL Server related repository.
# sudo ls -lrt /etc/yum.repos.d

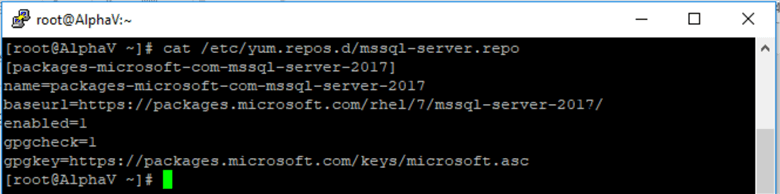
The mssql-server.repo file contains packages for the base SQL Server release and bug fixes or improvements since the release of SQL Server 2017.
To view the contents of this file, use the below command.
# cat /etc/yum.repos.d/mssql-server.repo
We can see that the repository contains the below contents.
- Name: Name of the package
- Baseurl: URL for the installable setup.
- Gpgheck: gpgcheck stands for signature verification from its central database if it is 1 then it asks for signature verification else it doesn’t.
- Gpgkey: It contains a URL to download the appropriate keys
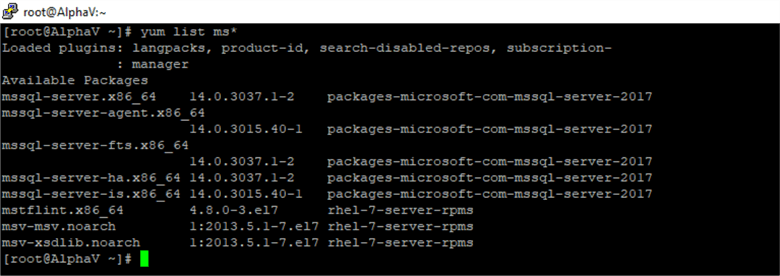
Before installing SQL Server, it is better to check any preinstalled packages related to Microsoft SQL Server.
# yum list ms*
Now, the next step is to install SQL Server. The below command will install the latest SQL Server version available. It will also install SQL Server Agent.
Note: Before SQL Server 2017 CU4, we needed to install SQL Server Agent separately.
This command uses the yum package to install SQL Server 2017. YUM (Yellowdog Updater Modified) is an open source command-line tool as well as a graphical based package management tool for RPM (Red Hat Package Manager) based Linux systems. It allows users and system administrators to easily install, update, remove or search software packages on systems.
# sudo yum install -y mssql-server
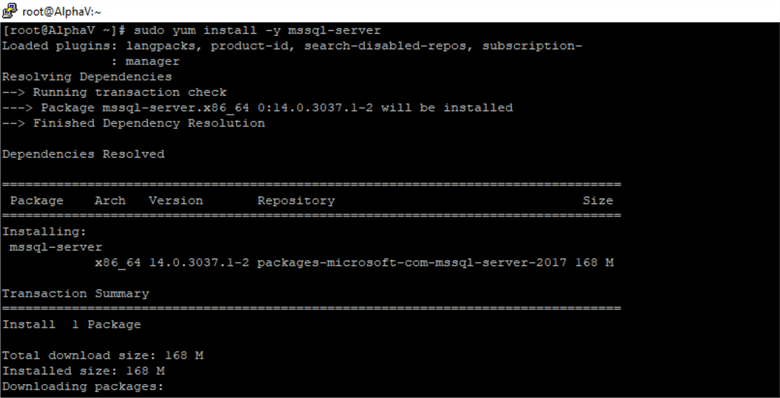
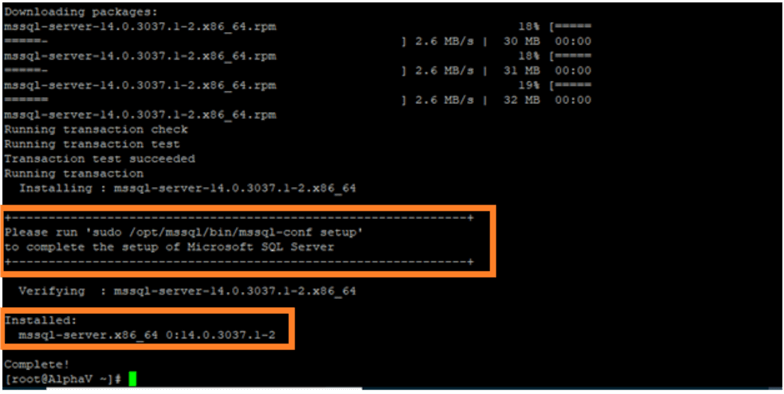
It downloads the required packages and imports GPG keys.
We can see below that the SQL Server installation is complete, however, it says, "Please run /opt/mssql/bin/mssql-conf setup to complete the setup of Microsoft SQL Server".
We also need to restart SQL Server to apply this setting using the below command.
# systemctl restart mssql-server-service
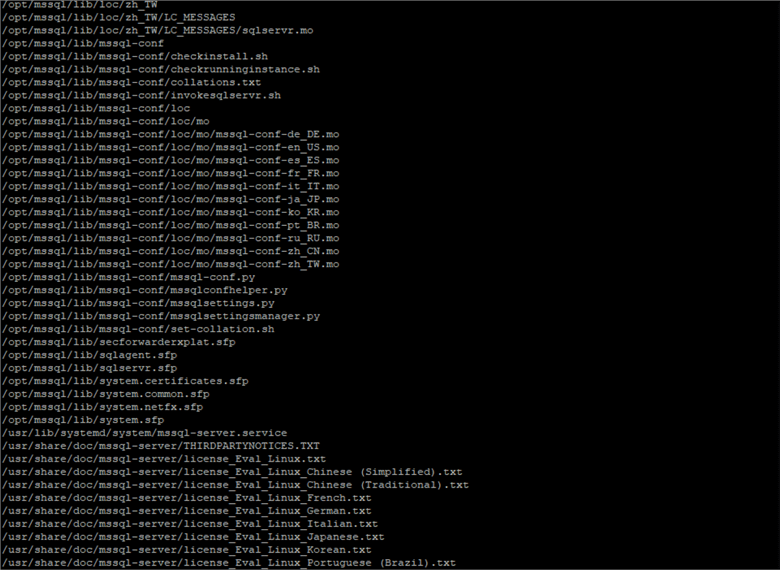
We can get the information of installed features using the below command.
# rpm -ql mssql-server


Now we need configure the setup. It will install the necessary edition, default system database locations. A couple of inputs required for this configuration.
# sudo /opt/mssql/bin/mssql-conf setup
First, we need to choose an edition of SQL Server:
- Evaluation (free, no production use rights, 180-day limit)
- Developer (free, no production use rights)
- Express (free)
- Web (Paid)
- Standard (Paid)
- Enterprise (Paid)
- Enterprise Core (Paid)
8- I bought a license through a retails sales channel and have a product key to enter.
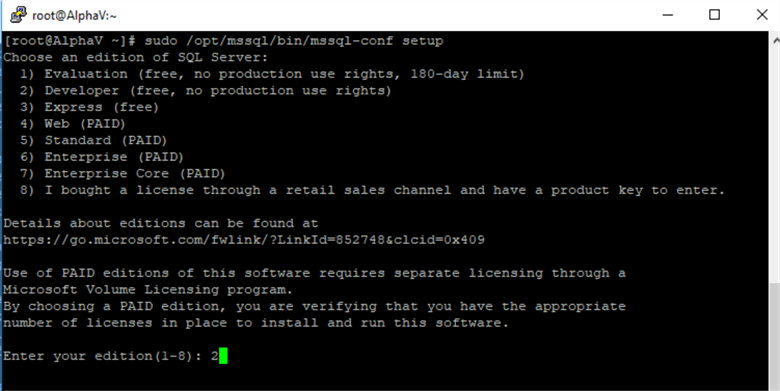
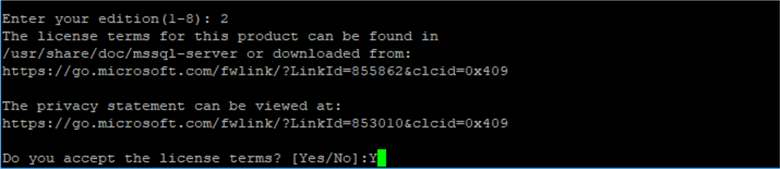
In this demo, I want to install SQL Server 2017 Developer edition so provide the value 2 and press Enter.
Now it asks to accept the License term and we need to provide Y or Yes as an input.
If we want to review the privacy statement, go to the Privacy Statement link.
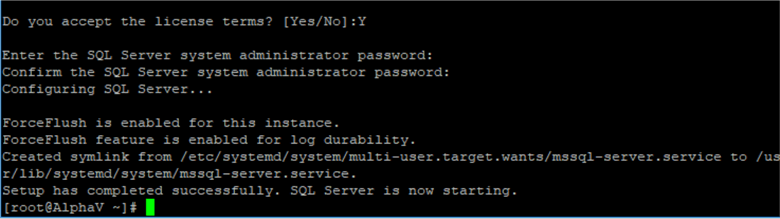
In the next step, enter the SQL Server administrator (SA) password.
Once we give the SA password, it configures SQL Server. In the end, it gives the below message.
"Set up has completed successfully, SQL Server is now starting."
If we want to check the version number of the SQL Server package, use the below command.
# yum list mssql-server

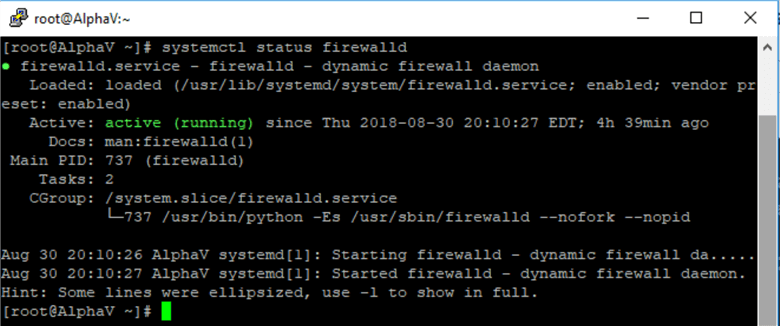
Enable Firewall to connect SQL Server remotely
We need to enable TCP port 1433 in the firewall to connect remotely.
First, check the status of the firewall daemon.
# systemctl status firewalld
TCP port 1433 is the default SQL Server connecting port, and we can add a firewall rule to allow incoming connections. To make the effect permanent, we need to add the - - permanent parameter, so that rule work even after a reboot.
#sudo firewall-cmd --zone=public --add-port=1433/tcp --permanent

Now reload the firewall configuration using the below command
# sudo firewall-cmd --reload

To confirm the status of the port in the firewall, run the below command, we can see the list of enabled ports.
# firewall-cmd --list-ports

We can see that default port 1433 is now enabled to allow connections in the firewall.
Enable SQL Server Agent
By default, SQL Server Agent is disabled. Let's first check the existence of SQL Agent components.
# /opt/mssql/bin/mssql-conf list
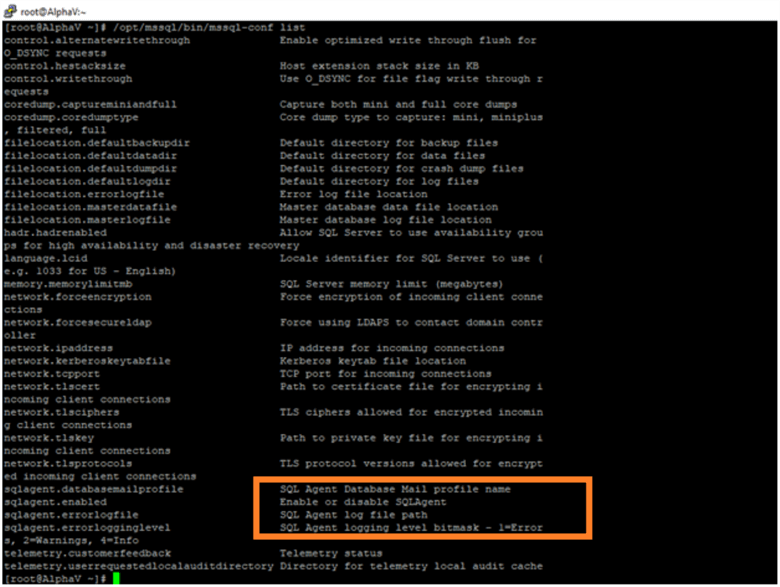
SQL Server Agent is present, run the below command to enable it. We need to restart the SQL Server service after enabling it.
# /opt/mssql/bin/mssql-conf set sqlagent.enabled true

Restart SQL Server service using the below command.
# systemctl restart mssql-server.service

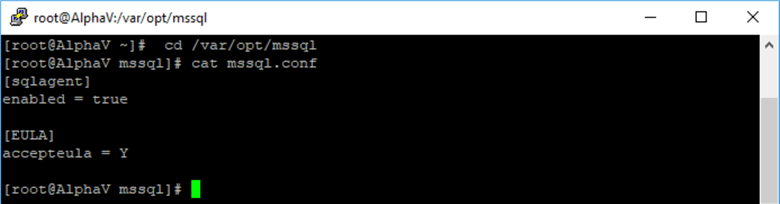
Once we have restarted the service, we can see that the SQL Agent is showing True in the mssql.conf file.
# cd /var/opt/mssql
# cat mssql.conf
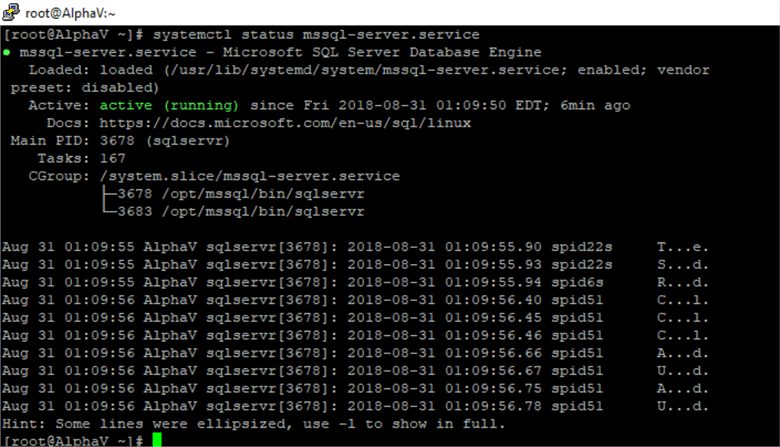
Verify that SQL Server is up and running.
# systemctl status mssql-server.service
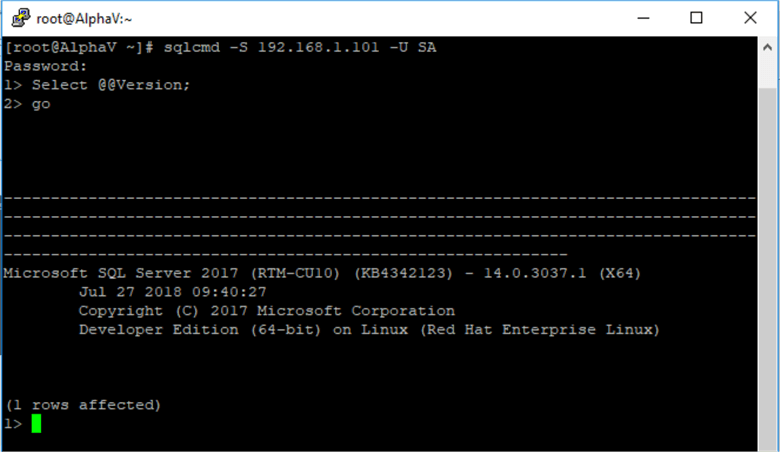
Connect to SQL Server using sqlcmd utility
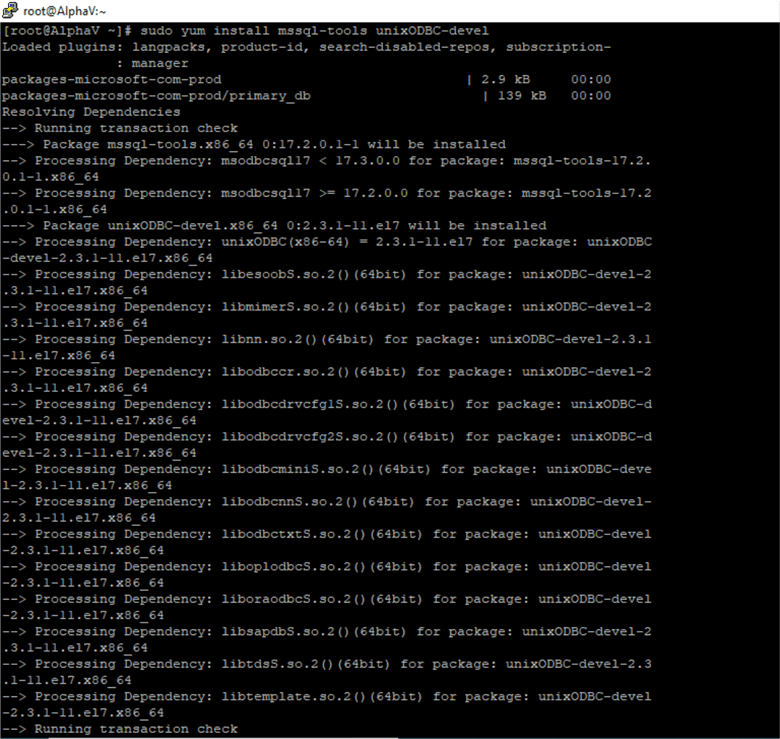
By default, the SQLCMD utility is not available in the Microsoft SQL Server Linux version and requires the mssql-tools package.
Run the below command to download the Microsoft Red Hat repository configuration file.
# curl https://packages.microsoft.com/config/rhel/7/prod.repo > /etc/yum.repos.d/msprod.repo

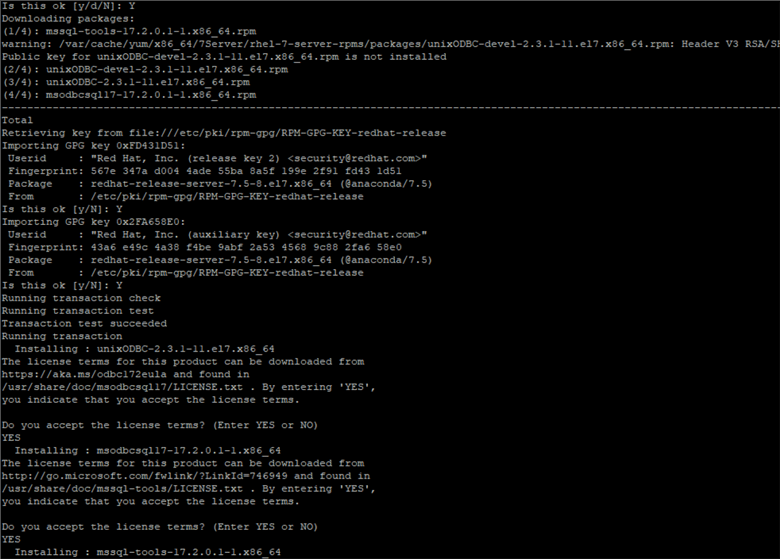
Once the package is downloaded, run the below to install mssql-tool. You need to accept a few conditions during the installation. Enter 'Y' to accept it.
# sudo yum install mssql-tools unixODBC-devel
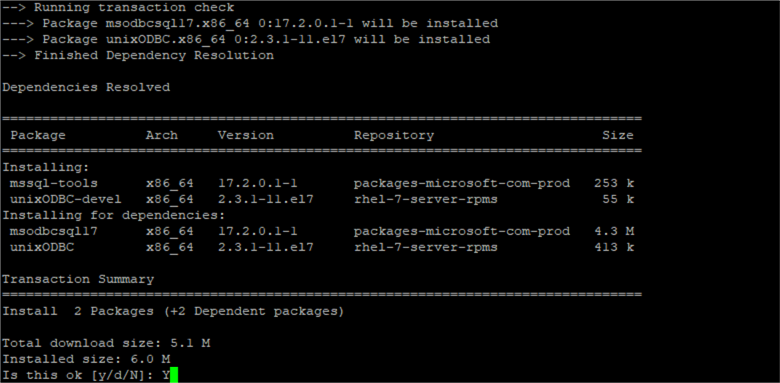
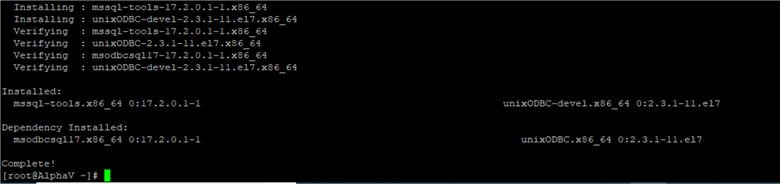
Mssql-tools installation is complete now and we can connect to SQL Server remotely by PuTTY and test the connection.
You may still get "sqlcmd: command not found" error when you try to run sqlcmd if you have no proper symlinks created.
Run the below to create symlinks.
# ln -sfn /opt/mssql-tools/bin/sqlcmd /usr/bin/sqlcmd

Try to connect to the server via sqlcmd using:
# sqlcmd -S 192.168.1.101 -U SA
Or
# sqlcmd -S localhost -U SA
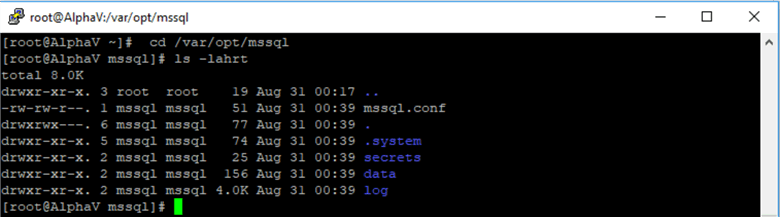
The default location of the data files, log file and error logs
In SQL Server 2017 on Linux, the default location of the data files and log files are /var/opt/mssql/data.
We can see below the content under the /var/opt/mssql/data.
Use the below commands.
# cd /var/opt/mssql
# ls -lahrt
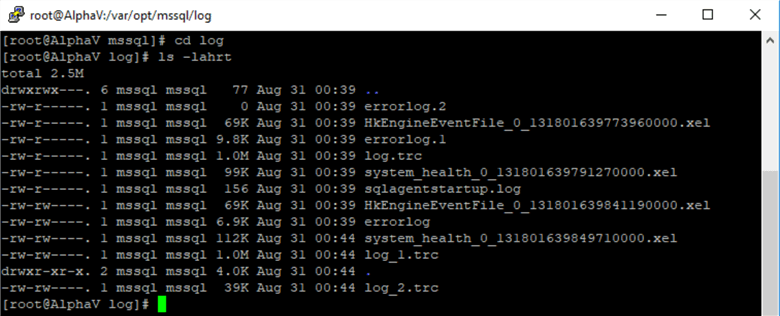
Similarly, the location of the error log file and default trace files are: /var/opt/mssql/log.
# cd /var/opt/mssql/log
# ls -lahrt
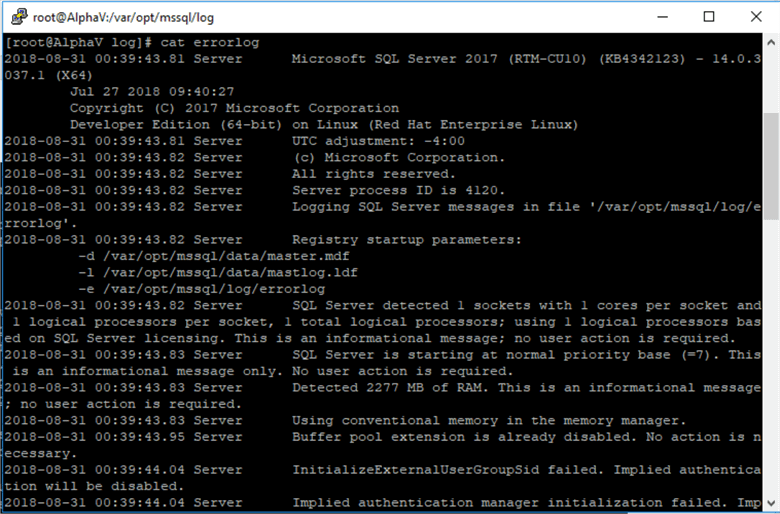
To read the error log file, run the below command.
# cat errorlog
Next Steps
- Use this newly installed SQL Server 2017 instance running on Linux to start learning about the differences of Windows vs. Linux for SQL Server.
- Explore these other SQL Server 2017 tips.
- Read SQL Server technical documentation.


About the author
 Rajendra Gupta is a Consultant DBA with 14+ years of extensive experience in database administration including large critical OLAP, OLTP, Reporting and SharePoint databases.
This author pledges the content of this article is based on professional experience and not AI generated.
View all my tips
