By: Rahul Mehta | Comments (2) | Related: > Power BI
Problem
With the evolution of the cloud, data is widely stored in different formats in the cloud. One of the popular platforms is Microsoft Azure and data is stored using Azure SQL Database. Microsoft has extended support and provided a few ways to connect to Azure SQL Database from Power BI and in this article we will demonstrate one of simpler ways to connect Power BI to Azure SQL Database along with a key configuration before connecting Power BI to Azure.
Solution
As shown in the below image, we can see a database named "SampleAdventureDB" on Azure SQL Database. This database has several tables and one of these tables is queried using the Query Editor.
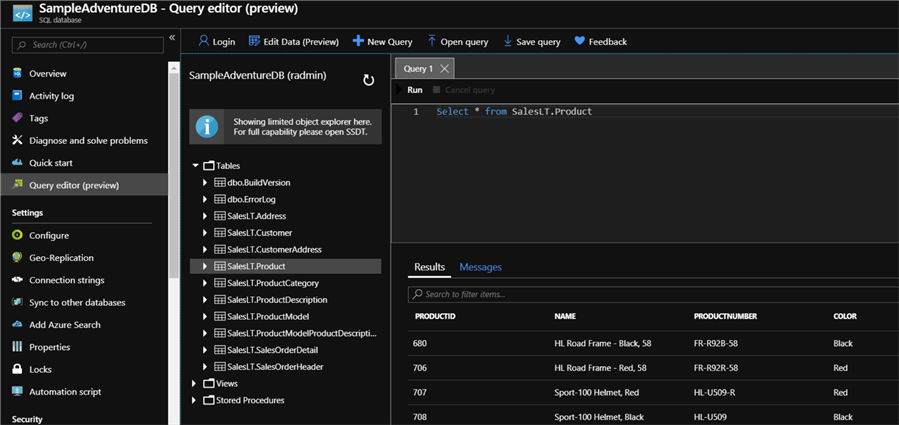
Now we need to connect Power BI to this Azure SQL Database. There are two major ways which one can connect Power BI to Azure SQL Database:
- Via connector
- Via scripts
For this article we are going to use the option "Via connector".
Connect Power BI to Azure SQL DB
To access the Azure SQL Database from Power BI via connector, we must perform the below steps:
- Configure the "Firewall" settings at the Azure SQL Database server
- Use Azure SQL Database connector to connect to Azure SQL Database
- Select the appropriate server and database to query the data
So, letís get started.
Step 1 - Configure the Firewall settings at Azure SQL Database server
Many times, I have come across a situation where either the developers are unable to access Azure SQL Database or users are prompted with the below error.
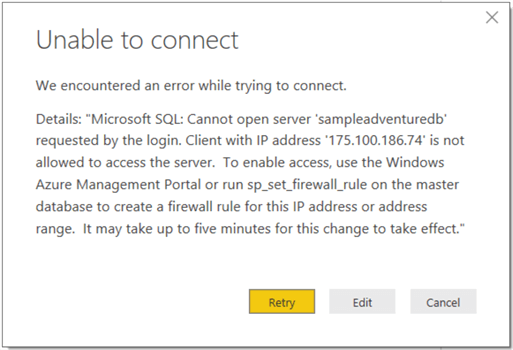
Before we jump to the issue, let’s understand how the cloud firewall works as shown below.
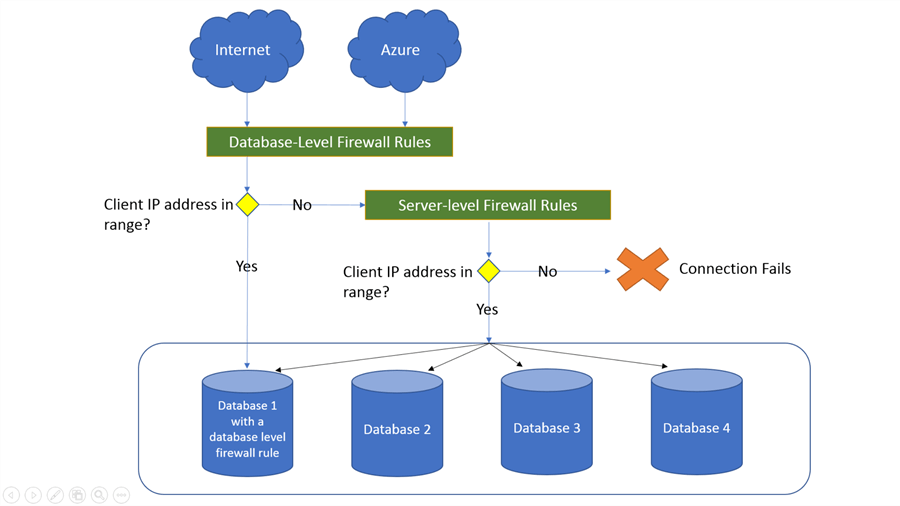
The above image is a Microsoft provided image which states how the database request is processed on Azure. Ideally the request originates from the internet or a cloud platform like Microsoft Azure.
- The first level verification occurs at the database level where the firewall rules are defined to access the database from a set of "Client IP address" range. This level of firewall access is configured to allow users/platform to access only a single database.
- However, if the access is not provided at the database level, then a further check occurs at the server level firewall rules. This kind of access isn’t restricted to any single database, rather it is provided to access multiple databases or resources on the server. This kind of access must be given with caution as it has risk of providing unnecessary user access to restricted databases and resources.
- In case the access is neither provided at the database level or at the server level, then the connection will fail to establish.
- Thus, the reason behind the above error could be due to inappropriate
configuration of the Firewall settings at the Azure SQL DB Server. We need to configure
two IP address ranges:
- Client IP address range: To allow a IP range of computers or network to access the SQL DB
- Server IP address range: To allow a IP range of computers or network to access the SQL Server
To configure the server level IP address, in the Azure portal go to SQL Databases, select the database "SampleAdventureDB" and on the right side click on "Set server firewall" as shown in the below image:

Once the "Firewall settings" window opens, provide a name in the "Rule Name" and the starting and ending range of the IPs you want to give access. In the case where it is a single computer you use the same starting and ending IP. Once entered, click on the "Save" button at the top which will create this firewall rule.
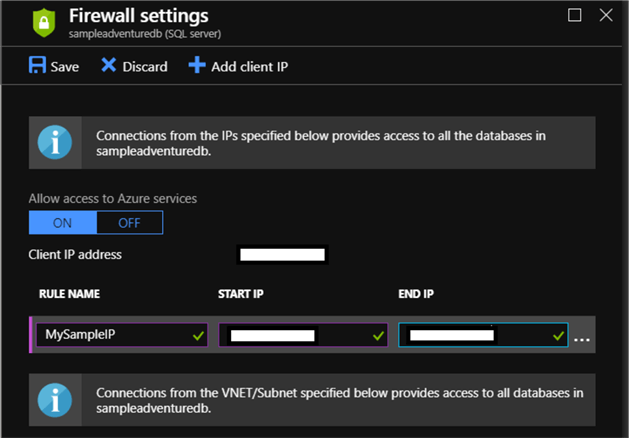
The rule will be created in about 5-10 minutes. The same steps could be performed using the "Add Client IP".
Step 2 - Use Azure SQL DB connector to connect to Azure DB
Now as we successfully allowed our client machine to connect to Azure SQL Database, let’s configure the connection in Power BI.
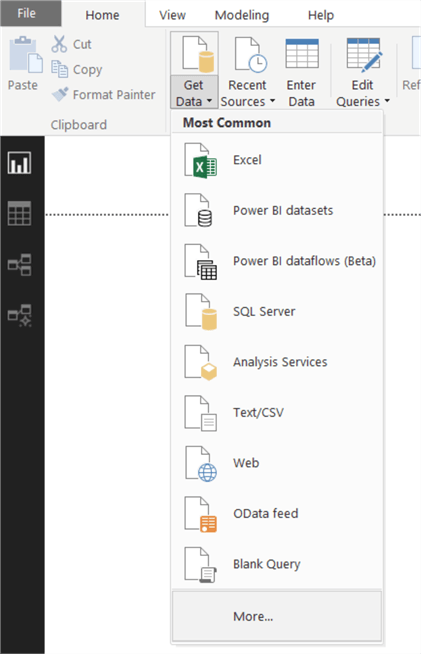
To do so, go to Power BI Desktop and select Home > Get Data > More...
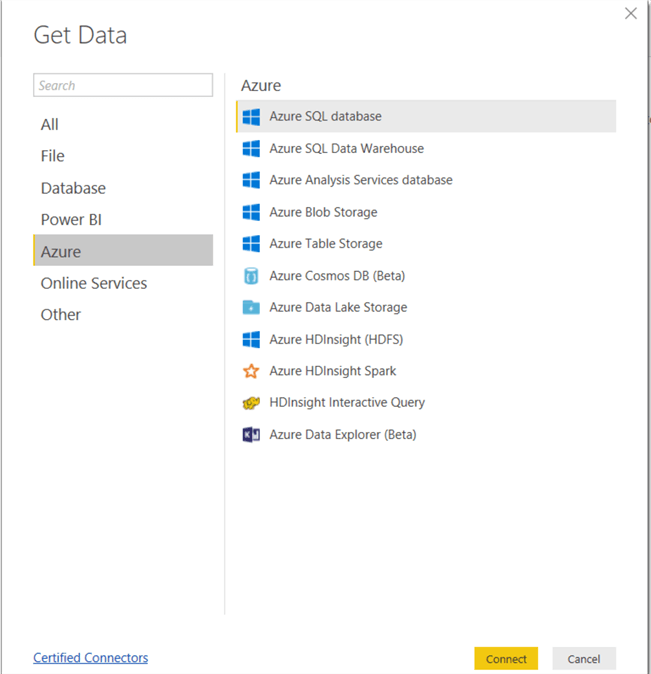
A "Get Data" connection window will appear with several connection options. Select "Azure" on the left and under that "Azure SQL database" and click on "Connect" as shown in the below image. A common mistake made is selecting "Azure Table Storage" which is an entirely different storage entity. So, ensure you select "Azure SQL database".
Step 3 - Select appropriate Server and Database to query data
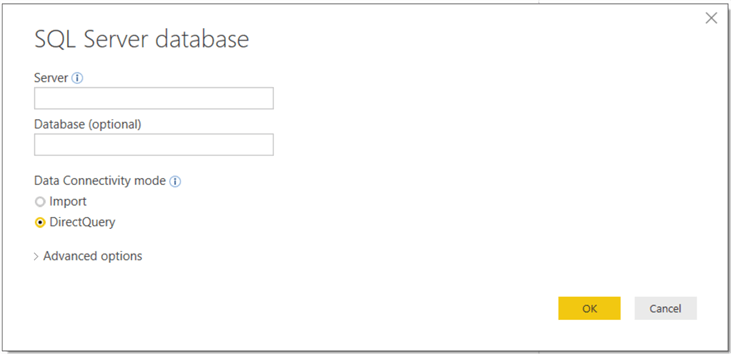
A SQL Server Database window will open. Provide the database server name and database name (which is optional). Now the key selection here is to either "Import" the data or use a "Direct Query" on the database. I recommend "Direct Query", but it depends upon the need and DTU’s (Data Transaction Units) allowed. Click on "OK" once the details are provided.
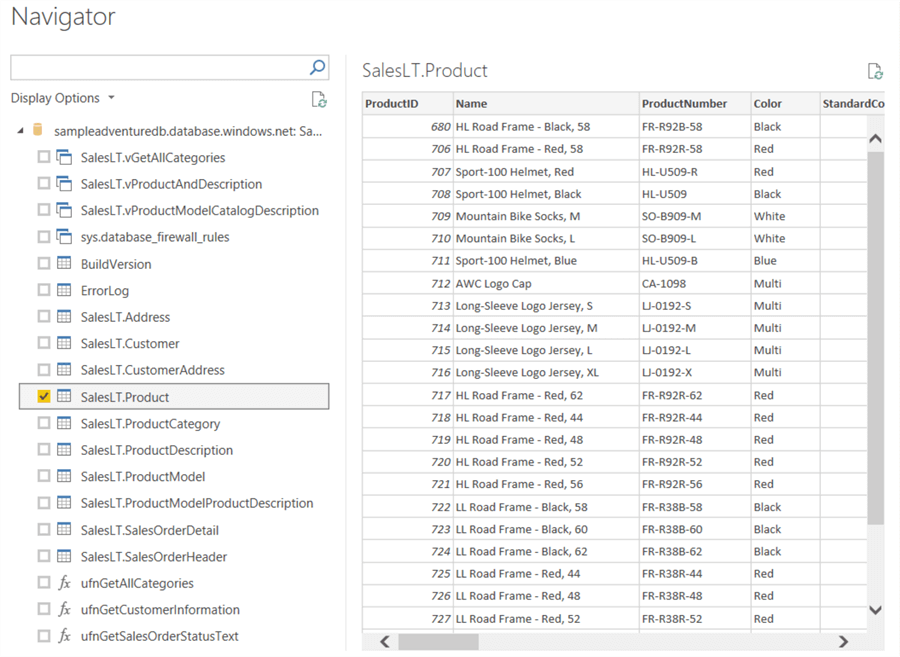
The next step is to select the tables from the database. Select the necessary tables as needed, in our case we will be selecting from "SalesLT.Product". A preview pane displays a small set of data as soon as we select the table. If you need to edit some of the data you can use the "Edit" option at the bottom or just click "Load" to load the dataset into the report.
Within a few minutes, the data will be loaded and will be available for use. All the fields, will be shown in the "Fields" pane as shown below.
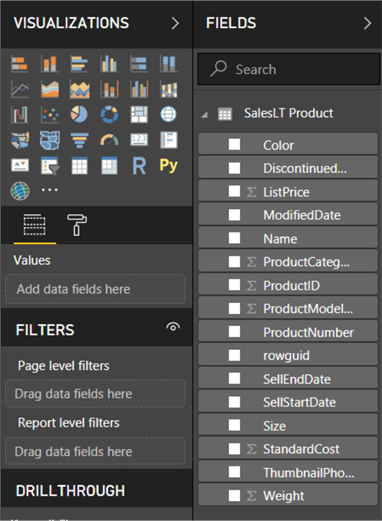
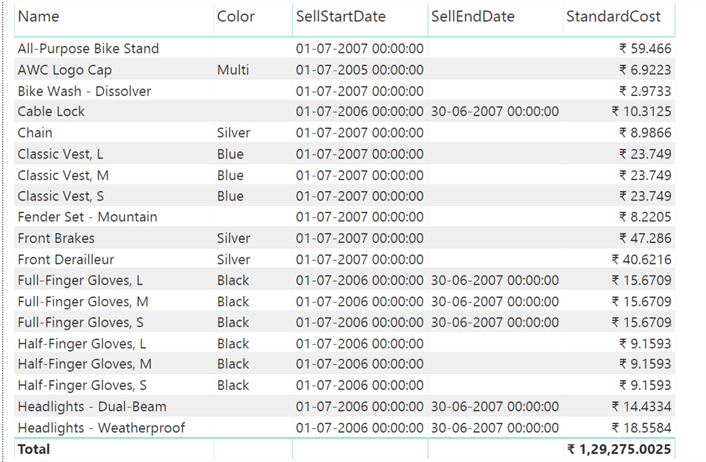
I created a sample report by selecting a few fields from the table as shown below.
Next Steps
- Try to connect to other Azure Data storage like Azure Cosmos DB, Azure Data Lake Storage or others.
- Take some time to check out and configure the advanced connection settings.
- Check out these other Power BI Tips
- Check out these other Azure Tips
Learn more about Power BI in this 3 hour training course.
About the author
 Rahul Mehta is a Project Architect/Lead working at Tata Consultancy Services focusing on ECM.
This author pledges the content of this article is based on professional experience and not AI generated.
View all my tips


