Problem
Azure Data Factory (ADF) is one of the most popular cloud integration tools. A typical ADF may contain many objects, like pipelines, activities, datasets, etc. How can you create an inventory of all these objects?
Solution
Import ADF configuration and analysis notebook into the Databricks
I am going to use the Azure ARM templates feature to create an ADF inventory. An Azure ARM template represents Microsoft’s infrastructure as a code solution, designed to automate code deployments to Azure. A typical ARM template is a JSON document with a hierarchical structure, which describes objects belonging to some Azure container, their parameters, and dependencies between them. On the other hand, if you already have resources deployed to Azure, you can easily download an ARM template for your resource groups or individual resources. If you want to get more information on ARM templates, this link could be a good starting point.
I am going to use Azure Databricks in combination with PySpark to analyze the ARM template and get insights on ADF objects. Azure Databricks is an Apache Spark- based technology, allowing us to perform rich data transformations with popular languages like Python, R, Scala or SQL. What makes Databricks even more appealing is its ability to easily analyze complex hierarchical data using SQL like programming constructs. If you’re not familiar with Azure Databricks, I’d strongly encourage you to visit this link and get basic Databricks management skills. I should mention that this analysis could easily be performed on your locally running Spark environment as well, and the only reason I used Databricks for this purpose was that it has everything you need to get started.
So, let’s navigate to ADF design page on Azure portal, extract ADF configuration, using the Export ARM template button from the design pane and store it in a local folder on your machine, as follows:

Figure 1
Next, if you already have a Databricks account, sign into it, otherwise, you can sign up for a free community service access here.
From the Databricks’ home page, select Data command, followed by the Add Data command and specify the location of the ARM template on your machine, this will upload it into Databricks’ DBFS file system (you can learn more on DBFS file uploads here). The final upload dialogue window will provide you with a path to the file’s location, as follows:


Figure 2
The next step is to import the notebook containing the script into your workspace. Select the Workspace command, then select the Import command from the drop-down list, switch to the File option and copy/paste the code from here – Download the scripts for this article. You can check this article for more details. Here is the screenshot:

Figure 3
Finally, create a cluster and attach it to your notebook. I will walk you through the notebook and explain each code section in the following sections.
Introduction to Pyspark data frame methods
Many Pyspark data frame methods resemble SQL clauses, so for those who already know SQL, it would be very easy to learn them. I’ll provide a brief explanation of the main methods used through this tip. Here is the description of these methods:
- The select and selectExpr methods are used to extract selected columns from the data frame. When applied to hierarchical data like JSON, these functions allow specifying the full path to the specific attribute.
- The alias method allows renaming the columns.
- The withColumn method allows creating new columns, using expressions and other columns.
- The withColumnRenamed method allows renaming existing columns
- The orderBy method allows ordering the results by specified columns.
- The filter method allows the filtering of the results by using certain conditions.
- The drop method allows for removing specified columns.
It is also worth noting that Spark methods can be chained, where the output of each expression is assigned to the next expression. For example, df.select().orderBy() expression creates a new data frame from df data frame, then creates another data frame by ordering the output of the previous data frame. We will use this kind of chaining in below code samples quite often, as it allows creating a compact and easily readable code.
Explore the JSON data hierarchy
First, let’s import necessary PySpark libraries, as follows:
from pyspark.sql.functions import explode_outer,explode,colfrom pyspark.sql.types import StringType,StructField,ArrayType
Next, create a data frame adfDoc by reading the ARM template from DBFS file store, using the path we have obtained from the file upload step. The next command displays the data frame’s schema using printSchema method, as follows:
adfDoc=spark.read.option("multiline","true").json("/FileStore/tables/arm_template.json")
adfDoc.printSchema()
Here’s output from this query:

Figure 4
Although this hierarchy includes multiple major sections, we will mainly focus on the reresources section, which contains most of the ADF objects. Note that elements within the resources section have either simple data type (like string), array type or struct type. If the element has a struct type, we can access its sub-elements by specifying the navigation path from root to the leave. For example, we can use the elelement.name path to refer to the name. If the element has an array type, we can use PySpark’s explode function, which will flatten this structure (i.e. create a new row for each element in the array).
Because the resources node is of array type, we can flatten it. So, the first command in the next code section flattens this node and renames it as RootObjects. The next command extracts distinct values of the node RootObjects.type. This will provide us with the list of available object types within this template, as follows:
rootObjects=adfDoc.select(explode("resources").alias("RootObjects"))
display(rootObjects.select("RootObjects.type").distinct())
Here’s output from this query:

Figure 5
This query reveals that our ARM template contains the following high-level object types:
- Pipelines
- Linked services
- Datasets
- Integration runtimes
- Triggers
Note that each of these objects is nested (for example, the pipeline objects contain activity objects). We will explore each object type separately in the next sections.
The utility functions
The quick look at the content of the ARM template reveals the name attributes for many objects within ARM template have a format like “[concat(parameters(‘factoryName’), ‘/ObjectName’)], which might require some cleansing. So, the next section of the code contains cleansing function to extract the name from simple string, as follows:
def cleanPipelineName(Name):
  if Name==None:
    return None
  return (Name.split(",")[1].replace(")]","").replace("'",""))
We also need to register this function, so that we could call it from data frame transformations. The following command registers the above provided function as a user defined function (UDF):
cleanNameUDF=spark.udf.register("cleanNameSQL",cleanPipelineName,StringType())
Note that the first argument for the register function (cleanNameSQL) specifies an alias for SQL references, while the result of this function assigned to the UDF name (cleanNameUDF), which can be referenced from the data frame calls.
We also need to create a similar function to cleanse array- type values, as follows:
def cleanseNamesArr(arr):
  cleansedArr=[]
  for Name in arr:
    if Name is not None:
   cleansedArr.append(Name.replace("concat(variables('factoryId')","")   .replace("[,","").replace(")]",""))
  return (cleansedArr)

cleanseNamesArrUDF=spark.udf.register("cleanseNamesArrSQL",cleanseNamesArr,ArrayType(StringType()))
The pipelines inventory
Let’s create the dfPipelines data frame, by applying a filter method to the rootObjects data frame on an object type and then rename the RoRootObjects column as Pipelines, using the withColumnRenamedmethod, as follows:
dfPipelines=rootObjects.filter("RootObjects.type=='Microsoft.DataFactory/factories/pipelines'").withColumnRenamed("RootObjects","Pipelines")
dfPipelines.printSchema()
Here’s output from this query:

Figure 6
Now we can use the selectExpr method, to extract common attribute values under the Pipelines node. Note that I have used the cleanNameSQL alias to refer to the cleansing UDF we created earlier, as follows:
dfPipelineMainDetails=dfPipelines.selectExpr("Pipelines.properties.folder.name as Folder", "cleanNameSQL(Pipelines.name) as PipelineName", "Pipelines.properties.description as Description", "cast(cleanseNamesArrSQL(Pipelines.dependsOn) as string) as DependsOnObject",  "Pipelines.properties.parameters as Parameters","Pipelines")
dfPipelineMainDetails.printSchema()
Here’s output from this query:

Figure 7
Finally, let’s get the pipeline inventory by selecting the necessary columns and ordering the list by folder and pipeline name. Our pipeline inventory is ready-you can click the Download CSV button located at the bottom of the command panel, if you want to download the CSV output to your computer, as follows:
dfPipelineInventory=dfPipelineMainDetails.select("Folder","PipelineName","Description","DependsOnObject").orderBy("Folder","PipelineName")
display(dfPipelineInventory)

Figure 8
The activities inventory
The ADF activity details are part of the activities array element within each pipeline. So, we will need to apply an explode method to dfPipelineMainDetails data frame, to get the root level activities data frame, as follows:
dfActivities=dfPipelineMainDetails.withColumn("ActivityDetails",explode("Pipelines.properties.activities")).select("PipelineName","ActivityDetails")
dfActivities.printSchema()
Here’s output from this query:

Figure 9
Next, we extract common attributes from the root level ActivityDetails attribute, as follows:
dfActDetails=dfActivities.selectExpr("PipelineName","ActivityDetails.name as ActivityName", "ActivityDetails.description as Description","ActivityDetails.type as ActivityType", "ActivityDetails.typeProperties.storedProcedureName as StoredProcedureName", "ActivityDetails.typeProperties.scriptPath as ScriptPath", "ActivityDetails.linkedServiceName.referenceName as linkedServiceName", "ActivityDetails.dependsOn as ActivityDependeniesRaw", "ActivityDetails.typeProperties as ActivityTypePropertiesRaw")
dfActDetails.printSchema()
Here’s output from this query:

Figure 10
Note that we have included the typeProperties and dependsOn array attributes and named them as AcActivityTypePropertiesRaw and ActivityDependeniesRaw in respectively in this data frame – we will use these attributes to derive further information down the road.
Now we can get the dependency details by applying the explode_outer method to ActivityDependeniesRaw attribute, as follows:
dfActDetails_Dep=dfActDetails.withColumn("ActivityDependency",explode_outer("ActivityDependeniesRaw")).selectExpr("*","ActivityDependency.activity as DependentOnActivity","ActivityDependency.dependencyConditions as DependencyCondition").withColumn("DependencyCondition",col("DependencyCondition")[0]).drop("ActivityDependency","ActivityDependeniesRaw").orderBy("PipelineName","ActivityName","DependentOnActivity")
dfActDetails_Dep.printSchema()
Here’s output from this query:

Figure 11
Activities can also be nested, i.e. they can contain other activities. We can retrieve included activity details from the AcActivityTypePropertiesRaw attribute, as follows:
dfActDetails_Inc=dfActDetails_Dep.withColumn("IncludedActivities",explode_outer("ActivityTypePropertiesRaw.activities")).selectExpr("*","IncludedActivities.name as IncludedActName","IncludedActivities.type as IncludedActType", "IncludedActivities.typeProperties.storedProcedureName as IncludedActivityStoredProcedureName", "IncludedActivities.typeProperties.scriptPath as IncludedActivityScriptPath", "IncludedActivities.linkedServiceName.referenceName as IncludedActivitylinkedServiceName").drop("IncludedActivities","ActivityTypePropertiesRaw").orderBy("PipelineName","ActivityName") display(dfActDetails_Inc)
The resulting list contains the most common activity attributes, including the name, type, linked service name, etc. and you can download the list using Download CSV button at the bottom of command panel:

Figure 12
The linked services inventory
The remaining object types are relatively simple, and we can get their inventories using technics from the previous sections. Let us get linked services root nodes, by applying a filter method to the rootObjects data frame on object type, as follows:
dfLinkedServices=rootObjects.filter("RootObjects.type=='Microsoft.DataFactory/factories/linkedServices'").withColumnRenamed("RootObjects","LinkedServices")
dfLinkedServices.printSchema()
Here’s output from this query:
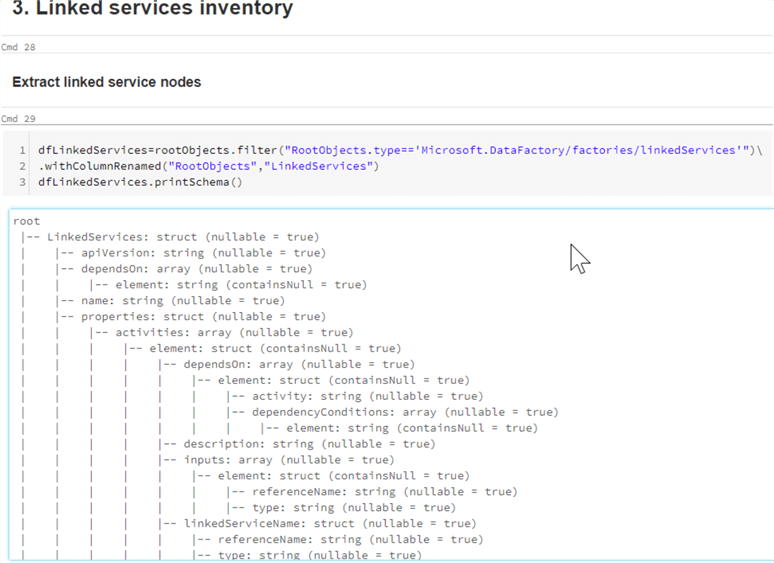
Figure 13
And then extract common attributes, to get the final inventory list, as follows:
dfLinkedServicesDetails=dfLinkedServices.selectExpr("LinkedServices.properties.folder.name as Folder","cleanNameSQL(LinkedServices.name) as LinkedServiceName","LinkedServices.properties.description as Description","LinkedServices.properties.type as Type","cast(cleanseNamesArrSQL(LinkedServices.dependsOn) as string) as DependsOn")
display(dfLinkedServicesDetails)
The datasets inventory
Let us apply a filter method to the rootObjects data frame on the object type, to extract dataset root nodes, as follows:
dfDatasets=rootObjects.filter("RootObjects.type=='Microsoft.DataFactory/factories/datasets'").withColumnRenamed("RootObjects","Datasets")
dfDatasets.printSchema()
Here’s output from this query:

Figure 14
Then extract the common dataset attributes, to create a dataset inventory, as follows:
dfDatasetDetails=dfDatasets.selectExpr("Datasets.properties.folder.name as Folder","cleanNameSQL(Datasets.name) as DatasetName","Datasets.properties.description as Description","Datasets.properties.type as Type","Datasets.properties.linkedServiceName.referenceName as LinkedServiceName","cast(cleanseNamesArrSQL(Datasets.dependsOn) as string) as DependsOn").orderBy("Folder","DatasetName")
display(dfDatasetDetails)
The triggers inventory
The first code section for trigger objects extracts its root objects:
dfTriggers=rootObjects.filter("RootObjects.type=='Microsoft.DataFactory/factories/triggers'").withColumnRenamed("RootObjects","Triggers")
dfTriggers.printSchema()
Here’s output from this query:
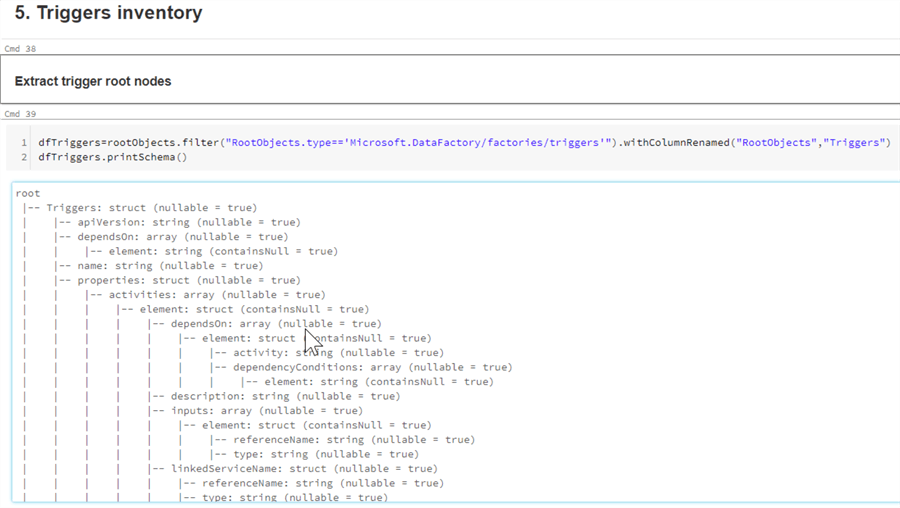
Figure 15
And here’s final script to get triggers inventory:
dfTriggerDetails=dfTriggers.selectExpr("cleanNameSQL(Triggers.name) as TriggerName", "Triggers.properties.description as Description", "Triggers.properties.type as Type","cast(cleanseNamesArrSQL(Triggers.dependsOn) as string) as DependsOn").orderBy("TriggerName")
display(dfTriggerDetails)
Final thoughts
The list of attributes I have extracted in this solution includes common attributes, which are part of my ADF solution. You may add more attributes or exclude some attributes, by exploring a list of available attributes. You can also use the technics described here to easily create an inventory of other Azure solutions.
Next Steps
- Read: What are ARM templates
- Read: Introduction to Azure Databricks
- Read: Read and write data by using Azure Databricks
- More Azure Data Factory articles
- Download the scripts for this article

Fikrat Azizov (MCSE Data Platform and MCSE Azure Solutions Architect) has been working with SQL Server since 2002. Fikrat’s main passions are SQL Server performance optimization, cloud data technologies and machine learning. Fikrat is currently working as a Solutions Architect at Slalom Canada.
- MSSQLTips Awards: Author of the Year Contender – 2019-2022 | Rising Star (50+ tips ) – 2021