Problem
You have a cloud-based object store that you would like to sync with your data warehouse. Each time a file is added to the object store the data in the file should asynchronously be captured in your data warehouse table. How can you accomplish this with minimal development effort? One option is to consider Snowflake.
Solution
Snowflake is the new kid on the block with regards to relation database management systems, it is a strictly cloud based data warehouse solution. In addition to numerous other impressive features Snowflake has a feature for just this kind of use case. This feature is called Snowpipe. Snowpipe offers a low latency solution for keeping the Snowflake data warehouse in sync with object storage (S3, Azure Blob or GCP).
For this example, I will be working with sample data for potential customers. Each month a csv file of potential customers will be uploaded to the company object store in this case S3. Once completed that file will be picked up and loaded via Snowpipe into our Snowflake table.
Example row of data from file:

For this tip I had access to a free tier Snowflake account and a free tier AWS account to configure my S3 bucket.
Snowflake Terminology
In Snowflake, the console is in a web interface, each tab that is a query area is referred to as a “Worksheet”. These worksheets are automatically saved and can be named. For this article, I will refer back to the Snowflake worksheet and all that means is returning back to the Snowflake web console inside of the designated worksheet.
Configure object storage
To make the load process easier, we will use a publicly accessible S3 bucket to load our data from.
To create an S3 bucket login to the AWS console. Search for S3:
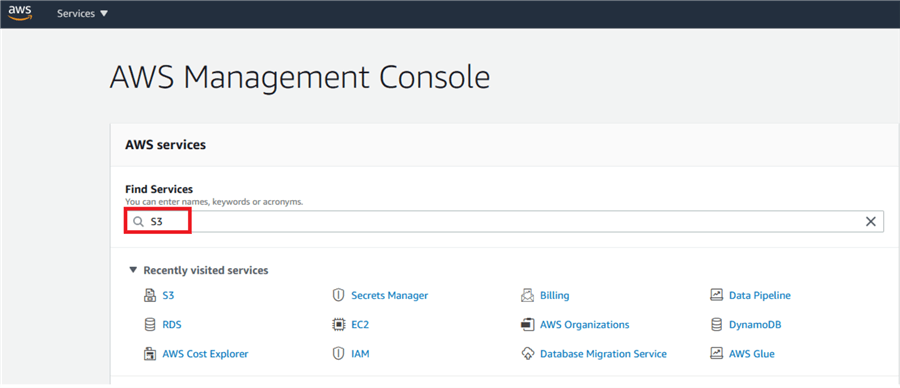
Click create a bucket:

Name your bucket
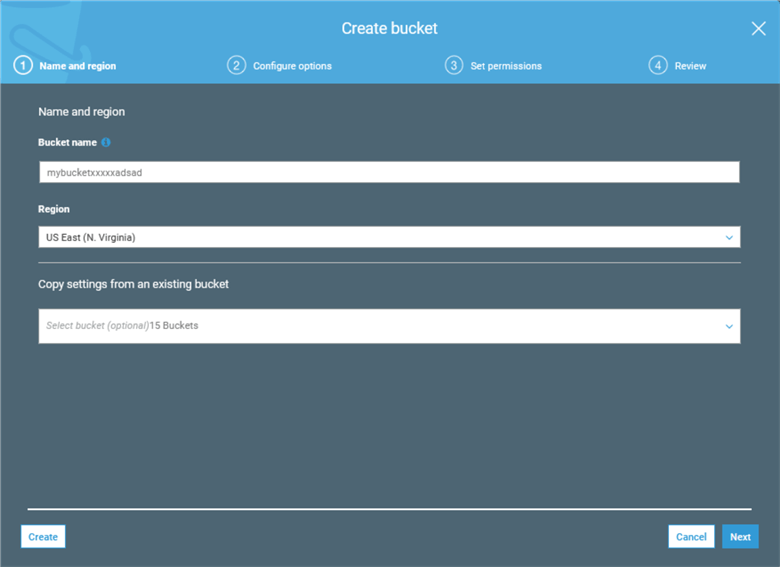
Click Next
Ignore settings on the Configure options module, we do not need to modify anything here.
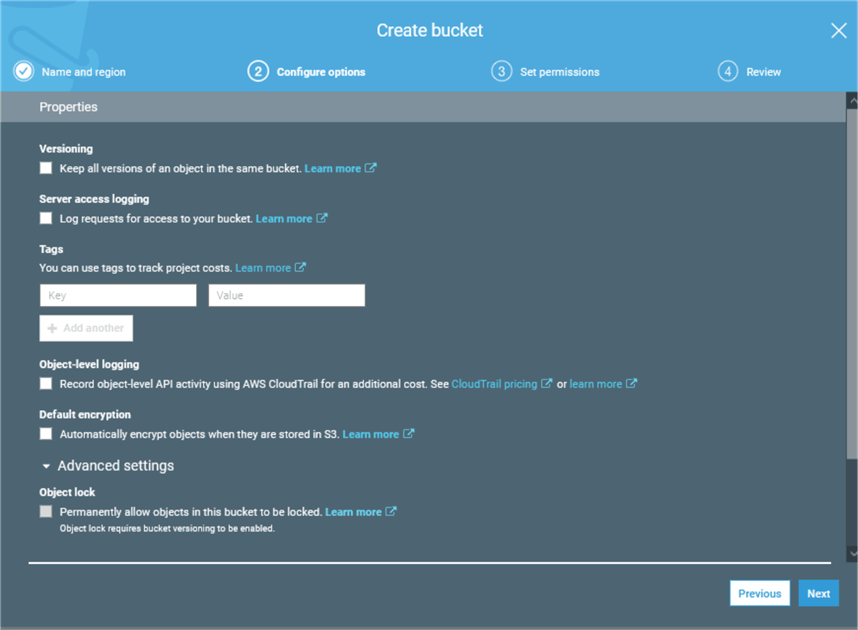
Click Next
On the “Set Permissions” module, uncheck Block All public access, and click acknowledge.

Review the settings

On the review module, click Create bucket.
Now click the bucket you just created from the S3 buckets console

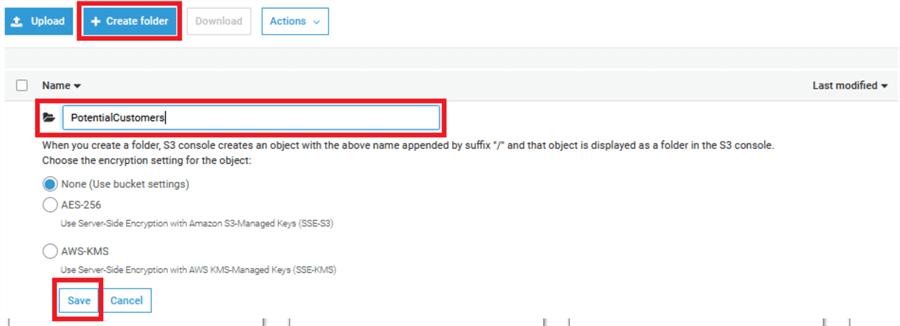
Inside of the S3 bucket create a folder called PotentialCustomers and click save.
Your S3 bucket should look like this.

Also configure public access under the permissions tab of the S3 bucket.
Permissions > Public access > Everyone and click check boxes for List objects and Read bucket permissions, click save.

Creating Snowflake database and stage
Now return to the Snowflake instance and worksheet and execute the following commands in a worksheet.

This will create a test database and create a stage to the configured S3 bucket. A stage is used by Snowflake in the loading and unloading of files. In this case we need the stage as an intermediary for our Snowpipe. Change “YOURBUCKETNAME” to the unique name of your bucket defined in S3.
CREATE DATABASE SnowPipeExample;
USE DATABASE SnowPipeExample;
CREATE OR REPLACE STAGE SNOWPIPE_STAGE  url='s3://YOURBUCKETNAME/PotentialCustomers/';
Create a table and the pipe

Next, we will create the table inside of Snowflake. Back in the Snowflake worksheet execute the next code block, issue the following command to create a table that mimics the csv file data.
CREATE OR REPLACE TABLE PotentialCustomers
(
CustomerName STRING,
PhoneNumber STRING,
Company STRING
);
Next inside the Snowflake worksheet create the pipe that will use the stage created above.

CREATE OR REPLACE PIPE PotentialCustomers_Pipe
auto_ingest = true
AS
COPY INTO PotentialCustomers FROM @SNOWPIPE_STAGE
file_format = (type = csv field_delimiter = ',' skip_header = 1);
Finish configuration of S3
Now that the stage and the pipe have been setup, one key piece of information needs to be set on the S3 bucket. To get this information run the following command in the SnowPipeExample database.

SHOW PIPES;

The field needed for the S3 bucket is the notification channel, this is a ARN or Amazon Resource Number. This number will be used to tie the pipe to the S3 bucket. Copy the number and return to the S3 bucket in the AWS console.
Return to the bucket previous configured and this time navigate to Properties > Events:

Click + Add notification

Configure the Event as follows:
- Name: SnowPipeEx
- Events: All Object create events
- Prefix: PotentialCustomers
- Send to: SQS Queue
- SQS: Add SQS queue ARN
- SQS queue ARN: {Paste SnowPipe Notification_channel Field Here}

Now inside of your S3 bucket back on the properties screen you should see 1 activate notification under events.

Upload files
Example files can be found here to match the schema created earlier.
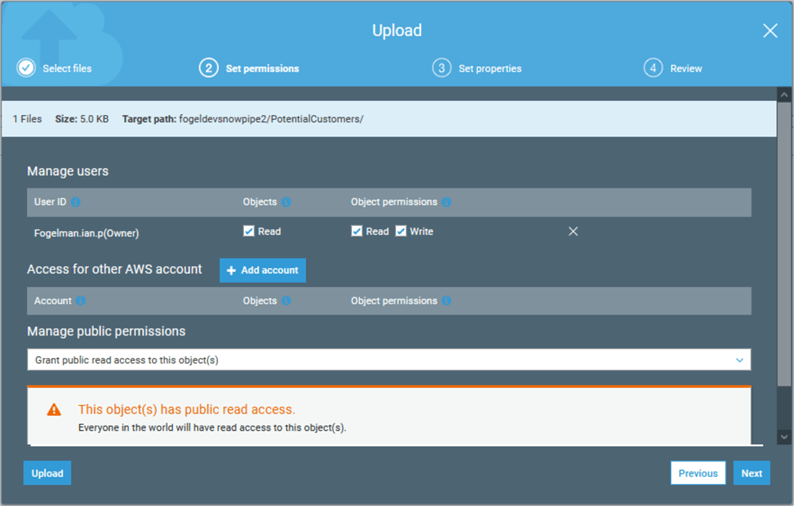
Now that everything is configured. It is time to test the process by uploading a file to the S3 bucket. When the file is uploaded the S3 event will trigger Snowpipe and the data will be loaded into the Snowflake PotentialCustomers table.
The key factor that makes this automatic is the key work in the Snowpipe auto_ingest = “true”. This uses the S3 notification event to fire the Snowpipe logic and insert into our table. Snowpipes can also be specified without the auto_ingest option if necessary.

Grant public access and click upload, it should be noted this is for testing / demonstration purposes only. In your company environment there is an alternative way to connect to S3 buckets without public access documented by Snowflake.
Now return to your Snowflake instance in the worksheet and run the following select statement.
SELECT * FROM PotentialCustomers;
There should be an exact replica of the data in the CSV file uploaded in this Snowflake table.

After the initial config it may take a few minutes for the Snowpipe to execute. Once it has successfully run, the loading time should be very performant.
Next Steps
- Check out some additional Snowflake tips
- Read the getting started with Snowflake documentation

Ian Fogelman is a MCSE in Data Management and Analytics and Amazon Web Services Certified Solutions Architect. Ian currently works as a Senior ETL Developer with American Family Life Assurance Company. Ian has over 7 years of experience in database technologies primarily in SQL Server, reporting and data integrations. Other technologies that Ian enjoys are Docker, data science and predictive analytics, AWS – Deep racer and Linux. Ian is also the founder and primary contributor to SuperFunSql.com where he covers many topics such as AWS services, Machine Learning, Python, SQL Server, Power BI and various programming language topics.
- MSSQLTips Awards: Rookie of the Year Contender – 2020