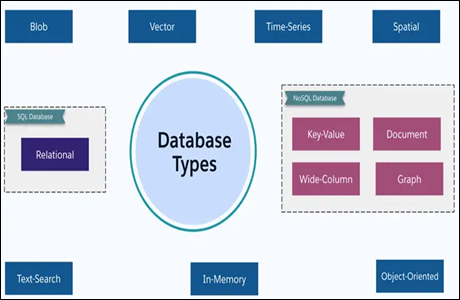
Overview
Snowflake works with immutable cloud storage as the storage layer for the data. This means it doesn’t change a file, it rather creates a new version of the file which allows for Snowflake time travel.
Explanation
The way Snowflake works opens new and exciting possibilities and one of them is time travel.
Introduction to Snowflake Time Travel
Imagine that every time you make a change to a table, a new version of the table is created. Each time you run an INSERT, UPDATE or DELETE (or any other DML statement), a new version of the table is stored alongside all previous versions of the table. This would mean you could read previous versions of the data in your table. Time travel in Snowflake is exactly that.
You can compare it with temporal tables in SQL Server. In fact, you’ll see the syntax to query with time travel is fairly the same as in SQL Server. The biggest difference, however, is SQL Server stores all the versions indefinitely, while Snowflake only maintains the different versions of your table for a specific period in time. Depending on your edition, this is either one day or up to 90 days. After those 90 days, the versions are lost. Well, they are kept for 7 more days, but only Snowflake support can access those. An overview:

How to Query Data
To query the current version of your table, you use the standard SQL you’ve been using all along. To query the previous versions, you need specific syntax, which we’ll cover in the next paragraph. The fail-safe cannot be queried. By default, time travel is enabled on every table. You can however shorten the data retention period or you can turn it completely off for a table. Those tables are called transient tables. Good candidates for transient tables are staging tables or tables which are truncated and re-loaded every day. Keep in mind storing all those different versions of your table actually consumes storage for which you have to pay.
Currently, Snowflake doesn’t have a back-up mechanism. It relies on the underlying cloud to make sure the data is safe and replicated. However, if you do something wrong, like accidentally deleting some data, you can use time travel to fetch the data before you made the change.
Querying Time Travel Data
Let us first create a new table:
CREATE TABLE IF NOT EXISTS dbo.TimeTravel(MyString STRING);With some sample data:
-- insert sample data
INSERT INTO dbo.TimeTravel(MyString)
SELECT 'Hello'
UNION ALL
SELECT 'MSSQLTips!';
Wait for a couple of minutes, then insert some extra sample data:
-- Insert other sample data.
INSERT INTO dbo.TimeTravel(MyString)
SELECT 'This is ...'
UNION ALL
SELECT '... more data.';
We now have 4 rows in the table, and 3 versions (1 with no rows, 1 with 2 rows and 1 with 4 rows).

Using the query history, we can fetch the query ID of our last INSERT statement.
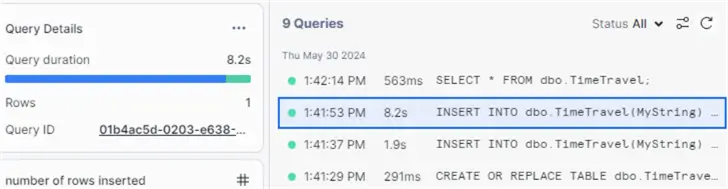
Using the BEFORE clause, we can fetch the version of the table before our last INSERT:
SELECT *
FROM dbo.TimeTravel
BEFORE (STATEMENT => ' 01b4ac5d-0203-e638-0000-00028dd261e9); -- replace with your ID
This returns two rows:

Using the OFFSET clause, we can go back a specific period in time.
SELECT *
FROM dbo.TimeTravel
AT (OFFSET => -60*6);
In the example here, we retrieved the version of the table before any row was inserted.

If you go too far back in time, you’ll get an error because the table didn’t exist yet.

Truncating a table, time travel still works. If you drop a table however, you cannot query the data anymore. You can restore the table though using the UNDROP command. Once the table is restored, time travel works again.
Additional Information
- You can also query time travel data for a specific time stamp.
- Want to know more about temporal tables in SQL Server, check out the following tips:

Koen Verbeeck is a seasoned business intelligence consultant with over a decade of experience with the Microsoft Data Platform. He holds several certifications, including Azure Data Engineer. He’s a prolific writer, with over 375 articles on technologies such as Microsoft Fabric, SSIS, ADF, SSAS, SSRS, MDS, Power BI, Snowflake and Azure services. He has spoken at various events such as PASS, SQLBits, dataMinds Connect and many others. He frequently delivers educational webinars on MSSQLTips.com. For his efforts, Koen has been awarded the Microsoft MVP data platform award for many years.
- MSSQLTips Awards:
- Leadership Award (200+ Tips) – 2021
- Author of the Year – 2014/2020/2022
- Author Contender – 2024/2025