By: Bhavesh Patel | Updated: 2022-06-14 | Comments (1) | Related: > Power BI Formatting
Problem
We can use Power BI Desktop to develop more interactive reports and in this tutorial I will cover how to create a custom page navigation for a Power BI report.
Solution
Using page navigation, we can navigate to a different page within the report. To setup a page navigation, we can create a button with page navigation as the action type and choose the destination page. To add more functionality we can create a custom navigation pane.
Let me demonstrate how to build custom page navigation in Power BI. Let's get started.
Step 1: Prepared data for Power BI Visual
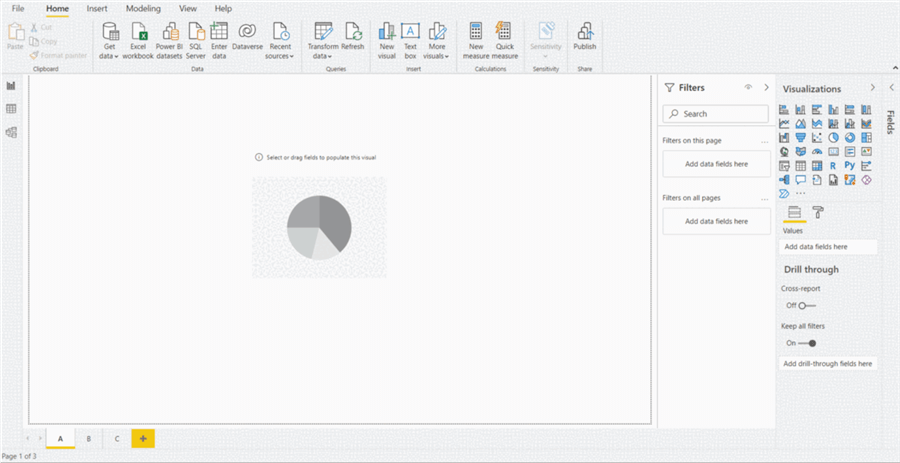
To demonstrate a custom navigation pane, first I am going to add three reports and set the names as "A", "B"" and "C" and add a visual in each page as shown below.
Step 2: Prepare Data for Drop Down Visual
To create the data to select the report page, we need to add some data for each page that will be used for navigation.
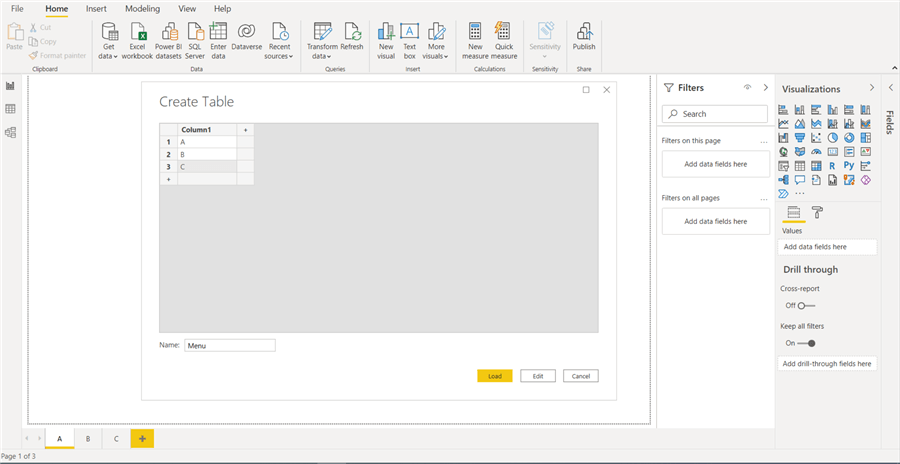
Go to the Home menu, select Enter data and add rows for each of the page names "A", "B", "C" and assign a Name like "Menu" as shown below. Note the column name is just "Column1".
Step 3: Prepared a Drop-Down Visual
We will create a dropdown visual to select the page we want to go to.
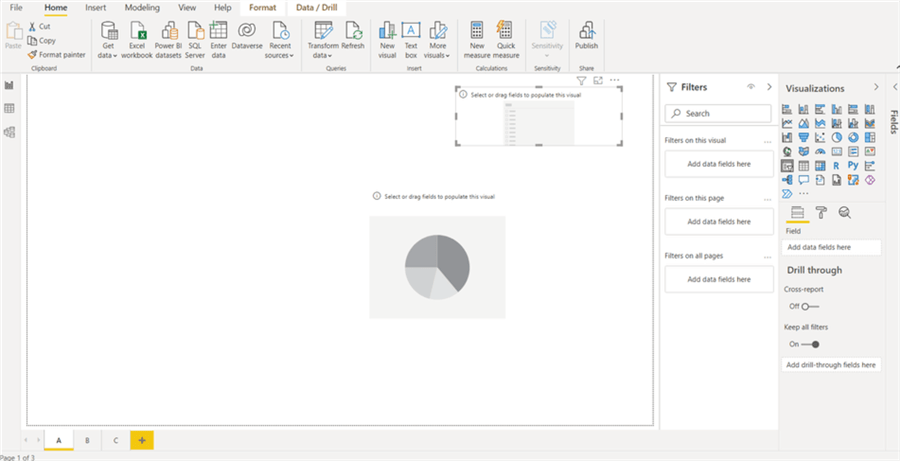
On page "A" add a visual slicer from the visualization tab and map to table Menu field column1.
On Selection controls, set Single Select on, so we can only select one item.
Step 4: Set the custom navigation as destination conditionality
Now, I am going to add a Button on page "A" that will be used to take action on the selected item from the dropdown we just created.
Go to Insert menu and select Buttons and choose Right Arrow button.
In Button properties, make sure the button is enabled and Action is enabled. In Type select Page Navigation. For Destination click on fx.
In the Destination Action, keep format as is, choose based on field as First Column1 and for Summarization choose first and press OK to save.
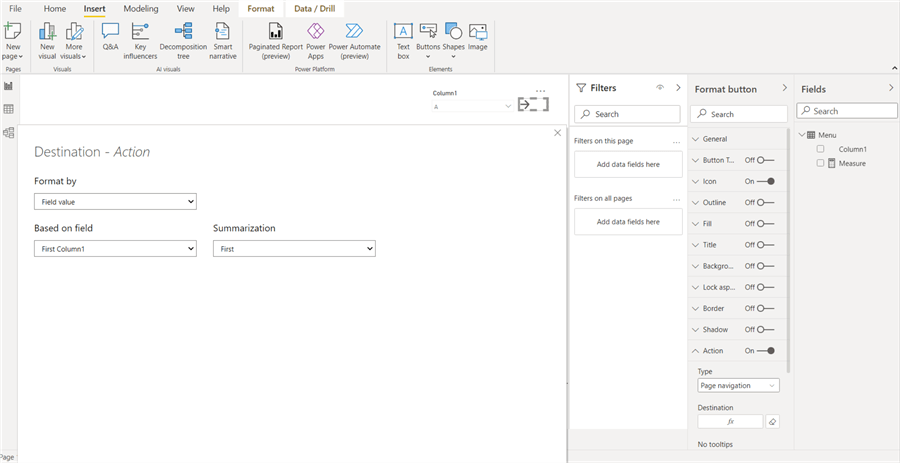
After applying the above steps, Page A is ready with a navigation tab.
Now you need to copy these navigation controls to each page. Note these controls don't need to be in synch for each of the pages, so you can use the no synch option.
Final Report
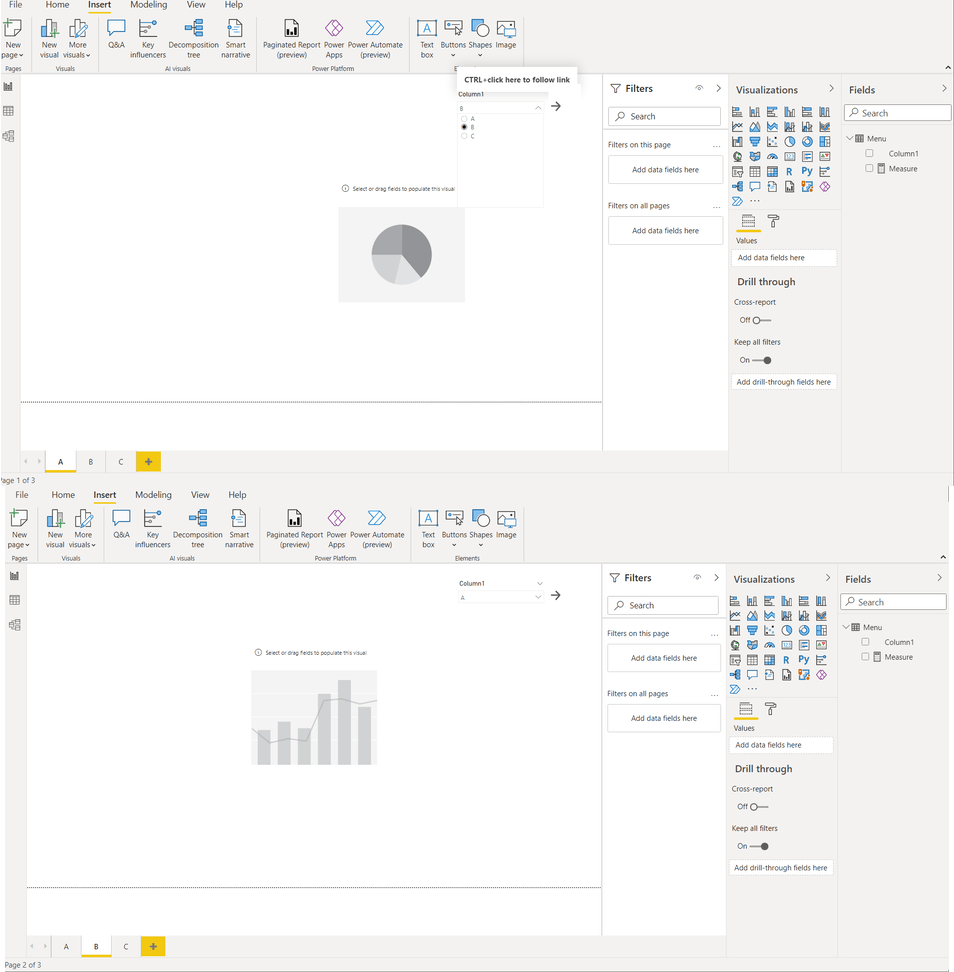
After applying all the steps, my report is ready with the custom page navigation as shown below.
Next Steps
When creating a multi page report it is hard to put everything on one page, so using page navigation is an easy way to build a better report.
Related articles:
- Learning SQL Server Power BI tips
- Download Power BI Tools and apps
- Power BI Documentation for more learning
Learn more about Power BI in this 3 hour training course.
About the author
 Bhavesh Patel is a SQL Server database professional with 10+ years of experience.
This author pledges the content of this article is based on professional experience and not AI generated.
View all my tips
Article Last Updated: 2022-06-14


