Problem
Power BI Paginated Reports has a few in-built data sources, but this is nowhere to be compared to that of Power BI Desktop, the latter of which has a connector to almost every data source popular to analysts.
One major constraint currently is that it is not as straight forward to use Excel or CSV as a source in Power BI Paginated Reports. Thus, where organizations have their legacy reports in Excel or CSV or have the datasets in these two formats it becomes a major task to get the datasets into Power BI Paginated Reports Builder. There was a work around in SSRS where this can be configured to use ODBC as a connector for Excel for example. In this article I will demonstrate a workaround using Power BI datasets.
Solution
Available Data Source Options in Power BI Paginated Reports
The two connection modes currently in Power BI Paginated Reports include:
- Option to add Power BI Dataset Connection
- Option to add other Data Sources
More information on supported data sources for Paginated Reports can be found here. We are leveraging option one (Power BI Dataset Connection) in this article. The second option is limited to the following data sources currently (as at the time this article was written):
- Azure Analysis Services
- Azure SQL Data Warehouse
- Microsoft Azure SQL Database
- Microsoft SQL Server
- Microsoft SQL Server Analysis Services
- Oracle Database
- Teradata
- Enter Data
As can be seen there is no options for Web connections like Salesforce, Dynamics 365, as well as SharePoint and OneDrive sources. The example demonstrated in this article can be used to build a connection to other data sources that are not currently supported by Power BI Paginated Reports.
Implementing this solution
For the demonstration of this article I have leveraged OneDrive for Business to save the Excel workbook holding this dataset as shown in Fig. 1 below:

The plan here is to just import the dataset into Power BI Desktop and publish the dataset to Power BI Service. However, to ensure the dataset is constantly updated we can use Power BI On-Premises Gateway to refresh the dataset in Power BI Service or configure the dataset imported into Power BI Desktop to use a Web service which should not require a gateway to refresh the Power BI Service.
To do this, the following steps should be employed chronologically:
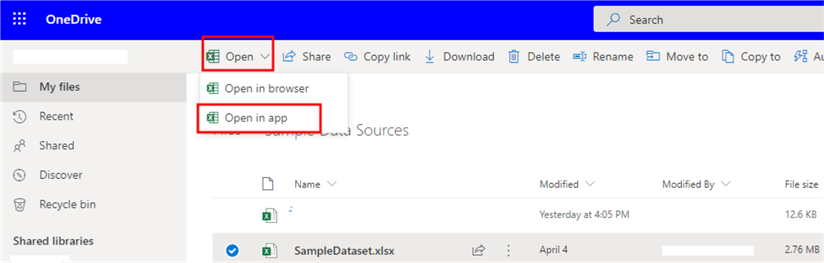
Step 1: Click on the Excel File within OneDrive that contains the dataset(s) and on the top left of the web page expand the dropdown that states “Open” and select the “Open in App” option. This would open the dataset in the Excel desktop app as seen in Fig. 2:
Step 2: Once the Excel App opens the data, click on File > Info and copy the OneDrive Web path for the Excel dataset. You can also copy the path location by right clicking the Open File Location and the select “Copy Path” as seen in Fig. 3 below:

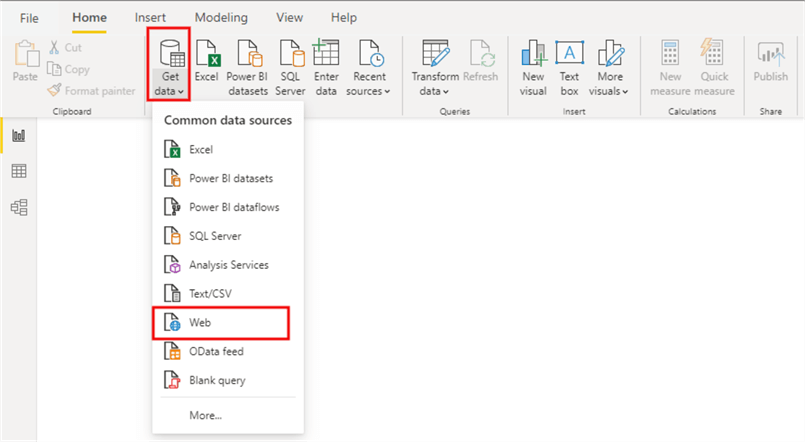
Step 3: Depending on the location of your dataset, the next step is to connect to the OneDrive path in Power BI Desktop. There is more than one way to do this, but I am going to make it simple. In Power BI Desktop click on “Get data” and select “Web” as the connector of choice as seen in Fig.4 below (this depends on if you are getting the data from Salesforce or SharePoint or OneDrive, all follow same process in the end).
Note that the copied path would look like the path below in Fig.5, however the last part should be removed as seen in Fig.6 to ensure it works.
Fig. 5:
https://xyz-my.sharepoint.com/personal/name_xyz_com/Documents/Sample%20Data%20Sources/SampleDataset.xlsx?web=1
Fig. 6:
https://xyz-my.sharepoint.com/personal/name_xyz_com/Documents/Sample%20Data%20Sources/SampleDataset.xlsx
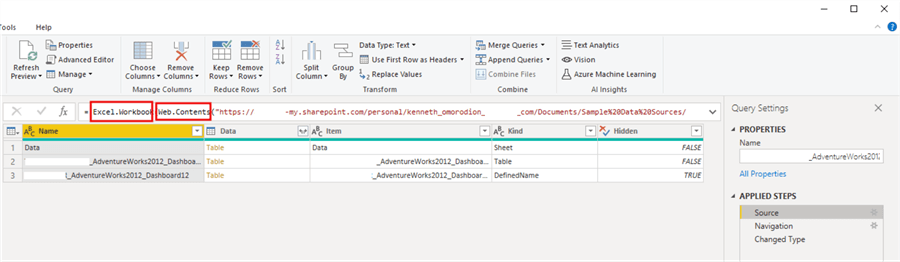
Step 4: After loading the data into Power Query, it is essential to check that the source path is using the right M code to ensure the refresh of the dataset do not require a gateway.
Click on the “Source” in the transformation’s steps of the dataset, this should expose the path formula in the formula bar (Note: activate the formula bar in case it is turned off). This is where the trick is done, ensure Web.Contents is seen in the path in the formula bar otherwise change it to Web.Contents as seen in Fig.7, Fig.8 and Fig.9 below.
Fig.7:
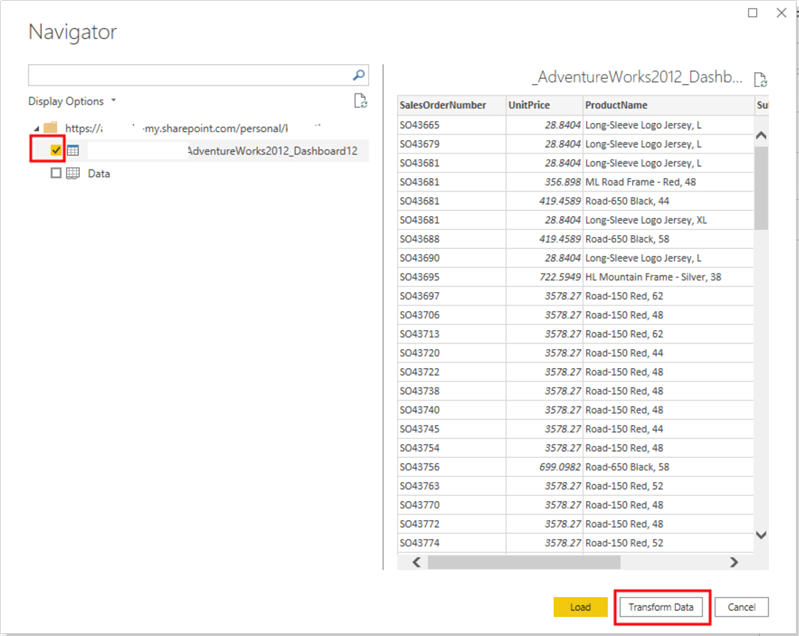
Fig.8:
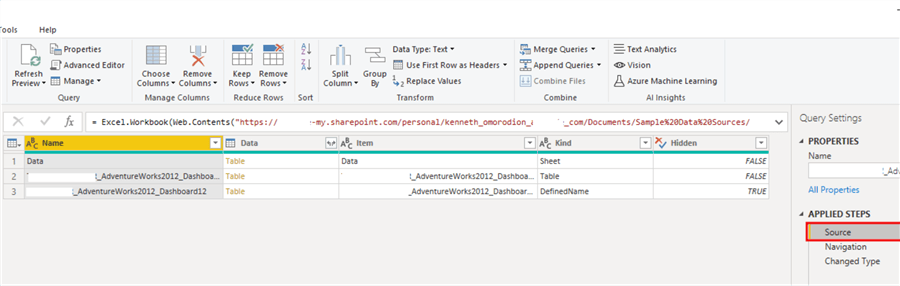
Fig.9:
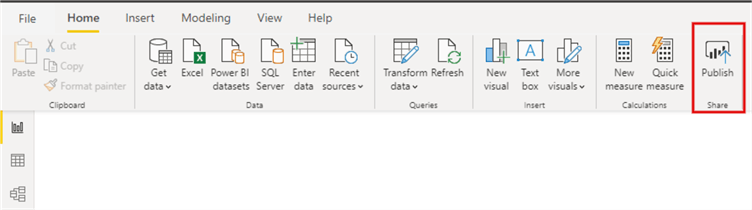
Step 5: After performing any data transformation in accordance with your business needs then “Close and Apply” and Publish the empty report to the Power BI Service. No visuals are needed since the purpose of the whole process is to get the dataset into Power BI Paginated Reports where paginated reports can be developed leveraging the pixel-perfect nature of the reports. See Fig.10 and Fig.11 below.
Fig.10:
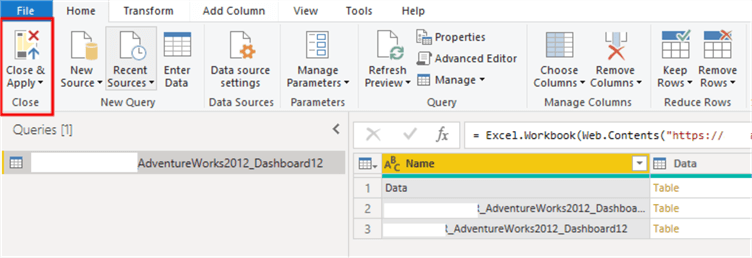
Fig.11:
Step 6: Then, log in to Power BI Service and locate the Workspace where the dataset has been published to and then click on “Datasets”. Choose the dataset and configure the refresh schedule as seen in Fig.12 below. Note that the Gateway connection stipulates that a gateway is not required to refresh this dataset because we have dealt with this earlier in Power BI Desktop.
Fig.12:
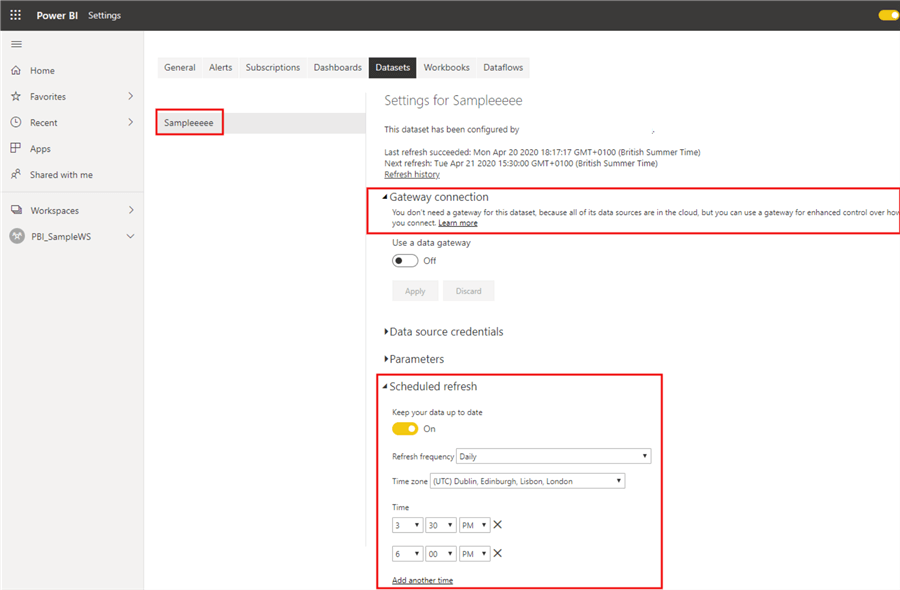
Also, please note that you might need to configure the Data Source Credentials before you can schedule a refresh. In that case you only need to use your OAuth credentials as seen in Fig.13 below.
Fig.13:

Step 7: Next open the Power BI Report Builder from the left pane, right-click on “Data Sources” and select “Add Power BI Dataset Connection …”. This will open a new window where the list of Power BI Service Workspaces is listed and when the correct Workspace is selected the datasets in that Workspace is seen and selected. This would create the Data Source as required. See Fig.14 below.
Fig.14:

Step 8: Having created the Data Source, next is to create a dataset from the data source for Power BI Paginated Reports Builder to consume from. To do this, right-click on the data source just created and select “Add dataset”. This should pop up new windows as seen in Fig.15, Fig.16, Fig.17 and Fig.18 chronologically.
In Fig.15 you can change the dataset name to a user-friendly name, I have left it as the default. Then the “Query designer” is used to build the query to generate fields for the dataset.
Fig.15:

In Fig.16 a new window is popped up which shows the Language I have chosen to use to query the dataset (in this case I have used DAX, there is an alternative of using MDX too). The model is seen on the left pane.
Fig.16:

In Fig.17 the dataset name has been expanded to expose the fields. Each field is dragged across and dropped into the empty query execution area.
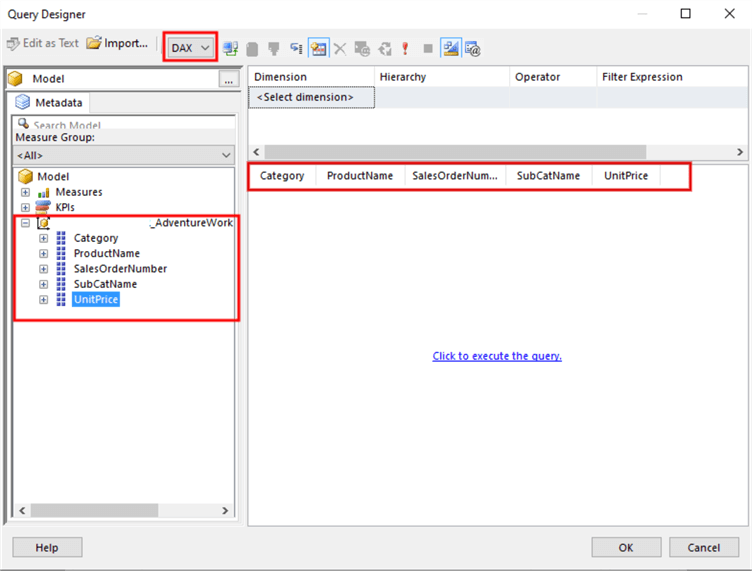
In Fig.18 the “Category” field has been dragged into the filter region and made a Parameter by ticking the box at the front end as seen in the diagram. Also, the query has been executed to see the output from the dataset. Feel free to add your parameters according to business needs or this can also be done later. Click “Ok” and the dataset should now be ready to use to create the paginated reports.
Fig.18:

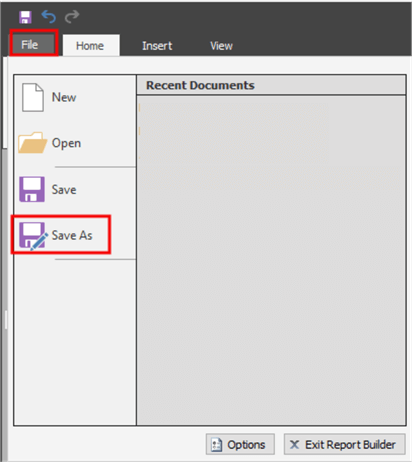
Step 9: After creating the paginated reports, it is now time to publish (save) the report back to Power BI Service for final consumption by stakeholders, just like any other Power BI Reports. Fig.19 and Fig.20 shows how that is done. However, Power BI Paginated Reports requires (as at the time this article was written) a Premium capacity to be published to Power BI Service. So, with Premium capacity environment, Paginated reports are published and set on refresh schedules with On-Premises gateway like any other Power BI reports in the Power BI Service. The official documentation on this from Microsoft can be found here.
Fig.19:
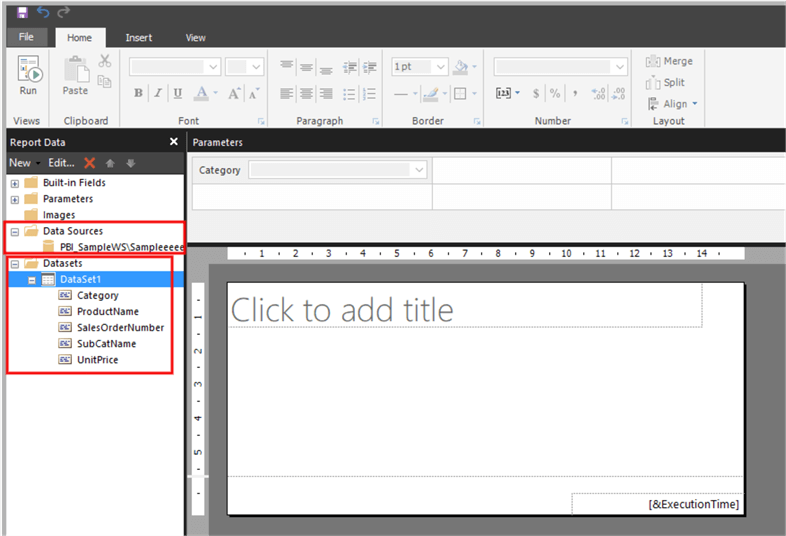
Fig.20:
Next Steps
- Power BI desktop can be downloaded from here.
- Power BI Paginated Report Builder can be downloaded from here.
- You can get more information on how to create a Paginated report from the Microsoft documentation here.
- You can download Power BI data Gateway here. Note this would be required to get the report published from Power BI Report Builder to Power BI Service.
- Check out all of the Power BI tips on MSSQLTips.com

Kenneth A. Omorodion is a Microsoft Certified Solutions Associate (MCSA) with 12+ years of enterprise application experience in Power BI, DAX, Microsoft Fabric, Business Intelligence, data warehousing, SSRS, T-SQL, and Azure. Beyond his technical skills, Kenneth has expertise working with stakeholders’ and business leaders to help them better understand key insights. He has a great track record of successfully delivering full life cycle Business Intelligence and data solutions to organizations with measurable business impact.
- MSSQLTips Awards
- Achiever Award (75+ Tips) – 2025
- Author of the Year-2021
- Author Contender-2022/2023/2024
Thank for tip. It work for me.