Problem
What is the geo-replication feature of Azure SQL database? Please explain the geo-replication business continuity feature, its uses, and implementation.
Solution
Business continuity ensures your systems keep running with minimal impact in case of any disaster or unplanned disruption. Geo-replication is one of the business continuity features offered by the Azure SQL Database service to ensure continuous data replication to a single or multiple secondary SQL databases from a primary SQL database. We can replicate databases to other locations and if needed, initiate a failover to make the replicated database the primary to keep the business running in the event the database becomes inaccessible.
Active geo-replication uses Availability Group technology to continuously replicate data asynchronously to secondary databases. It does not support automatic failover, it requires manual intervention to failover to a secondary database. You can configure this feature as a business continuity solution if the application needs an RTO of 30 seconds and/or an RPO of 5 seconds. Note: This feature cannot be configured for SQL-managed instances as it does not support managed instances; however, you can configure it for a single Azure SQL database or a pool of databases, known as an elastic pool.
Configure Active Geo-Replication
In the section below, let’s configure geo-replication for the Azure SQL database, AdventureWorks. We will access our target database using the Azure portal, configure geo-replication, and perform the failover process.
Access Database Using Azure Portal
Log in to the Azure portal using www.portal.azure.com. Launch the Azure SQL Database Dashboard to access your target database. To search, type “SQL database” in the search box to get a list of databases.
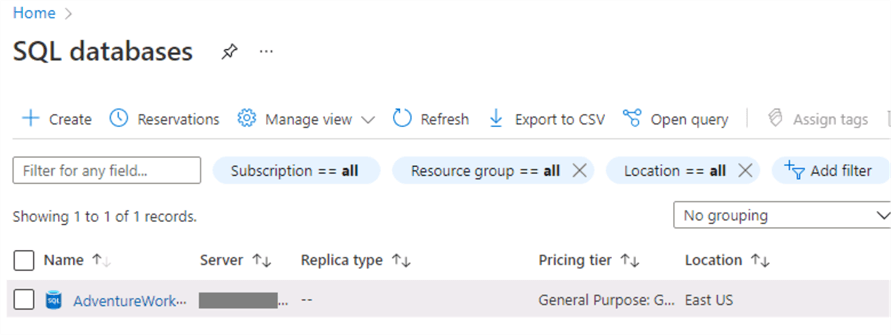
Click on the identified Azure SQL database, AdventureWorks, to get the image below. We can configure geo-replication using the Replicas tab under Data management on the left. You can also configure or validate whether geo-replication is configured for your database by accessing the Database features tab shown below. Note: the block Replicas under the Recovery subtab of Database features. Click on this block to see or configure geo-replication for the database.

Configure Active Geo-Replication
By clicking on Replicas, you will get the screenshot below, which shows there are no replicas, meaning geo-replication is not configured for this database. Click the + Create replica link (in red rectangle) to launch the geo replica configuration form.

The configuration form will create a new Azure SQL database based on our inputs for your desired secondary region. There are multiple sections given in the Basics tab of this form, such as:
- Project details
- Primary database details
- Database details\Server details
- Backup storage redundancy
All sections are self-explanatory but need to be filled in carefully. The Database details section is where you configure your secondary replica database by entering the server’s name, authentication mode, compute sizes, etc., for your geo replica. I will show you all these configurations in a step-by-step process below.
Project details are for subscriptions and resource groups and will be prefilled. Primary database details will show the name of the primary database and its region. You need to validate these details and proceed to the next section, which is more important.

Below you can see the database name, AdventureWorks, which cannot be changed. Next, choose the server’s name from the drop-down or create a new server by clicking the Create new li link below the server name drop-down.

By clicking the Create new li link, the screen below will appear. Enter the name of the server and choose your desired location as the secondary region where the database will be hosted. Click on the checkbox “Allow Azure services to access server” if you want this server to be accessed by other Azure services.

Next, we need to choose the preferred Authentication method for this database. We have three options available, as shown in the screenshot below. Choose the best option for your requirements. For this demonstration, I chose a mixed mode where both SQL and Azure AD authentication can be used. Once you select an option, provide the admin account details.
Since I chose SQL and Azure AD authentication, I need to provide admin accounts for both. Click on the Set admin link beside the Set Azure AD admin op option. Choose this account carefully: it will have administrative privileges, and unauthorized users must not have access to your database.
Next, provide a SQL login and password, which will have admin privileges, shown below. Then click OK.

Once you click OK, you will return to the original geo-replica form. Here, we can see the Database details section, where the server name and region are chosen and reflected in the desired section below.
Next, choose whether this database will be part of an elastic pool. Since there is only one database for this demo, we should keep it as No. Finally, we need to choose the compute size of this server. Click on the Configure database link under the Compute + storage option in the image below. Choose the desired compute size based on the workload. Ideally, it should be the same as the primary database configuration. I have kept it as general purpose with the given compute sizes for this demonstration.

The last section is Backup storage redundancy. Choose this option as per your backup policy. If you don’t want to choose a specific option, the default option will be configured based on your primary Azure SQL database configuration. Click the Next: Networking button at the bottom of the image. I kept all settings for Networking and Additional settings the same and clicked Review + create to initiate the validation process.

The estimated monthly cost for your selected configurations for this Azure SQL database will appear. Make sure to validate and understand the cost factor, then click Create to initiate deployment. Geo-replication will be configured, and data will flow to the newly created Azure SQL database.

Validation and Failover
Geo-replication has been configured for the Azure SQL database, AdventureWorks, with a single geo-replica in the previous section. Next, we will validate this configuration, initiate a failover to make the newly configured geo replica primary, and test this configuration to see if it is working correctly.
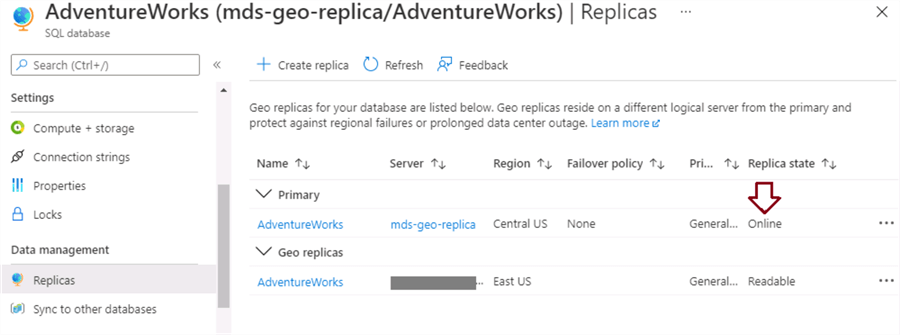
Log into the Azure portal and access your target database dashboard page. Access the Replicas tab using any of the two methods mentioned previously. You can click on the Replicas link given under Data management from the left side pane. Here you can see the configured geo replicas in the right-side pane. The primary database is online from the East US region, whereas its geo replica is online for read-only queries from the Central US region.

Now, let’s explore how to perform a manual failover in geo-replication. First, you need to identify which geo replica will become primary to serve your transactions in case you have more than one geo replica. Since we have only one geo-replica, we will initiate a failover for this one. Click on the three dots in the last column, as shown below. You will get the drop-down menu, where you can choose the “Forced failover” op option. Since this is a forced failover, you can expect some data loss.

The pop-up window below will appear. Click Yes.

Once you click the Yes button, the replica state will be changed for both primary and secondary databases. The new primary database replica state will change to Pending, whereas the replica state for the new geo-replica (once primary) will display as Failover. . The replica state for both databases will show this status for a while due to internal processing.

Click Refresh below to keep refreshing the replica state. The primary and geo-replica details have been changed in the image below. The new primary database is online from the Central US, while its geo-replica is now readable from the East US region.
The failover process has been completed successfully. You can revert back to the previous primary databases as the primary region if you’d like.
Next Steps
- Today, we explored the active geo-replication feature for Azure SQL databases. This feature replicates your data to other regions as a business continuity solution. We can configure up to four geo-replicas for an Azure SQL database. Consider the pricing before deciding the number of geo-replicas for your primary database. This article has also explained the step-by-step process to configure a geo-replica for a SQL database, along with its failover validation.
- Check out these additional Azure articles.

Manvendra is a passionate database lover currently working as a Technical Architect at one of the top MNCs. He has extensive experience on all versions of SQL Server since 2000 and has built Big Data skills. He has lead projects on the following database features: Database Mirroring, Always ON, Replication, Log Shipping, Geo-Clustering and Performance Tuning and delivered many SQL Server projects on consolidation, upgrades, heterogeneous replication, HA / DR solutions, automation and major performance tuning projects. You can also follow Manvendra on his blog, Twitter, LinkedIn and Facebook.
- MSSQLTips Awards: Champion (100+ tips) – 2018 | Author Contender – 2015-2018, 2021-2022

