Problem
Sometimes there is the need to add databases to existing Azure SQL Database auto-failover groups. This article will demonstrate how to add Azure SQL databases to an existing auto-failover group. To learn how to configure auto-failover groups for Azure SQL databases, I recommend reading: How To Configure Azure SQL Auto Failover Groups.
Solution
An auto-failover group is an Azure SQL database feature designed to automatically manage data replication, failover, and connectivity for SQL databases post failover. It uses the same technology to replicate data as active geo-replication. Auto-failover groups offer automatic as well as manual failover modes.
Auto-failover groups are created at the server level on which SQL databases are hosted. We can add one or more databases as a group under this failover group, like adding databases in availability groups. There may be circumstances when you need to add a new database to an already created or running failover group. Another possibility could be that you missed adding a database to the failover group while configuring it, and later you need to do it to make it a successful configuration. This article will address these scenarios.
Add Azure SQL Databases to a Failover Group
This section will explain how to add a database to a failover group. First, we will create a failover group without adding a database. Then we will create a new SQL database or identify any existing databases and add this database to the above-created failover group. The high-level steps are divided into the below sections.
- Create a failover group without adding any databases
- Add eligible databases to the failover group or create a new SQL database and add it to the failover group
- Test failover
Create a Failover Group Without Adding Any Databases
Suppose you have a SQL Server, mds-sql-server, on which two databases are configured: mds and mds-prod. Now you have decided to create a failover group for both databases. Here we will create the failover group but will not add the databases at this time. Adding the databases after creating the failover group will be covered in a later section.
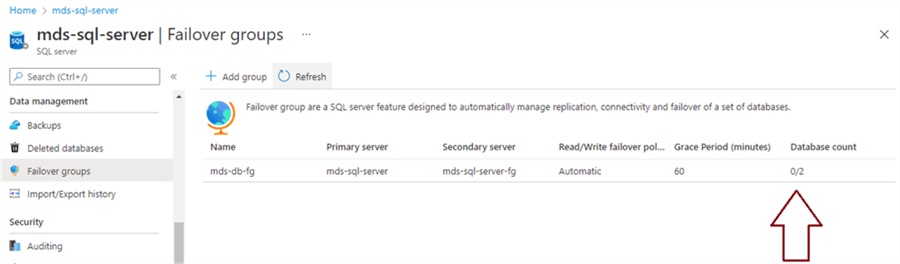
Log in to the Azure portal and go to the SQL Server resource mds-sql-server dashboard page, as seen below.
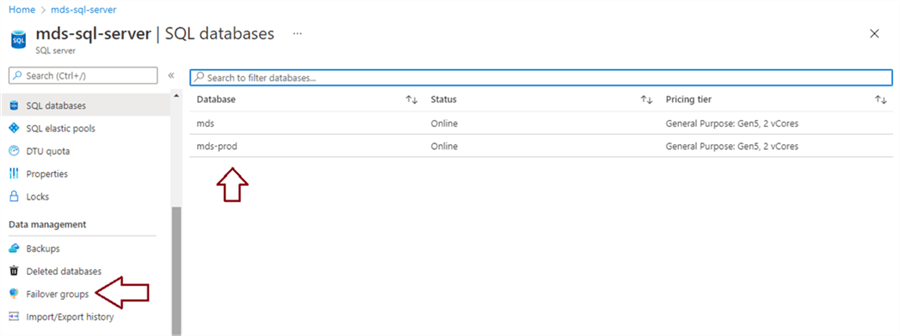
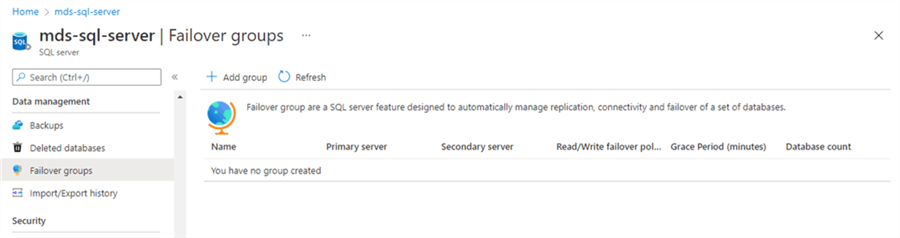
Under the Data management tab in the left pane, click the Failover groups option (see the dark red arrow in the above image). If you already have a failover group created, you will see it in the right pane. If you don’t have a failover group, click on the + Add group tab to initiate the failover group creation process (see below).
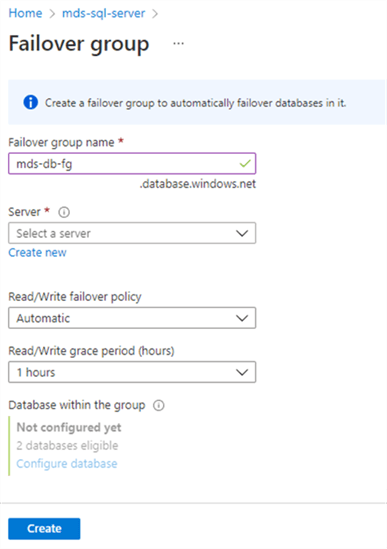
The screen below will appear. Enter the name of the failover group and choose the secondary server’s name on which the secondary databases will be replicated. If you don’t have a secondary SQL Server yet, click the Create new link to enter details for a new secondary SQL Server creation.
Clicking the Create new link for a secondary SQL Server will open the following screen. Enter the name of the secondary SQL Server participating in this failover group, its server admin login, and password.

Click Select once you enter all details for the secondary server and the failover group creation page will reappear to configure other parameters.
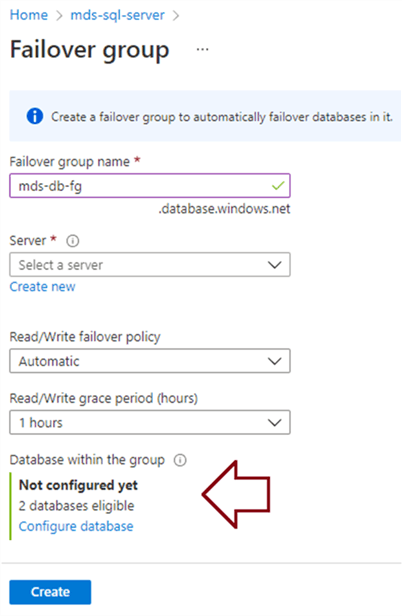
For this demonstration, I left the remaining parameters as is. I have not configured the Azure SQL databases because we want to create a failover group first without a database. Later in this tip, we will add Azure SQL databases to this failover group. Notice in the image below that the Database within the group section is showing "Not configured yet".
Click Create to initiate the failover group creation process. The deployment will begin, and you will be notified once it is successfully created.
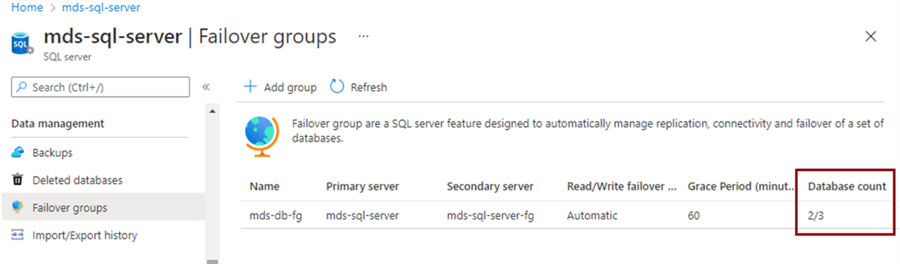
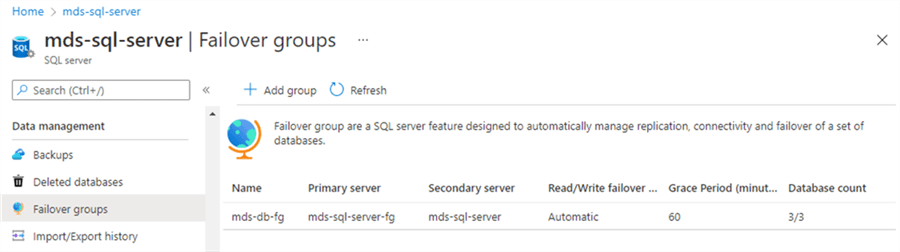
Go back to the SQL Server mds-sql-server dashboard page to access the Failover group from the left pane to see the status of the newly created failover group. Here, we can see its details in the right pane. In the image below, notice the dark red arrow pointing at the last column, Database count. It reads 0/2, meaning two databases are eligible for this failover group, but none have been added. Let’s verify this in the next step.
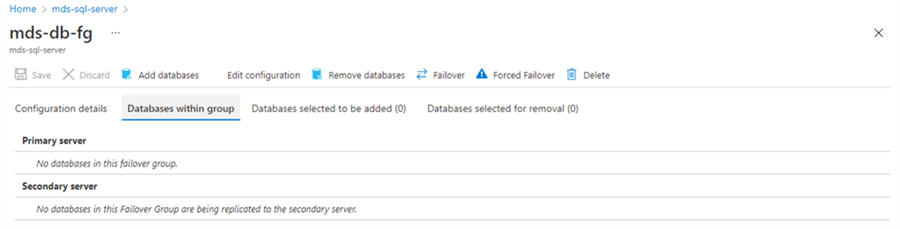
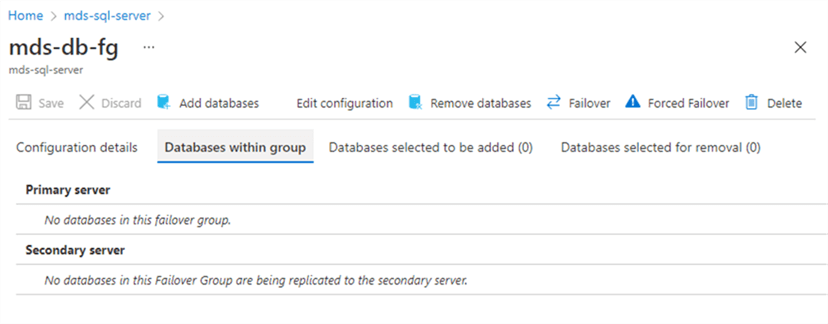
Click the mds-db-fg failover group and the group’s configuration page appears (below). Click the Databases within group tab to see all databases added to the failover group. Notice that not a single database is listed in this failover group.
We have successfully configured a failover group without a database. Next, we will add eligible databases to this failover group.
Add Eligible Azure SQL Databases to the Failover Group
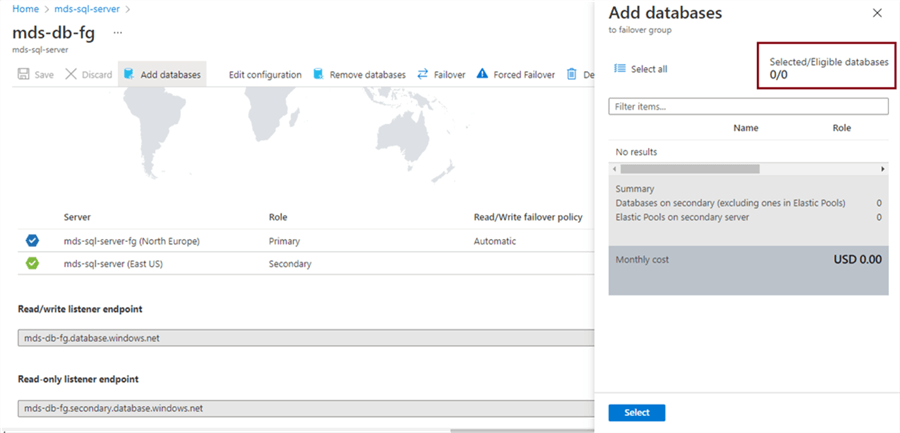
Note: Before continuing with this next step, please ensure that the primary role of this failover group is on the SQL Server that all eligible Azure SQL databases are hosted. If you failover this dummy failover group, roles will be changed successfully, but you cannot add databases since your secondary SQL Server does not have any databases yet. I tested this by failing over and making the secondary SQL Server mds-sql-server-fg the primary role. Then I clicked Add databases to see all eligible databases that can be added. The screenshot below shows zero databases are selected or eligible in the dark red rectangle.
I also performed a failback to make SQL Server mds-sql-server the primary where both Azure SQL databases mds and mds-prod are hosted. The screen below shows the new primary and secondary roles.
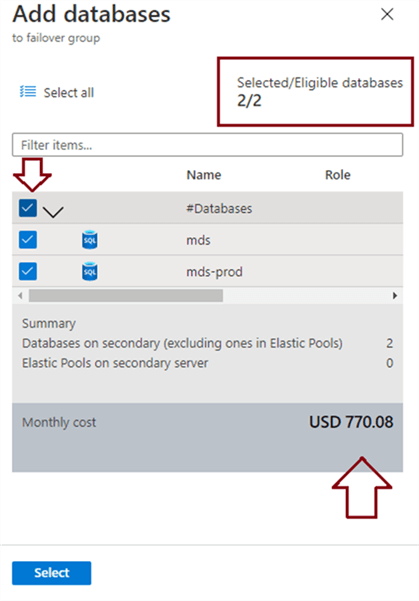
Now, click Add databases and a pop-up window will appear to select all eligible databases and validate the pricing. Both databases are showing as eligible and able to be selected. Click the check box beside each database you want to add to the failover group. Whether you want one or both, choose the desired database(s) accordingly.

I have selected both databases, mds and mds-prod, as shown in the image below. We can see the total expected cost of adding both databases. Note: Assess the pricing before adding any database to the failover group. Click Select to add your eligible databases to the failover group.
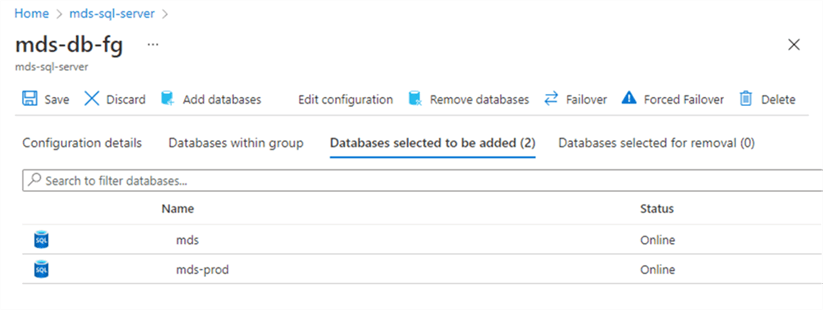
You will be returned to the screen below indicating the databases were added to the failover group. You can verify them and click Save to add these Azure SQL databases to the failover group.
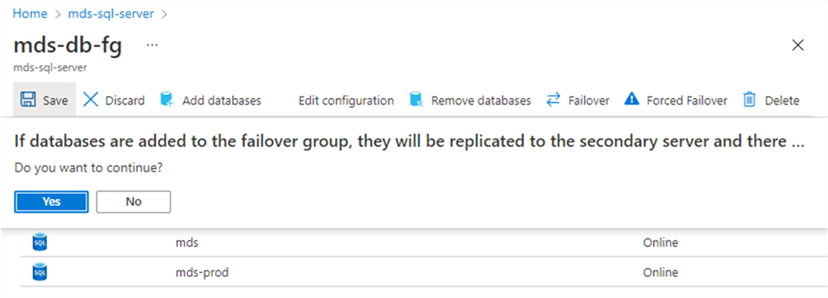
A pop-up window will appear, as seen below. Click Yes to proceed with the process.
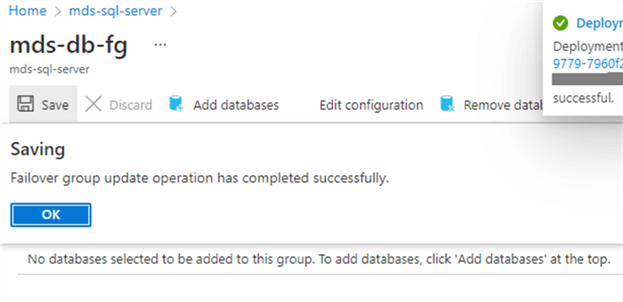
The screenshot below shows that the group update was successful. Additionally, you will receive a successful deployment notification once the databases are added successfully.
The below screenshot shows that the databases are not in the failover group. This image was captured after adding the databases to the failover group without doing a refresh. For the newly-added databases to appear in the Databases within group tab, close this configuration page and reopen it, or refresh the page.
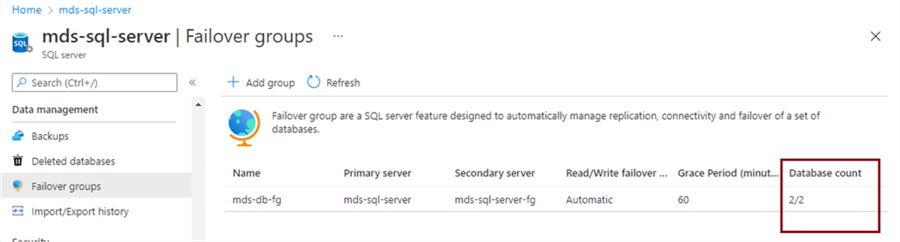
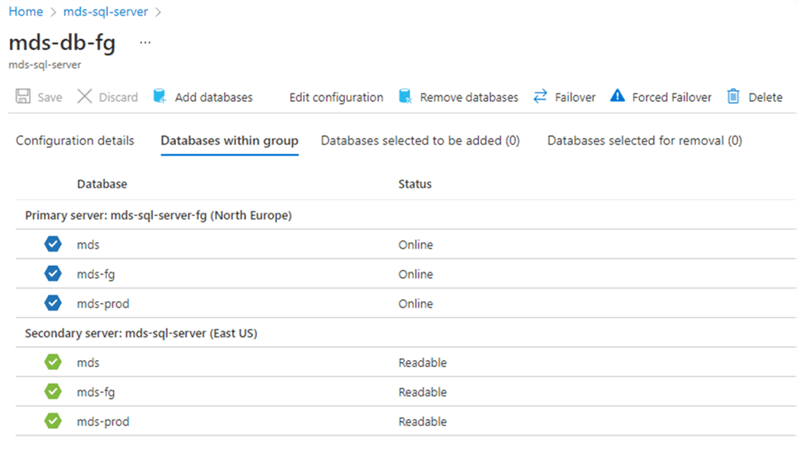
After a refresh, you can see below that the Database count column shows 2/2, meaning both eligible databases have been added to the failover group.
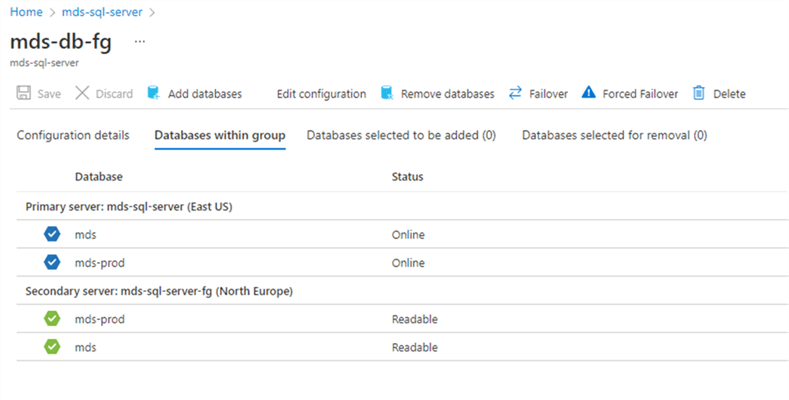
You can further validate this by accessing the Databases within group tab and see the databases from both regions and their status below.
Create a SQL Database and Add It to the Failover Group
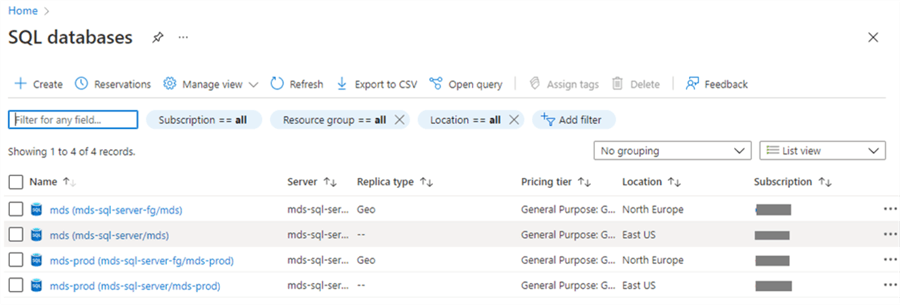
Now we will create a new database and add it to the failover group. Below I accessed the Azure SQL databases dashboard to view all databases, noting two SQL databases hosted on two different SQL Servers.
For this demonstration, I created one more Azure SQL database named mds-fg on server mds-sql-server which we will add to the failover group.
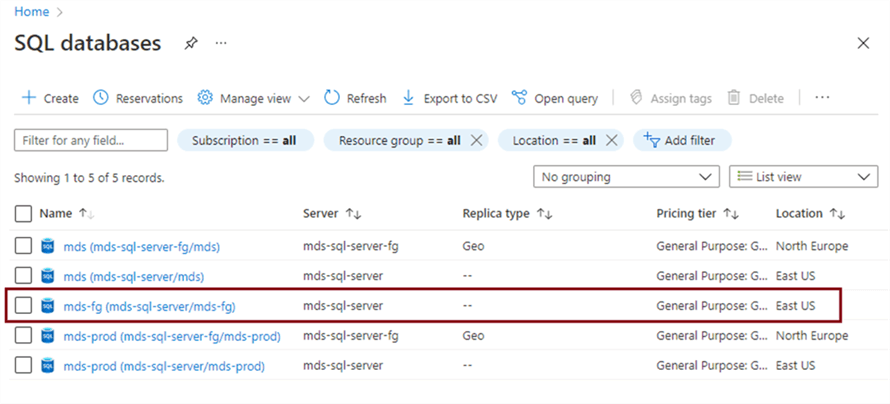
Access the Failover groups tab on the SQL Server mds-sql-server dashboard page. The total number of eligible databases has changed from 2 to 3, where only two are in the failover group out of the three eligible databases.
Click failover group mds-db-fg to open its configuration page and click Add databases, as shown below. There is one eligible database selected to add to the failover group. Click Select, which will show the failover group mds-db-fg page.

Once the database is added to the failover group, the seeding process will begin replicating data to the secondary region. The seeding process for the new database can be monitored, as shown in the screenshot below. Note: If your Azure SQL database is large, you may need to wait some time for it to sync fully.

Once the seeding process is complete, the status of the secondary database will change to Readable for read-only transactions.
Testing Failover
We have successfully added three Azure SQL databases to the failover group, mds-db-fg. Next, we will perform a failover to ensure the databases come online from their secondary SQL Server. Notice that the primary SQL Server is mds-sql-server, and the secondary SQL Server is mds-sql-server-fg in the below image.

We can also validate that all databases are online for read/write operations from (East US), whereas the secondary region shows as (North Europe).

Next, click the Failover tab (below) to initiate the failover process. Click Yes from the popup warning window to continue the process.
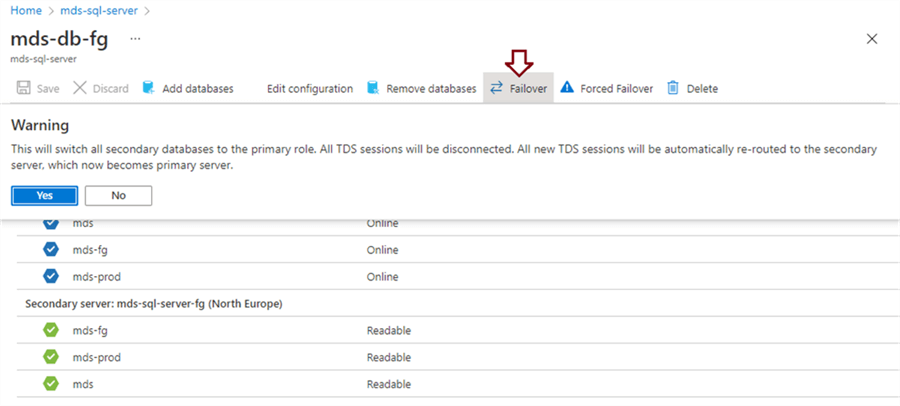
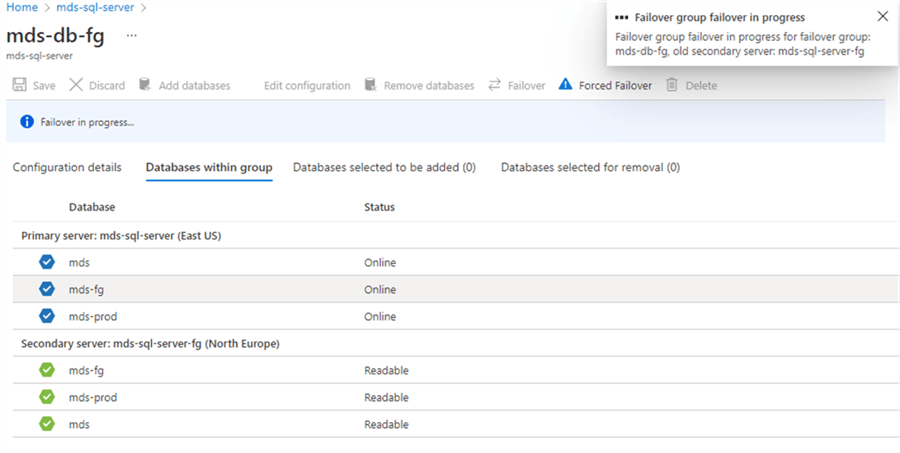
Failover will begin processing; you can see it "in progress" in the image below. All tabs will be disabled, i.e., greyed out.
Once the failover process is complete, you will see that all databases hosted in the secondary region, North Europe, have become primary and ready to accept read/write transactions. The image below verifies this information.
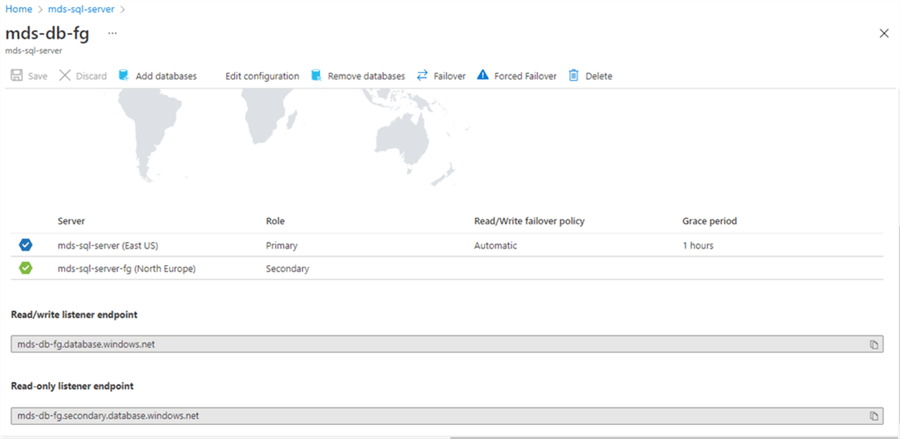
Close the above configuration window and return to the failover group page. You will see that the primary server is mds-sql-server-fg, whereas the secondary server is mds-sql-server. Compared to the first image in this section, you will see that both servers have changed roles after the failover process.
Next Steps
- We have successfully added two existing databases and a newly-created Azure SQL database to a failover group and successfully tested failover to ensure this configuration works.
- Check out these related articles:

Manvendra is a passionate database lover currently working as a Technical Architect at one of the top MNCs. He has extensive experience on all versions of SQL Server since 2000 and has built Big Data skills. He has lead projects on the following database features: Database Mirroring, Always ON, Replication, Log Shipping, Geo-Clustering and Performance Tuning and delivered many SQL Server projects on consolidation, upgrades, heterogeneous replication, HA / DR solutions, automation and major performance tuning projects. You can also follow Manvendra on his blog, Twitter, LinkedIn and Facebook.
- MSSQLTips Awards: Champion (100+ tips) – 2018 | Author Contender – 2015-2018, 2021-2022

