By: Koen Verbeeck | Updated: 2023-01-18 | Comments (1) | Related: > Power BI
Problem
I'm building a Power BI report using data from our data warehouse. We need to combine our data with data from another data domain for one particular analysis. This data is stored inside an Analysis Services 2022 Tabular model. Is it possible to show it on the report?
Solution
When connecting to earlier Analysis Services Tabular models (SQL Server 2019 and lower) from Power BI Desktop (PBI), you had two choices to retrieve the data:
- Import Mode: Import the data into the model of PBI itself. However, let's assume we can't use this because the dataset is too big, or maybe you don't have clearance to make an actual copy of the data.
- Live Connection: The data stays at the source. Queries are sent from PBI to the Tabular model, and only the results are transferred back. However, you can only query the Tabular model with a live connection. You cannot combine the data with other sources.
The solution is to use a composite model. This is a model in PBI where we combine data from import sources with DirectQuery sources. With the release of Analysis Services 2022 (SSAS), a Tabular model can now be used as a DirectQuery source in a composite model.
This tip will walk you through the steps of combining SSAS 2022 with other data in PBI Desktop.
How to Create a Composite Model with SSAS 2022
Create an SSAS Tabular 2022 Model
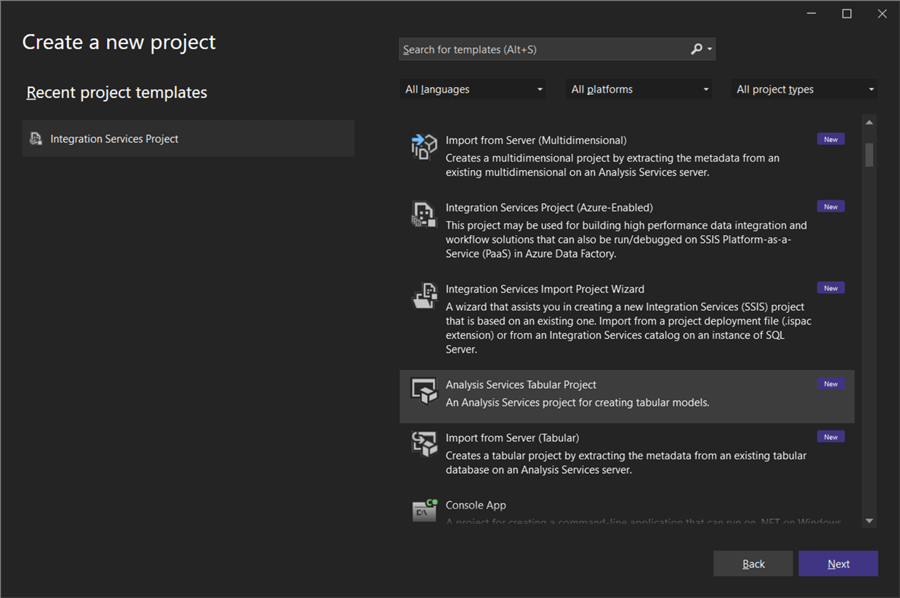
The first step is to install SSAS 2022. Next, you must install the SSAS extension in your Visual Studio (VS) instance. Then you can create a new project in VS, "Analysis Services Tabular project," as seen in the following image.
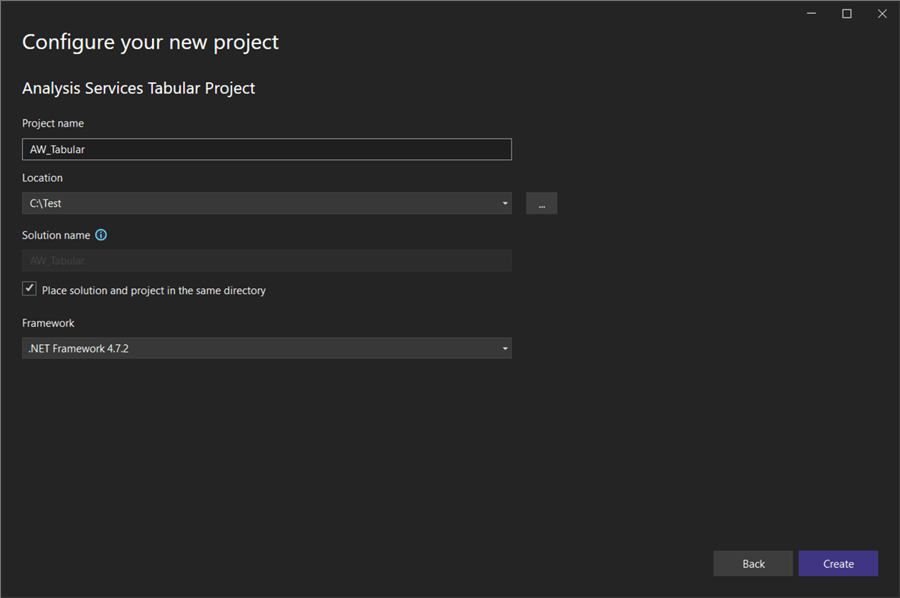
Give the new project a name and choose a location to save it. Click Create:
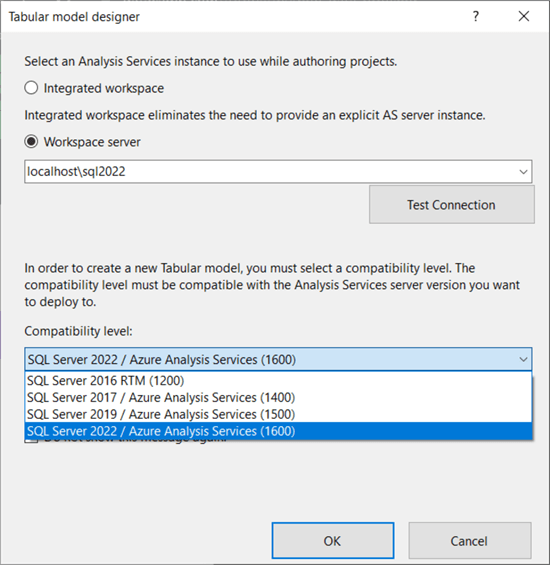
A pop-up will appear, asking you to set the compatibility level and choose where you want to host the workspace. For this example, we need the 1600 compatibility level. Click OK.
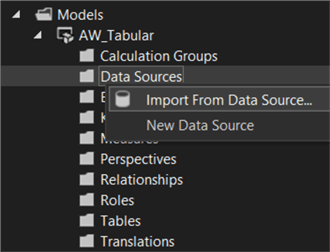
Let's connect to some data. In this example, we will use the Adventure Works DW sample database. Right-click on Data Sources and select Import From Data Source….
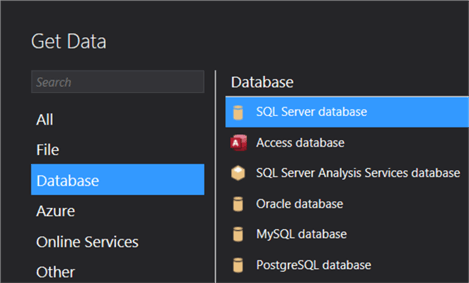
Choose SQL Server database as the data source.
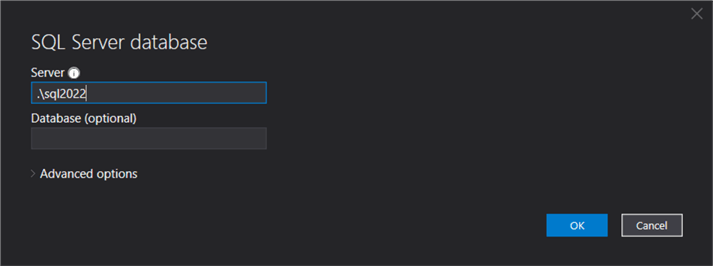
Enter the name of your SQL Server instance. Click OK.
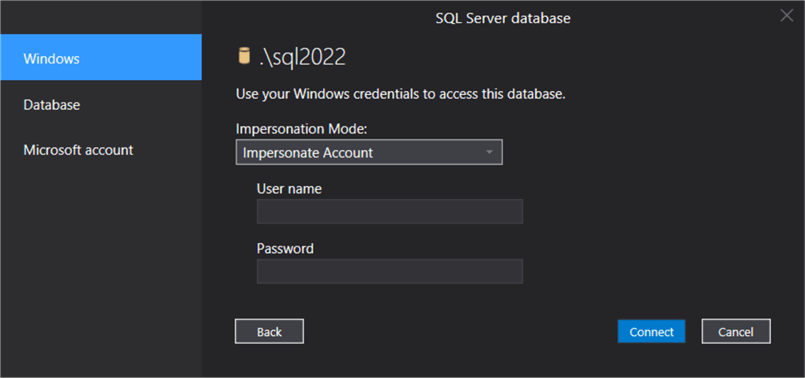
Configure how you want SSAS to connect to the database server. You can choose between Windows credentials, SQL Server users (the database option), or a Microsoft account (where you need to log in to Active Directory). Click Connect.
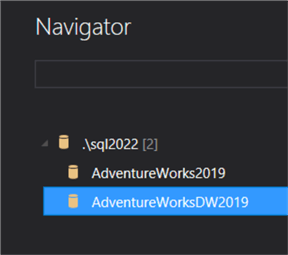
In the navigator, choose the AdventureWorksDW2019 database.
From the list, choose the following tables:
- DimCustomer
- DimDate
- DimProduct
- DimProductCategory
- DimProductSubcategory
- FactInternetSales
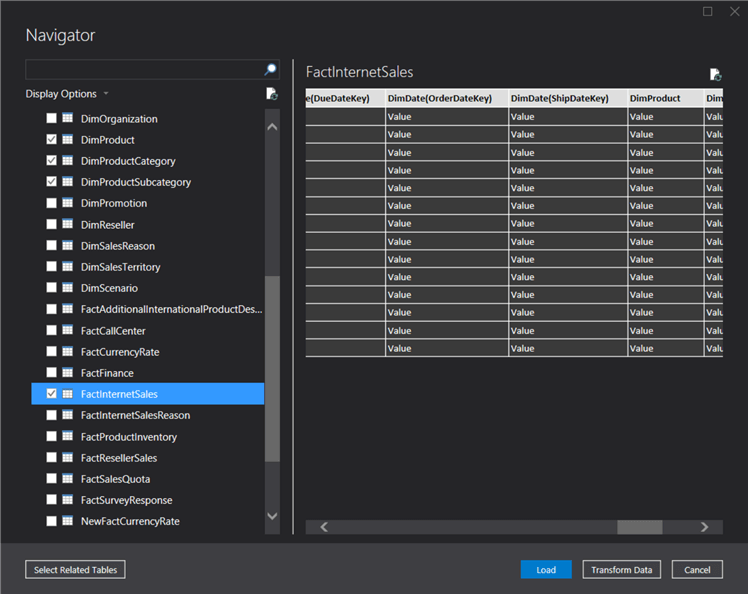
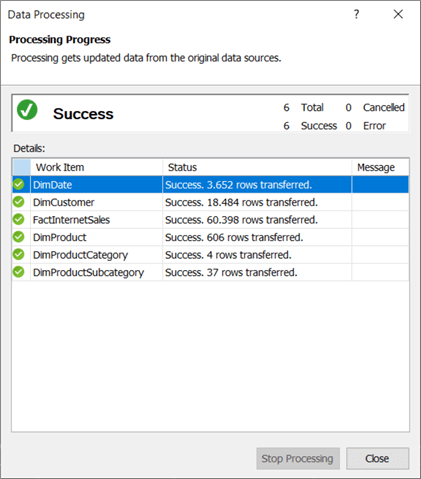
Visual Studio will create the connection and import the data from the tables into your workspace.
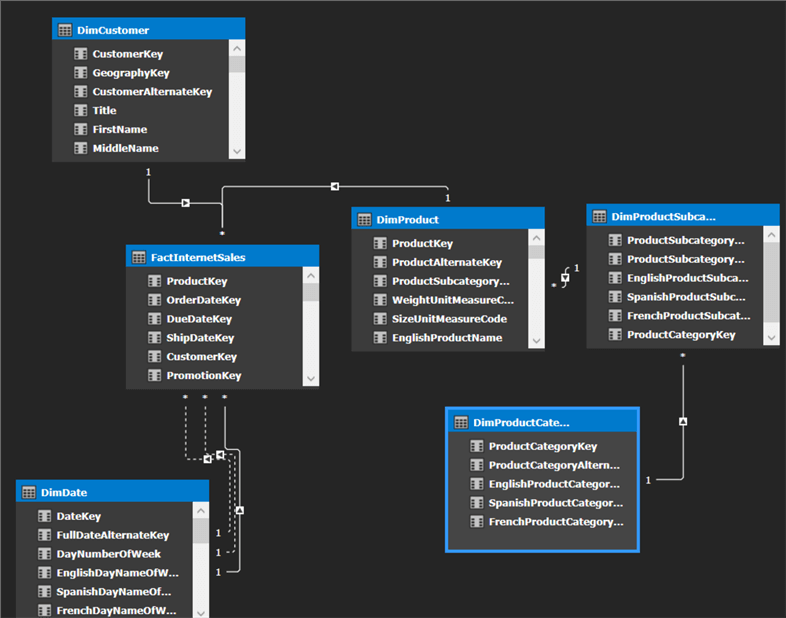
Once the tables are imported, you can create relationships between them if the designer hasn't done this already for you.
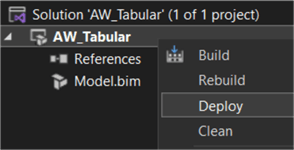
Right-click the model name in the object browser, and click on Deploy. Depending on your settings, this will deploy the model to the server and optionally process the data.
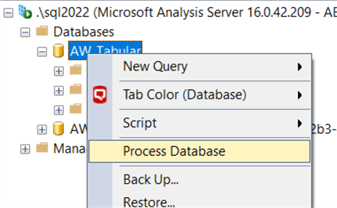
If the data hasn't been processed during deployment, log into the server using SQL Server Management Studio (SSMS) and process the database:
Create a Composite Model in Power BI Desktop
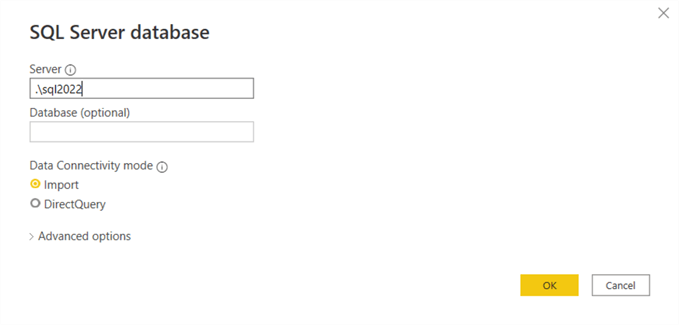
Now that we have a model in SSAS Tabular, we need to create another in Power BI Desktop. Select SQL Server as the source, specify the server name, and choose Import as the connectivity mode. Click OK.
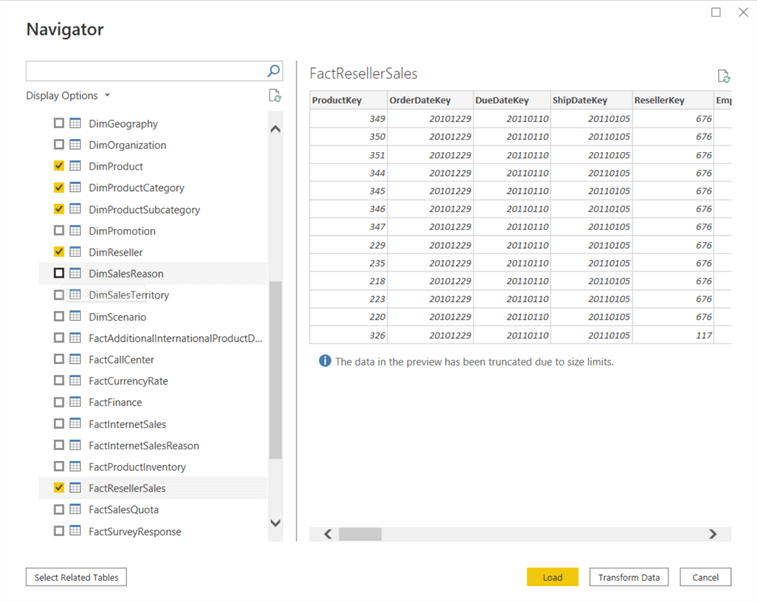
In the Navigator, choose the following tables:
- DimDate
- DimProduct
- DimProductSubcategory
- DimProductCategory
- DimReseller
- FactResellerSales
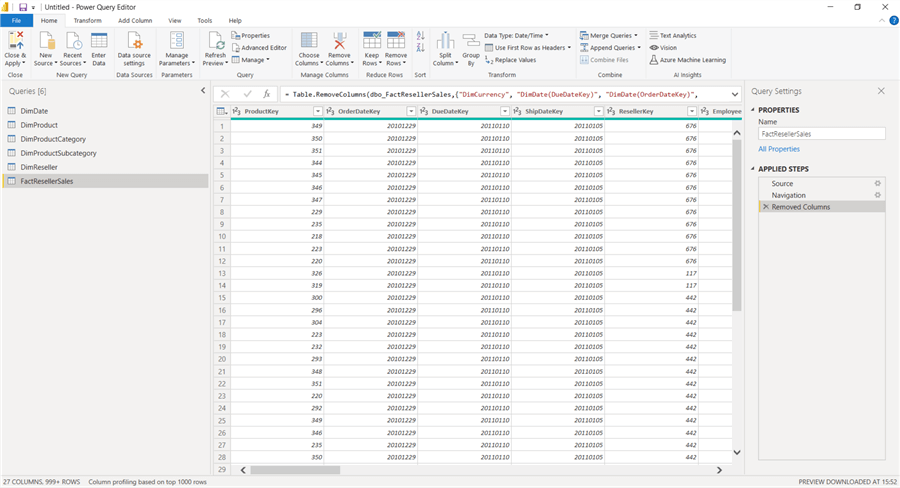
In Power Query Editor, remove unnecessary columns (typically table relationships that were added due to the foreign keys present in the fact table).
When the tables are imported into the model, make sure the following relationships are created (most of them should've been added automatically):
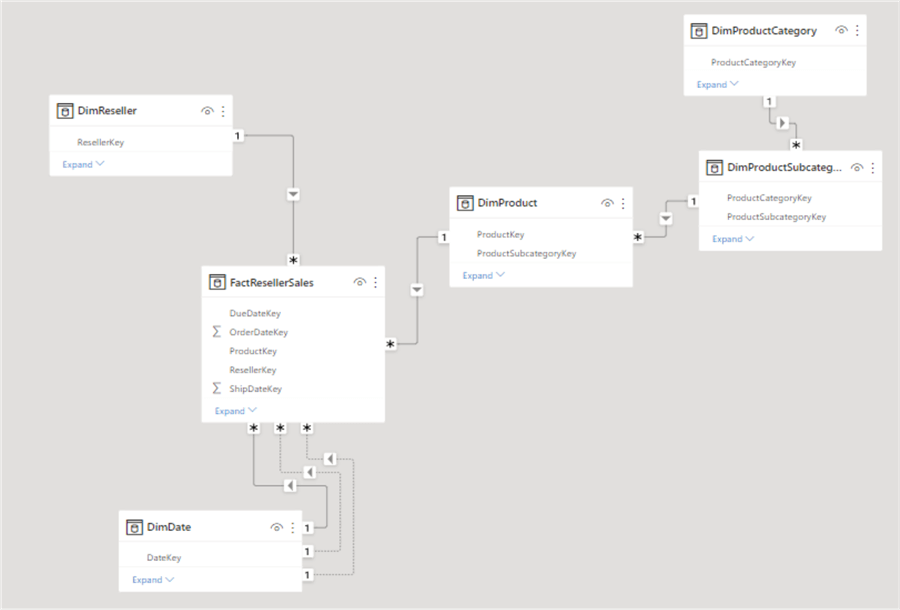
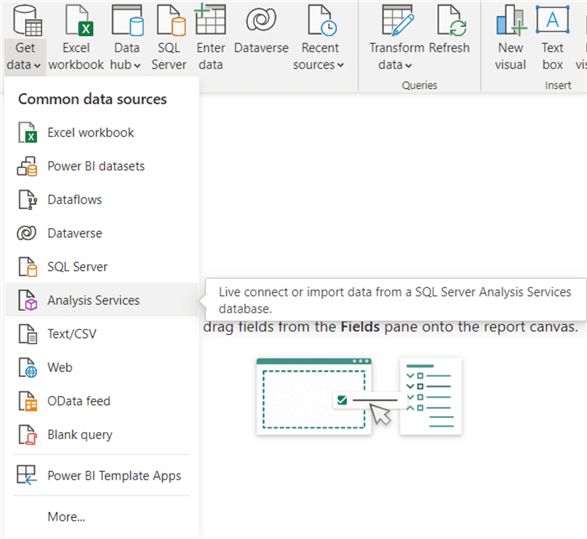
Now we can add tables from our SSAS Tabular 2022 model into the Power BI Desktop model. But, instead of simply importing the data, we're adding them as DirectQuery tables. This means the data stays in the SSAS 2022 database and is not transferred to the PBI model. Click on Get Data in the ribbon and choose Analysis Services as the data source.
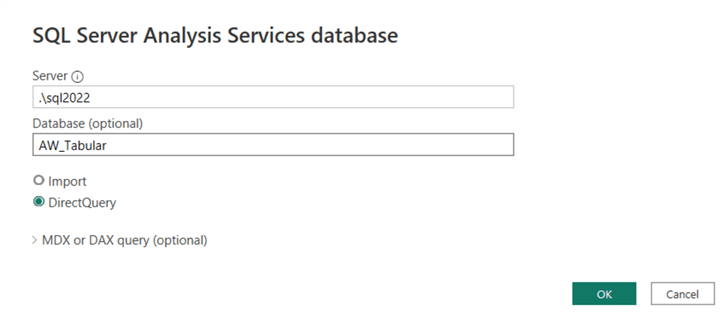
Specify the server, the database we created in the previous section, and DirectQuery as the connectivity mode. Click OK.
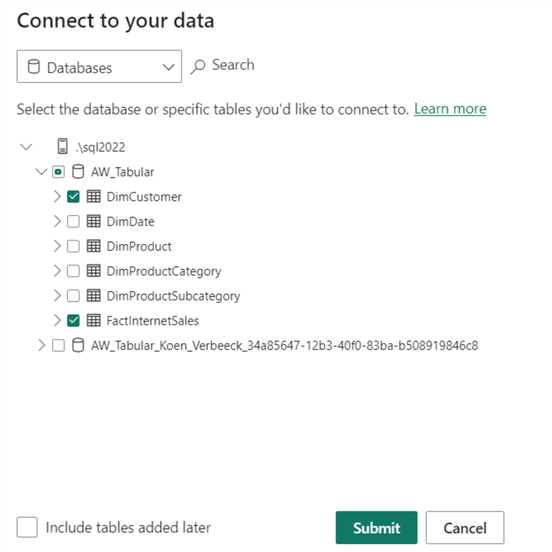
Select the DimCustomer and the FactInternetSales tables from the tree view and click Submit.
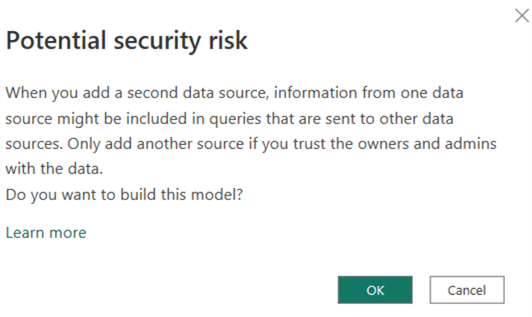
You might get a security warning like the one below. This is because when you define a model with a DirectQuery source, it's possible that data from the import source gets sent to the SSAS 2022 model. For example, the model has the dimension DimProduct in common (here, it's imported into the PBI Desktop model). Suppose we create a filter on a particular product and ask for data from the FactInternSales table (which is in DirectQuery mode). This means the specific product code can be sent along with the query to SSAS 2022, so the results can be filtered.
Here is the final model:
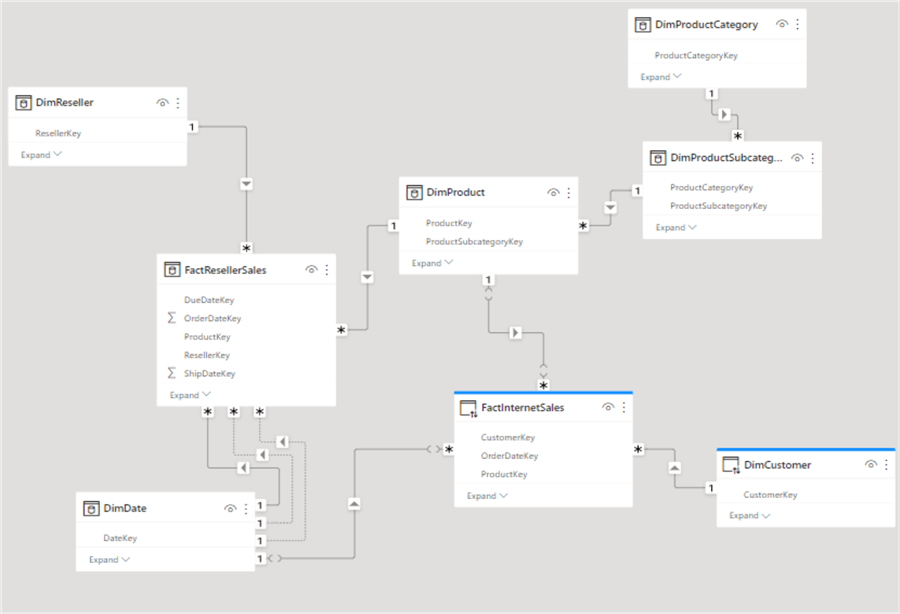
You can see two different connectivity modes because the icons left of the table name are different between some tables. In the bottom right corner of PBI Desktop, you can also see the storage mode is mixed:

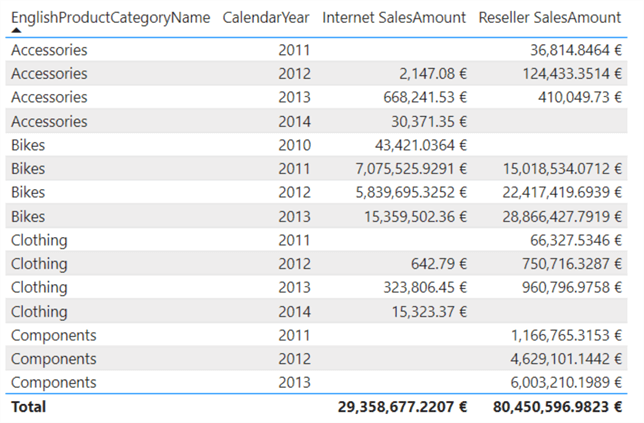
Now it's possible to create visualizations where we combine data from the PBI Desktop model with data from the SSAS 2022 model:
Conclusion
With the release of SQL Server 2022, we can add Analysis Services 2022 Tabular models as a DirectQuery source to our Power BI Desktop models giving us much more flexibility when designing Power BI reports. For example, in Data Mesh architectures, where other teams manage certain data products, it becomes easier to use their data in your reports without taking an actual copy of their data.
Next Steps
- You can download the sample models used in this tip here.
- For more information about the different source modes for a Power BI Desktop model, check out Power BI Desktop Data Source Considerations.
- You can find more SQL Server 2022 tips in this overview.
- Want to learn more about SSAS? You can start here.
Learn more about Power BI in this 3 hour training course.
About the author
 Koen Verbeeck is a seasoned business intelligence consultant at AE. He has over a decade of experience with the Microsoft Data Platform in numerous industries. He holds several certifications and is a prolific writer contributing content about SSIS, ADF, SSAS, SSRS, MDS, Power BI, Snowflake and Azure services. He has spoken at PASS, SQLBits, dataMinds Connect and delivers webinars on MSSQLTips.com. Koen has been awarded the Microsoft MVP data platform award for many years.
This author pledges the content of this article is based on professional experience and not AI generated.
View all my tips
Article Last Updated: 2023-01-18


