By: Jan Potgieter | Updated: 2023-07-19 | Comments | Related: 1 | 2 | 3 | > Application Development
Problem
We have created a web application to administer a database containing information for several companies and their employees. We also created the facility to generate a QR Code for each employee with an ID, Name and Surname, Email address, and contact number.
The QR Code is now needed to facilitate logging the attendance for each employee when arriving at and leaving the office.
How can we extend the Web Application with the QR Code generating facility to log the entry and exit of the employees at the office?
Solution
In this tip, we will be building on a previous tip, QR Code Generator in Web-Based App from data stored in SQL Server, where a web application was developed, by adding a simple page to scan the employee's QR Code when they are moving in and out of the office.
Setting Up the Database Environment
If you have worked through the previous tutorials in this series, your database and SQL login are ready to use. However, if you need to restore your environment, you can use the SQL script in the download for this article: Complete-HRDatabase - Before.sql.
In the previous tip, we worked through the following:
- Create the database if it does not exist.
- Set up the Login and User for the web application.
- Create two tables: Companies and Employees and their relationship.
- Insert data into the companies to be used in the web application.
- Create the CRUD (insert, select, update, delete) stored procedures for both tables.
This tip will work through the following:
- Add a new webpage to the web application that will enable you to scan the QR Code for an employee and connect the new webpage (EmployeeChkQR.aspx) to the database to be able to write the scanned QR Code details to the database
- Make a change to the menu of the website to be able to navigate to the new webpage
- Change the links on the page to use the latest Bootstrap and jQuery versions in the web application
- Create a new table:
dbo.Attendance, where the logging of the employees' movement in and out of the office will be kept - Create a new Stored Procedure:
dbo.usp_InsQRScanthat will check if the employee is clocked in or out of the office and insert a record accordingly
Note: The SQL Server name needs to be changed when running the solutions provided in the downloads file.
Step 1: Add the New Webpage "EmployeeChkQR"
Open the before-solution that was developed in Microsoft Visual Studio Community 2019.
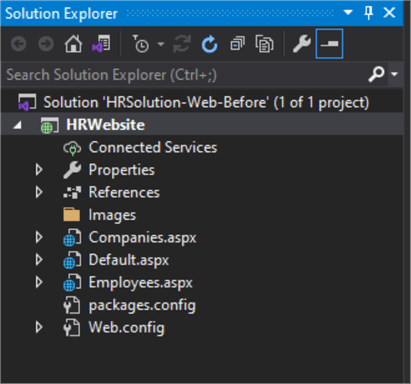
In the Solution Explorer, you will see the files in the Solution, like in the image below.
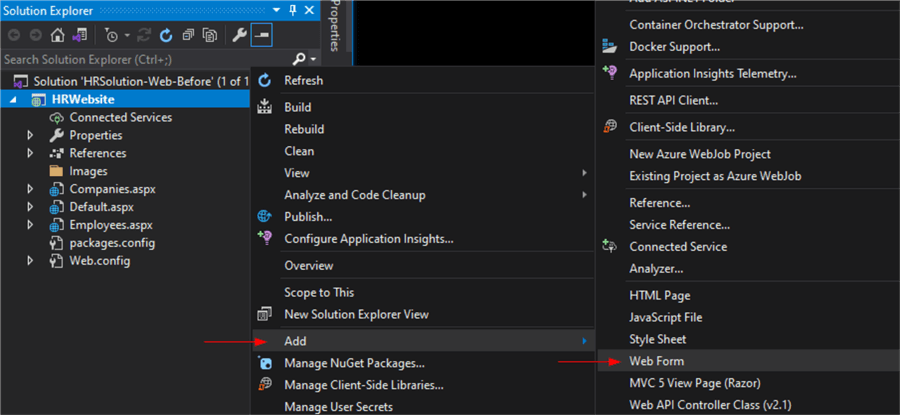
Right-click on the HRWebsite folder, select Add, Web Form and give it a new name. In this tip, it was named EmployeeChkQR.
When the newly created file (EmployeeChkQR.aspx) is open in the Visual Studio editor, copy and paste the following code over the existing code.
<%@ Page Language="C#" AutoEventWireup="true" CodeBehind="EmployeeChkQR.aspx.cs" Inherits="HRWebsite.EmployeeChkQR" %>
<!DOCTYPE html>
<html xmlns="http://www.w3.org/1999/xhtml">
<head runat="server">
<meta name="viewport" content="width=device-width, initial-scale=1, shrink-to-fit=no" />
<title>Employees Homepage</title>
<script type="text/javascript" src="https://ajax.googleapis.com/ajax/libs/jquery/3.6.4/jquery.min.js"></script>
<script src="https://cdn.jsdelivr.net/npm/[email protected]/dist/js/bootstrap.min.js"></script>
<link rel="stylesheet" href="https://cdn.jsdelivr.net/npm/[email protected]/dist/css/bootstrap.min.css" />
<script src="https://rawgit.com/schmich/instascan-builds/master/instascan.min.js"></script>
<style>
.content {
max-width: 300px
}
.videoStyle {
border-radius: 5px;
box-shadow: inset 0 1px 1px rgba(0,0,0,.075), 0 0 8px rgba(102, 175, 233, .6);
border-color: black;
width: 300px;
}
.btnStyle {
display: flex;
justify-content: center;
padding: 5px;
}
h1 {
width: 100%;
margin: 0 auto;
text-align: center;
}
textarea {
resize: none;
text-align: center;
}
</style>
</head>
<body>
<form id="form1" runat="server">
<asp:ScriptManager runat="server"></asp:ScriptManager>
<%-- Webpage Heading --%>
<h1>Check QR Code</h1>
<div class="row" style="margin: 20px 0 10px 0; display: block;">
<div class="col-xs-12 btnStyle">
<video id="preview" class="videoStyle" />
<script type="text/javascript">
function play_single_sound() {
var audio = new Audio('../Sounds/SpeechOn.wav');
audio.play();
}
let scanner = new Instascan.Scanner({ video: document.getElementById('preview') });
scanner.addListener('scan', function (content) {
play_single_sound();
//alert(content);
var test = content.toString();
document.getElementById('<%= HiddenField1.ClientID %>').value = test;
$("#<%= txt_Person_Nm.ClientID %>").val($('#<%= HiddenField1.ClientID %>').val());
});
Instascan.Camera.getCameras().then(function (cameras) {
if (cameras.length > 0) {
var selectedCam = cameras[0];
$.each(cameras, (i, c) => {
if (c.name.indexOf('back') != -1) {
selectedCam = c;
return false;
}
});
scanner.start(selectedCam);
} else {
console.error('No cameras found.');
}
}).catch(function (e) {
console.error(e);
});
</script>
</div>
</div>
<asp:UpdatePanel ID="UpdatePanel1" runat="server">
<ContentTemplate>
<div class="row" style="margin-bottom: 5px; display: block;">
<div class="col-xs-12 btnStyle">
<asp:TextBox ID="txt_Person_Nm" runat="server" Width="1000px" ReadOnly="true" TextMode="MultiLine" BorderStyle="None" />
<asp:HiddenField ID="HiddenField1" runat="server" />
</div>
</div>
<div class="row" style="margin-bottom: 5px; display: block;">
<div class="col-xs-12 btnStyle">
<asp:Button ID="btnSaveQRCode" runat="server"
OnClick="btnSaveQRCode_Click"
Text="Save" CssClass="btn btn-info" />
</div>
</div>
</ContentTemplate>
</asp:UpdatePanel>
<div class="row">
<div class="col-xs-12 btnStyle">
<asp:Label ID="lblMessage" runat="server" Text=" " ForeColor="Red" />
</div>
</div>
</form>
</body>
</html>
To work on the back-end of the webform (EmployeeChkQR.aspx.cs), you can right-click on the file in the Solution Explorer and select View Code, or you can press F7 while the file is open.
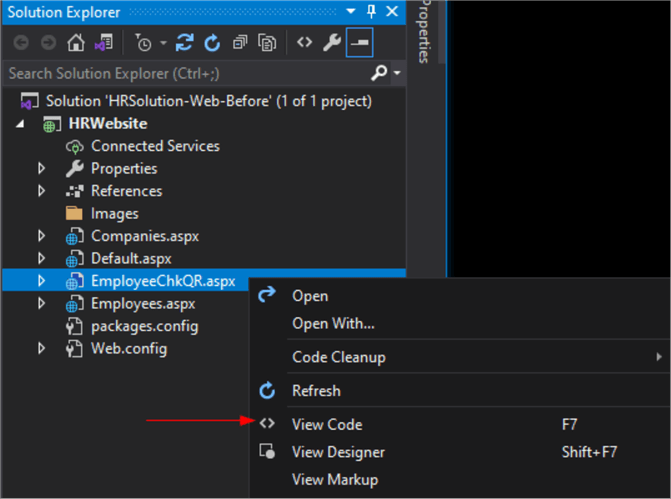
The back-end file (EmployeeChkQR.aspx.cs) will also be opened in the editor. The following C# code can be pasted over the existing code.
using System;
using System.Configuration;
using System.Data;
using System.Data.SqlClient;

namespace HRWebsite
{
    public partial class EmployeeChkQR : System.Web.UI.Page
    {
        bool blDoReg = true;
        int intEmpID;
        SqlConnection myCon = new SqlConnection(ConfigurationManager.ConnectionStrings["HRDBConnection"].ConnectionString);
        protected void Page_Load(object sender, EventArgs e)
        {
            lblMessage.Text = "";
            txt_Person_Nm.Text = "";
        }
        protected void btnSaveQRCode_Click(object sender, EventArgs e)
        {
            blDoReg = true;
            intEmpID = 0;
            if (HiddenField1.Value == "")
            {
                blDoReg = false;
            }

            if (blDoReg)
            {
                intEmpID = int.Parse(HiddenField1.Value.Split('_')[0]);
                try
                {
                    myCon.Open();
                    using (SqlCommand cmd = new SqlCommand("dbo.usp_InsQRScan", myCon))
                    {
                        cmd.CommandType = CommandType.StoredProcedure;
                        cmd.Parameters.Add("@EmpID", SqlDbType.Int).Value = intEmpID;

                        cmd.ExecuteNonQuery();
                        lblMessage.Text = "QR Scan saved!";
                    }
                }
                catch (Exception ex)
                {
                    lblMessage.Text = ex.Message;
                }
                finally { myCon.Close(); }
                lblMessage.Text = "Information saved!";
                txt_Person_Nm.Text = "";
            }
            else
            {
                lblMessage.Text = "No AR Scan to work with!";
                lblMessage.ForeColor = System.Drawing.Color.Red;
            }
        }
        private void doSaveQRScan(int EmpID)
        {
            try
            {
                myCon.Open();
                using (SqlCommand cmd = new SqlCommand("dbo.usp_InsQRScan", myCon))
                {
                    cmd.CommandType = CommandType.StoredProcedure;
                    cmd.Parameters.Add("@EmpID", SqlDbType.Int).Value = EmpID;

                    cmd.ExecuteNonQuery();
                    lblMessage.Text = "QR Scan saved!";
                }
            }
            catch (Exception ex)
            {
                lblMessage.Text = ex.Message;
            }
            finally { myCon.Close(); }
        }

    }
}
Step 2: Add the New Webpage to the Menu and Add a Link for Bootstrap
Open the Employees.aspx file by double-clicking it in the Solutions Explorer window.
The new and/or changed code will be highlighted in yellow for explaining below, and only the top 64 rows (from the beginning to just before the definition of the Gridview) will be shown, as nothing below that was changed:
- The first yellow part was a change in the versions of jquery, bootstrap.js, and bootstrap.css.
- The second yellow part was done to change how the new versions of the above are used to display the menu and add the menu link for the new page.
You can now try to make the changes to the Default.aspx and the Companies.aspx pages regarding the above changes.
<%@ Page Language="C#" AutoEventWireup="true" CodeBehind="Employees.aspx.cs" Inherits="HRWebsite.Employees" %>
<!DOCTYPE html>
<html xmlns="http://www.w3.org/1999/xhtml">
<head runat="server">
    <title>Employees Homepage</title>

    <script type="text/javascript" src="https://ajax.googleapis.com/ajax/libs/jquery/3.6.4/jquery.min.js"></script>
   <script src="https://cdn.jsdelivr.net/npm/[email protected]/dist/js/bootstrap.min.js"></script>
   <link rel="stylesheet" href="https://cdn.jsdelivr.net/npm/[email protected]/dist/css/bootstrap.min.css" />
    <script type="text/javascript">
        function openEmpDetail() {
            $('#modEmpDetail').modal('show');
        }
        function openEmpQR() {
            $('#modEmpQR').modal('show');
        }
    </script>
</head>
<body>
    <form id="form1" runat="server">
        <asp:ScriptManager ID="ScriptManager1" runat="server"></asp:ScriptManager>
        <div class="container">

            <%-- Webpage Heading --%>
            <div class="row">
                <div class="col-xs-12">
                    <h1>Employees Homepage</h1>
                </div>
            </div>

            <%-- Menu / Message / New link --%>
            <nav class="navbar navbar-expand-sm navbar-dark bg-dark">
               <div class="collapse navbar-collapse" id="navbarsExample03">
                   <ul class="navbar-nav mr-auto">
                       <li class="nav-item active">
                           <a class="nav-link" href="Default.aspx">Home <span class="sr-only">(current)</span></a>
                       </li>
                       <li class="nav-item active">
                           <a class="nav-link" href="Companies.aspx">Companies <span class="sr-only">(current)</span></a>
                       </li>
                       <li class="nav-item active">
                           <a class="nav-link" href="Employees.aspx">Employees <span class="sr-only">(current)</span></a>
                       </li>
                       <li class="nav-item active">
                           <a class="nav-link" href="EmployeeChkQR.aspx" target="_blank">QR Reader <span class="sr-only">(current)</span></a>
                       </li>
                   </ul>
               </div>
           </nav>

           <div class="row" style="margin-top: 20px;">
               <div class="col-sm-10">
                   <asp:Label ID="lblMessage" runat="server" Text="" />
               </div>
               <div class="col-sm-2" style="text-align: right;">
                   <asp:Label ID="Label5" runat="server" Text="[" Font-Size="12px" Visible="true"></asp:Label>
                   <asp:LinkButton ID="lbNewEmp" runat="server" Font-Size="12px" OnClick="lbNewEmp_Click">New</asp:LinkButton>
                   <asp:Label ID="Label6" runat="server" Text="]" Font-Size="12px" Visible="true"></asp:Label>
               </div>
           </div>
Step 3: Create the New Attendance Table that will Keep the Attendance Records
Open SQL Server Management Studio, open a new query window, copy the following SQL Code, and run the code to create the new table.
USE HRDatabase;
GO

-- DROP TABLE [Attendance]
CREATE TABLE [dbo].[Attendance] (
   [ID]          INT         NOT NULL IDENTITY (1, 1),
   [EmpID]       INT         NOT NULL,
   [ArrDepWork]  VARCHAR(20) NOT NULL DEFAULT('Arrive'),
   [CreatedDate] DATETIME    NOT NULL CONSTRAINT [DF_CreatedDate_Scans] DEFAULT (getdate()),
   CONSTRAINT [PK_Scans] PRIMARY KEY CLUSTERED ([ID] ASC),
   CONSTRAINT [FK_Scans_Employee] FOREIGN KEY ([EmpID]) REFERENCES [dbo].[Employees] ([ID]) ON DELETE CASCADE ON UPDATE CASCADE
);
GO

--INSERT dbo.Attendance(EmpID, [ArrDepWork], CreatedDate) VALUES (100, 'Arrive', getdate())
--INSERT dbo.Attendance(EmpID, [ArrDepWork], CreatedDate) VALUES (100, 'Depart', getdate())

SELECT * FROM dbo.Attendance;
GO
Step 4: Create the New Insert Stored Procedure
Still in SSMS, open another new query window and copy the following SQL Code into it and run it to create a new Stored Procedure that will be used to insert the scanned QR Code record.
Take note of the following in the Stored Procedure below:
- Provision needed to be made for whether the employee has scanned in or out.
- If the number of scans in is equal to the number of scans out, the employee is not at the office
- Else, if the number of scans in is NOT equal to the number of scans out, the person is at the office
CREATE or ALTER PROCEDURE [dbo].[usp_InsQRScan]
   @EmpID    int
AS
/*
   exec dbo.usp_InsQRScan @EmpID=100
*/
BEGIN
   DECLARE @ArrDep VARCHAR(20),
         @In      INT,
         @Out     INT,
         @AttWork VARCHAR(3)

   SET @In = (
            SELECT COUNT(*)
            FROM dbo.Attendance
            WHERE EmpID = @EmpID
            AND ArrDepWork = 'Arrive'
            AND CAST(CreatedDate AS DATE) = CAST(getdate() as date)
            )
   SET @Out = (
            SELECT COUNT(*)
            FROM dbo.Attendance
            WHERE EmpID = @EmpID
            AND ArrDepWork = 'Depart'
            AND CAST(CreatedDate AS DATE) = CAST(getdate() as date)
            )

   SELECT @AttWork = (CASE WHEN @In > @Out THEN 'Yes' ELSE 'No' END)

   IF (SELECT @AttWork) = 'Yes'
      BEGIN
         INSERT dbo.Attendance(EmpID, [ArrDepWork], CreatedDate)
         VALUES(@EmpID, 'Depart', getdate())
      END
   ELSE
      BEGIN
         INSERT dbo.Attendance(EmpID, [ArrDepWork], CreatedDate)
         VALUES (@EmpID, 'Arrive', getdate())
      END
END
Step 5: Run the Web Application
Now you can start the web application by pressing the F5 function key to run the web application.
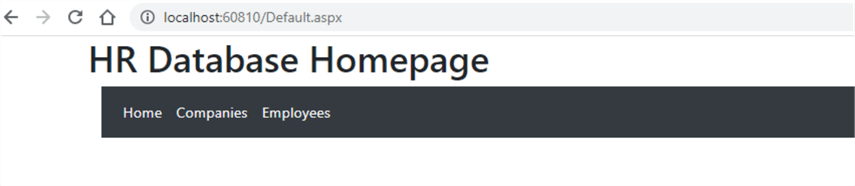
When a browser is opened, you will see the home page of the web application with the menu showing the Companies and Employees links next to the Home link.
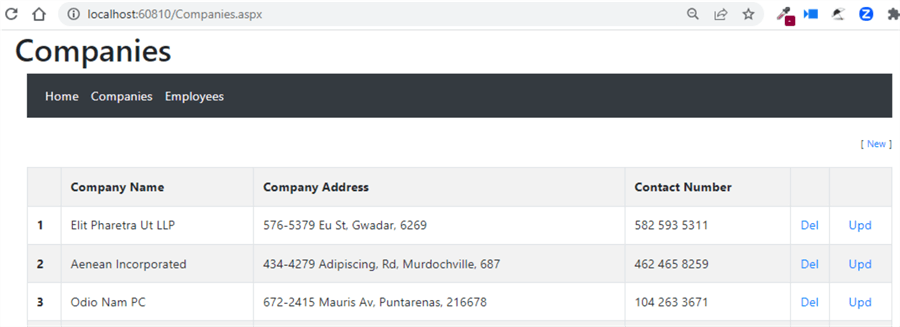
When you select the Companies menu option, you should see a list of all the companies.
When you select the Employees link, you should see a list of the employees and a new Menu link, QR Reader.
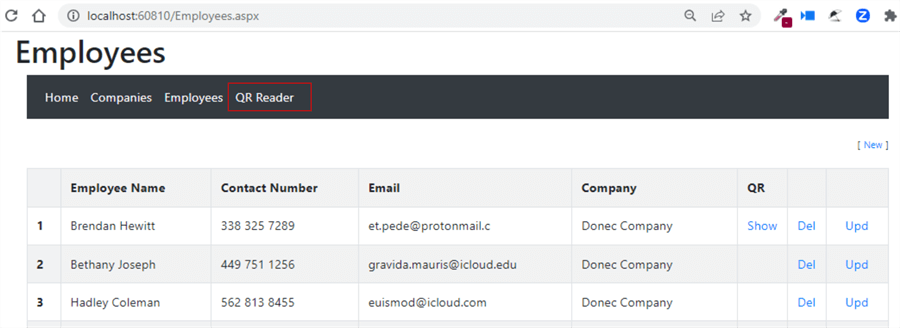
When you click on the QR Reader link, a new page will open that uses the camera on your system.
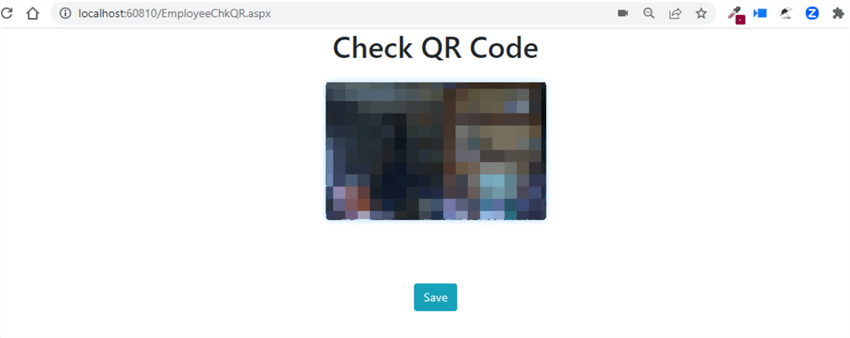
Now, you can take one of the printed images of the employees and show it in front of the camera, and your camera should read the image and display the details in a text area below it.
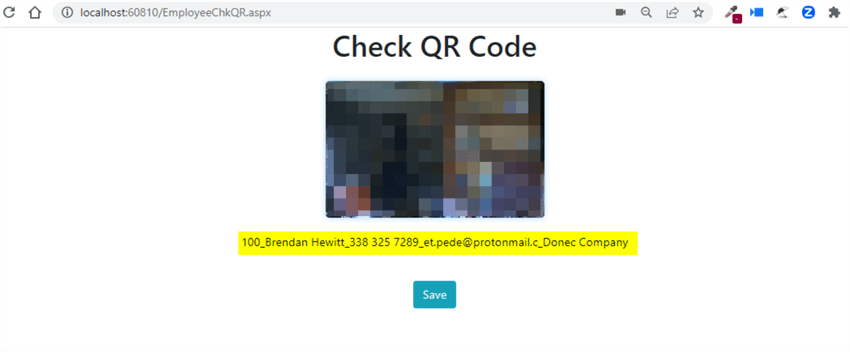
Next, you can click the Save button below to save the employees' movement (either in or out) at the office.
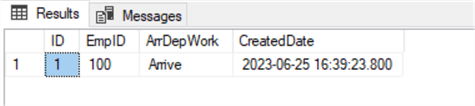
You can see the records being inserted by running a Select on the attendance table below.
SELECT TOP (1000) [ID]
   ,[EmpID]
   ,[ArrDepWork]
   ,[CreatedDate]
FROM [HRDatabase].[dbo].[Attendance]
Conclusion
In this tip, we used a previously developed web application where we created the facility to generate a QR Code image for an employee and created a new functionality to scan an employee's card when he arrives at the office or when he departs the office.
This is a useful way to track the employees to know whether they are in the office.
Next Steps
- The above tip can also be used to list all the employees and their movements by day.


About the author
 Jan Potgieter has more than two decades of expertise in the database industry as a Certified Microsoft SQL Server Administrator and Database Developer.
This author pledges the content of this article is based on professional experience and not AI generated.
View all my tips
Article Last Updated: 2023-07-19
